- Companies
-
- Marketing
- Create Marketing Lists
- Send Email Campaigns
- Creating a simple Web Form
- Smart Lists
- reCAPTCHA for Web Forms
- Facebook Lead Ads
- About Web Forms
- Insta-Buy Web Forms
- Add or Remove Contacts/Companies from Lists
- Creating a Marketing List from Advanced Filters
- Editing existing List members
- Exporting Marketing Lists
- Filtering by Lists
Create Marketing Lists
CRM provides the functionality to create and manage marketing lists for email or digital marketing, or simply for easy customer segmentation. At present, marketing lists can be created in relation to:
- Companies (if you have company-level contact with your customers), or
- Contacts (if you mainly have personalised contact with your customers).
For example, if you had a marketing list of “All Golf Shops” which didn’t have any personal details, you’d create a list related to Company and work thought it that way. On the other hand, if you run training courses and want to contact attendees of those courses via email you’d want more personalised communication in the form of a Contact marketing list.
See also:
If you have Mailchimp or Campaign Monitor integrated with your CRM, you can schedule to push these Lists out to either service on a regular basis.
We also have a video on creating Lists in CRM:
There are a few ways to create marketing lists in the CRM. The first is to do so through the marketing module. To do this, navigate to Marketing > Lists and in the top right, click on New List.

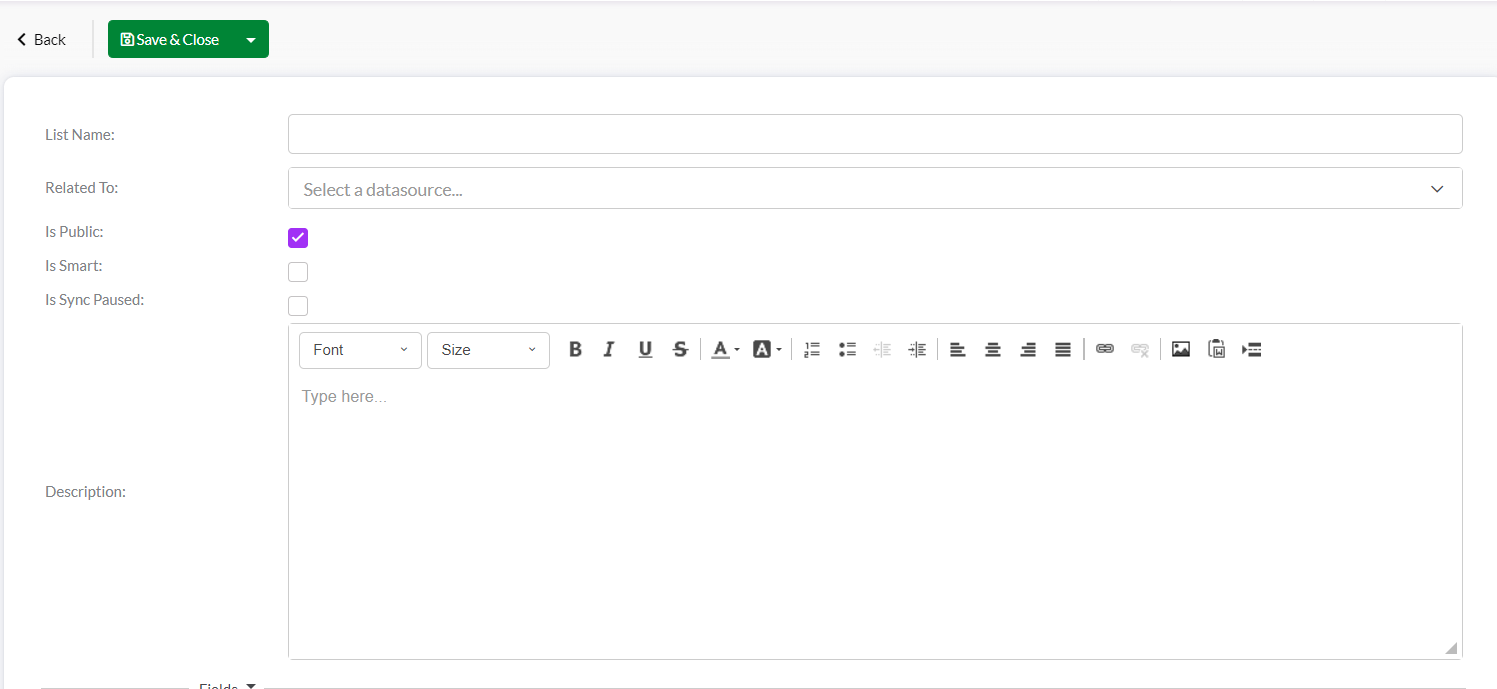
You’ll then be taken to the list creation screen where you’ll be prompted to fill in some general details about the list – including the list name, whether the list is related to Contacts or Companies, and any further list description if desired.
Once complete, hit Save & Close and you’ll be ready to start adding members to the list.
To view your lists and list members, or to edit list names, navigate to Marketing > Lists to see a collection of existing lists in the grid.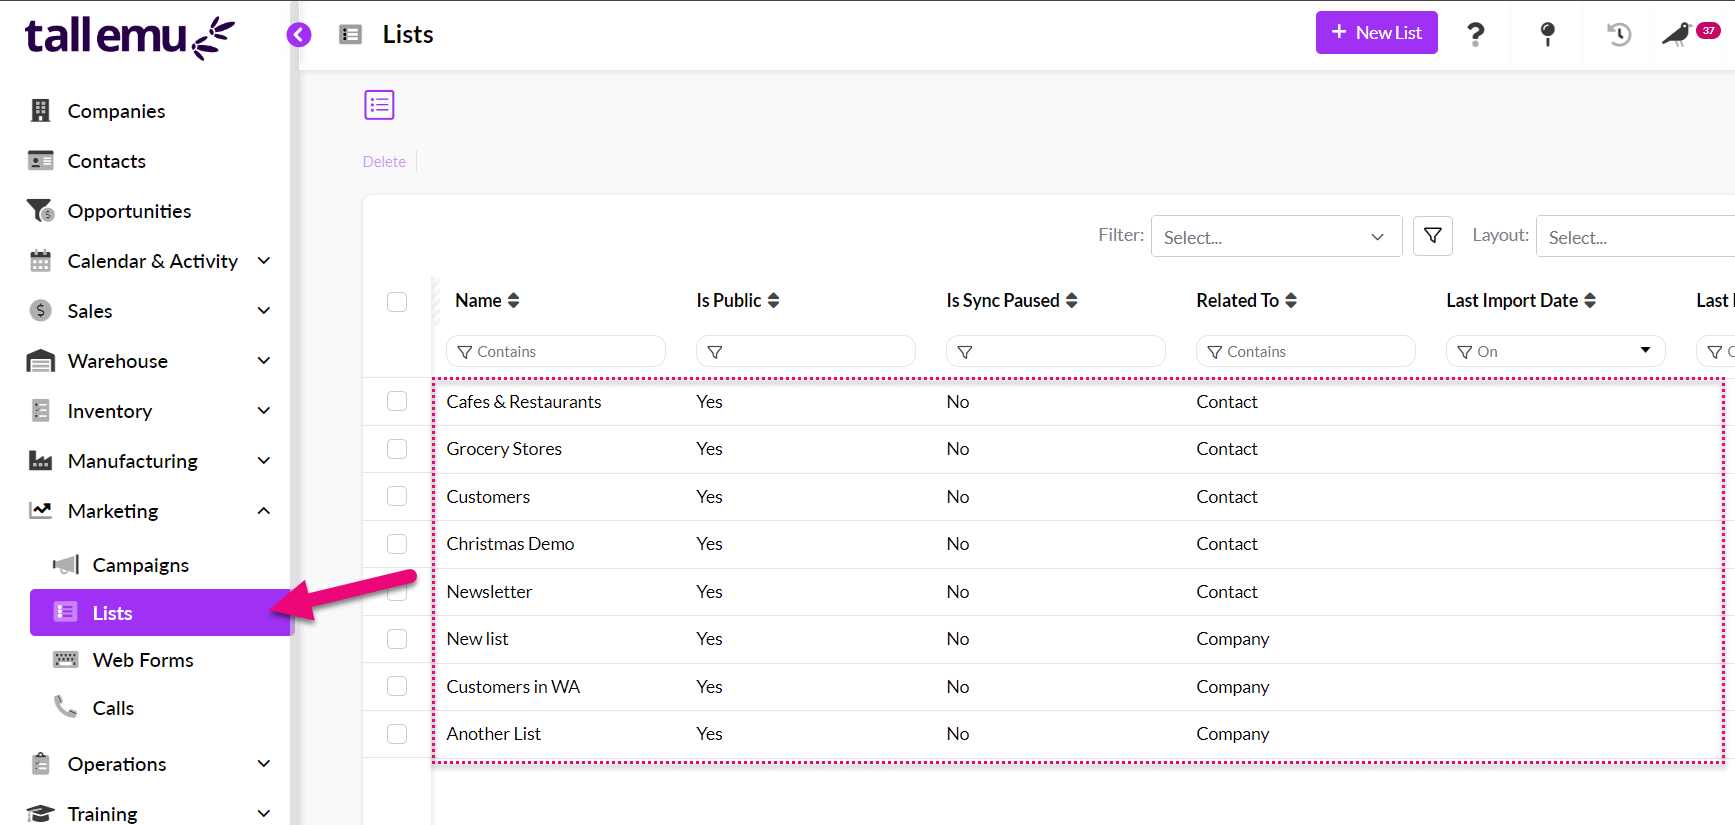
Simply click on the desired list to view and manage list members, edit list features or upload to digital or email marketing platforms.

There are 3 buttons you can use to export data from a List:
- Export as Facebook Audience – this gives you an Excel spreadsheet that is pre-formatted to suit an import into Facebook.
- Export as Google Match Template – this gives you an Excel spreadsheet that is pre-formatted to suit an import into Google.
- Export to Excel – this gives you an Excel spreadsheet containing all the data from the subscriber tabs.

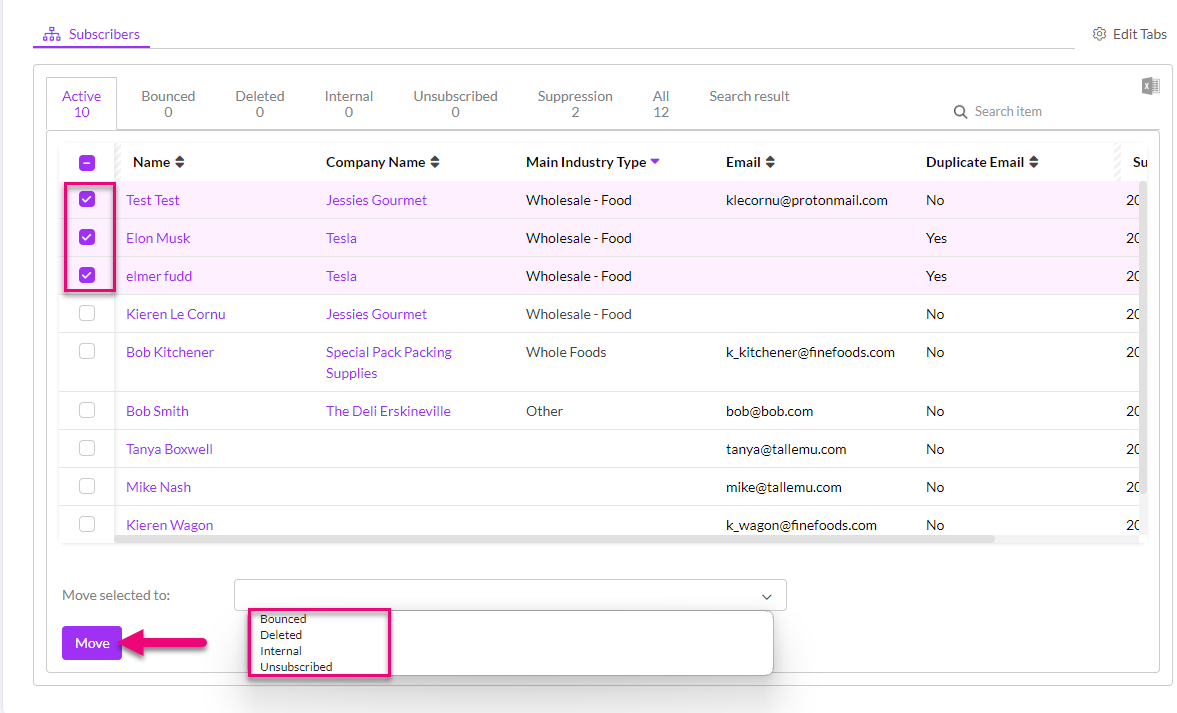
From the Subscribers tab, you can select records and then move them between the various tabs using the radio buttons and the options at the bottom of the tab.
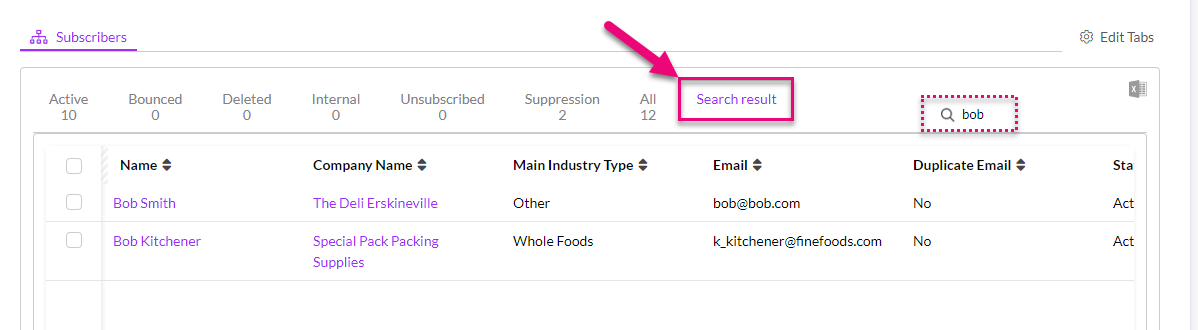
You can also search for subscribers using the box – just type in the search term and click on the magnifying glass icon to initiate the search.
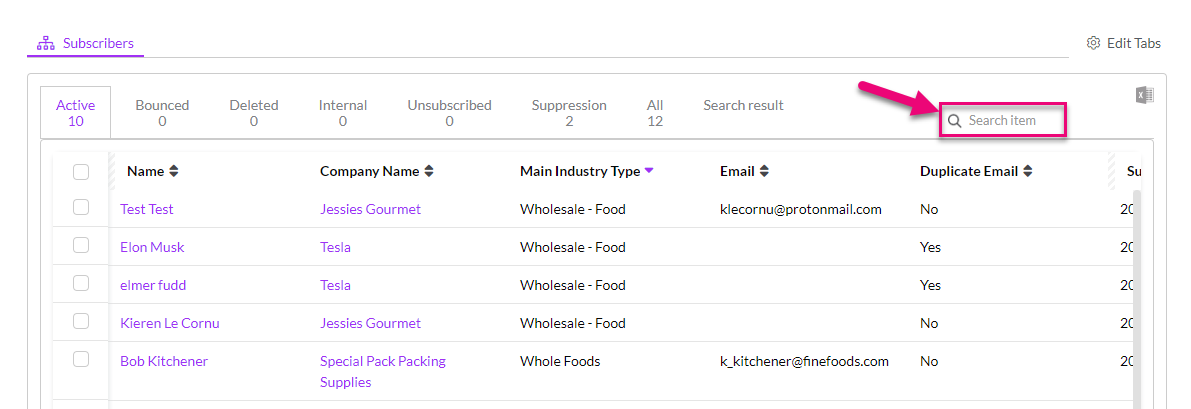
The results will then be displayed on the Search result tab.
From either a Company or Contact record, you will be able to see the relevant Lists that are applied.

You can then use the ‘+’ and ‘-‘ buttons to amend the Lists linked to the record.

To send out a group of SMS, simply open the List and select the Sms button.
This will send an SMS to all those within the List with a valid number.


More information on Burst SMS can be found here.
If you have Mailchimp or Campaign Monitor integrated with CRM, you can schedule to push these Lists out to either service on a regular basis.
- Click on the Upload to campaign system button on the List.
- Ensure that you have set up a sync schedule for your EDM from Admin > Integrations.
