- Companies
-
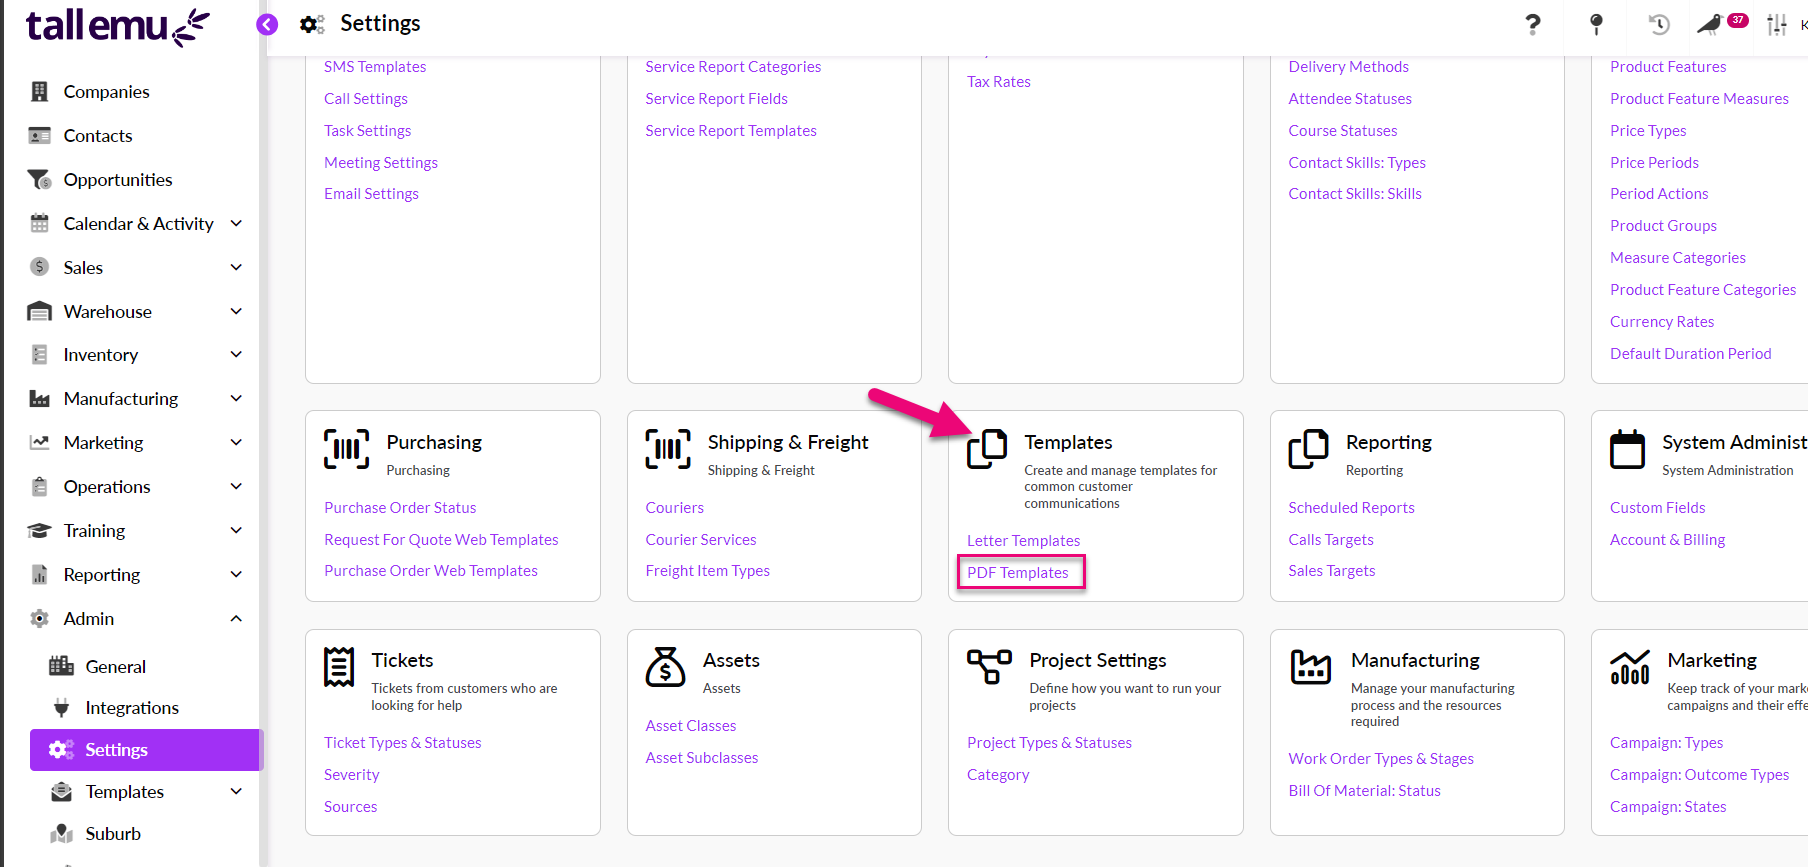
- Admin
- Account Options
- Pricing settings
- PDF and Email Template system preferences
- Locations
- Brand Customisation
- Product Categories
- Product Groups
- Enable Time Billing
- Customising Assets
- Custom Fields
- Delivery Resources
- Delivery Options
- Reporting Preferences
- Sales & purchase settings
- Calendar Settings
- Messaging settings
- Repeated Invoice frequency
- Company Settings
- Credit Settings
- Sales Regions
- Asset Settings
- Ticket settings
- Relationships
- Proposal-based Quotes
- Customising Training
- Prefix/Sequences settings (Record Numbering)
- Creating SMS Templates
- Invoice Settings
- Creating Email Templates
- Creating Letter Templates
- Using Letter Templates
- Using SMS Templates
- Using Email Templates
- Setting up Teams
- System security
- Users
- Activate a new User account
- Log into a User account
- Managing Connections
- Calculating Landed Costs
- Resources
- Payment Methods
- Payment Terms
- Couriers
- PDF Templates
- Service Reports
- Quote Form Templates
- System Quote Preferences
- Credit Control
- Setting up Teams
- Regional Settings
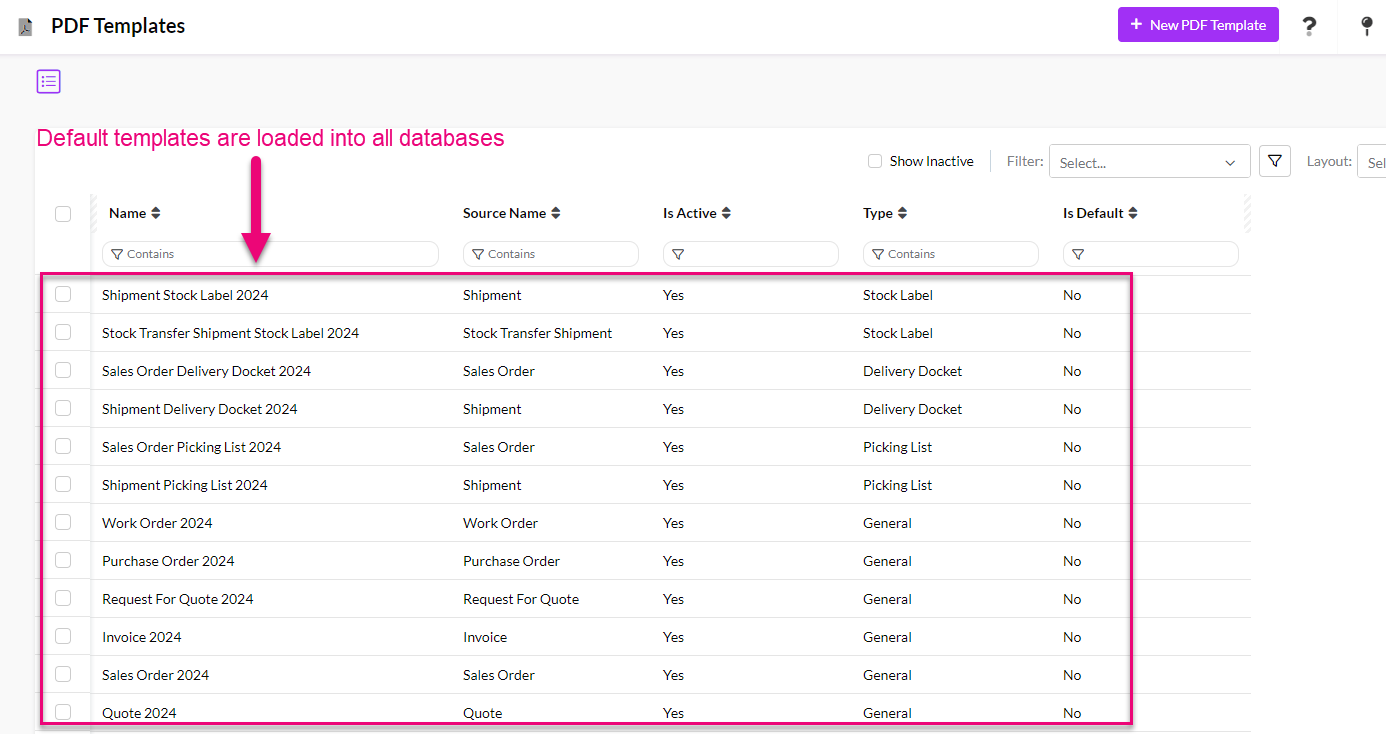
PDF Templates
You can add and customise your own PDF templates for a range of documents in CRM from Admin > Settings > Templates > PDF Templates.
This is done by populating a Microsoft Word document with CRM merge codes, which is then uploaded to CRM and used to generate PDF documents.
We provide you with a range of Word documents that are pre-filled with merge codes; this way you can modify them to suit you, rather than having to build templates from scratch in Word.
We also have a video that takes you through the basic steps to create a custom PDF template.
We have created a few ‘starter’ Word document templates (that are pre-filled with merge codes) that you can download and then adjust to suit your requirements. There are 2 ways to access these:
From CRM
- In Admin > Templates > PDF Templates there are a range of preloaded templates for different areas.
- Click on any template to open it, then click on the Download button – this will start the automatic download of the Word document version of the template.
If your download doesn’t start automatically, make sure your browser isn’t blocking it.

- You can then follow the instructions to customise the template, then upload the revised Word document to CRM.
Download the Word files here
You can click on any of the following links to download a copy of the Word document template:
- Invoice
- Purchase Order
- Quote
- Request For Quote
- Sales Order
- Sales Order Delivery Docket
- Sales Order Picking List
- Shipment Delivery Docket
- Shipment Picking List
- Shipment Stock Label
- Stock Transfer Shipment Stock Label
- Work Order
You can then follow the instructions to customise the template, then upload the revised Word document to CRM.
From Admin > Templates > PDF Templates, click on New PDF Template.


- Give the template a name – this should make it easily identifiable for users.
- Add a description so that you can differentiate your templates.
- Select the Source from the drop-down list (e.g. Quote, Sales Order, Invoice or Purchase Order) – this indicates the type of record the PDF is linked to.
- As several areas of CRM have multiple types of PDFs that can be generated, these can be selected by then specifying the Type of template. In the following screenshot example, I have chosen a Source of Sales Order and then can select from Delivery Docket, General (being the Sales Order PDF itself) or Picking List in the Type field.
- Make sure the Is Active box is ticked.
- Click Save & Close on your new record.

There are several ways that you can access merge codes to use in your template:
- In Edit mode, click on the envelope icon next to the Source field. This will open a new window with merge codes for the module you selected, in this case it will show me the Quote codes.

- You can also access merge codes for the type of template you are creating when you have chosen Save & Close by choosing Show Merge Codes > Base Source – this gives me the same codes as the step above.

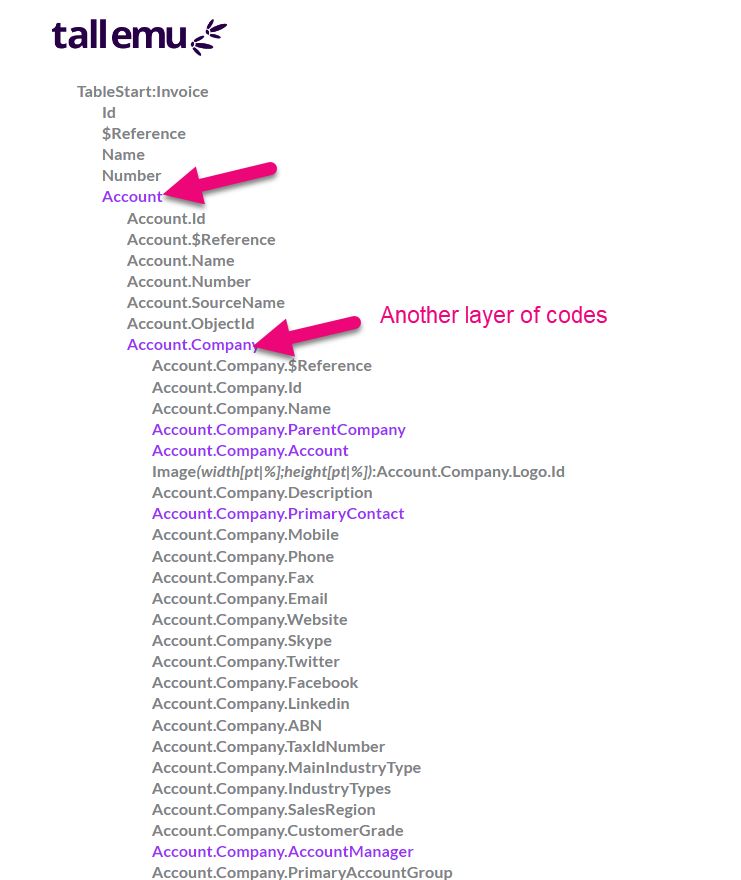
Following is an sample of the merge codes that will show for an Invoice.

You can click on any of the bold links to reveal more merge code options that will pull information from other areas of CRM i.e. I can locate codes for fields from the Company or Contact that are linked to an Invoice.

In the example below I have clicked on Account, which now shows me a range of fields related to customers and I can click again on either Account.Company or Account.Contact to reveal a further list of fields from those record types that I can use in my template.

The following screenshot shows where I have clicked on Account.Company to reveal a list of fields from the Company form that can be used in a template.
Pro-tip: to find merge codes quickly, use CTRL + F to open the search box in your browser, then type in the field you are looking for.
If you want to access the merge codes for your company, you will need to Save & Close the record and then click on Show Merge Codes > My Company.

Following is a sample of the merge codes that will show for an My Company.

You can either start with your own Word document, or use one of the document templates for Quotes, Sales Orders, Invoices and Purchase Orders that we have created for you to download – these versions come pre-populated with merge codes.
On the word document versions for download, you will see that:
- Merge codes are all shown in brackets (shown in red) – these codes pull information from CRM to display in your PDF.
- There is also regular typed text that is shown without brackets (shown in green) – you can change the text in these spots and add additional text anywhere in the document.
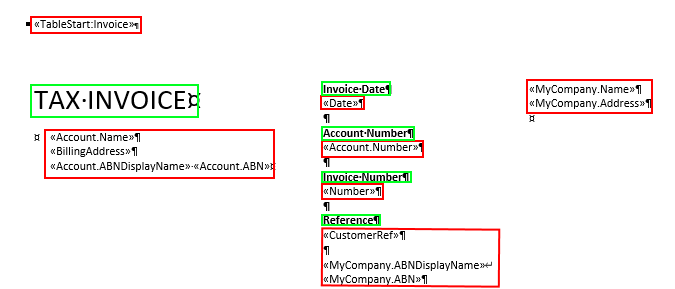
When working with codes in the word document, the highlighted codes shown below should not be deleted or amended. These table start/end codes are necessary to start and end merge processes and removing them will cause errors.

Note that your Word document must be saved as .DOC format and not .DOCX.
To customise your word document:
- Open your template and add the merge codes into the desired locations and format your document.
- Note that how you do this in Word will depend on the version you are running, but typically you can insert merge fields into the document from the toolbar by going to Insert > Quick Parts > Field and then selecting Mail Merge fields > MergeField and you can then insert the codes from CRM.


Ensure you save the document with the correct version type of .DOC
There may be instances when you want to adjust how merge data is displayed on a template.
For example, you may want to adjust the number of decimal places that show for number values or change a time/date field to show only a date.
To do this, right click on a merge field in your document and select Toggle Field Codes.

This will display the full code for the field.

Changing displayed decimals
I want to adjust this quantity field to 2 decimal places, rather than the standard 4, so I’m going to update the code to the following:

This is the code (without brackets) if you want to copy and paste it into your document – note that you will need to adjust the field name (in this case it is DisplayQuantity) if you want to apply this change to a different field and the number of decimal places shown in the code needs to be adjusted in line with how many places you want to show in your document:
MERGEFIELD DisplayQuantity \# #,##0.00
Changing displayed decimals for dollar ($) amounts
This is the code (without brackets) if you want to copy and paste it into your document – note that you will need to adjust the field name (in this case it is DisplayPrice) if you want to apply this change to a different field and the number of decimal places shown in the code needs to be adjusted in line with how many places you want to show in your document:
MERGEFIELD DisplayPrice\b $ \# #,##0.00
Changing displayed decimals for percentage (%) amounts
This is the code (without brackets) if you want to copy and paste it into your document – note that you will need to adjust the field name (in this case it is TaxRate.Rate).
MERGEFIELD TaxRate.Rate \f %
Changing date/time to date only
In the event that you want to change a time/date field to display only the date, you can also amend the field code to apply your change by using Toggle Field Code:

This is the code (without brackets) if you want to copy and paste it into your document:
MERGEFIELD Date \@ “dd MMM yyyy”
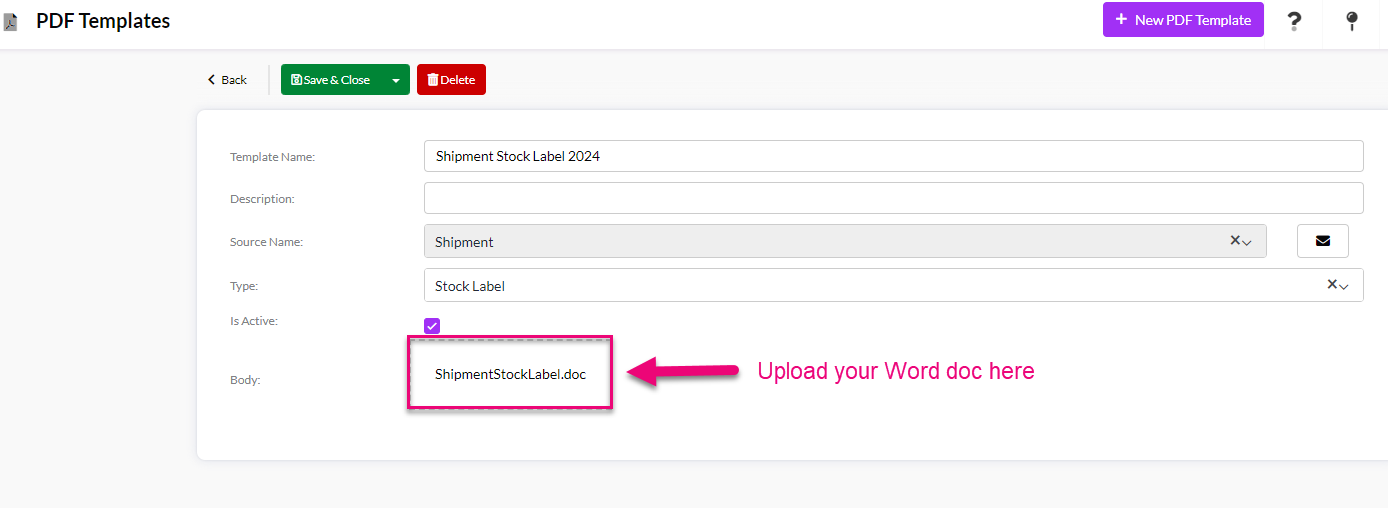
- Return to CRM and open your PDF Template record.
- Drag and drop your Word document into the marked area.
- Click on Save & Close.
Upload to an existing PDF template record to replace the current version
Upload to a new PDF template record
You can set your system default PDF Templates from the PDF And Email Templates section in Admin > General – just select the template type and select the desired version from the drop-down list.
Ensure that you scroll to the top of the page and click on Save to apply your changes.

The next time you generate a PDF document from a Quote, Sales Order, Invoice or Purchase Order, CRM will use your Word document to create a PDF.
When you are working with Quotes, Sales Orders, Invoices and Purchase Orders, you can also select a different PDF Template from the system default.

If you want to edit an existing PDF Template, you can click on the Download button to open a copy of the existing Word document and click on the Show Merge Codes button to reveal the merge code tables for both the module and your company (these will open in a new window).


You can then make changes to your document, save it and re-upload it to the record.
Ensure that your Word document is saved as .DOC format and not .DOCX before you upload it.
- Open an existing PDF Template record
- Click Edit
- Un-tick the Is Active box
- Save & Close the record

What does “Shipment” mean in the Source field?
This refers to Warehouse > Outbound Shipments.

Why can I create a Picking List or Delivery Docket from both Sales Order and Shipment as a Source?
This is because you can generate both PDFs from 2 places – a Sales Order and an Outbound Shipment. Whichever area you have chosen as the Source will be where the template is available for use.
What merge code do I use for Client PO on sales?
Use CustomerRef.