- Companies
-
- Admin
- Account Options
- Pricing settings
- PDF and Email Template system preferences
- Locations
- Brand Customisation
- Product Categories
- Product Groups
- Enable Time Billing
- Customising Assets
- Custom Fields
- Delivery Resources
- Delivery Options
- Reporting Preferences
- Sales & purchase settings
- Calendar Settings
- Messaging settings
- Repeated Invoice frequency
- Company Settings
- Credit Settings
- Sales Regions
- Asset Settings
- Ticket settings
- Relationships
- Proposal-based Quotes
- Customising Training
- Prefix/Sequences settings (Record Numbering)
- Creating SMS Templates
- Invoice Settings
- Creating Email Templates
- Creating Letter Templates
- Using Letter Templates
- Using SMS Templates
- Using Email Templates
- Setting up Teams
- System security
- Users
- Activate a new User account
- Log into a User account
- Managing Connections
- Calculating Landed Costs
- Resources
- Payment Methods
- Payment Terms
- Couriers
- PDF Templates
- Service Reports
- Quote Form Templates
- System Quote Preferences
- Credit Control
- Setting up Teams
- Regional Settings
Service Report Templates
From a Job in CRM you can produce a Service Report as a PDF document that shows all the tasks that were undertaken as part of the job.
This guide will show you how to set up your Service Report Templates so that they mirror the processes that staff go through when they carry out jobs.
In this example I’m going to set up a report for a coffee machine service that technicians will perform.
To begin, navigate to Admin > Settings > Jobs and from here you can access Service Report:
- Categories
- Fields
- Templates

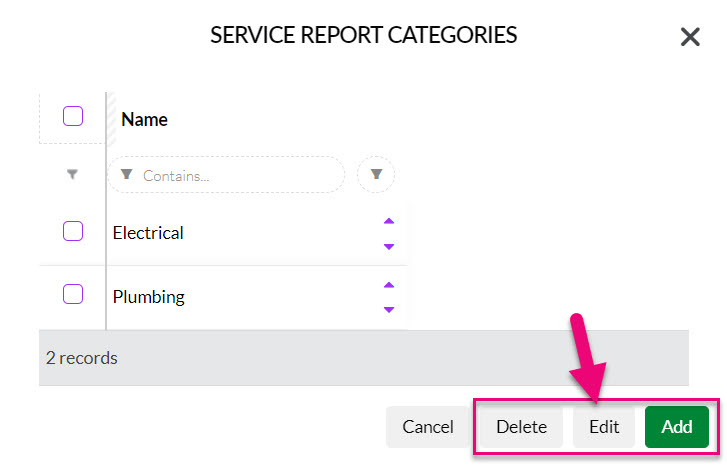
Navigate to Admin > Settings> Jobs> Service Reports > Service Report Categories.
These are the service functions that you perform for customers and in this example, we’re going to set up categories called “Electrical” and “Plumbing”.
These categories allow you to gather together functions and tasks that are performed during a service so that they can be shown neatly in groups on a Service Report.
Click on the Add button and enter in the category name and click Save. You can also click on existing categories to edit them.

Navigate to Admin > Service Reports > Service Report Fields.
These fields will reflect the types of activities you undertake for each type of the Service Report Categories that you have set up in the previous step.
In this example, I’m going to set up a range of fields that reflect the tasks my technicians undertake when they perform “Electrical” and “Plumbing” services on a job.
- Just click on the + Service Report Field button to get started.

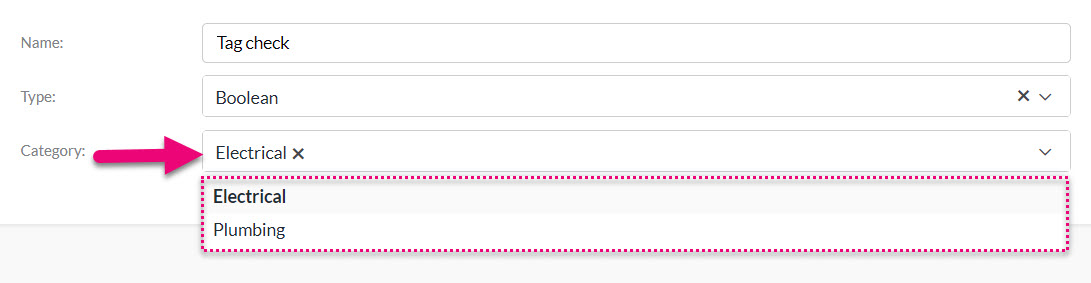
- Give the field a Name. In this example I’m going to set up an electrical cord tag test that technicians undertake. I’m going to link this to my Service Report Category for “Electrical” so that I can easily group all electrical tasks together on the Service Report.

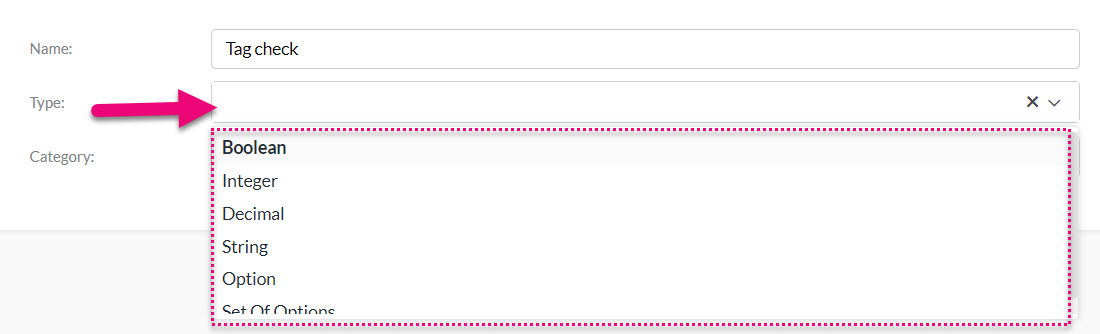
- I now need to select the Type of field I want to create. When setting up fields, you have a lot of flexibility as to how you configure them by choosing from different types of field. In this example I’m going to select Boolean because I want to create a check box for technicians to tick to indicate they performed the check.
- I now need to relate my new field back to a Category by selecting a Service Report Category from the list. I’m going to relate my field back to the “Electrical” option that I set up earlier.
- Click on Save & Close.
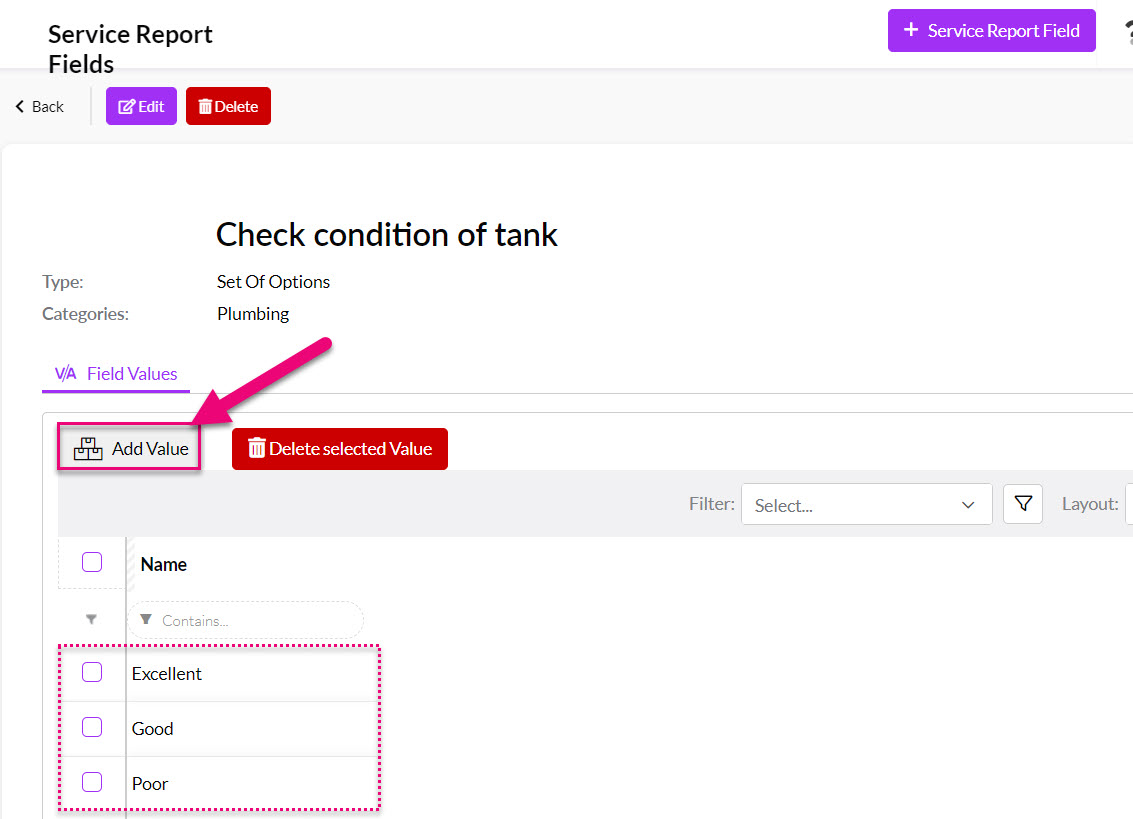
I can now return back to the main screen and add more report fields. This time I’m going to create a dropdown list of outcomes for a task that needs to be carried out on a job that involves “Plumbing” services.
This time I select Set Of Options when I choose a field Type and then I link the field to my “Plumbing” category.

When I Save & Close the field, I now have the option to add my set of options using the Add Value button where I can name and save each option.
I’m now going to create a 3rd report field and choose String in the Type field, this will allow technicians to add text notes to the field before they generate a report.

If you want to create different types of fields, this is a quick guide to the options and what they will allow you to do when you are generating a customer report:
- Boolean = check box.
- Integer = enter whole numbers.
- String = enter text description (long text).
- Option = enter a text value (short text).
- Set Of Options = dropdown list of options to select from.
Once you’re finished creating all your fields, you can proceed to the next step.
Navigate to Admin > Settings > Jobs > Service Report Templates.
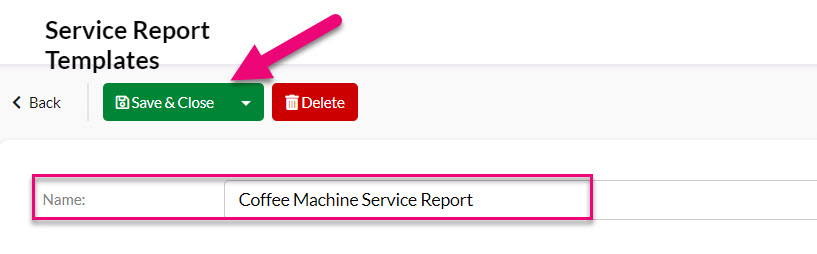
I am now ready to pull together the information by clicking on + Service Report Template.

You then need to enter in a template Name, then click Save & Close.
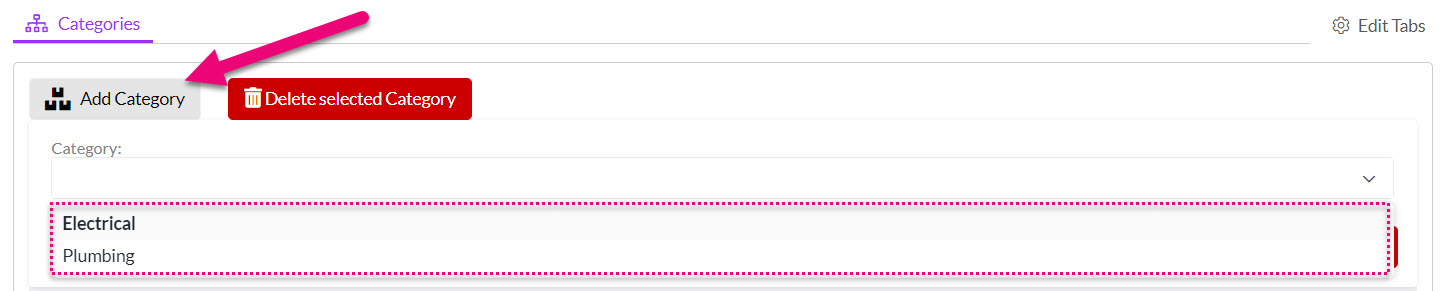
I now link up my template to the Service Report Categories I created earlier for “Electrical” and “Plumbing” by clicking the Add Category button.
This will automatically associate all of the Service Report Fields that I created and linked to the Service Report Categories for “Electrical” and “Plumbing”, thus completing my template.

Now that you’ve created a Service Report Template, you need to link it to your Service Products.
Once you have created your Service Report Templates, you need to go and link your Service Products with a template that so that whenever you add a Service Product to a Job, the right Service Report will be generated.
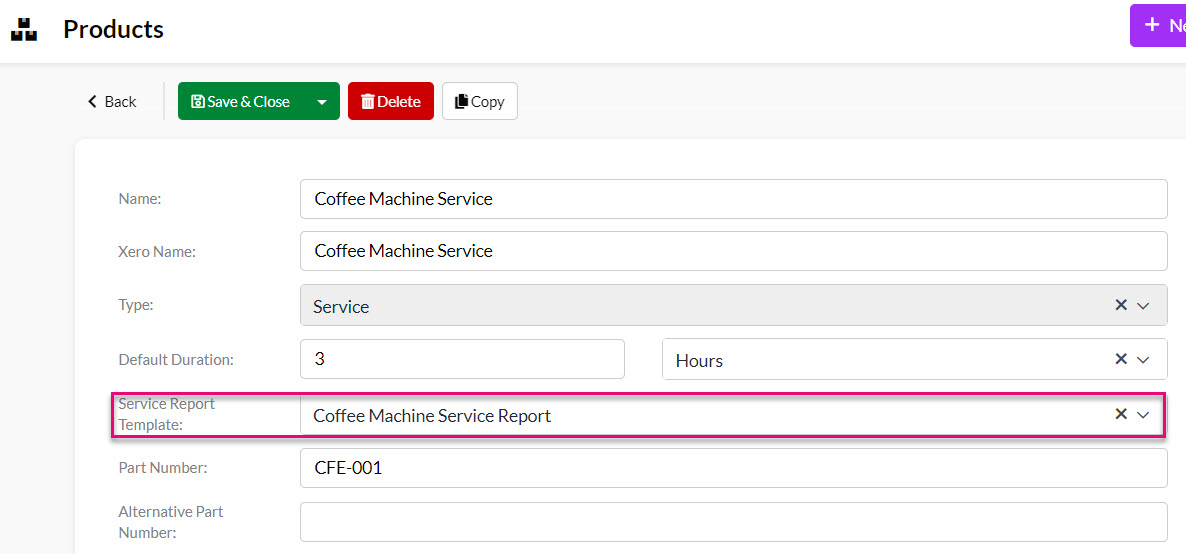
Go to Inventory > Products and filter them by Type = Service.
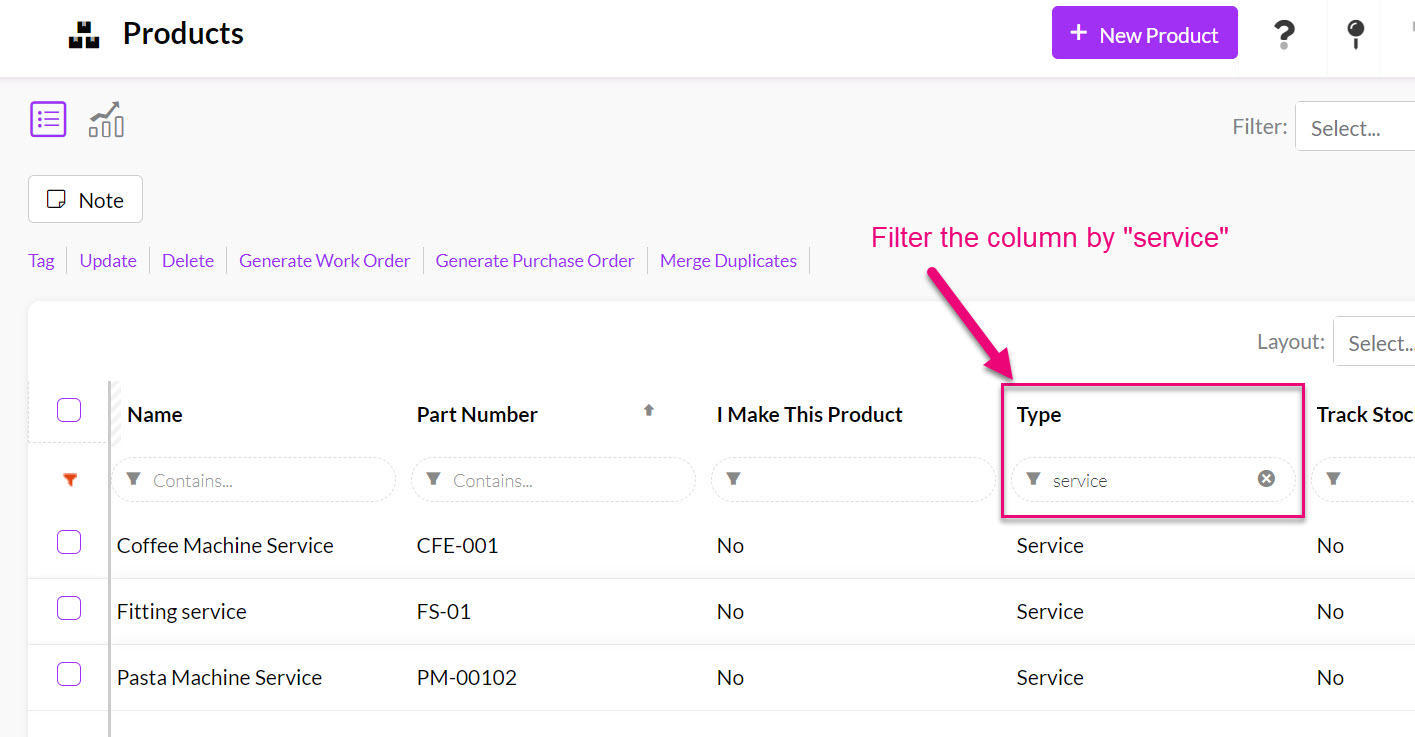
Open each record and select the Service Report Template you want to link it to, then choose Save & Close.

Open a Job record, then click Edit and scroll down to the items until you locate the Service Product/s that have been added.
Click on the green document icon.
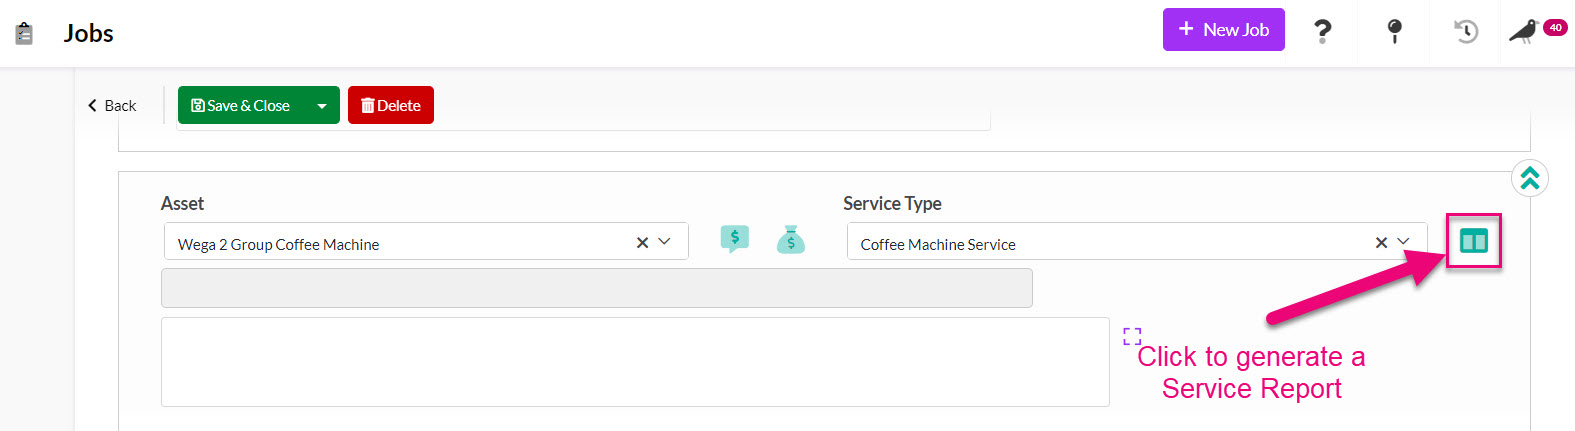
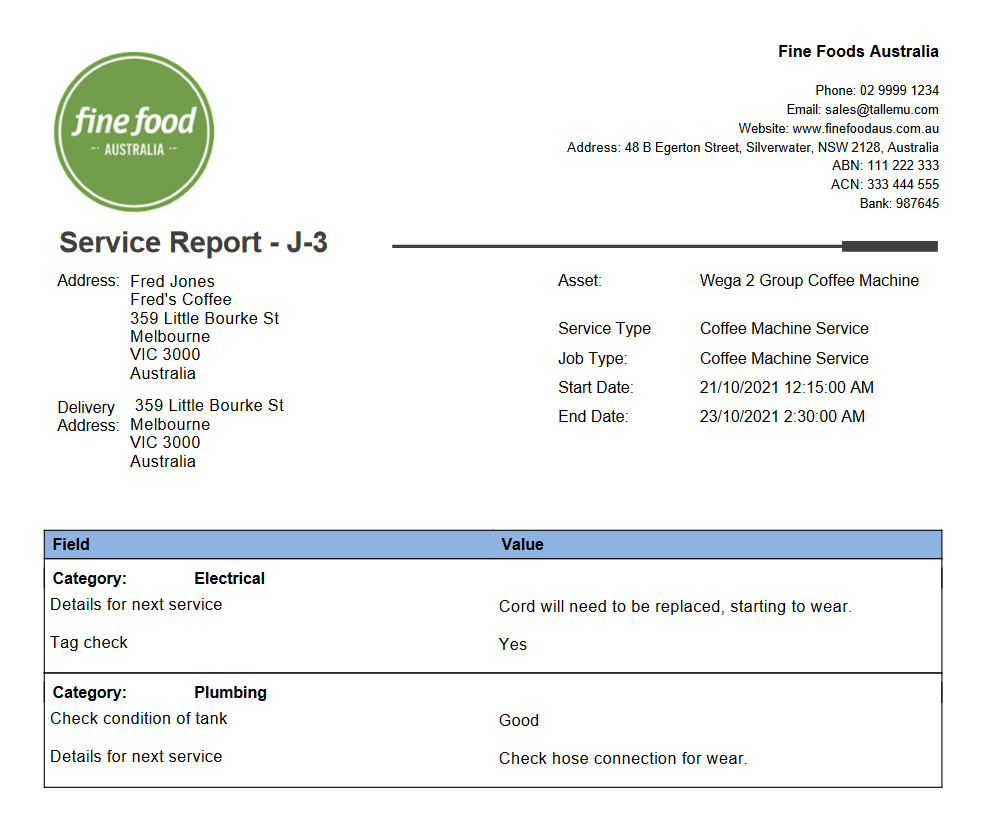
A new screen will show with a section for each of the Service Report Categories you created which shows the Service Report Fields that are applicable to the category.

You can then click on each of the fields to give them a value and then click on Save & Close once you have finished entering in the information. You will then be returned to the Job record.
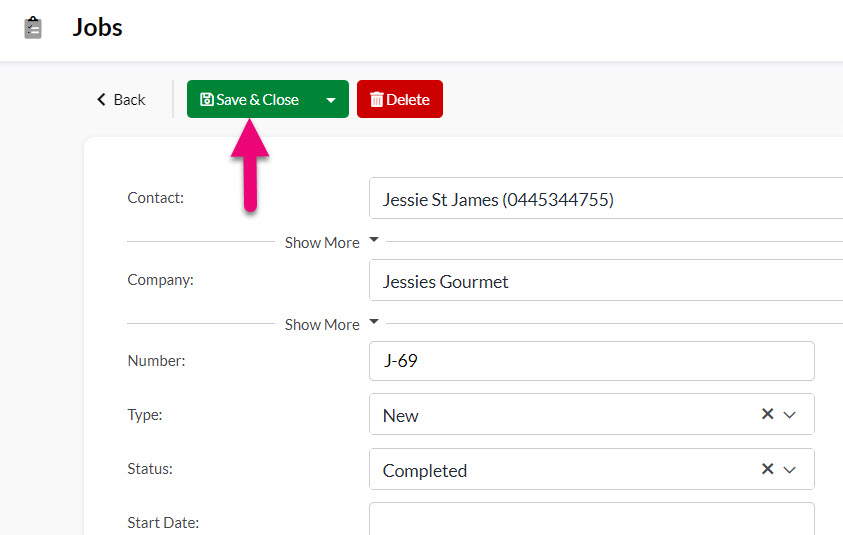
When you are finished, scroll to the top of the Job record and click on Save & Close.
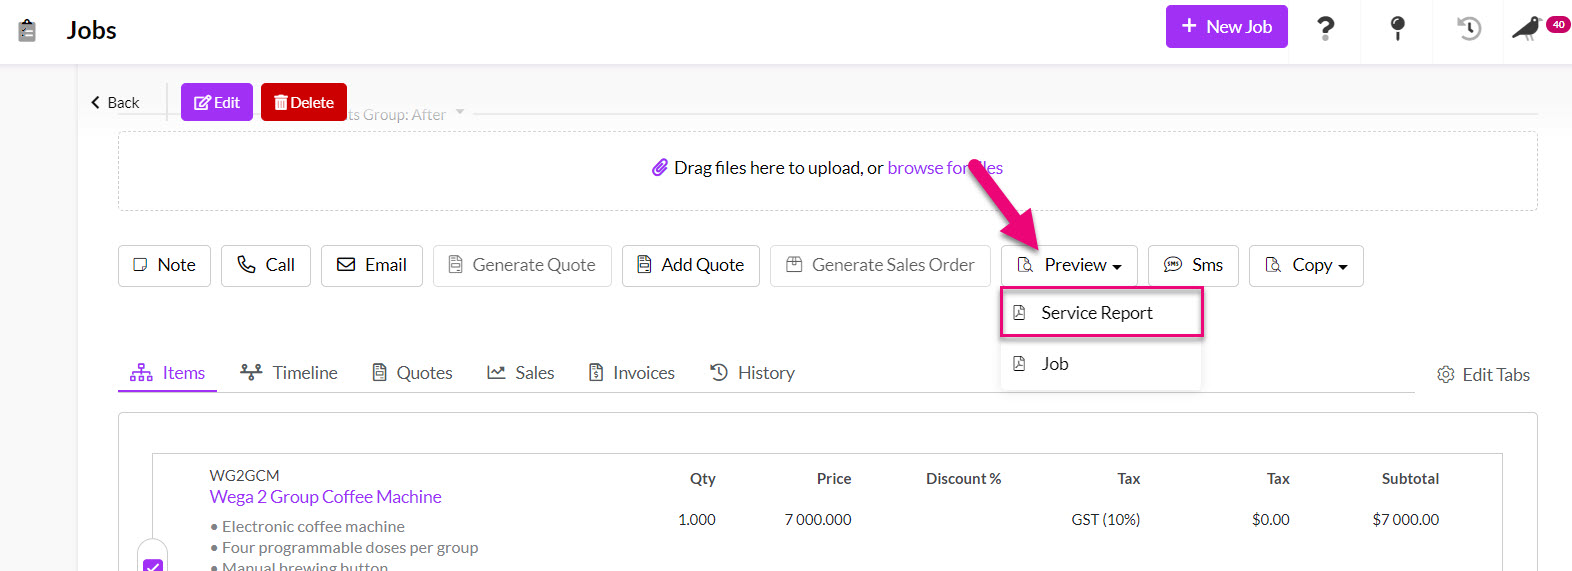
Once saved, on the Job record toolbar click on Preview > Service Report – the PDF document will then open in a new window.
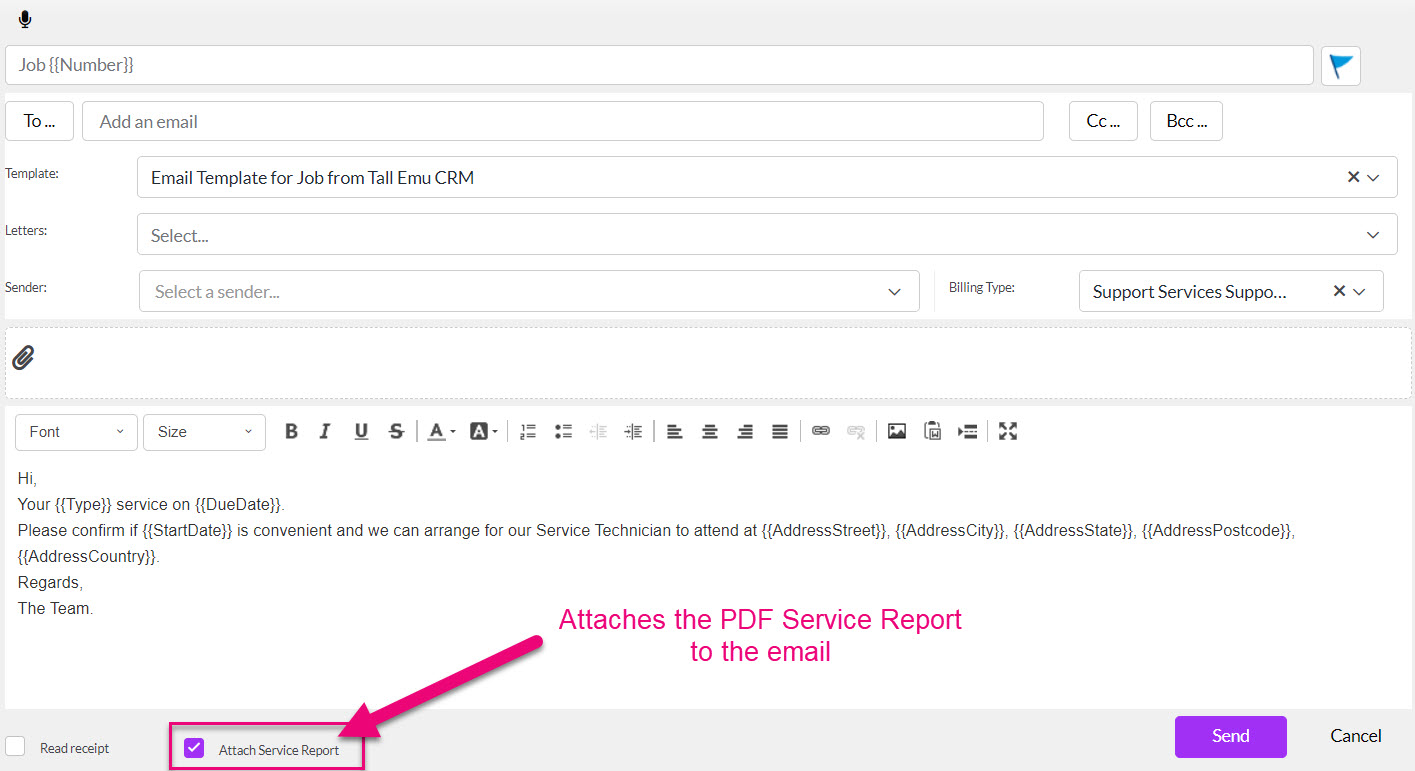
Open a job record and on the activity toolbar, click on Email. You can then either select an Email Template or start typing a new email.
At the bottom of the email is a check box called Attach Service Report, which is selected by default and will automatically attach a PDF copy of the report to the email. If you do not want to attach the report to the email you need to de-select this box.