Notes
You can add Notes to records throughout your CRM to store details about your activities so that the information is accessible to other users.
This page will take you through the available features of Notes in your CRM.
See also:
Where you can use Notes
The Note function is available in most areas of CRM.
Where your Notes will appear will depend on where you create them:
- From List View in most modules: if you create a new Note from List View in any module, it will only be linked to the Contact and/or Company record/s you select when you are creating the Note. There will be a button on the module toolbar in List View where Email is available.

- Directly from a record in most modules: if you create a new Note directly from a record in any module of CRM, it will apply to both the record you are in, as well as the Contact and/or Company record/s you select when you are creating the Note. For example, if you created a Note from an Invoice record and selected a Company and/or Contact to link it to, the Note will show up on all three timelines (i.e. the Invoice, Company and Contact timelines). There will be a button on the record toolbar where Note is available.
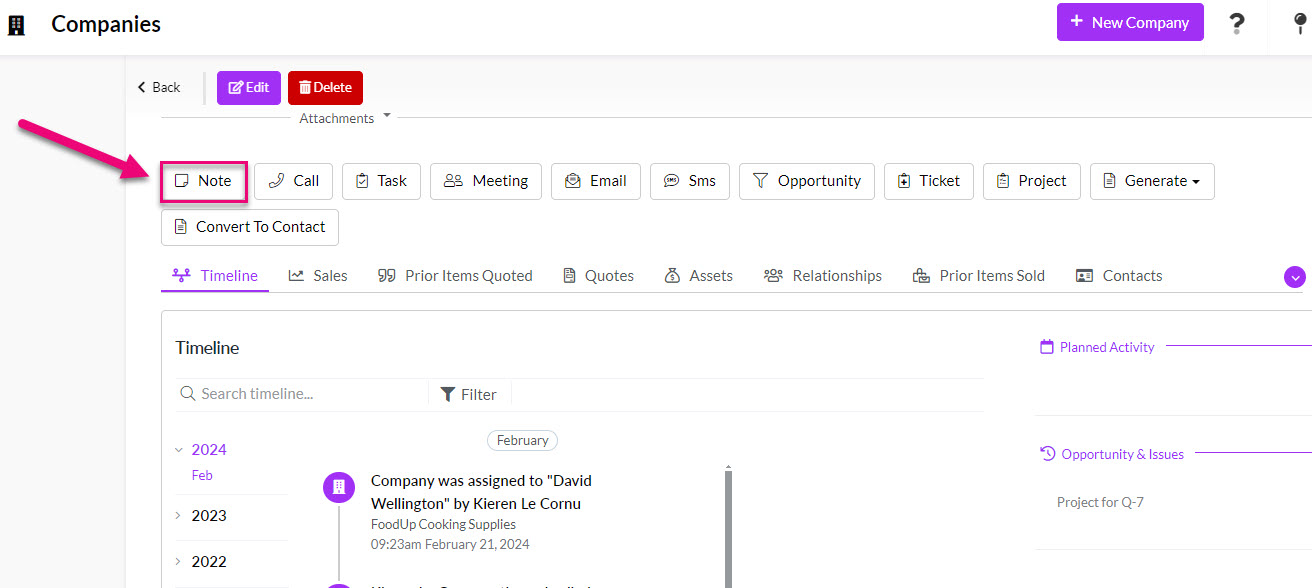
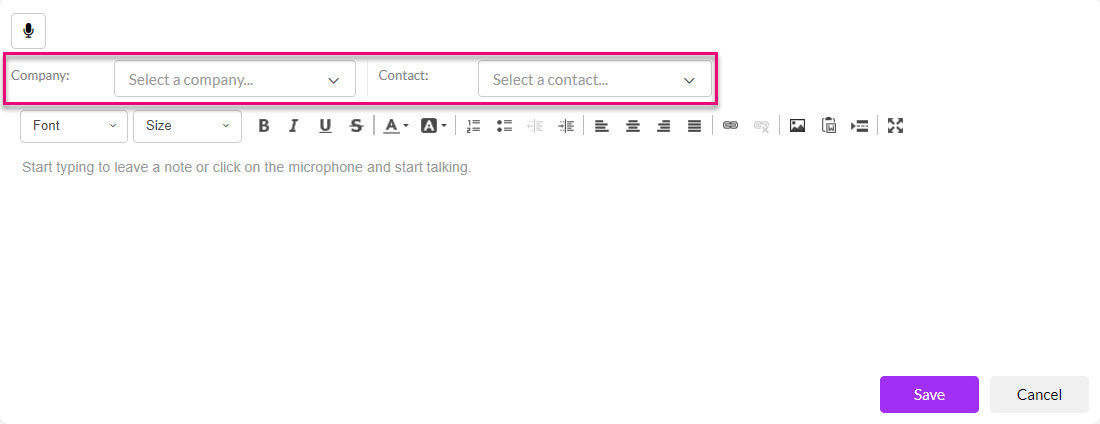
When you create a new Note and select a Company to apply it to, the system will automatically populate the Contact drop-down field with people that are linked to the Company record.
From a record Timeline
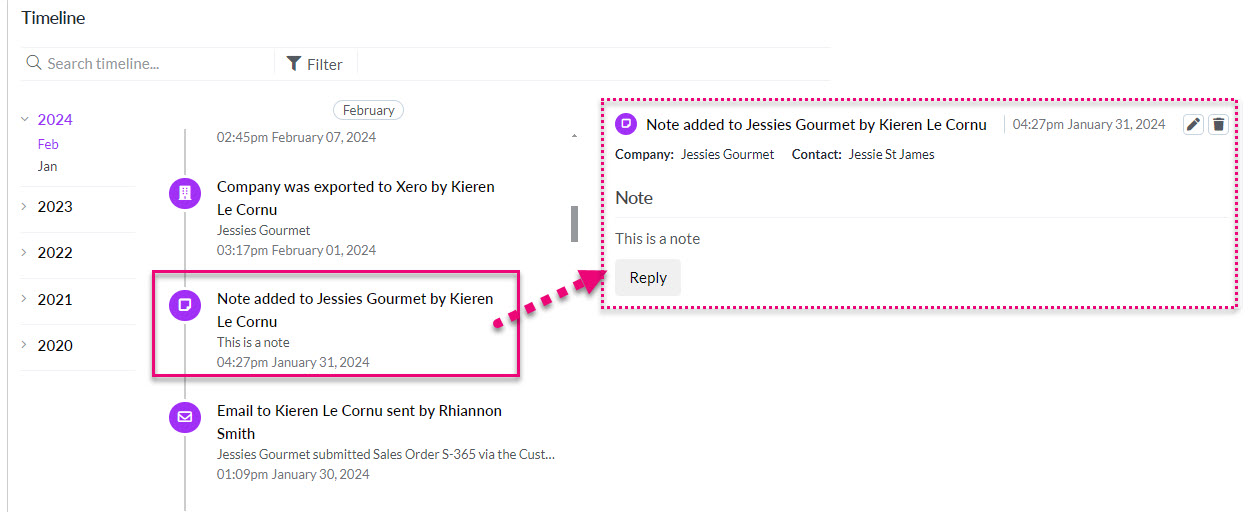
When you create a Note from anywhere within CRM, an activity is automatically created on the associated record/s in the Timeline area, forming part of the record history.
The Company and/or Contact that you chose when you created the Note will determine which record Timeline the Note will be visible on.

You can also filter the Timeline to display only Notes.

To see further detail about a note, click on it on the Timeline and the contents will be shown to the right.
See also:
From the Calendar module
You can also view all the Notes that have been created from anywhere in your CRM from a single point, by using the Calendar module in List View.
Once in List View, you will see a list of Activities from all over your system – you can then refine what you see by using the filters and search boxes.

Hovering over a Note on a Timeline will give you the option to edit or delete the Note.

The Note form includes a formatting toolbar, providing you with the ability to customise your note body with the following features. Hovering over each of the buttons will reveal a description of the button function.
- Font – choose a font and size and have the option to apply bold, italics, underline or strikethrough to the text and change the colour.
- Text format – increase/decrease indent, add a numbered or bullet point list, align text to left, centre, right or justify.
- Email format – choose a background colour from the palette.
- Insert an image – from either a URL or file upload.
- Add or remove a link – available for URL, email, phone or link to an anchor in the note text.
Email formatting toolbar
Rather than typing a Note, you can use the native voice transcription feature to turn your voice into text. While you are speaking, the system will record your audio and you will have the option to save the recorded audio as an attachment so that it will form part of the Note activity on the applicable record Timeline.
To begin voice transcription, press the microphone icon when you are creating a new Note and start talking – the system will begin transcribing your speech (there may be a slight delay in the text appearing in the note body).
![]()
If your browser does not already have permission for CRM to use your microphone, a prompt will display, and you will need to choose Allow.

Example of browser permission to enable a microphone
When the voice transcription starts, the microphone icon changes to a square – click on the square to stop the voice transcription.
![]()
When you end the voice transcription, you will have the option to save your recorded audio as an attachment to the Note activity or select Cancel to abandon the recording.

If you choose to save the audio file, you will see it attached to the Note – click Save.

You can now edit any of the text that has been transcribed before you save the Note.
You could utilise this feature if you wanted to add further information or an explanation (using audio) to accompany the Note activity record.
Note that for each User in your system, you can set a default preference for the Speech Recognition Language used.
![]()
See also:
In Notes you can use “@ mentions” to tag other Users or Teams.
This is done by typing “@” immediately followed by the first few letters of the User or Team name to reveal a mention tag.
Once you have added this, the User/s you mentioned will get an email with details of the mention, as well as notification in CRM.
This is very really handy for keeping colleagues in the loop when adding Activities to CRM; you can quickly let others know what is going on, without having to send a separate email.
In the example below, I want to tag my colleagues in the finance team in a Note I am writing, so I type in “@finan” to reveal a tag option, then click on this to select the Team; when I save my Note, the Users in the Team will get an email alert.
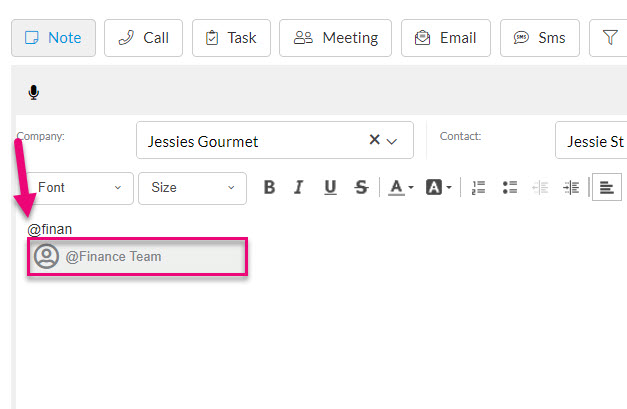
An example showing saving a Note with an @ mention.

Following is an example of a mention notification in CRM.

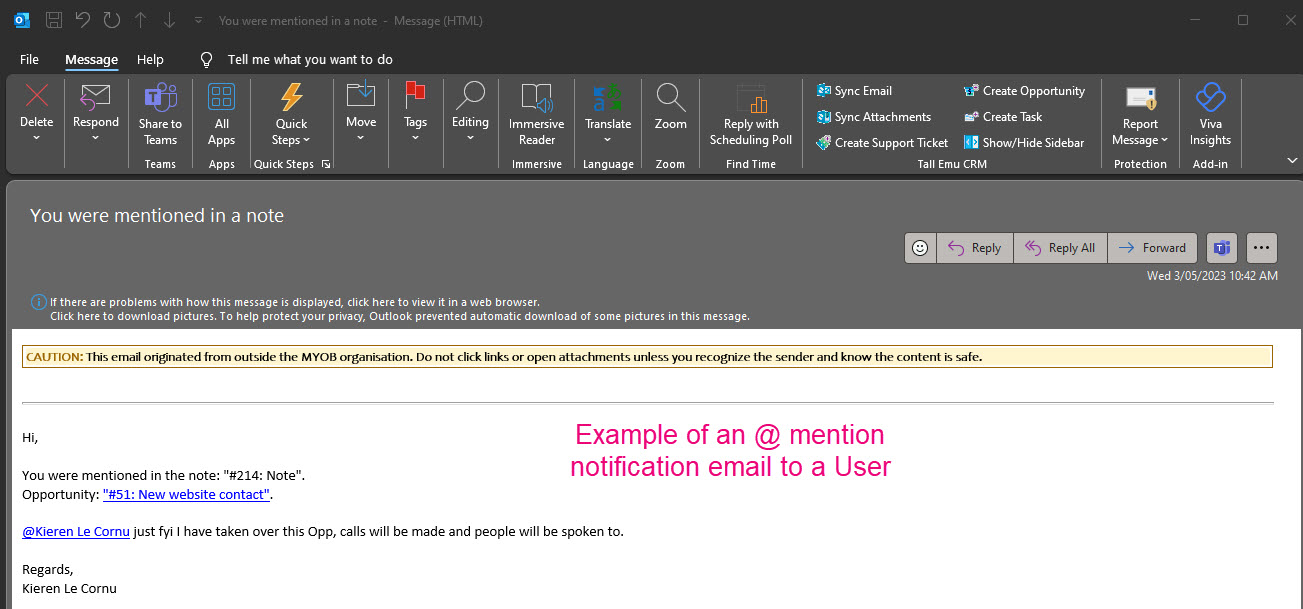
And this is an example of an email notification sent to a User who has been mentioned in a Note.
See also: