Tasks
You can add Tasks to records throughout your CRM as a way of tracking and storing information about your business activities, so the details are accessible to everyone in your team.
This page will take you through the available features of Tasks in your CRM.
Where you can use Tasks
The Task function is available in the following modules of your CRM: Contacts, Companies, Opportunities, Quotes, Orders, Invoices, Outbound Shipments, Stocktakes, Stock Transfers, Stock Transfer Shipments, Requests For Quote, Purchase Orders, Supplier Bills, Inbound Shipments, Supplier Companies, Supplier Contacts, Campaigns, Tickets, Projects, Jobs and Training Courses.
Where your Tasks will appear will depend on where you create them:
- From the main view in most modules: if you create a new Task from List View in any module, it will only be linked to the Contact and/or Company record/s you select when you are creating the Task. There will be a button on the module toolbar in List View where the Task function is available.

- Directly from a record in most modules: if you create a new Task directly from a record in any module of CRM, it will apply to both the record you are in, as well as the Contact and/or Company record/s you select when you are creating the Task. For example, if you created a Task from an Invoice record and selected a Company and/or Contact to link it to, the Task will show up on all three timelines (i.e. the Invoice, Company and Contact timelines). There will be a button on the record toolbar where the Task function is available.

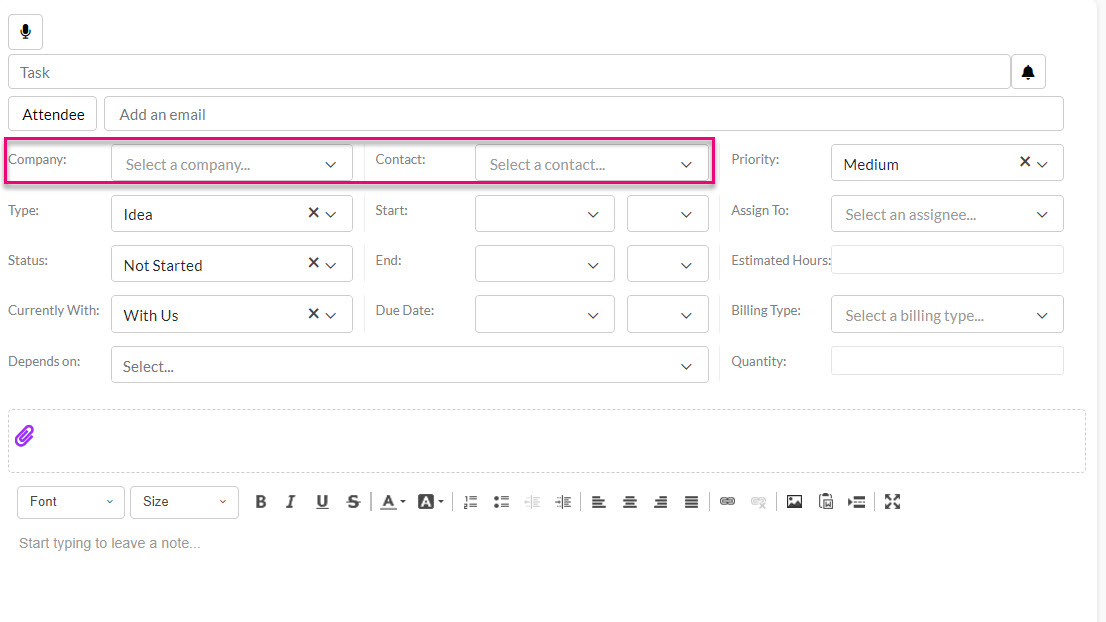
When you create a new Task and select a Company to apply it to, the system will automatically populate the Contact drop-down field with people that are linked to the Company record.
- From a Ticket: the Ticket form has a button that will quickly convert the contents to a Task.

- From Admin > General > Company Settings you can enable the option to Create Tasks Based on Product Sold.
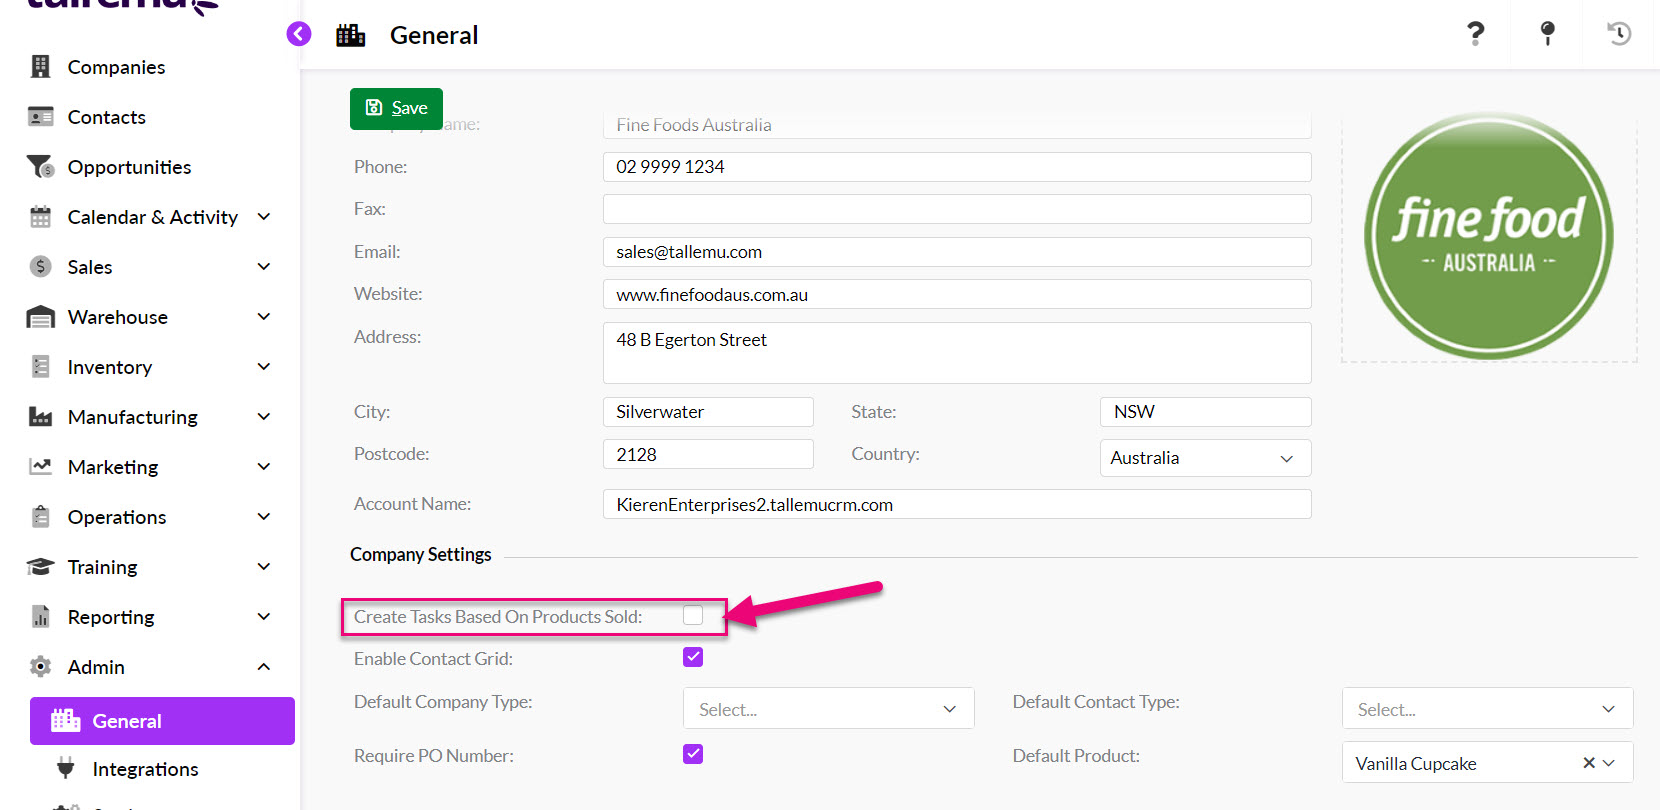
Once you enable this option, two additional fields will be shown:
-
- Task Type – here you can select from the options: No, Standalone Tasks or Tasks in a Project.
- Task Start Date Type – here you can select from the options: None, Current Date (Default) or Delivery Date (of SO).

- Ensure you click on the green Save button at the top of the page to apply your changes.

- From any Sales Order in your system, you can use the Generate button on the toolbar to select Task For Items.
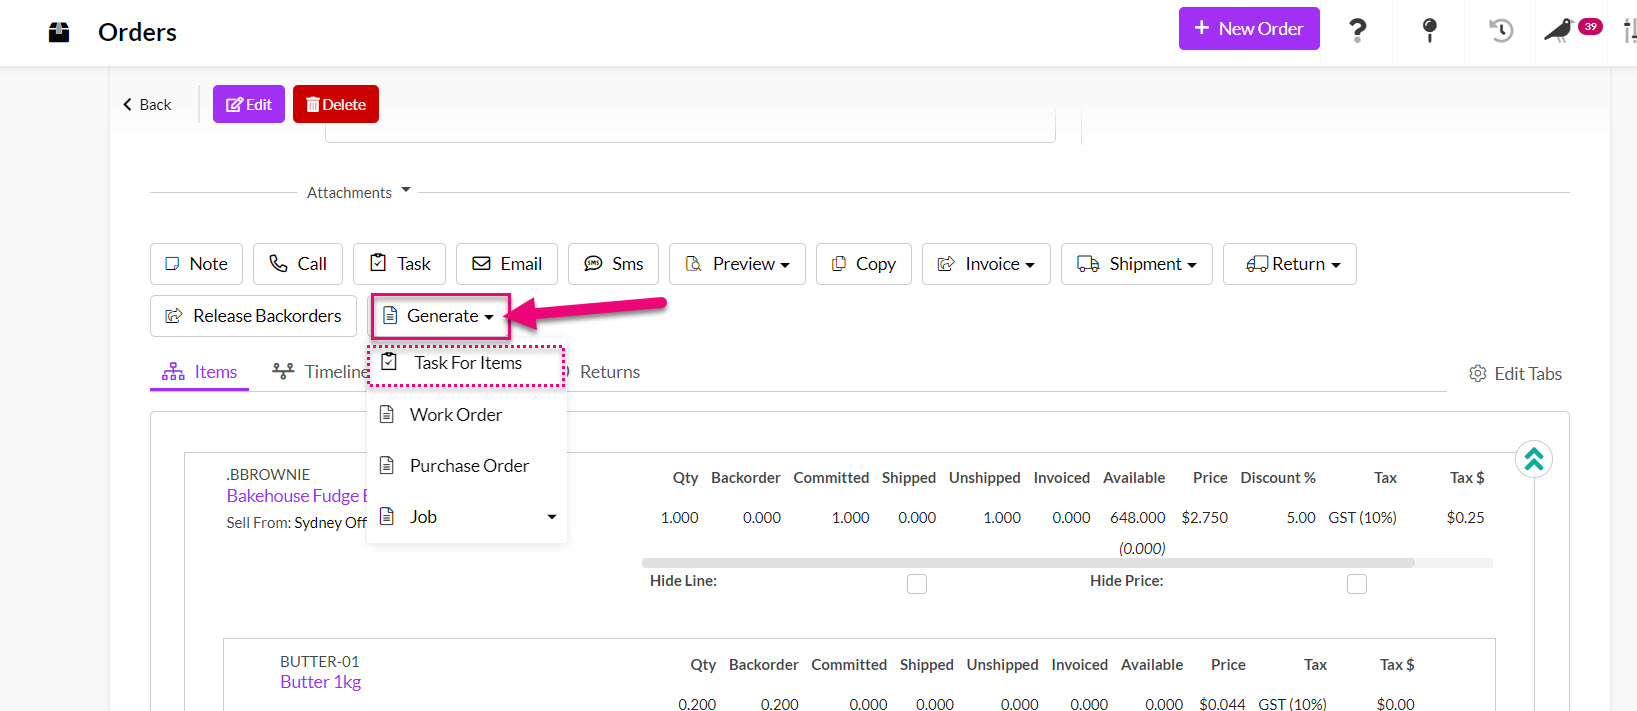
- You will then be prompted to confirm the choice.

Depending on whether you’ve chosen the Standalone Tasks or Tasks in a Project option, your automatically created Task will show either:
- On the Tasks tab of the relevant Product record.
- Via a new Project linked to the Sales Order – open the record and you will see the Tasks on the relevant tab.
See also:
You can customise the following Task field values with your own options:
- Reminder Minutes
- Priority
- Status
- Type
- Currently With
You can do this from Admin > Settings > Activities & Calendar > Task Settings.

Customising the values in these fields allow for you to organise and segment your team’s workflow.
See also:
From a record – pending Tasks
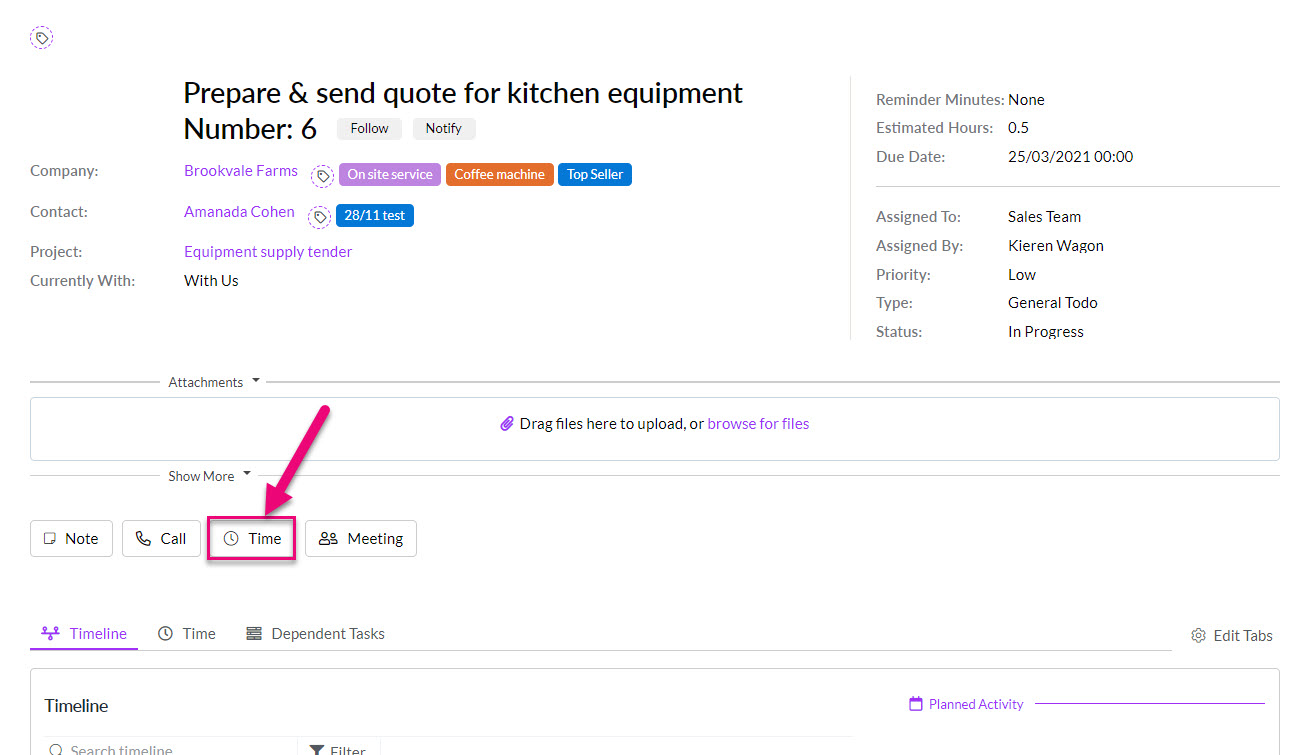
When you create a Task from anywhere within CRM, an activity is automatically created on the associated record/s in the Planned Activities area. When due date for a Task has passed, it will move to the Timeline area and form part of the record history.
The Company and/or Contact that you chose when you created the Task will determine which records the Task will be visible from. The following example shows the Planned Activities area on a Ticket record.

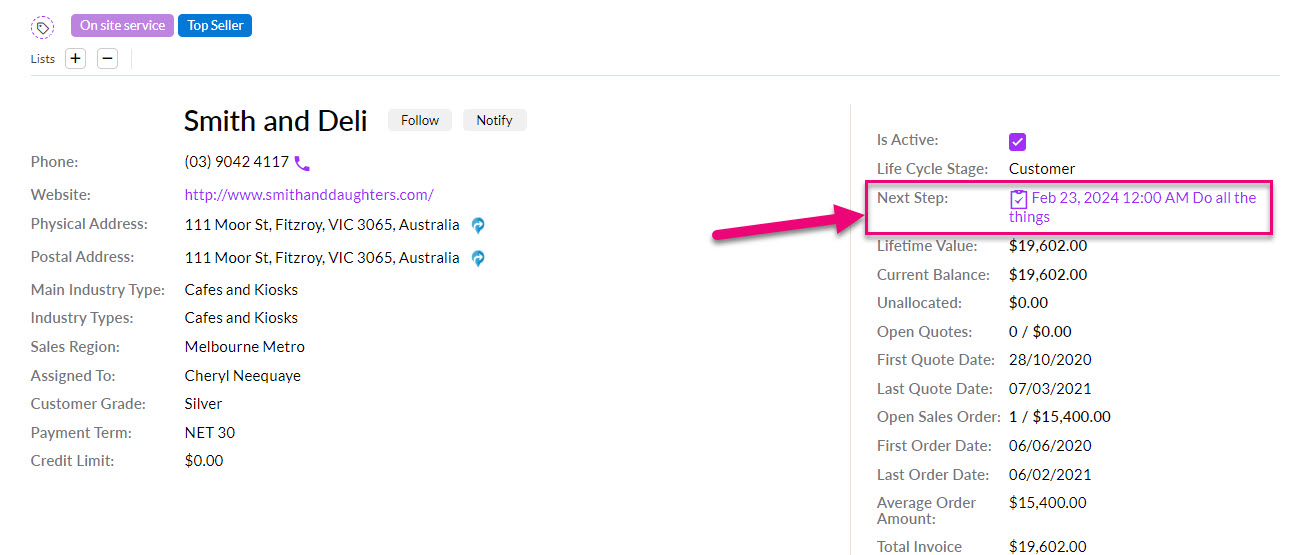
If a Task is the next Activity in date order, it will show as the Next Step in the top right-hand corner of the record.
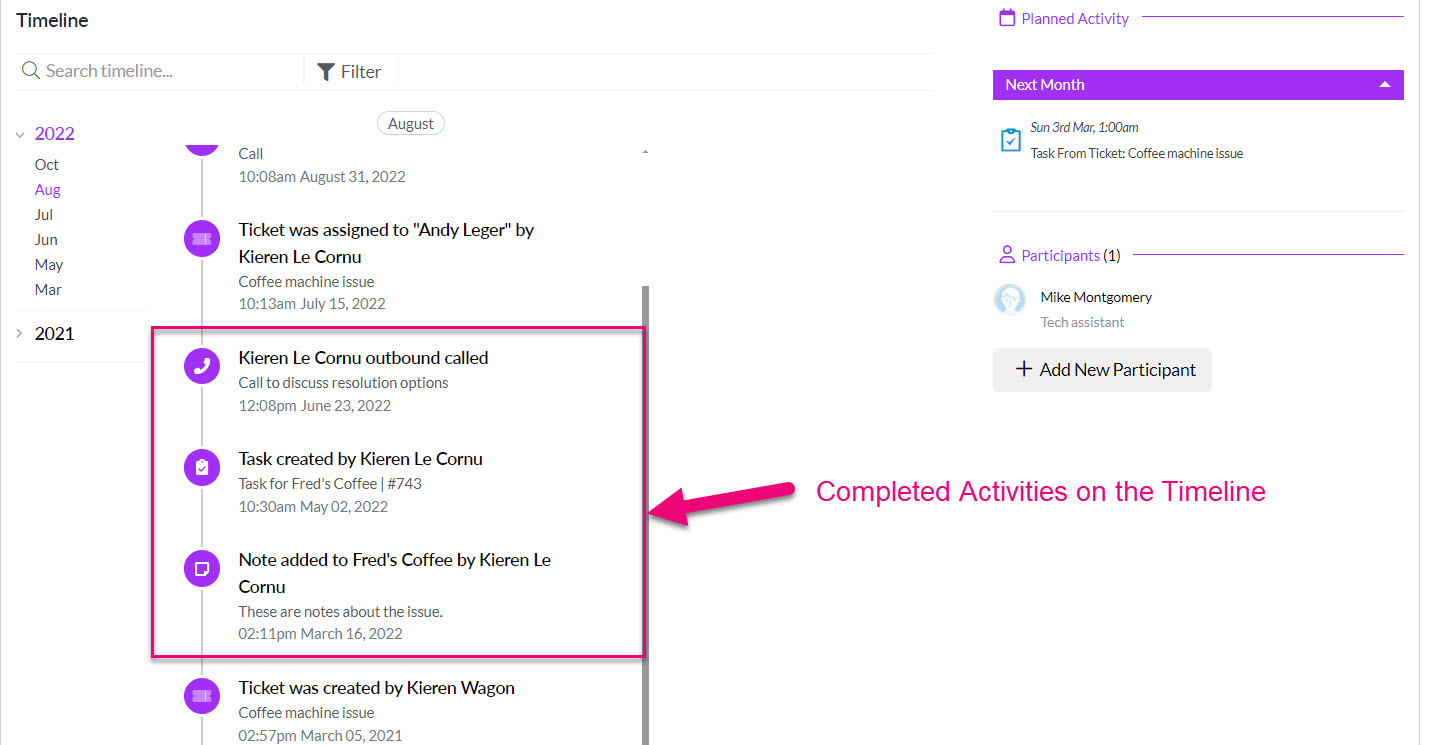
From a record – completed Tasks
When the due date for a Task has passed, it will automatically move from Planned Activities to the Timeline area and form part of the record history.
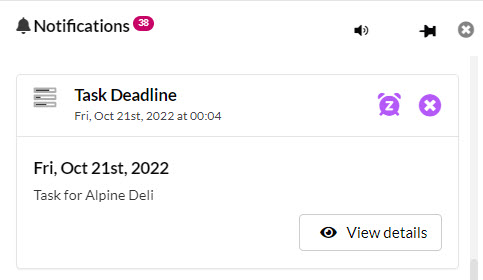
From Notifications – when a Task reminder is set
When you add a reminder to a Task, you will receive a Notification in CRM when your reminder is triggered.
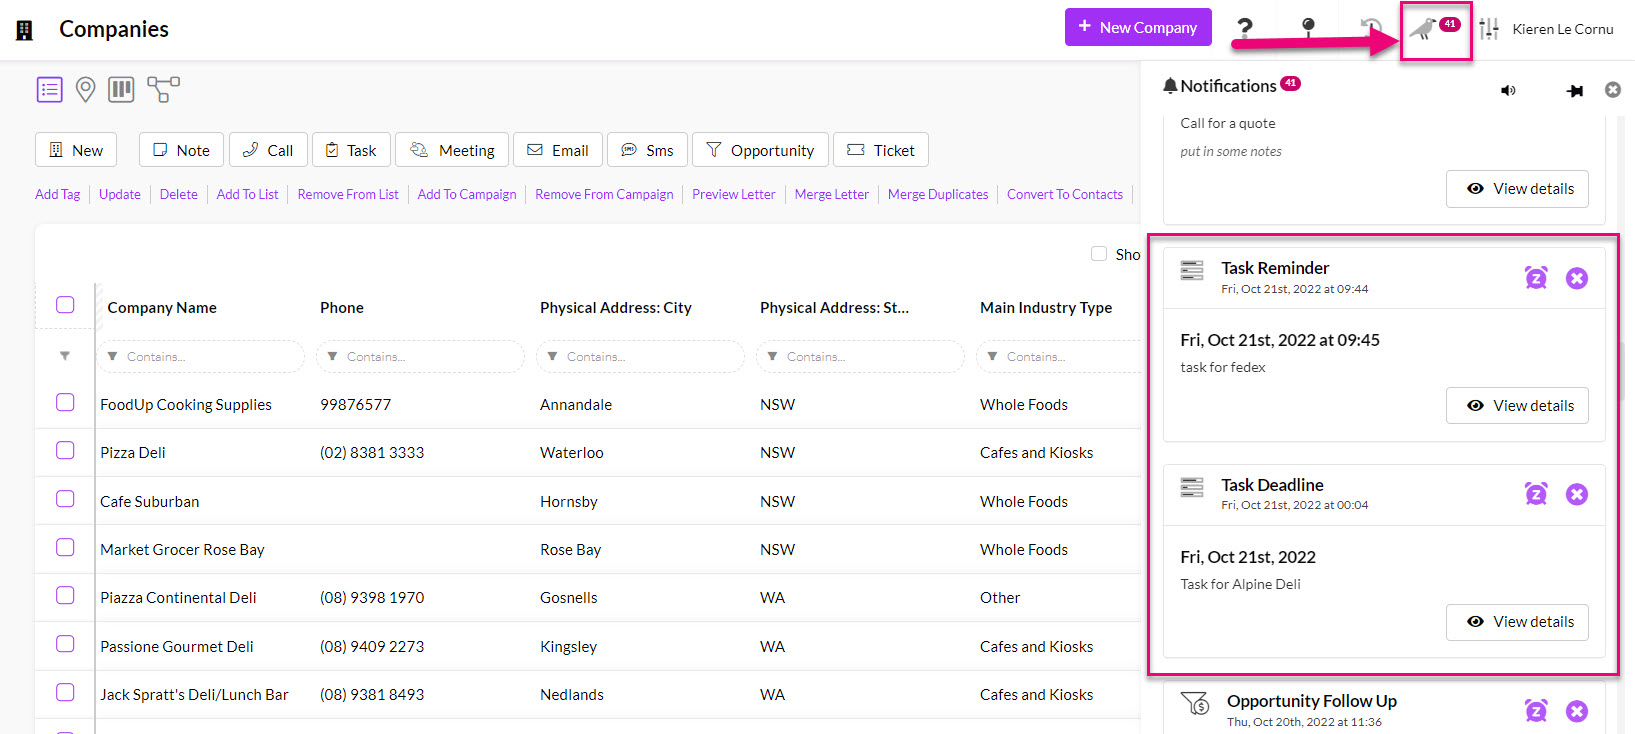
When the reminder appears in the Notifications area, you have the option to snooze the reminder or clear it.
Also see:
From the Calendar module – all Tasks
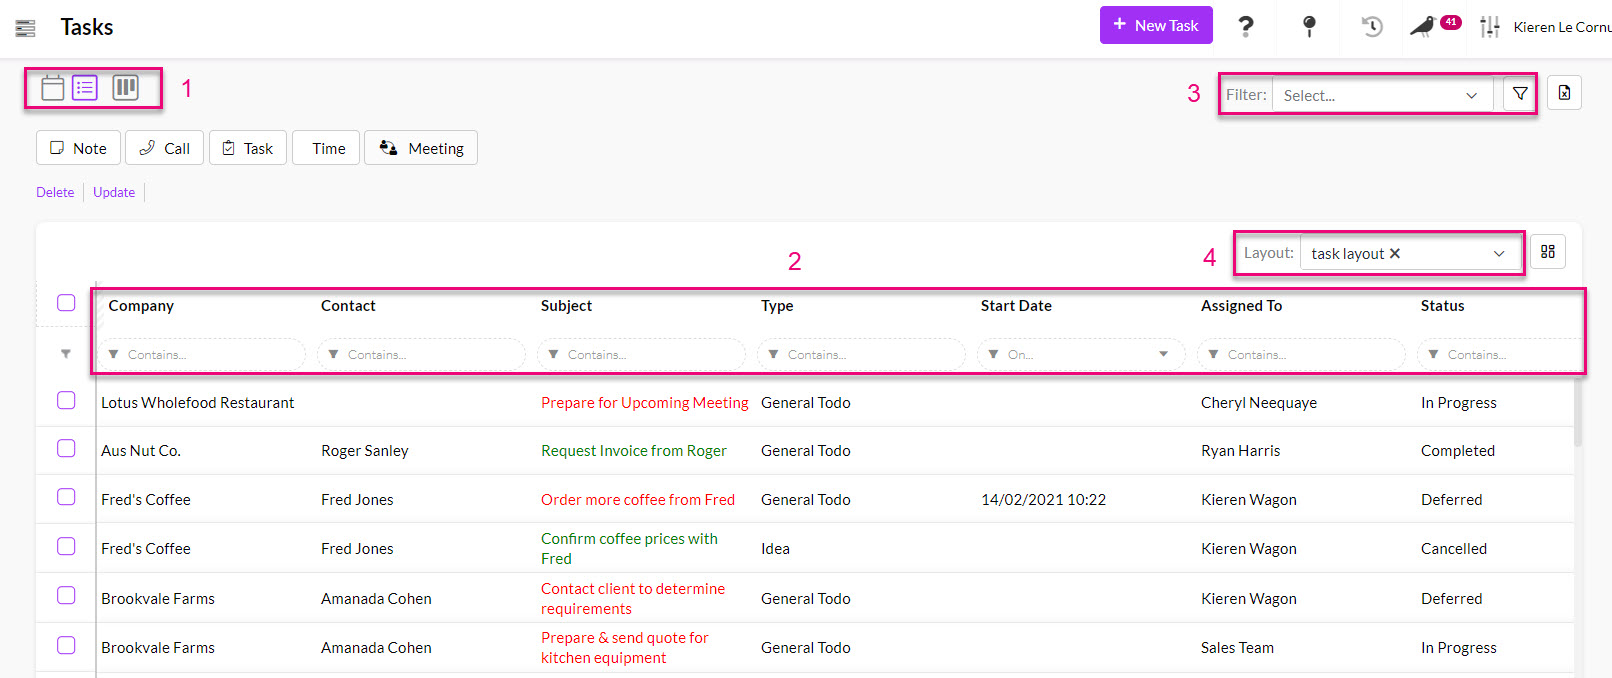
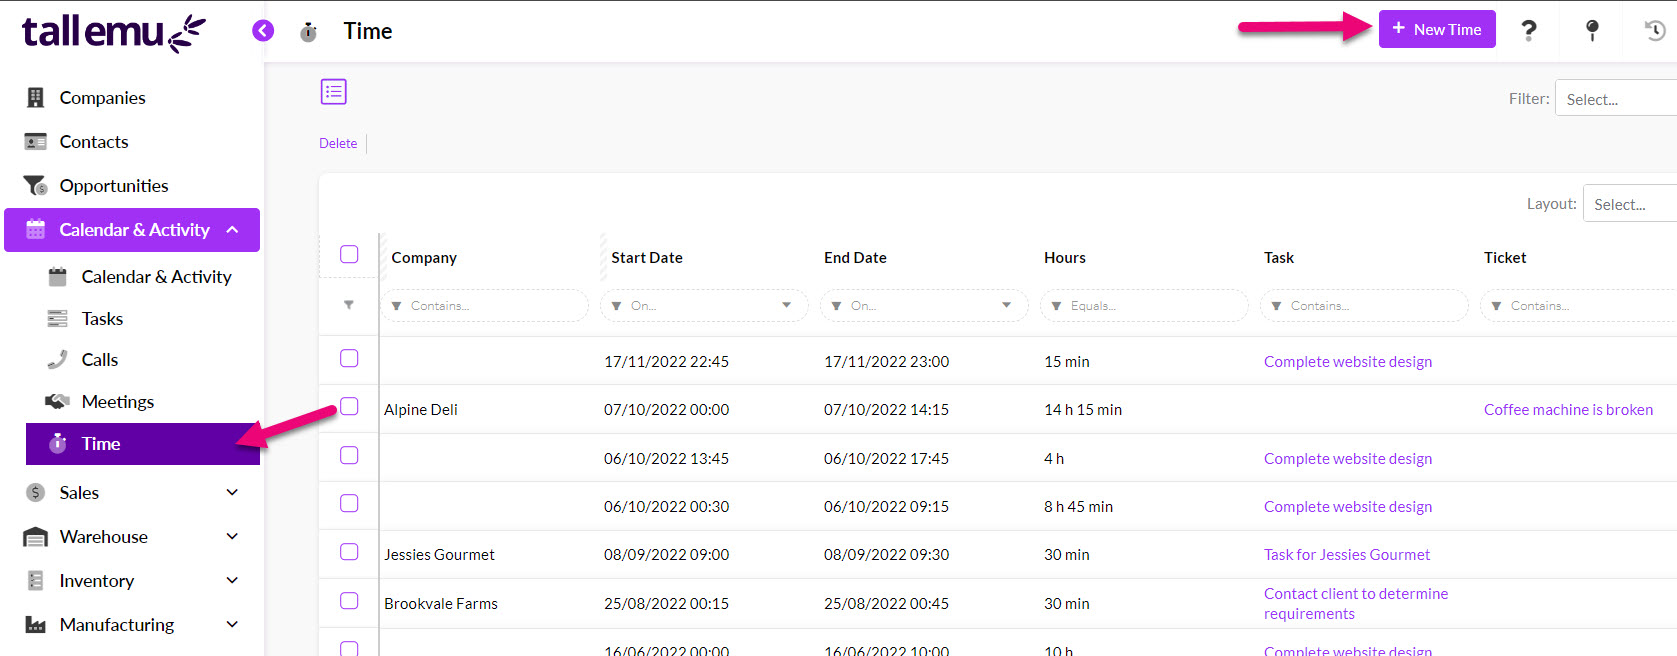
You can also view all the Tasks that have been created from anywhere in your CRM from Calendar & Activity > Tasks.
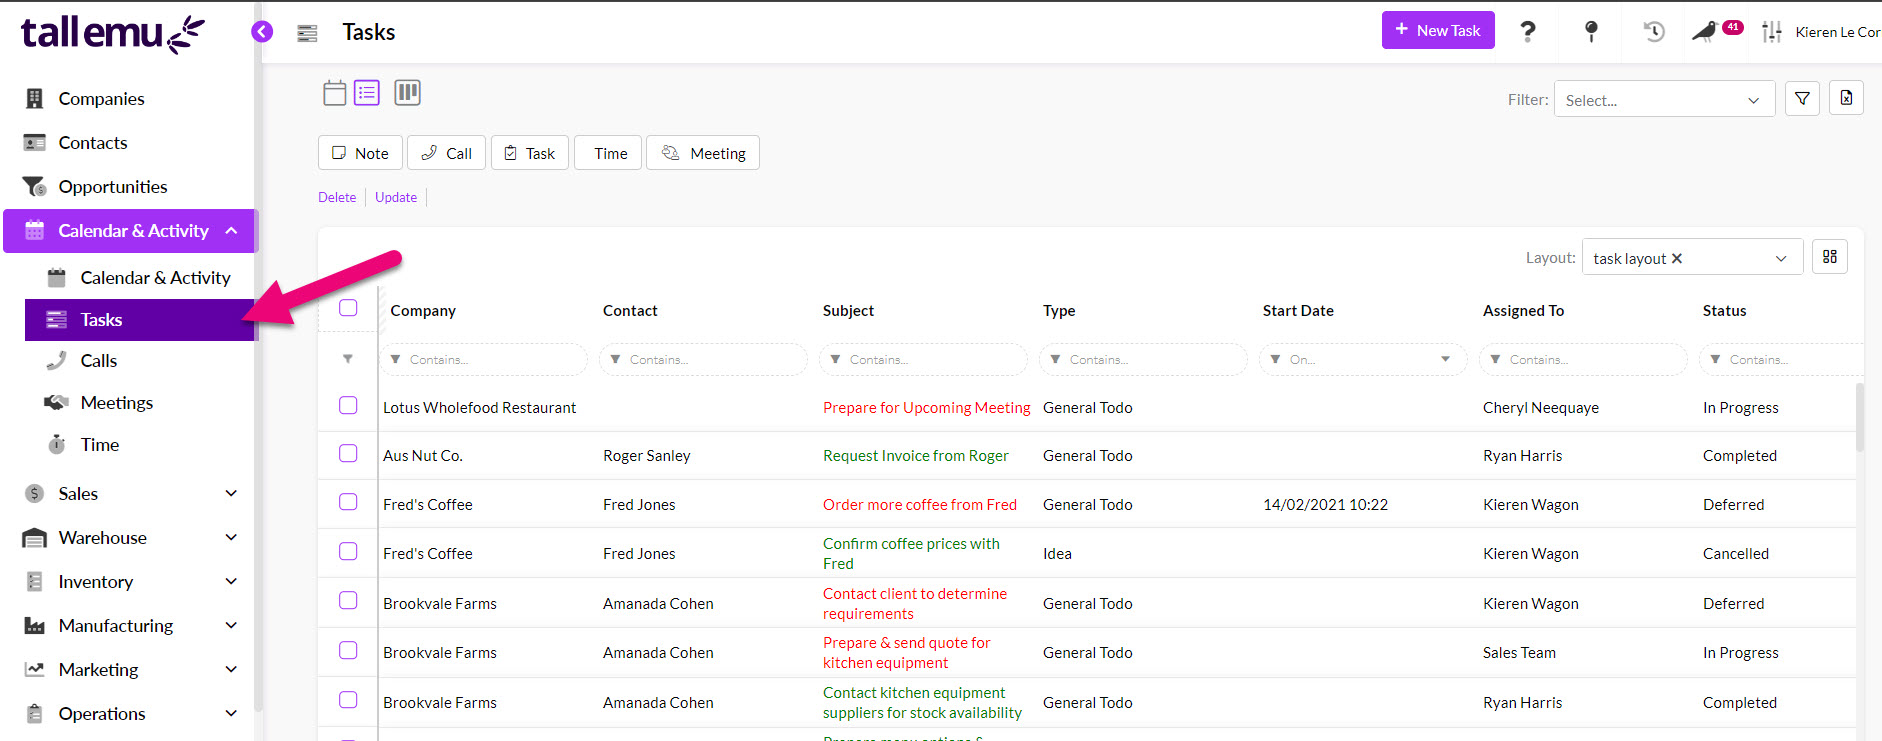
From this area, there are a number of ways you can search and sort your data:
- Use different views – List View, Kanban View and Calendar View.
- Filter records using the search boxes.
- Create and deploy Advanced Filters.
- Create and deploy Layouts.
There are 2 Task forms in CRM:
- Simple – this is a short form with a link to open the Task in advanced mode at the bottom.

When you create a Task from an activity toolbar, it will open in simple mode by default, and you can then switch to advanced mode.
- Advanced – this mode opens the full-size record.
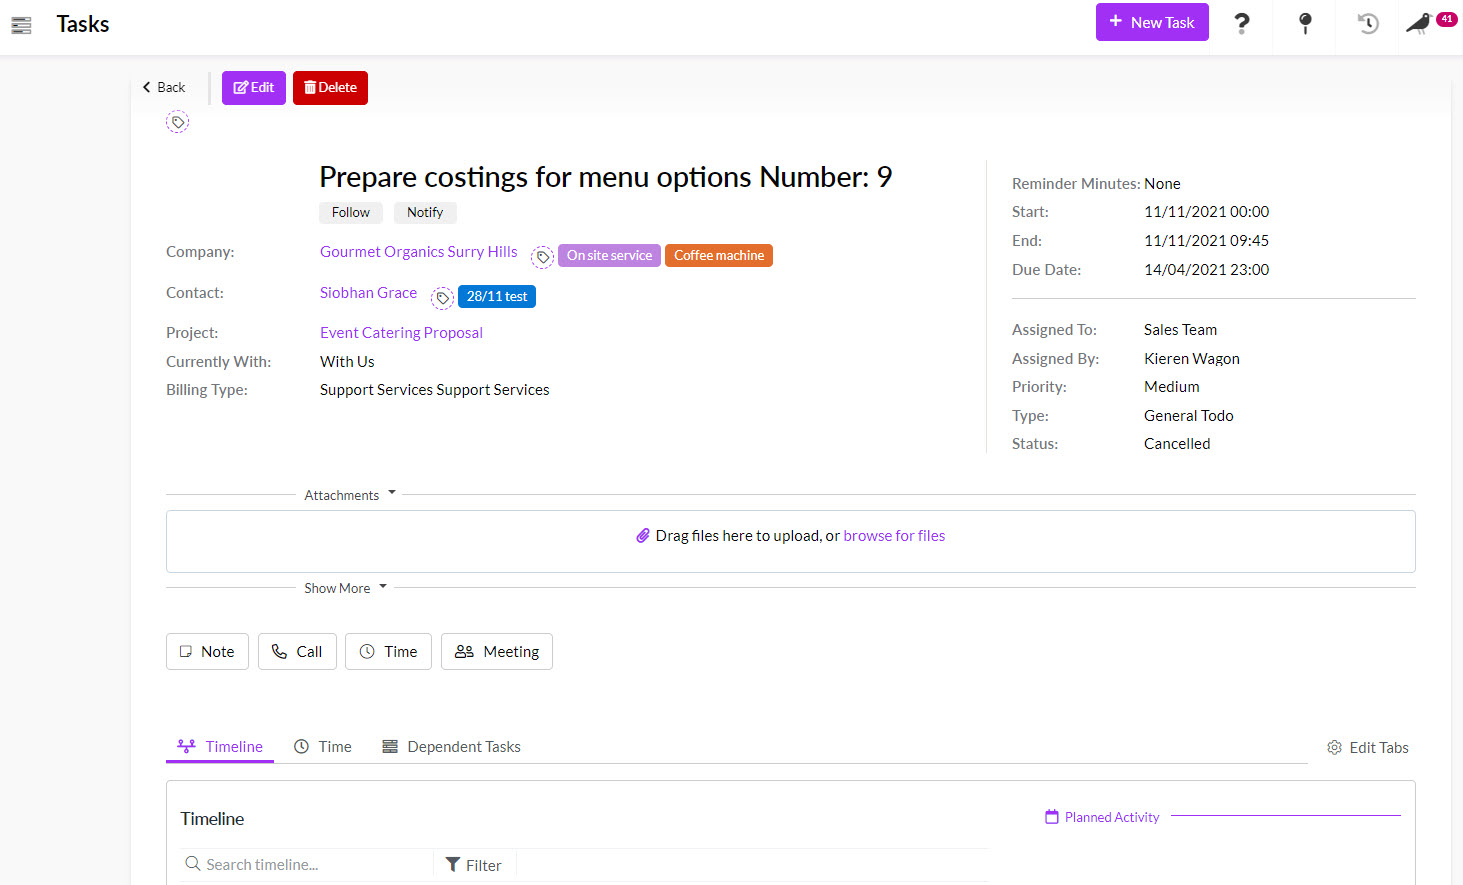
If you create a new Task using the New Task button from Calendar & Activity > Tasks, it will open in advanced mode by default.

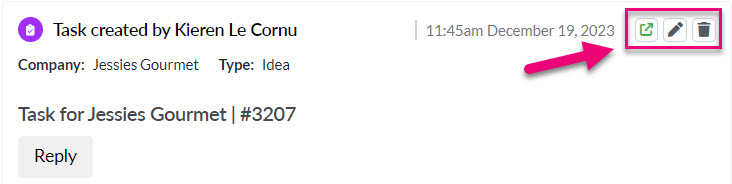
Clicking on a Task on a Timeline or in Planned Activities will give you the option to open in advanced mode, edit or delete the Task.

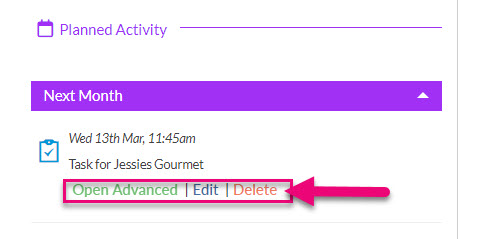
You can also hover over the Task in the Planned Activity area to the right of the Timeline to reveal options to Open in Advanced Mode, Edit or Delete.
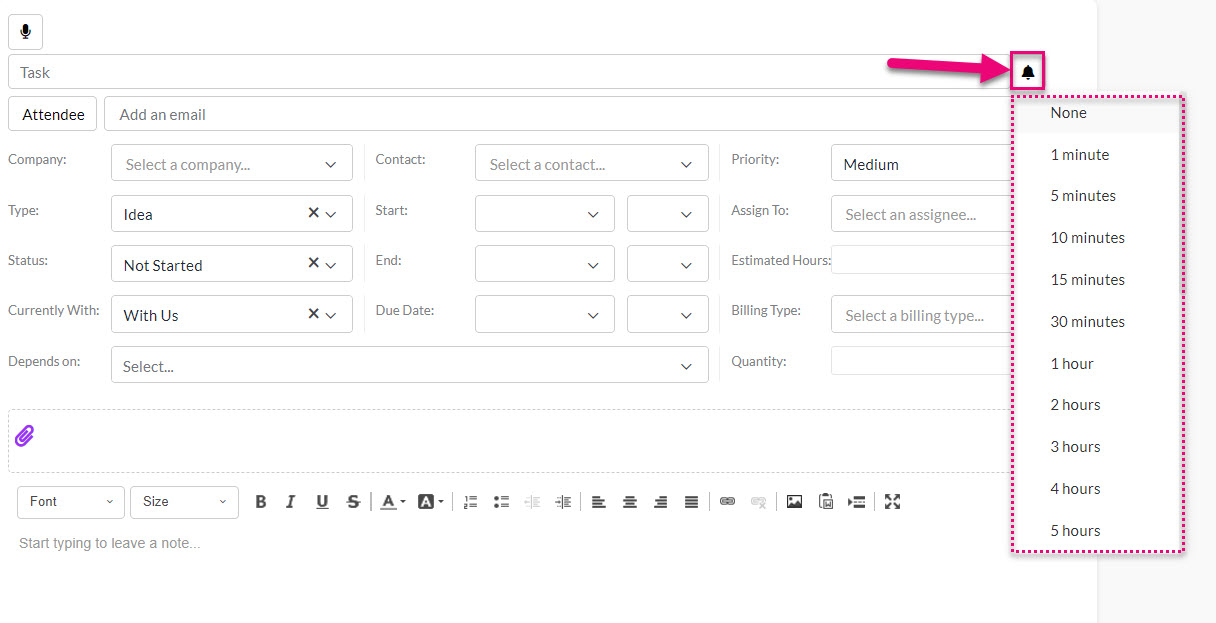
You can set reminders for your Tasks, which will prompt a Notification to appear in CRM. To set a notification on a Task, simply click on the bell icon, which will reveal the option to choose a time for your reminder (this is the time before your Task is due when the reminder will appear).
You can customise the time intervals that appear on your Reminder list from Admin> Settings> Activity> Task.
Your reminder will appear in the Notifications area of CRM.
You can click on the Priority field when creating a new Task to choose from Low, Medium or High. This function helps you to organise your workflow, as you will be able to search your CRM for Tasks based on their priorities and due dates.
By default, all new Tasks will have a Medium priority assigned. You can customise the options that appear on your Priority list from Admin> Settings> Activity> Task.

Tasks work in conjunction with Time – you can have multiple Time entries that are added up to determine the total time spent on a Task.
You can add Time from Calendar & Activity > Time or from a Task in Advanced View.
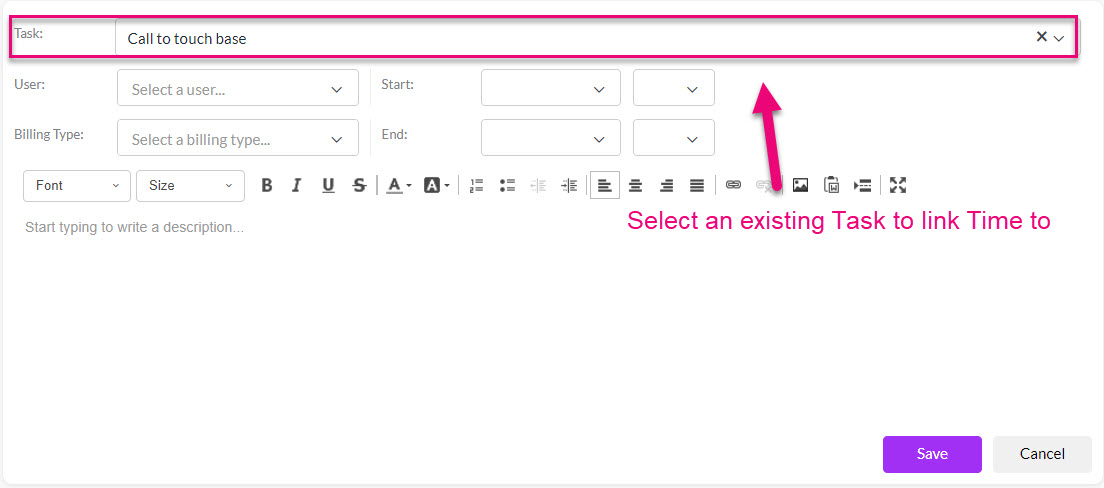
You can view all the Time spent on a Task from the Time tab in Advanced View.


For more about how to do this, refer to our Time Billing guide.
As well as being able to create a Task from a Ticket, you can link multiple existing Tickets to a Task.
From the Tickets tab on a Task, you can link existing Tickets via the Tickets tab with these options:
- Link Existing – this allows an existing Ticket to be linked to the Task. The linking of multiple Tickets to a Task is also supported.
- Unlink Existing – allows you to select a Ticket that is already linked to the Task and break the link between the records.

On Tickets, you can click on the Tasks tab and you will see 2 options:
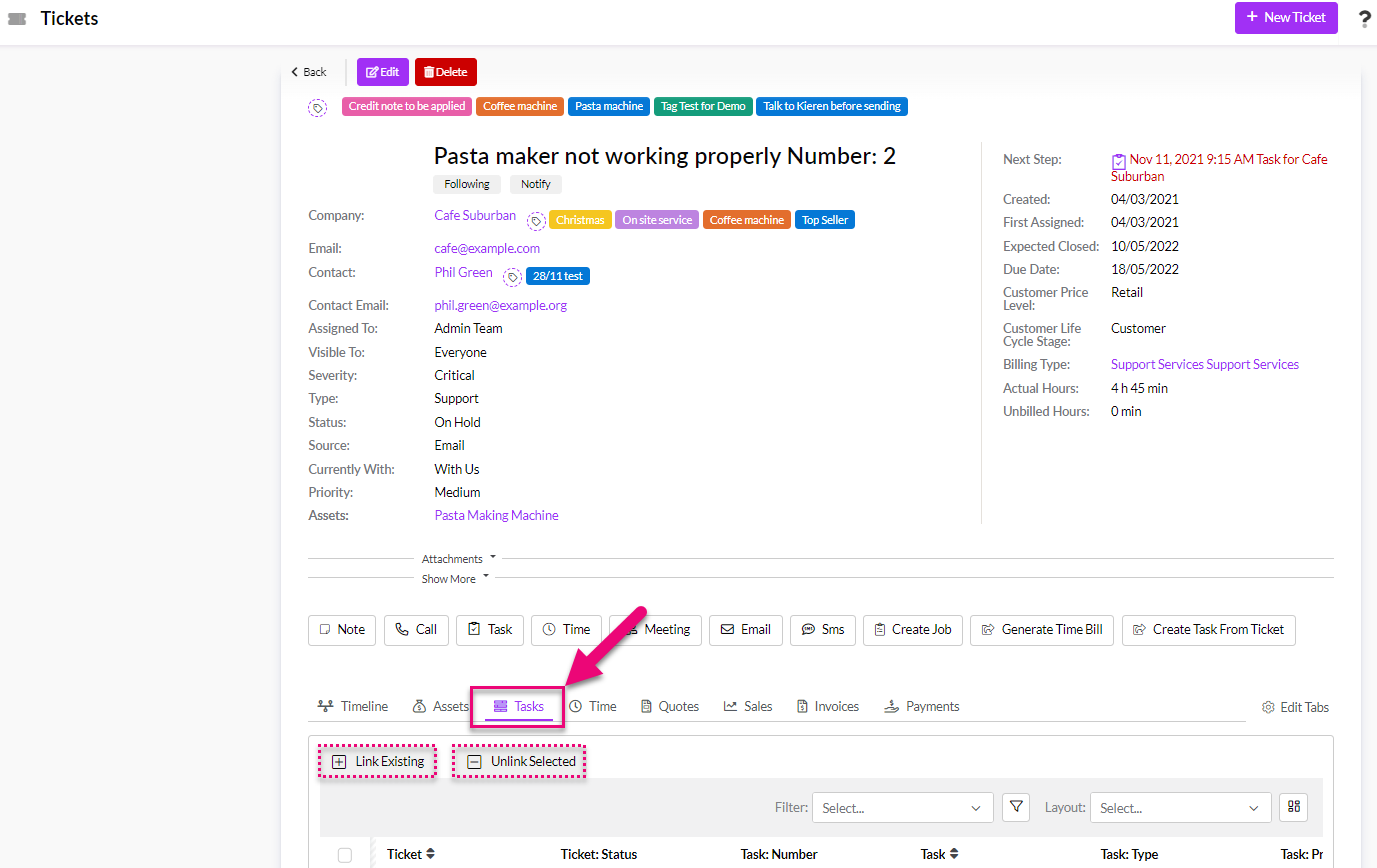
- Link Existing – this allows an existing Task to be linked to the Ticket. The linking of multiple Tasks to a Ticket is also supported.
- Unlink Existing – allows you to select a Task that is already linked to the Ticket and break the link between the records.
See also:
You can categorise your Tasks by applying different types to them, which will help you to search, sort and assign them. Click on the Type field when creating a new Task to choose from the available options.
You can customise the options that appear on your Type list from Admin> Settings> Activity> Task.

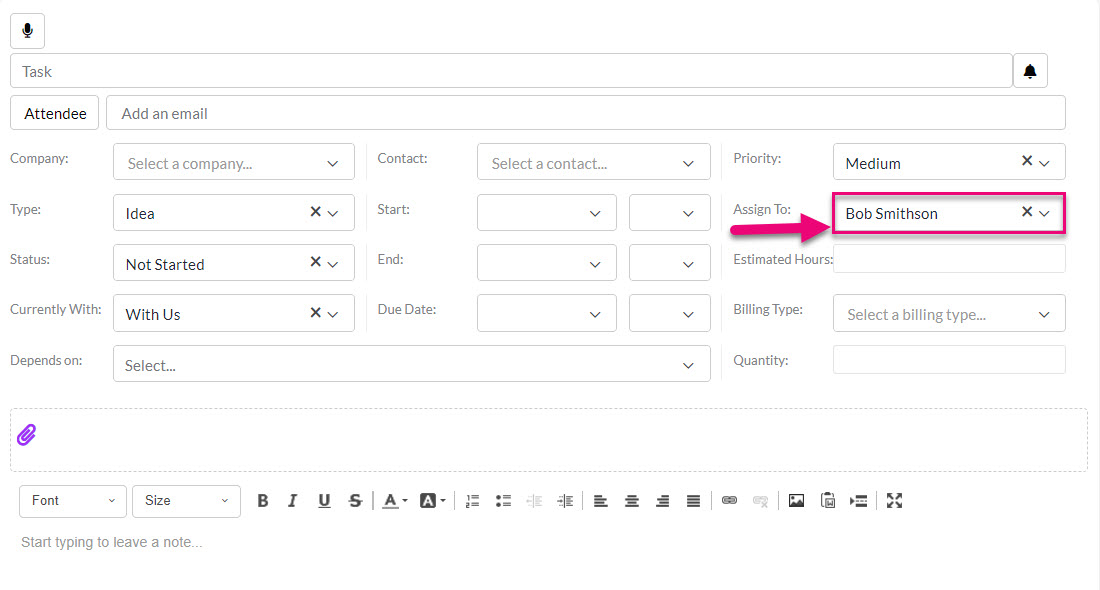
Assigning Tasks
You can assign Tasks to your users with the Assign To field, click on the field to reveal a list of users to choose from – this list is automatically populated with your active users. Assigning a user has the following implications:
- The assignee will receive an email notification with details of the Task.
- Any reminders set for the Task will show up in the assignee’s Notification area in CRM.
Setting Task responsibility
You can use the Currently With field to determine whether responsibility for the Task lies with you or a customer. You can customise the options that appear on your Currently With list from Admin> Settings> Activity> Task.

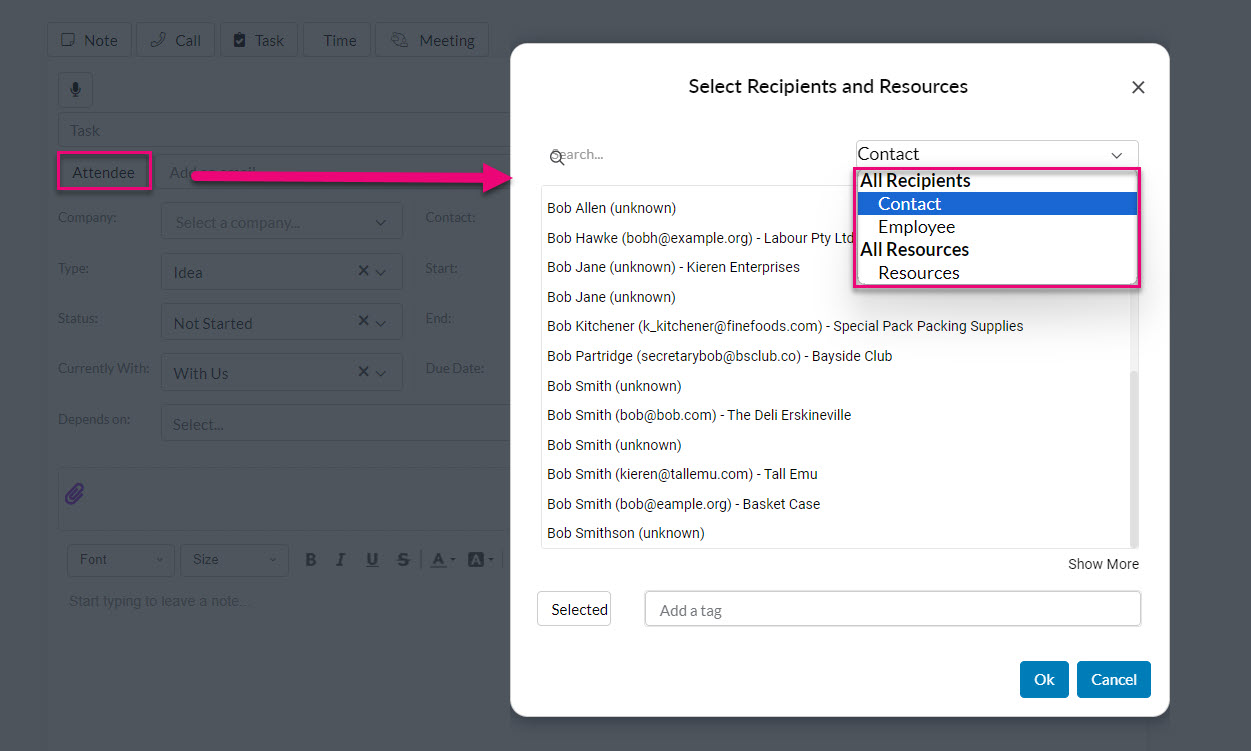
You can use the Attendee field to invite other people or resources to a Task – just click on the field button to display a search box that allows you to search and select from people and resources in your CRM. Adding attendees to a Task has the following implications:
- People invited as an attendee will receive a Task notification email.
- Resources invited as an attendee will have the specified time (the time between the task start and end dates) added to their resource calendar as a meeting.
You can add or amend Resources in your CRM from Admin> Settings > My Company > Resources.

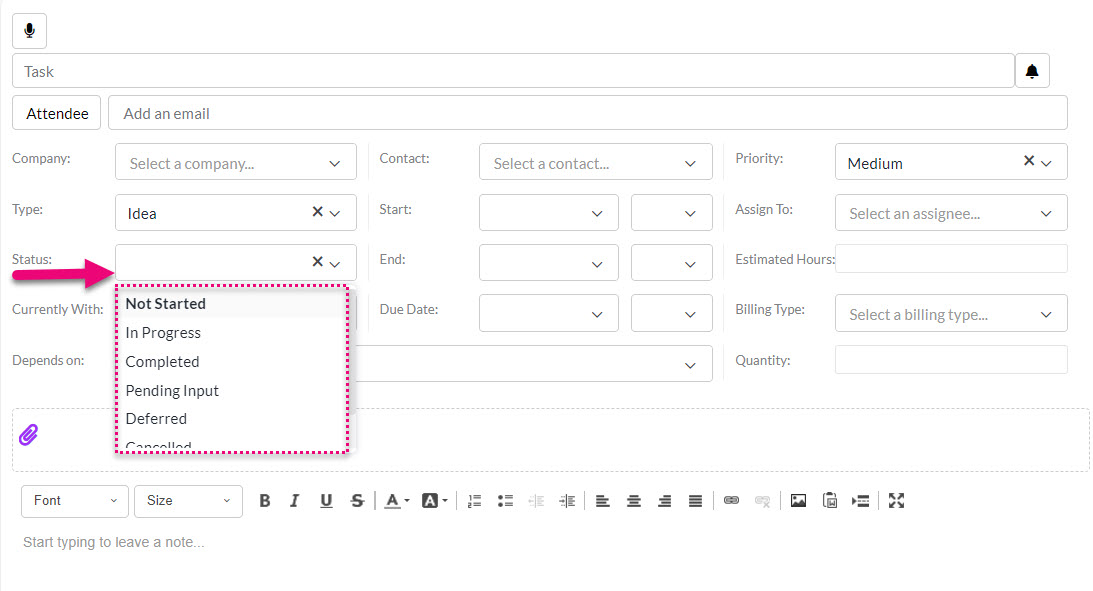
You can categorise your Tasks by applying different statuses to them, which will help you to search, sort and assign them. Click on the Status field when creating a new Task to choose from the available options.
You can customise the time options that appear on your Status list from Admin> Settings> Activity> Task.
Setting Task dates
You can use the Start, End and Due Date fields to apply dates and times to your Tasks.
The Due Date field determines where the Task will display in a record – if the date is upcoming, the Task will appear in Planned Activities area and if the date has passed, the Task will appear on the record Timeline.

Estimating time for a Task
You can add the time you think a Task will take to complete using the Estimated Hours field – this is a great way for teams and individuals to track and manage their workflow.

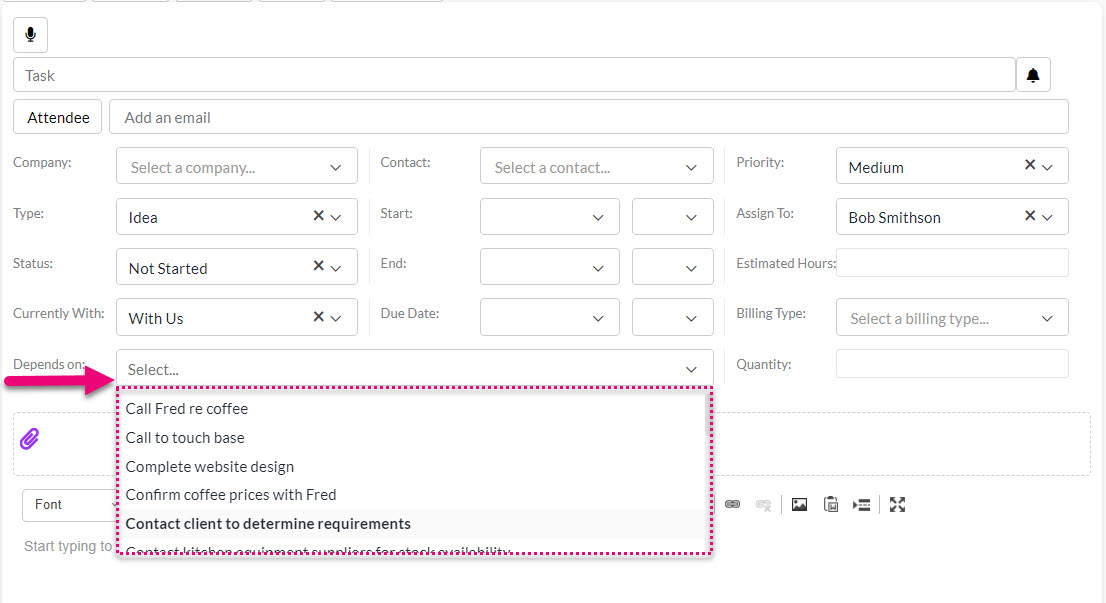
You can choose from existing Tasks if they apply to a new Task i.e. the new Task is dependent on another Task being completed first.
In the example below, if I have a Task to “Order more coffee from Fred”, I may need to complete an earlier Task to “Confirm coffee prices with Fred” before I can proceed with my ordering Task.
Dependencies are a great way to organise complex Tasks that may involve multiple parties or stages.
You can attach files to your Tasks by clicking on the paperclip icon, which will open a window prompting you to select a file.
Depending on the size of your attachment, it may take a moment to load and will then appear next to the paperclip icon.

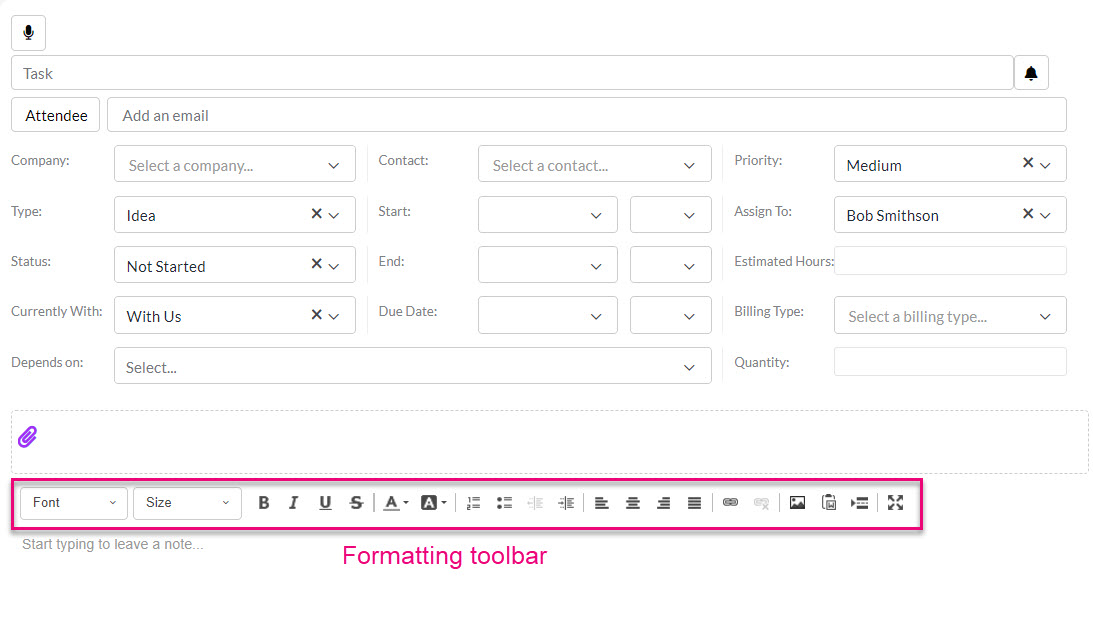
The Task form includes a formatting toolbar, providing you with the ability to customise your task body with the following features. Hovering over each of the buttons will reveal a description of the button function.
- Font – choose a font and size and have the option to apply bold, italics, underline or strikethrough to the text and change the colour.
- Text format – increase/decrease indent, add a numbered or bullet point list, align text to left, centre, right or justify.
- Email format – choose a background colour from the palette.
- Insert an image – from either a URL or file upload.
- Add or remove a link – available for URL, email, phone or link to an anchor in the task text.
Rather than typing a Task, you can use the native voice transcription feature to turn your voice into text. While you are speaking, the system will record your audio and you will have the option to save the recorded audio as an attachment so that it will form part of the Task activity on the applicable record Timeline.
To begin voice transcription, press the microphone icon when you are creating a new Note and start talking – the system will begin transcribing your speech (there may be a slight delay in the text appearing in the note body).
![]()
If your browser does not already have permission for the CRM to use your microphone, a prompt will display, and you will need to choose Allow.

Example of browser permission to enable a microphone
When the voice transcription starts, the microphone icon changes to a square – click on the square to stop the transcription.
![]()
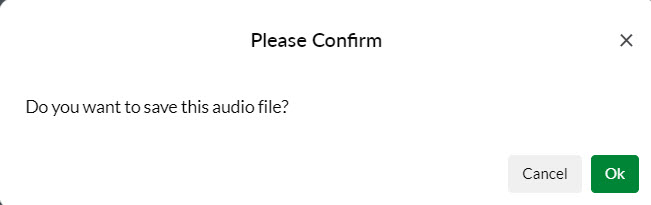
When you end the voice transcription, you will have the option to save your recorded audio as an attachment to the Task activity or select Cancel to abandon the recording.
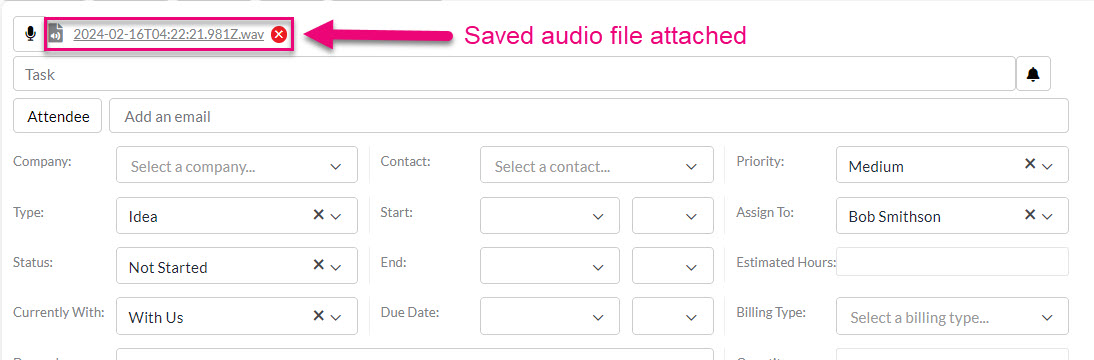
If you choose to save the audio file, you will see it attached to the Task – click Save.
You can now edit any of the text that has been transcribed before you save the Task.
Rather than typing a Task, you can record and attach an audio file instead of, or in addition to typed text.
To record an attach an audio file to your Note activity record, just click on the microphone button and the recording will immediately start. If you are speaking during the recording, the voice transcription feature will automatically commence and start turning your speech into text within the note body.
![]()
If your browser does not already have permission for the CRM to use your microphone, a prompt will display, and you will need to choose Allow.
Example of browser permission to enable a microphone
When the recording starts, the microphone icon changes to a square – click on the square to stop recording audio.
![]()
When you stop recording, you will then be prompted to save the audio file. If you are not happy with it and would like to start again, simply choose Cancel and you will return to the Task form.
When you click OK to save the audio file, you will see it attached to the Task – click Save.
You can then delete the transcribed text from the message body if you do not want to include it in the body of your Task.