Tickets
This module in CRM allows you to create records for customer issues and assign smaller tasks, breaking down workloads and providing structure for your team members.
There are a number of ways to create a new Ticket:
From Tickets
- From Operations > Tickets by clicking on the New Ticket button.

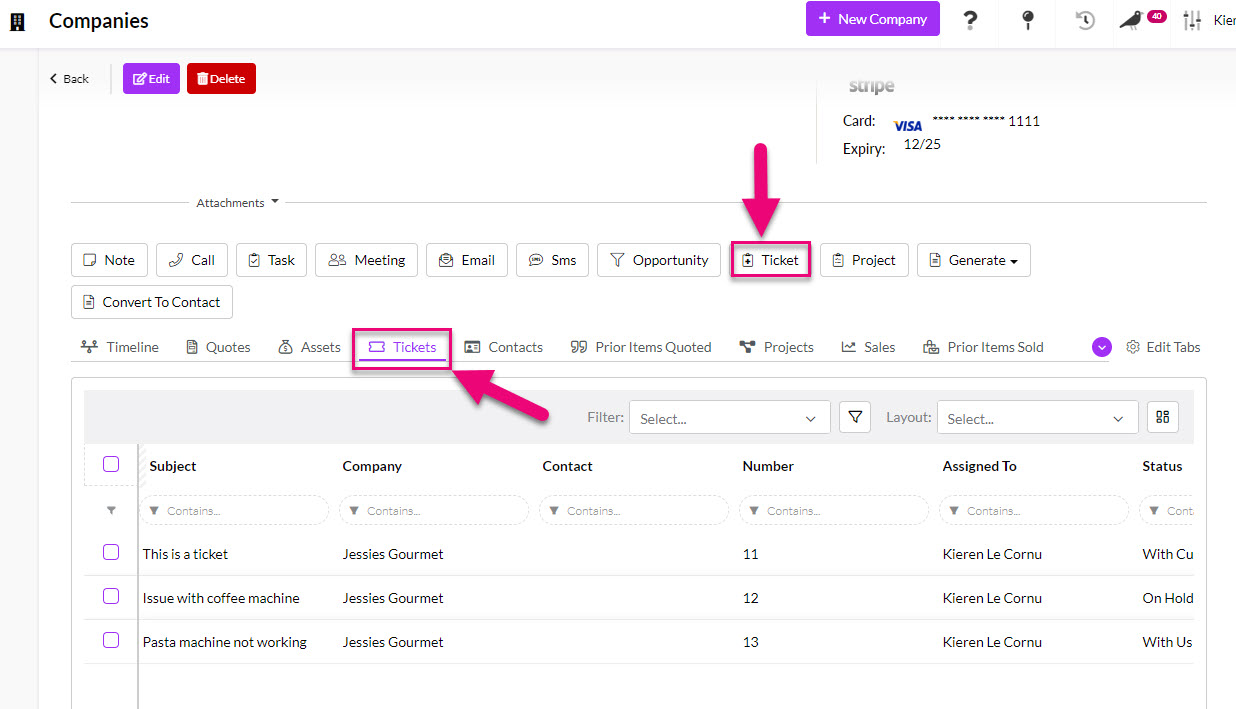
From a customer record
- From a customer record (Company or Contact) by using the Ticket button on the activity toolbar. You can also see all existing Tickets from the named tab.
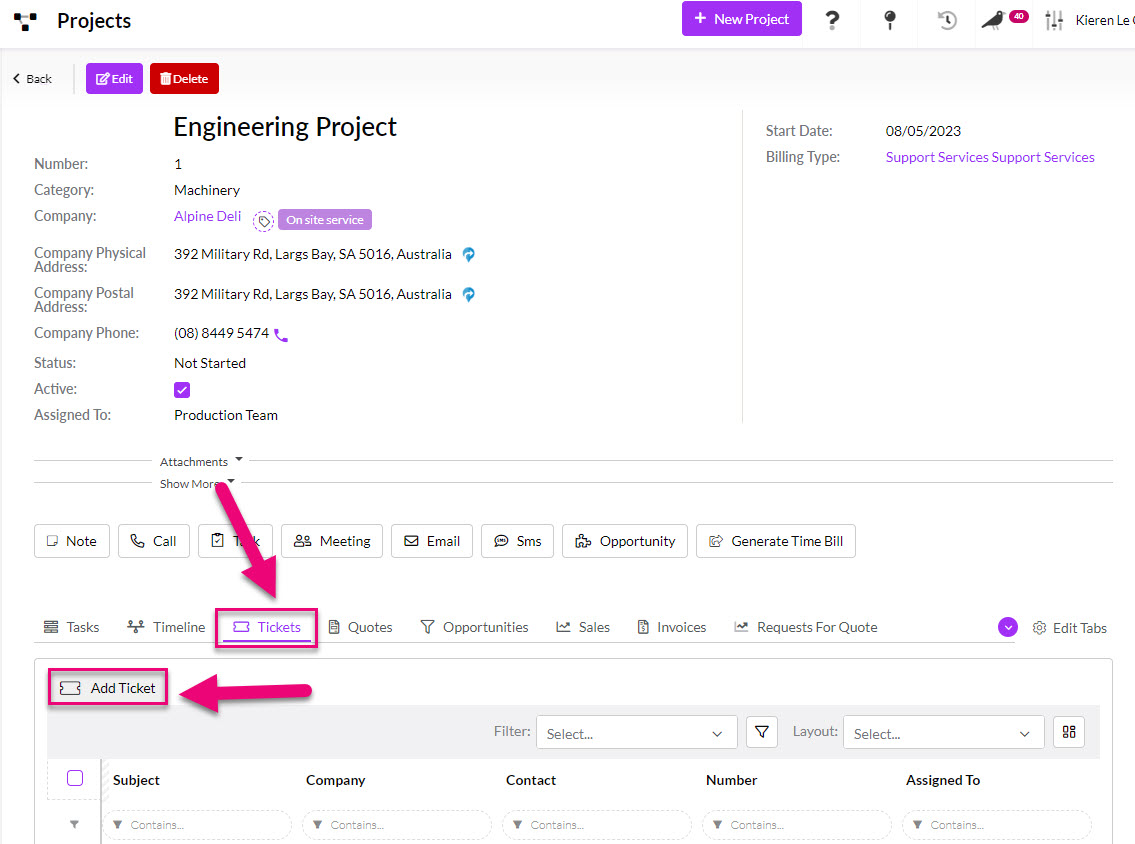
From a Project
- From the Tickets tab you can create a new one and view existing ones.
From an Asset
- From an Asset record by using the Ticket button on the activity toolbar. You can also see all existing Tickets from the named tab.

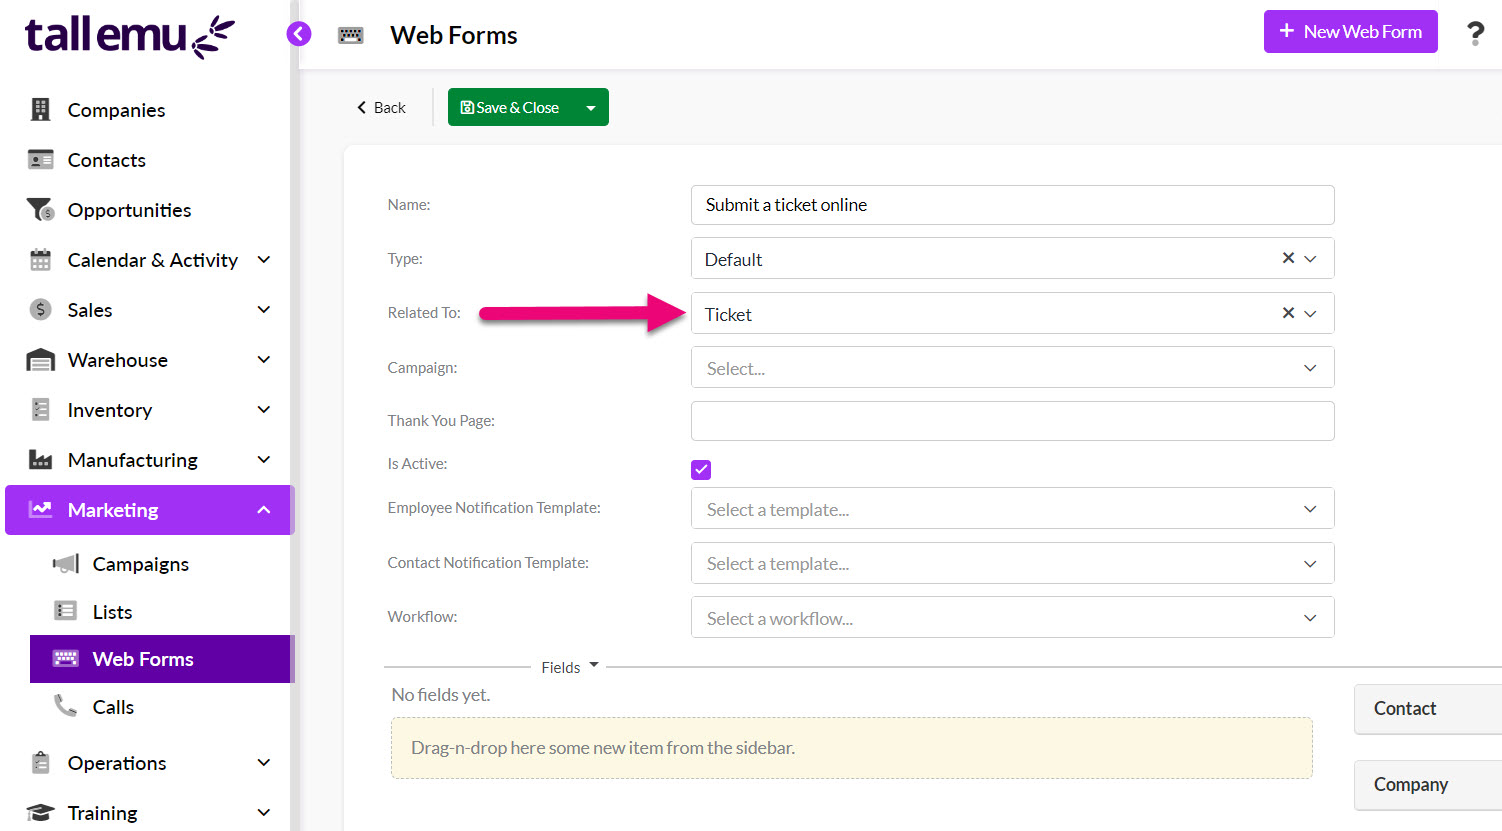
Using a Web Form
- You can set up a Web Form to automatically create a new Ticket – a form is filled in online and a new Ticket and Company and/or Contact can be created in CRM.
From Admin > Settings > Tickets you can access the lookup list values for the Severity, Type, Status and Source fields and customise them to suit your requirements.
This is an important step because it allows you to apply your specific terminology and internal process to Tickets in CRM so that they are easy to track and segment.
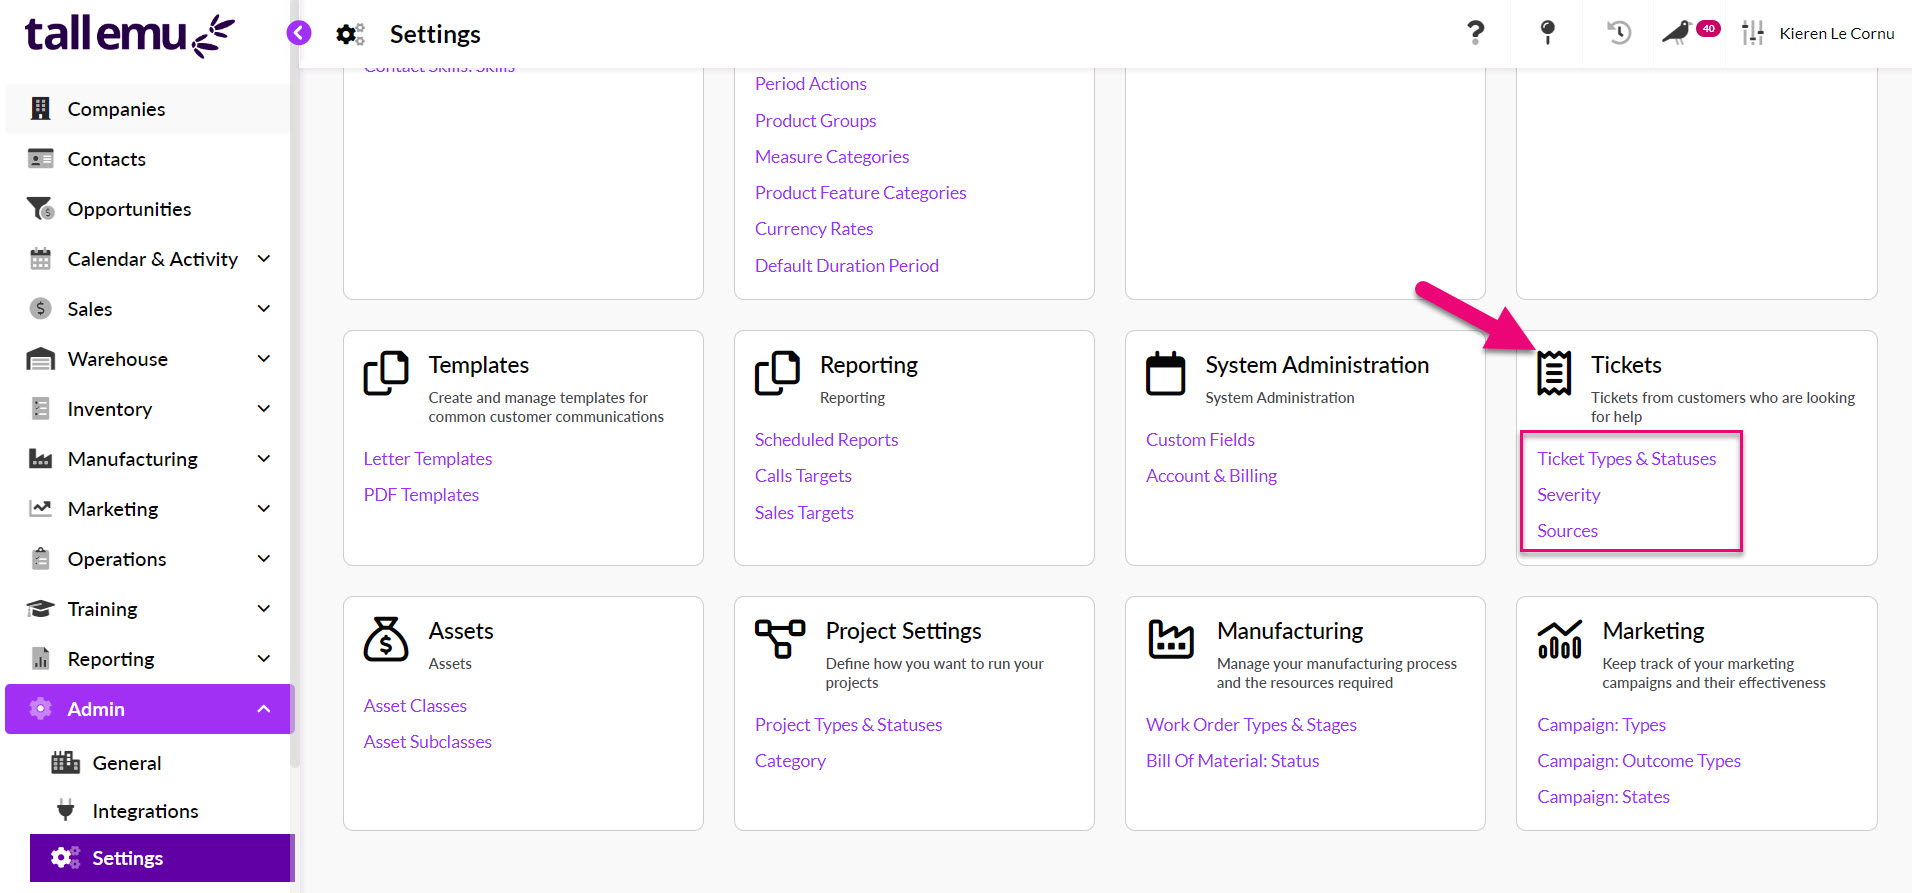
See our dedicated guide on how to customise Ticket fields.
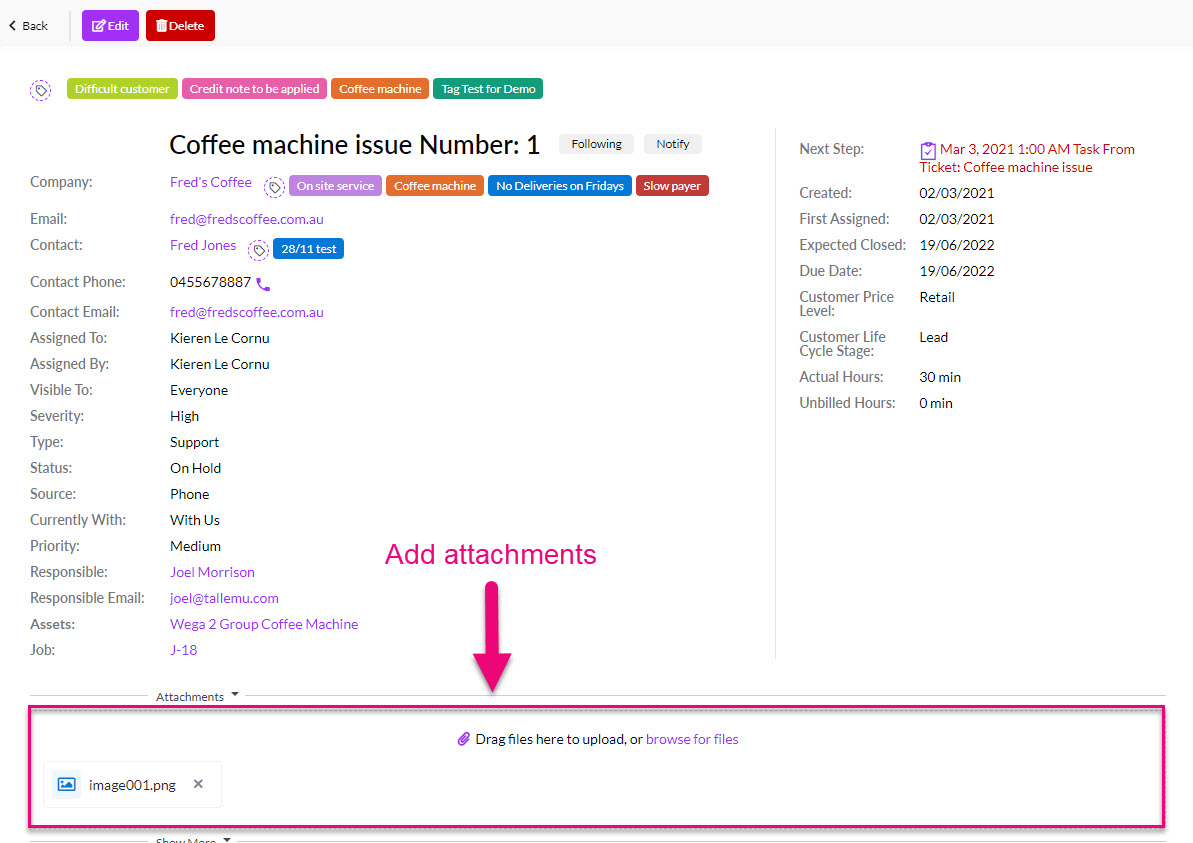
Just click on the paperclip icon to select the files you want to attach.
You can quickly create an Activity for a Note, Call, Task, Meeting, Email or SMS using the toolbar buttons.
You can also bill for the time you spend on Activities associated with Ticket– see the section on Time Billing for Activities.

You can also quickly create a Task using the toolbar button – this will automatically pull through the Ticket Name and Description into a new Task.

Activities you create will then display on the record in one of the following areas:
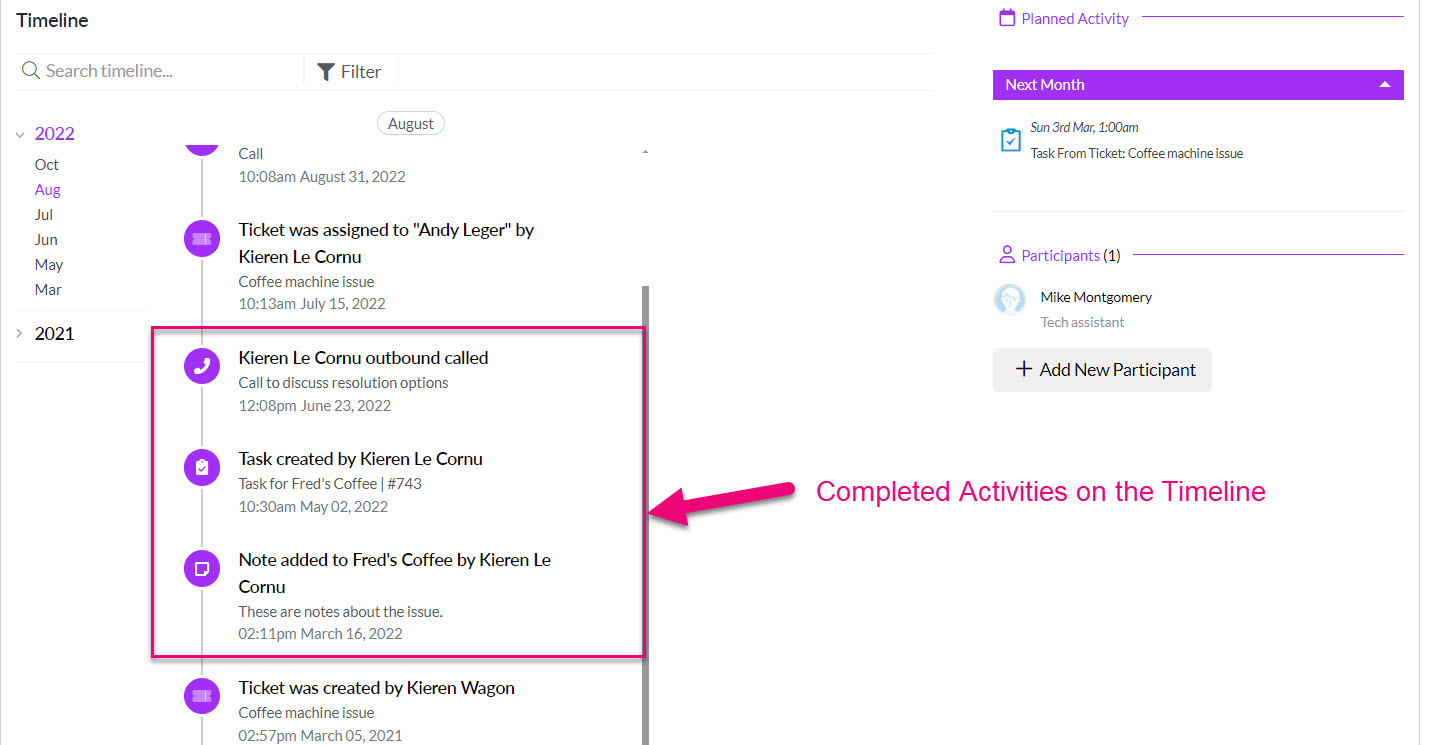
- Upcoming meetings, calls or tasks will show in the Planned Activity area to the right of the timeline.

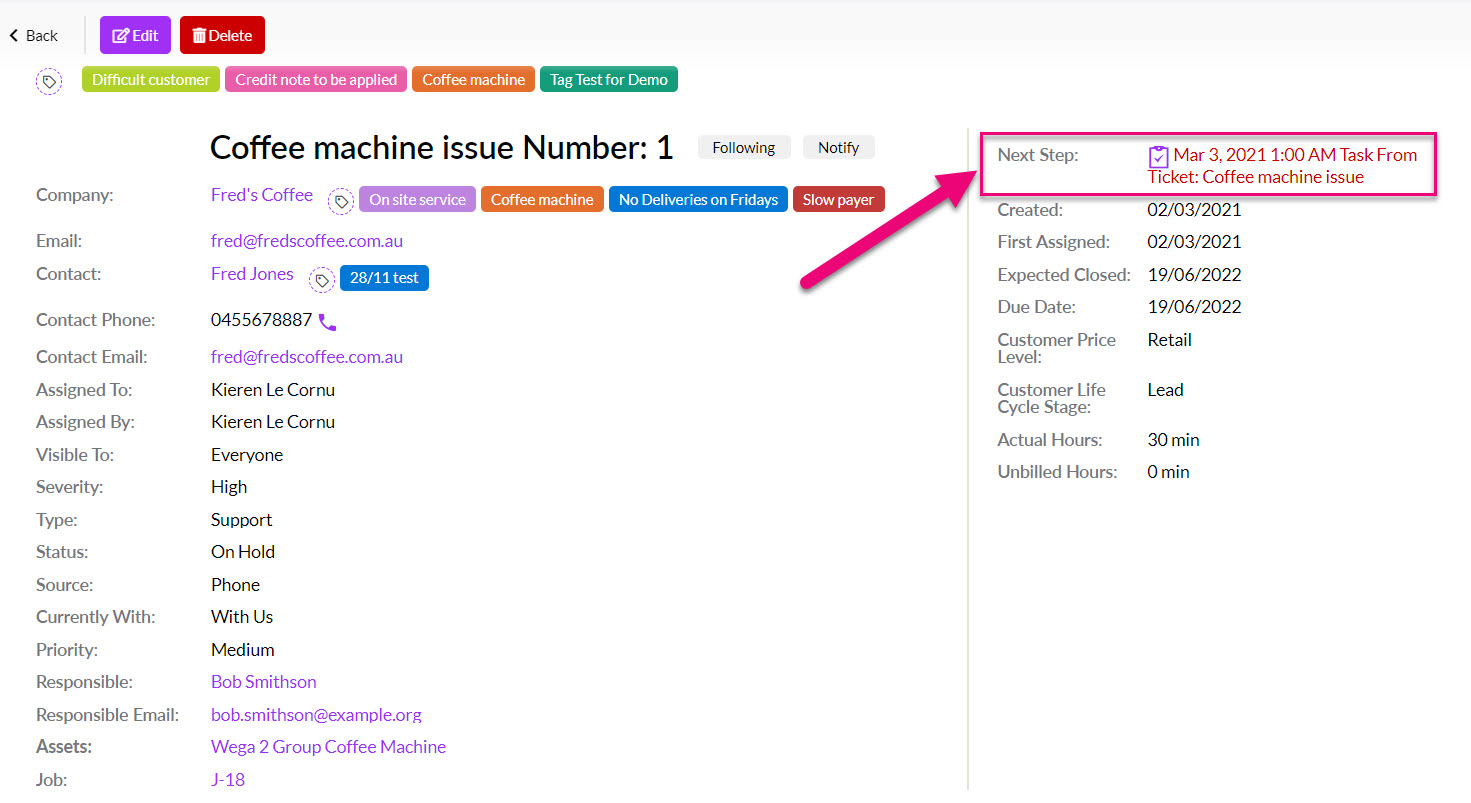
- The top right-hand corner of the record will also quickly show you what the next step for the Ticket is.
- Past or completed activities will show on the Timeline.
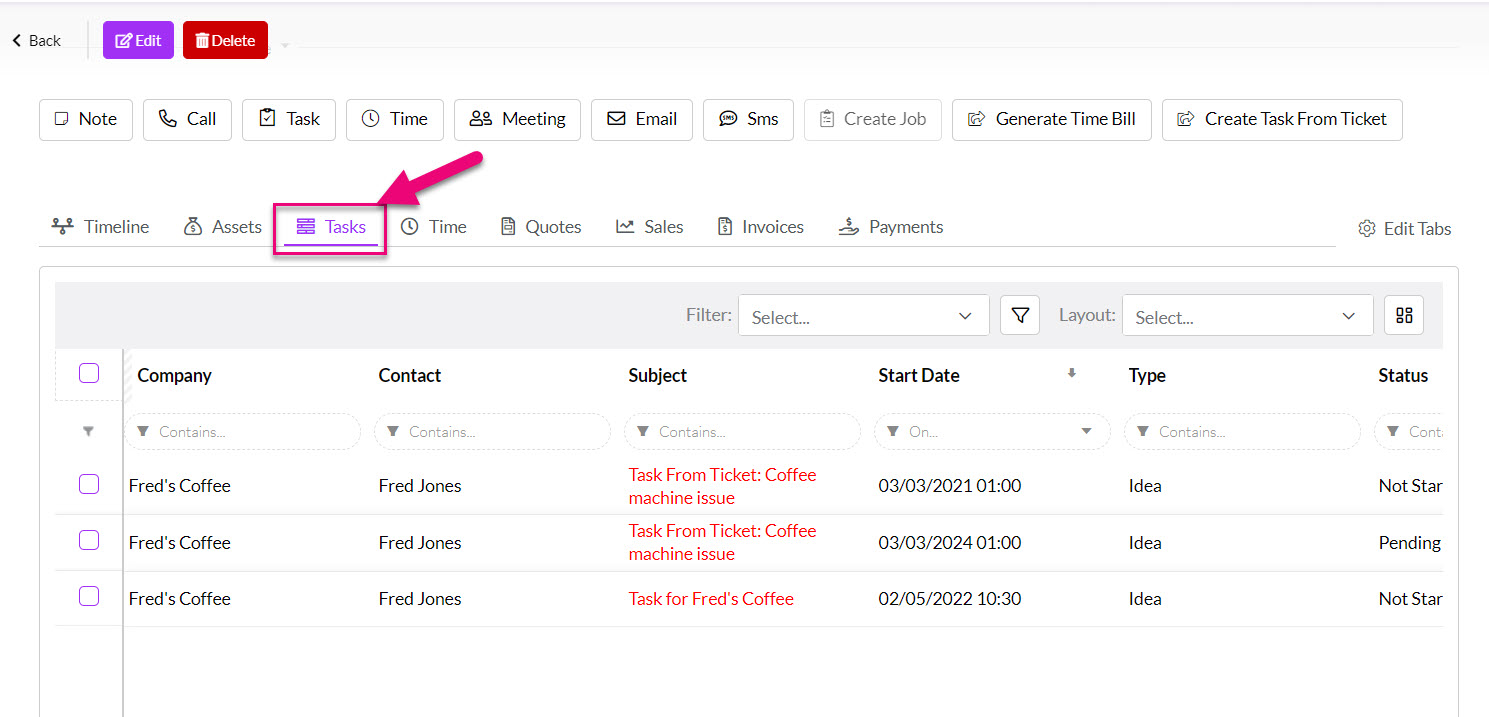
- You can also see all Tasks associated with the record by navigating to the Tasks tab where you can filter and search the records.
You can also set reminders for a range of Activities so that you and your team can receive notifications and alerts.
See our guide to Notifications and Reminders for more information.
- You can quickly add Quotes, Sales Orders and Invoices by navigating to the relevant tab and then clicking on the Add button.
- You can also view associated Payments from the named tab.

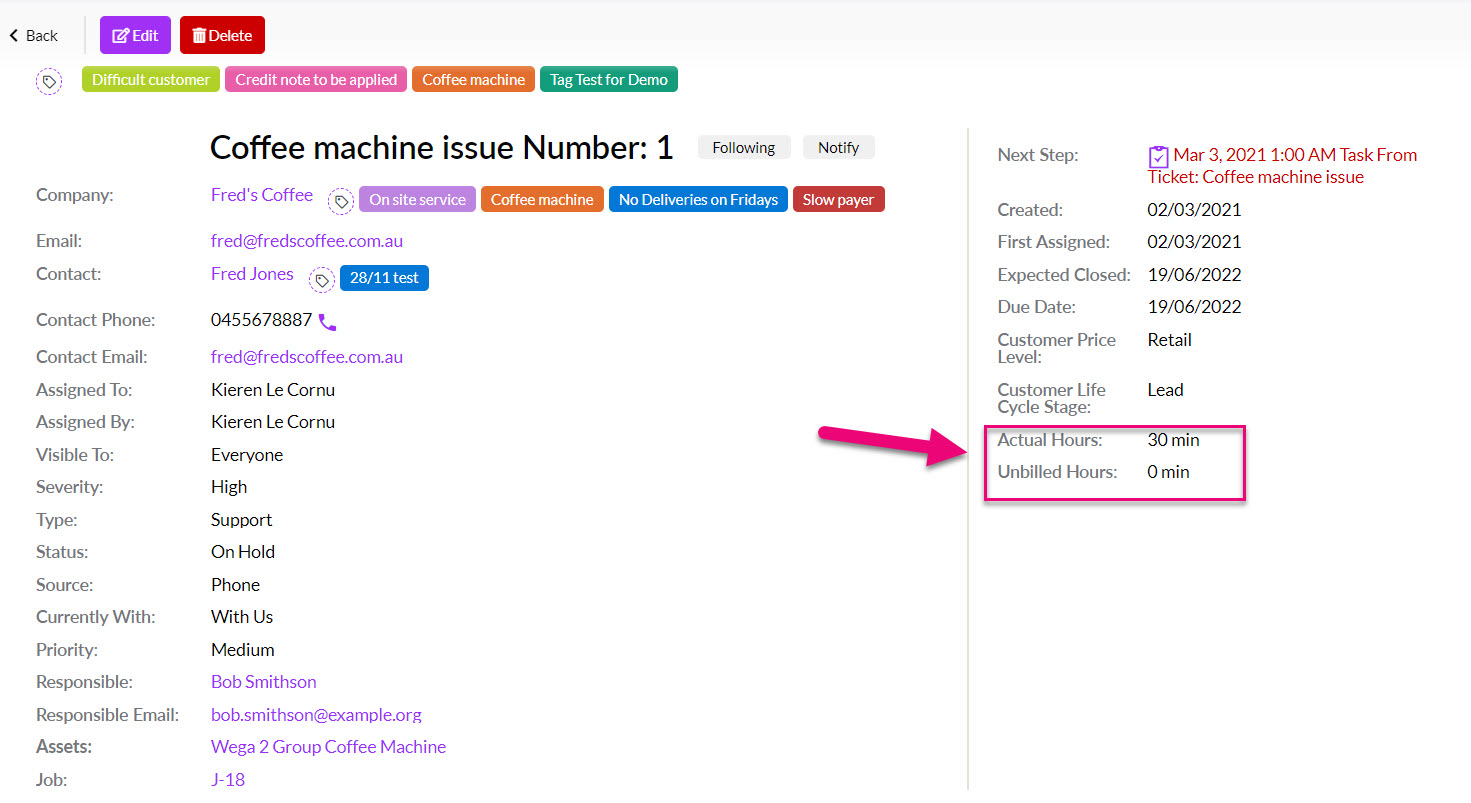
You can enable Time Billing in CRM with these instructions, which will allow you to quickly generate a time bill from the activity toolbar.

The top right-hand corner of the record will also show you the amount of time spent for the Ticket and how much of that time is unbilled.
On Tickets, you can click on the Tasks tab and you will see 2 options:
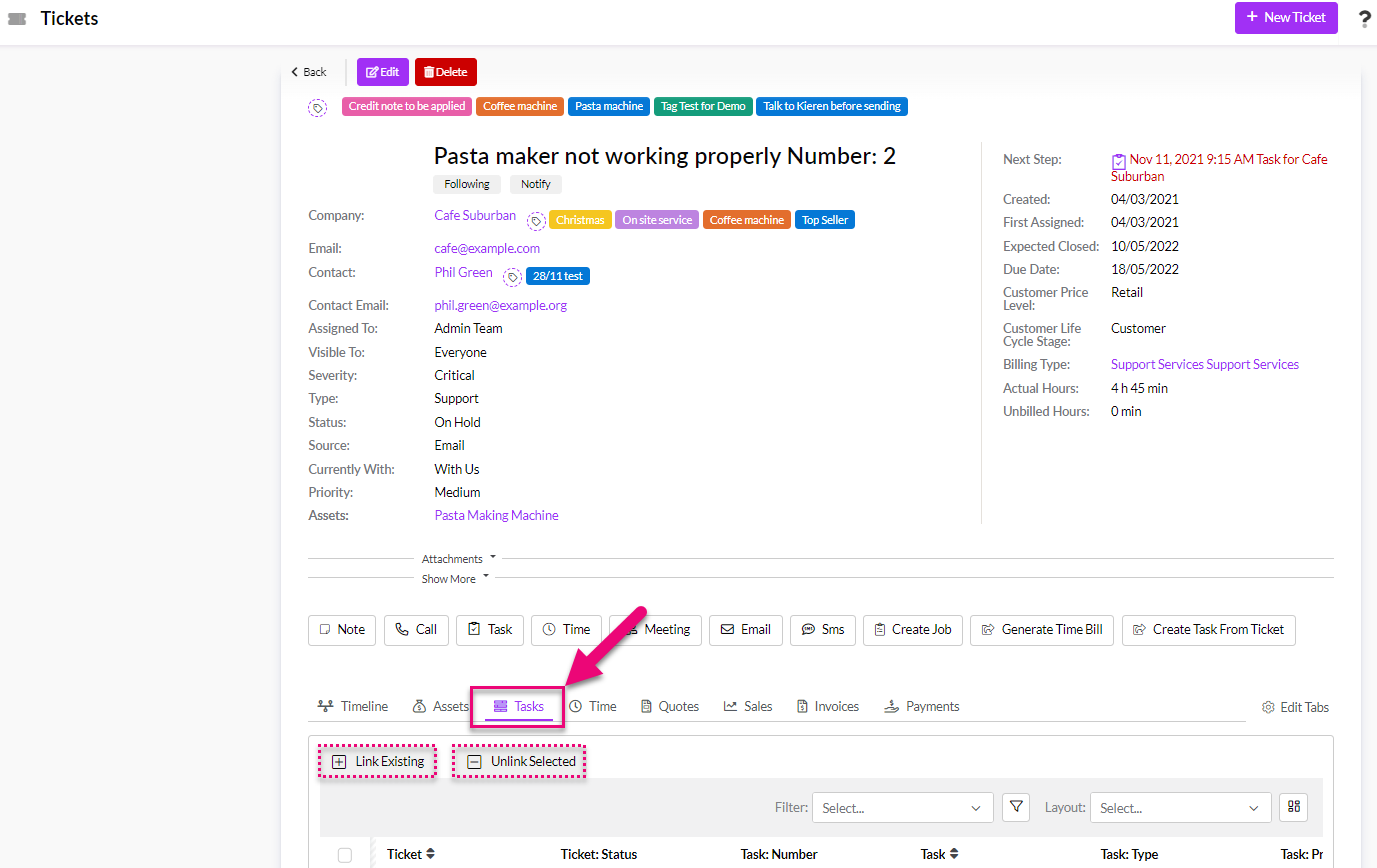
- Link Existing – this allows an existing Task to be linked to the Ticket. The linking of multiple Tasks to a Ticket is also supported.
- Unlink Existing – allows you to select a Task that is already linked to the Ticket and break the link between the records.
From the Tickets tab on a Task, you can link existing Tickets via the Tickets tab with these options:
- Link Existing – this allows an existing Ticket to be linked to the Task. The linking of multiple Tickets to a Task is also supported.
- Unlink Existing – allows you to select a Ticket that is already linked to the Task and break the link between the records.

To the right of the Timeline is an area for Participants where you can add other CRM Users or Teams to the Ticket.
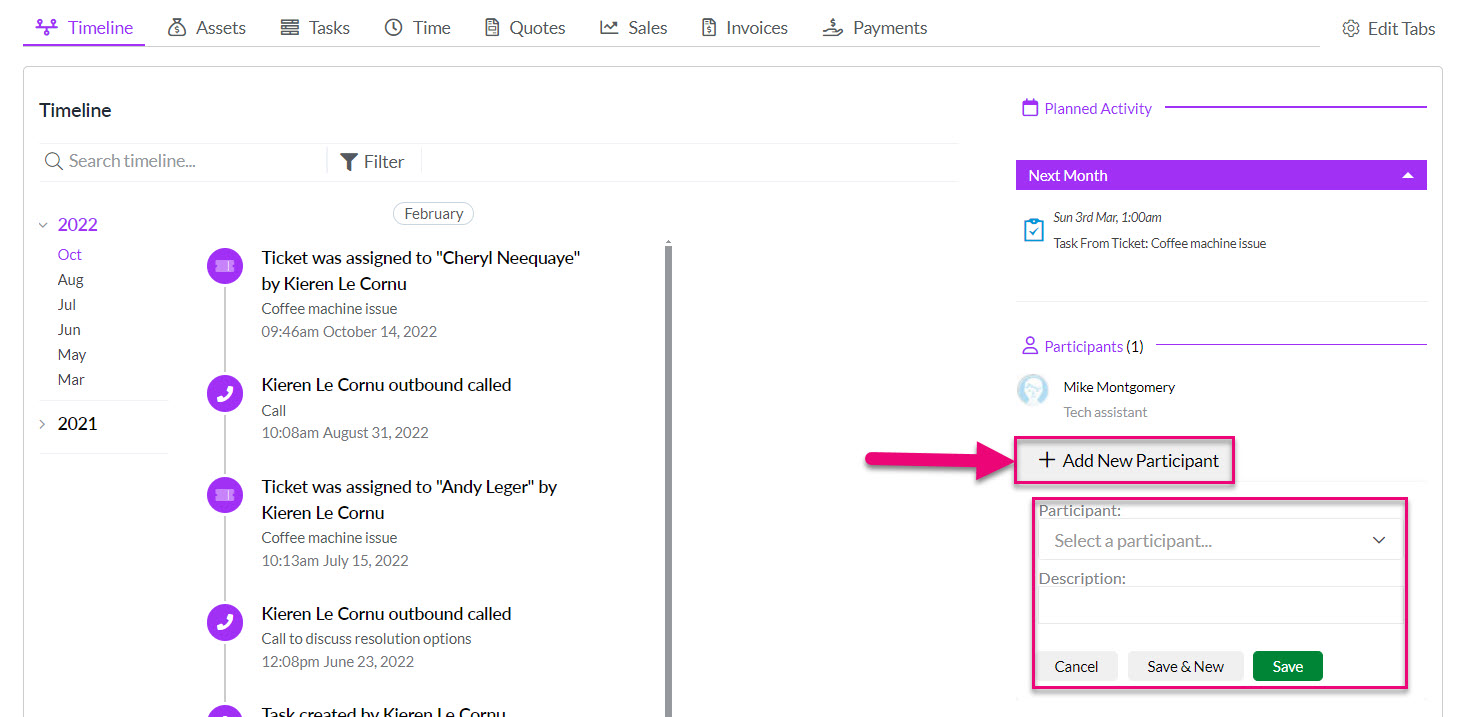
You can also do this via the Assigned To and Responsible fields.

You can set up a Ticket deadline reminder in CRM for the person the record is Assigned To by using the Due Date field.
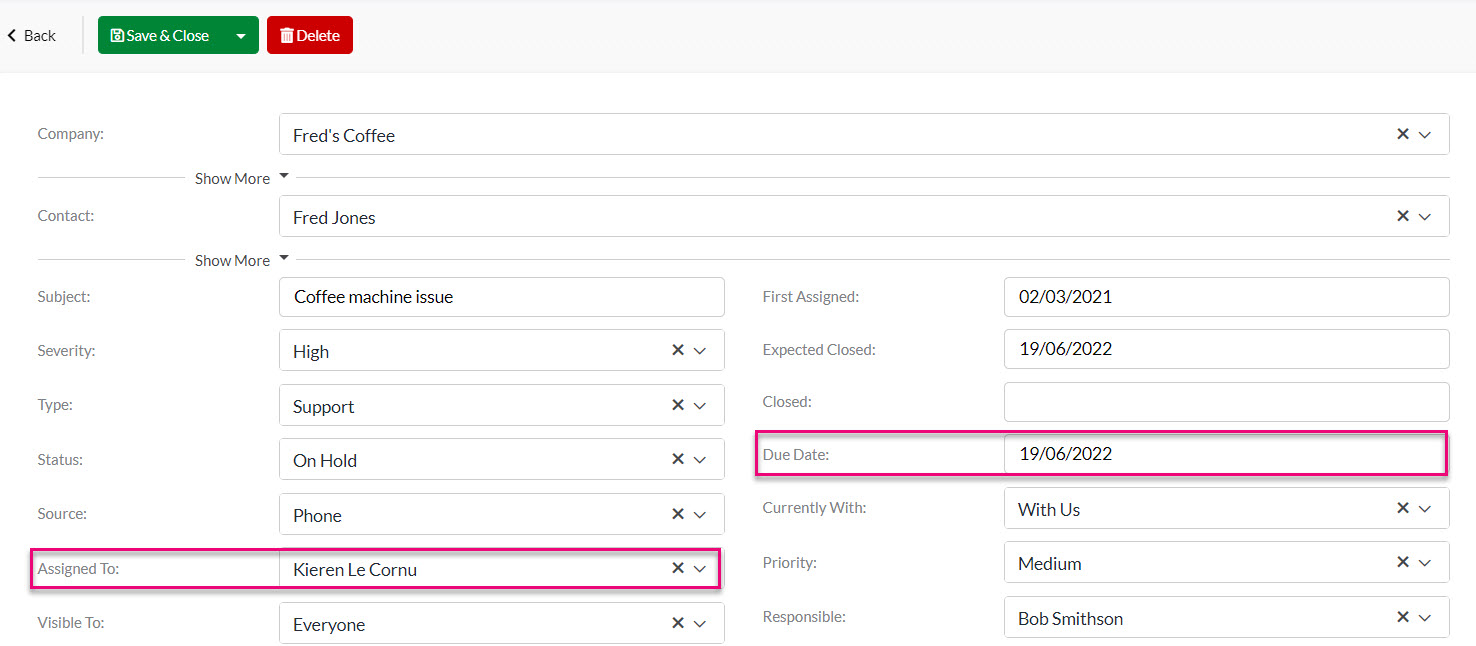
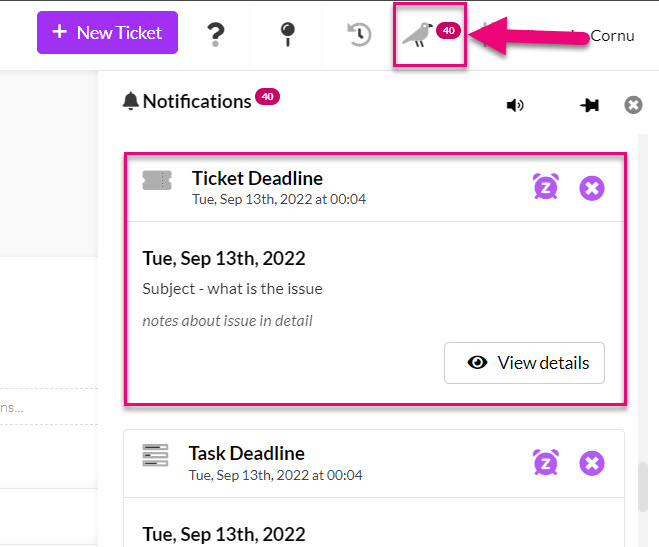
On the Due Date the User that the record is Assigned To will receive a notification in CRM.
You can also set reminders for a range of Activities so that you and your team can receive notifications and alerts.
See our guide to Notifications and Reminders for more information.
There are 2 ways you can do this:
1. Bulk update: you can select multiple records and then use the Update button on the toolbar to bulk update Ticket fields for multiple records.
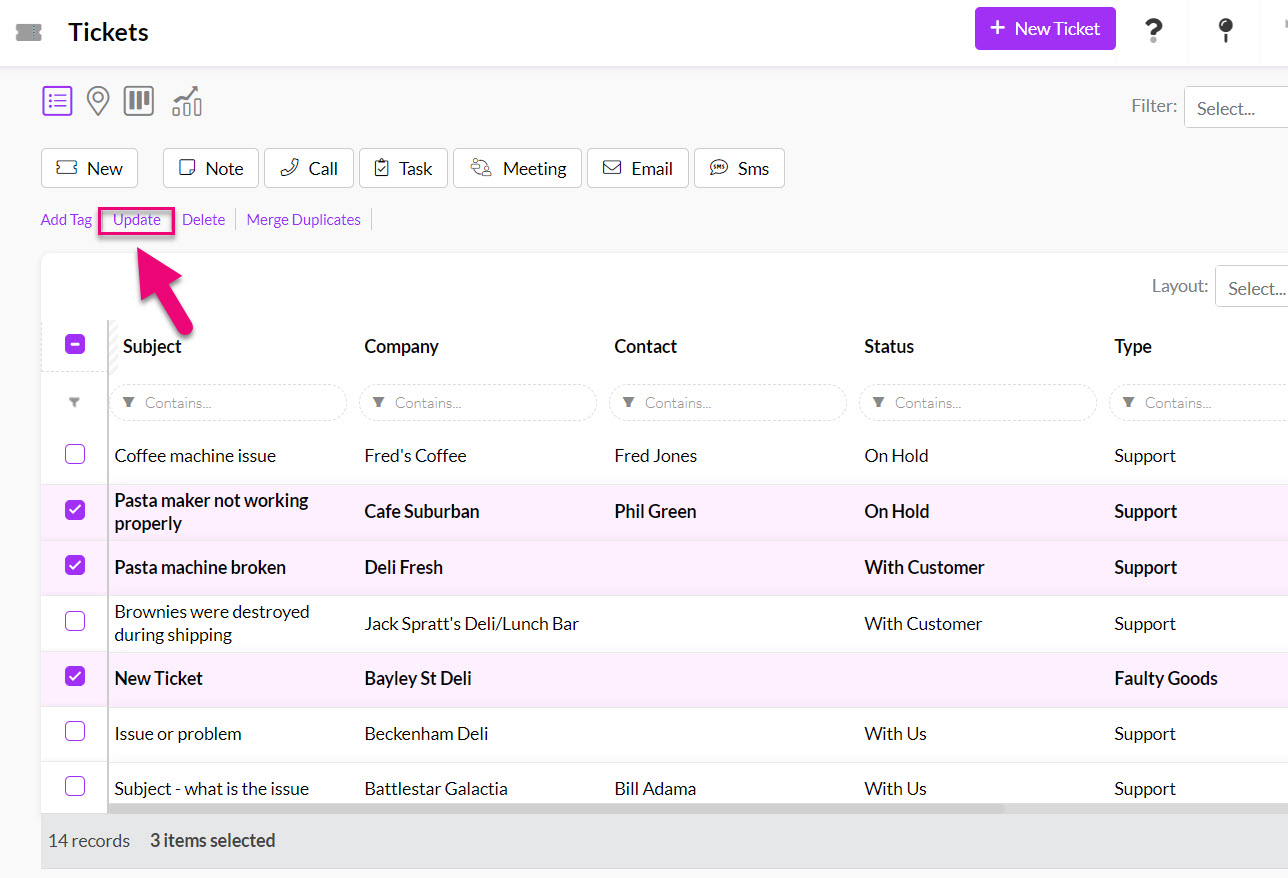
You can then select the field/s you want to update and then press Update to apply the change.
Just note that if you want to update the Status field value, you must select the Type field value first as the options available in the Status field are determined by the Type (as per the following screenshot).
2. Export and reimport data: you can export your data to Excel, update it and then reimport it back in to update existing records. You can also use the import to add new Tickets to CRM.
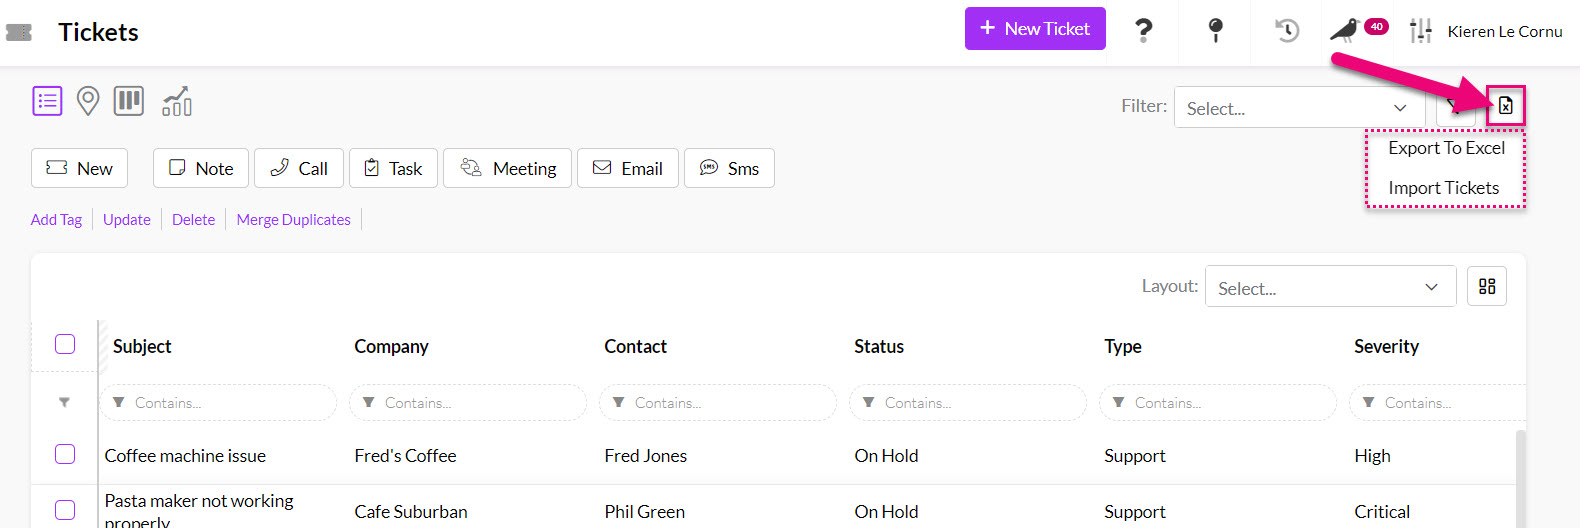
See our guides on bulk updating and export & reimport.
You have 4 different view options in Tickets, and you can switch between the views by using the selector icons above the activity toolbar, as per the following examples.
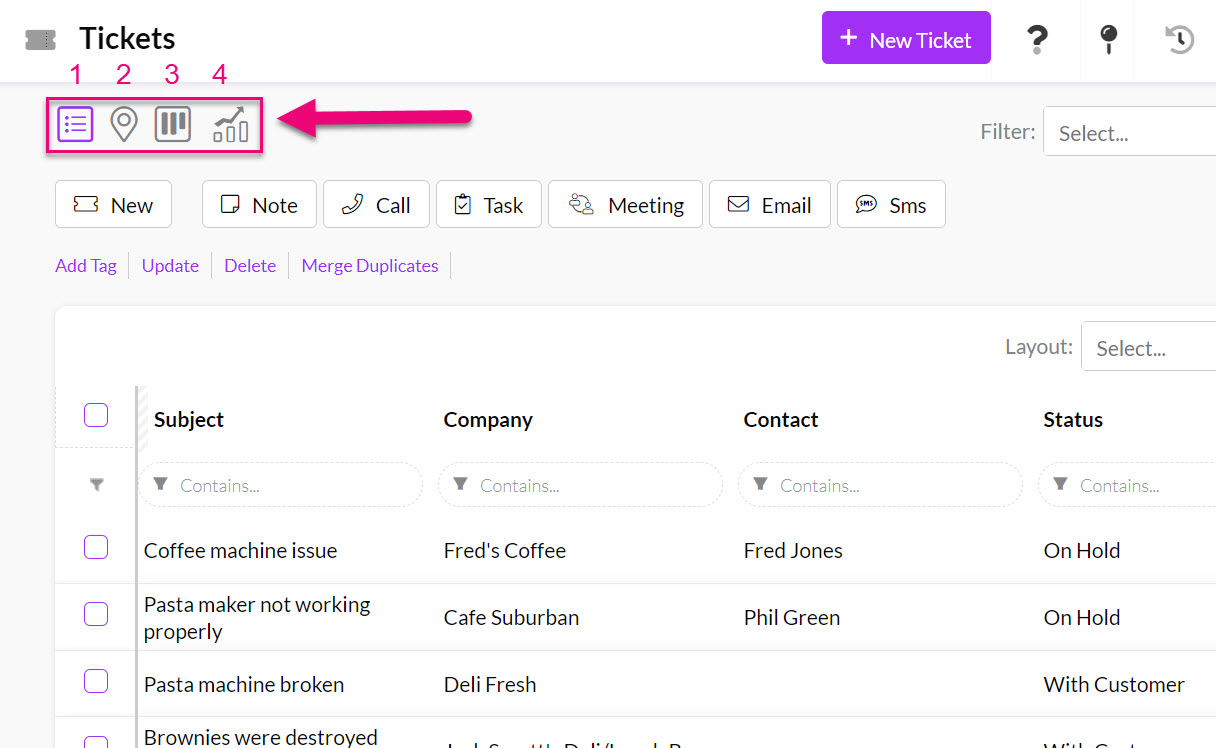
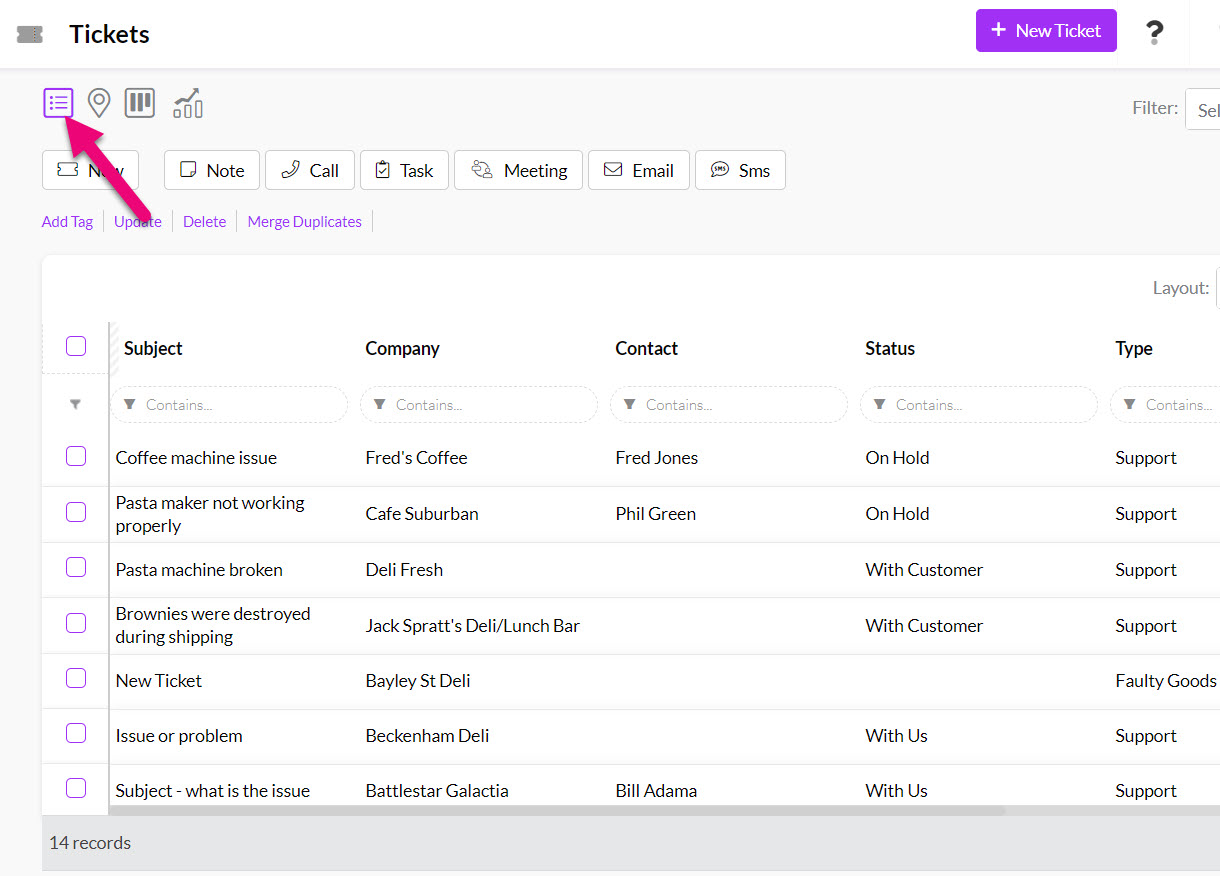
- 1. List view – displays a list of records you can search and sort. Setting up Filters and Layouts here will make it easy to track and manage your workflow in future.
- 2. Map view – if you have added address information to your records, each Ticket will display as a pin on the map.

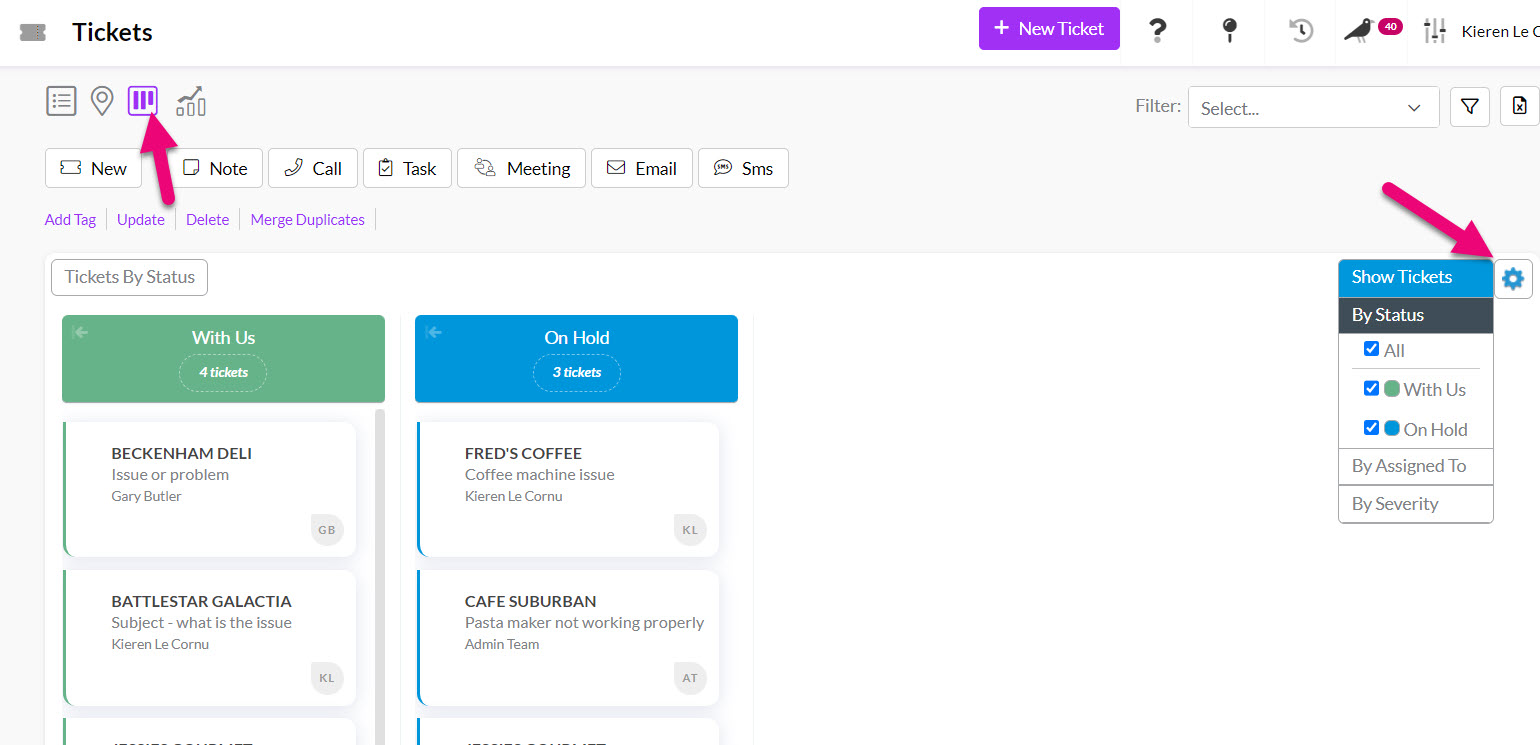
- 3. Kanban view – this will display your records according to their Status, or you can click on the gear icon to change the view so that it is sorted by who the records are Assigned To or the Severity.
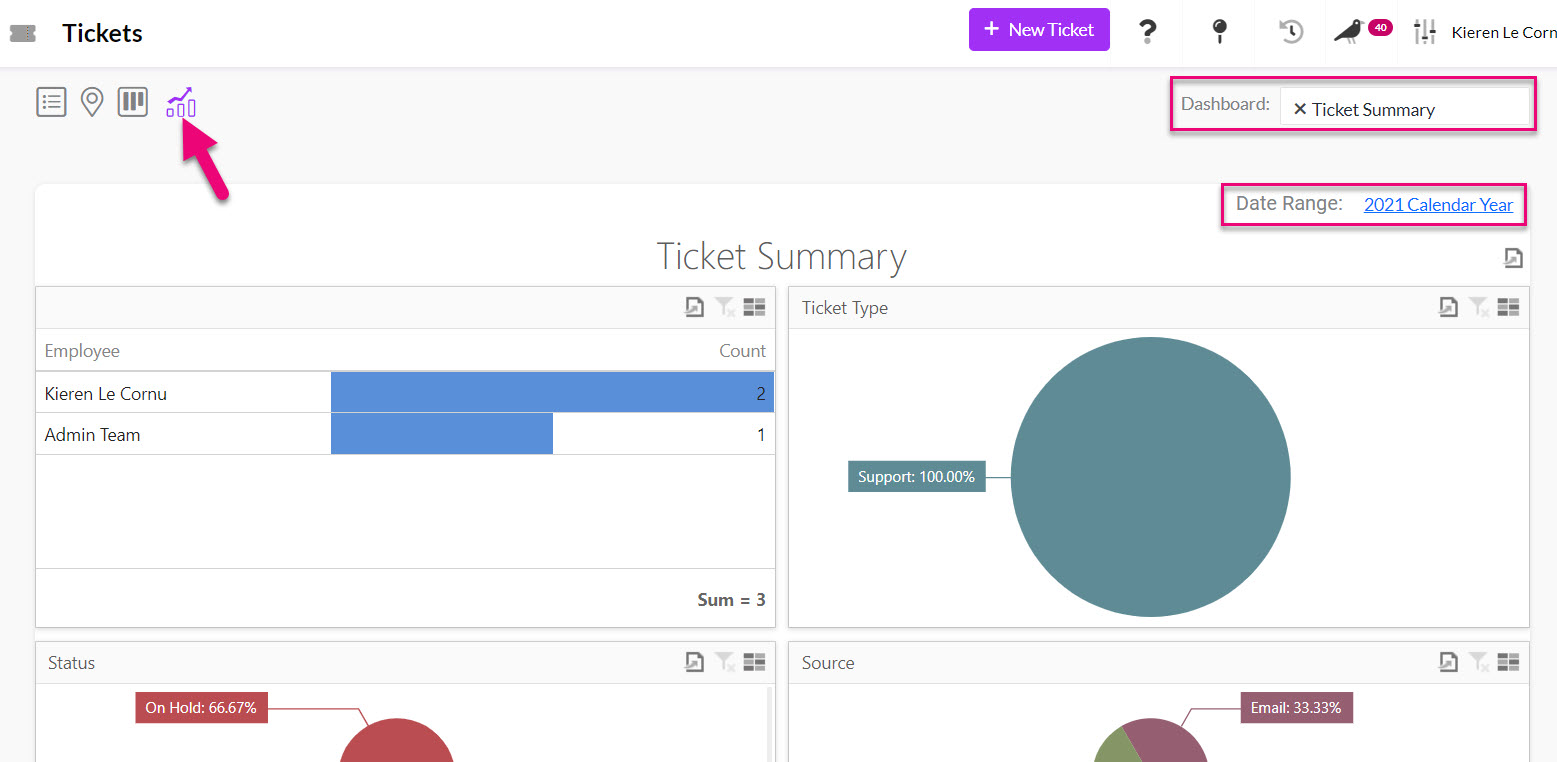
- 4. Dashboard view – this will allow you to visualise your data via graphs and charts. You can also choose from other dashboards or change the date range for the displayed data.