About the Opportunities form
If you’d like to learn where and how you can create new Opportunities, click here.
Following is a guide to the fields that you will see when creating a new Opportunity. The only difference between the short and long form is that the long form displays all fields.
Opportunity short form
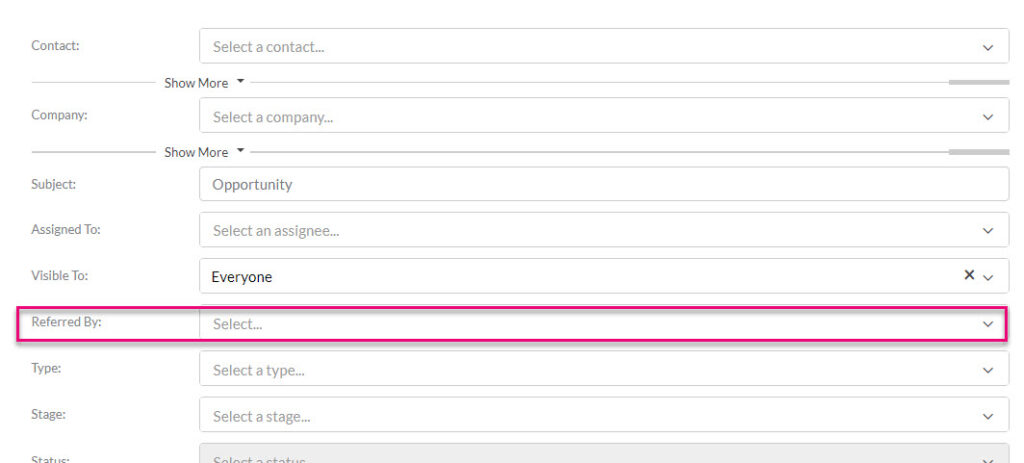
Opportunity long form
You can use the Assigned To field to specify the owner of the record – the choice you make here should be the salesperson responsible for the opportunity.
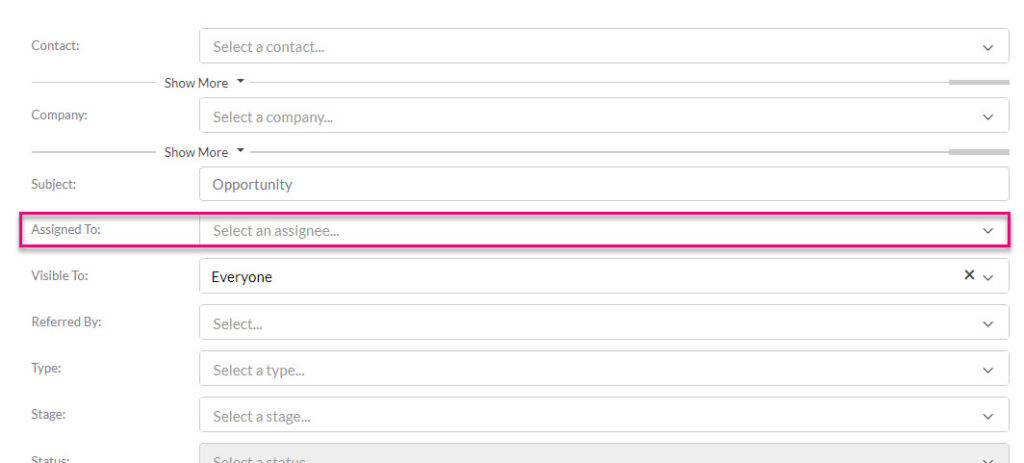
- This field can be used in conjunction with the Follow-Up Date field so that the salesperson can organise their sales workflow. Learn more about Notifications & Reminders.

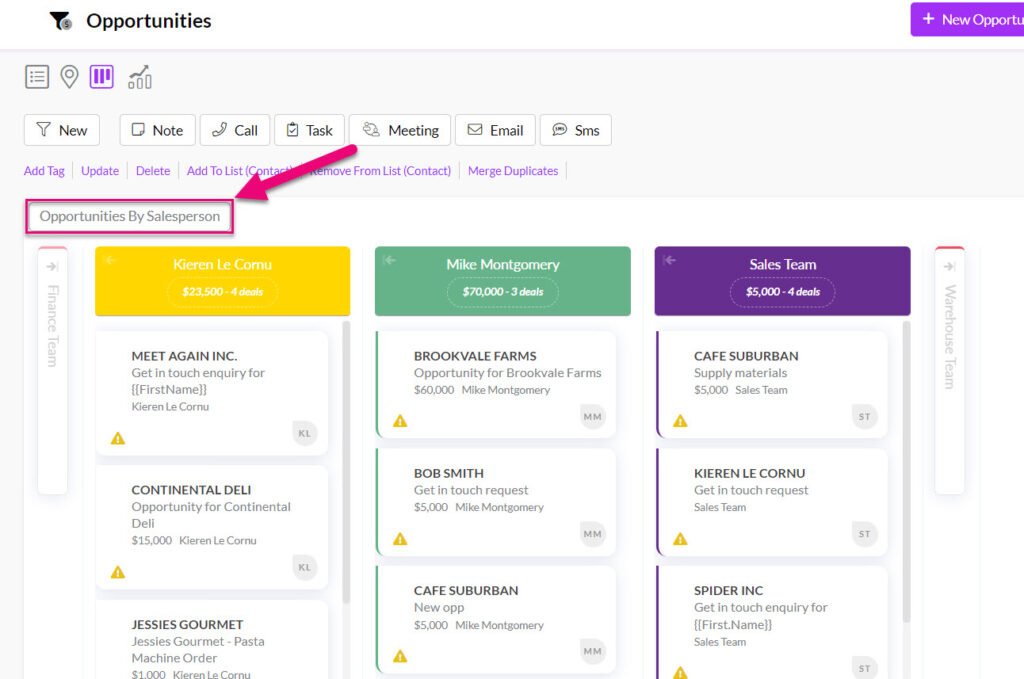
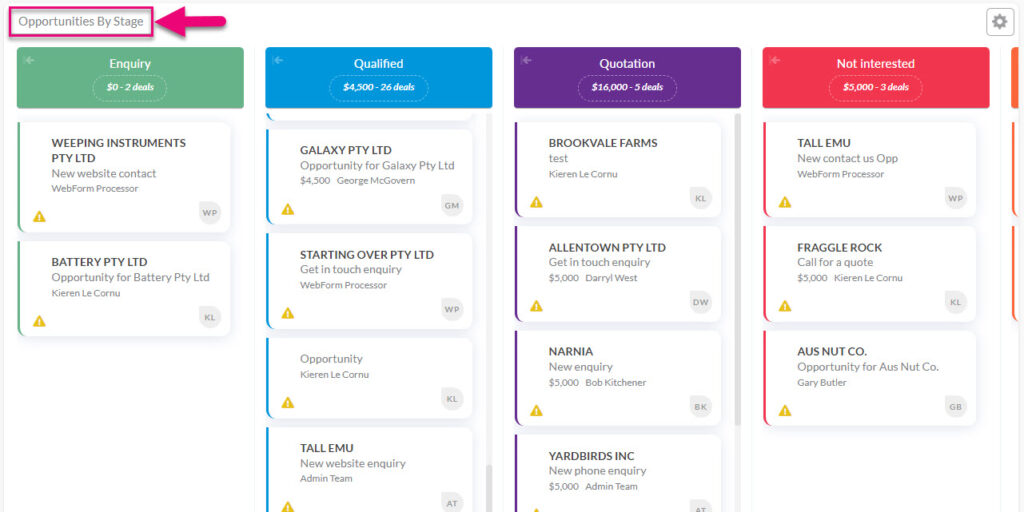
- When in Kanban View, you can filter your view by salesperson.
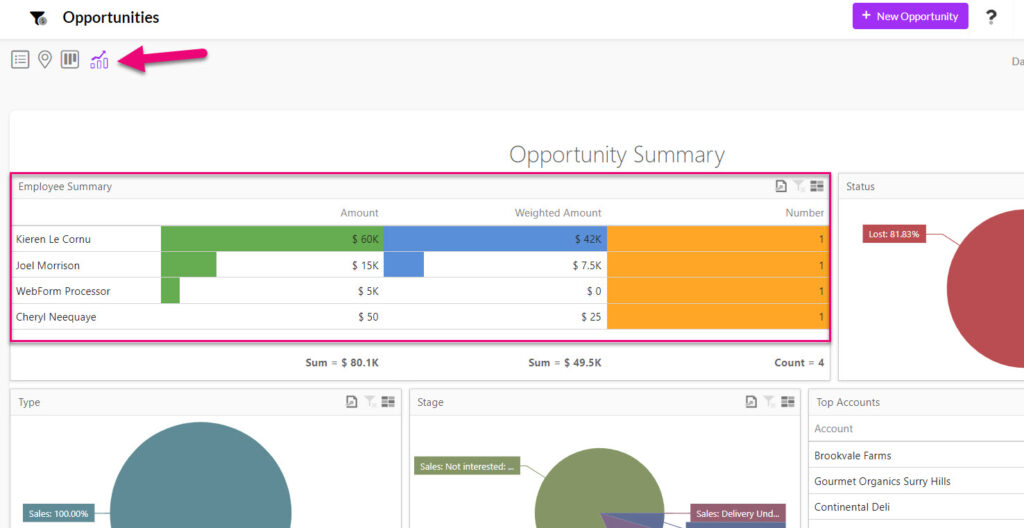
- The salesperson will also be shown when viewing Dashboards related to Opportunities.
You can use the Referred By field to link the new Opportunity to an existing Company or Contact record as the referral source.
You can also add multiple referral sources to (or delete sources from) the record once you have saved it – these sources can be managed from the Referrals tab when you open a record.
You can restrict the visibility of records to certain people in 2 ways:
1. Use the Visible To field to select whether the record is visible to everyone, only the person it is Assigned To or members of your Team. See this guide for more information.
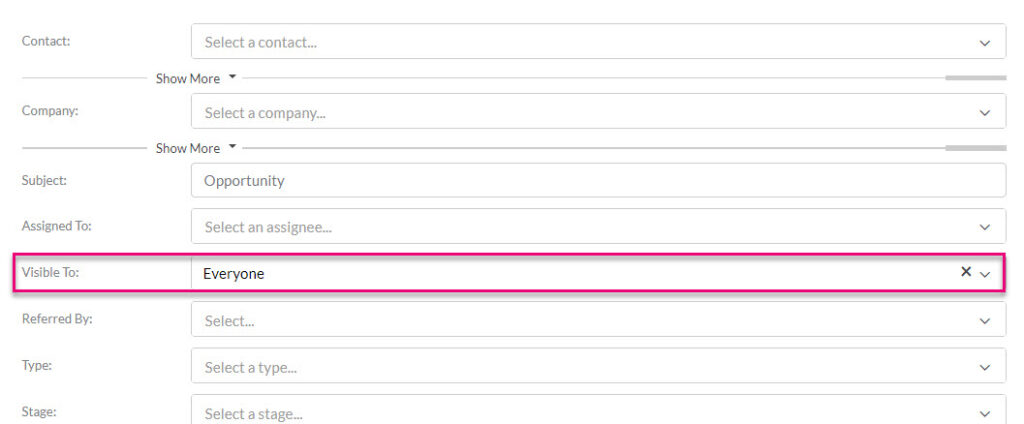
2. Via Teams you can decide which Types are visible to which Users. See the following section on Types and this guide on Teams for more information.

You can use the fields Type, Stage and Status to help organise, track and prioritise your sales pipeline.

You can learn how to customise the options that appear in the Type and Stage fields with this guide.
- Type: you can use this field to break down the sorts of sales opportunities you receive – you may want to organise these by department,
- Stage: this is used to describe where the opportunity sits in your overall sales process e.g. it is very early on and is an enquiry or you have spoken with the prospect a few times and sent them a quote – you can customise the options that appear in this field.
- Status: when you create a new Opportunity record, the field value defaults to Open. If the record is then marked as either Won or Lost, the field will automatically update with the new value. The field can also be updated to Closed if a selection is made in the Stage field that forces the record to be closed off.
This information will also flow through into Kanban and Dashboard Views, as well as Reports. For this reason, it is important that you customise the options to use your terminology and suit your needs.

You can add an actual or approximate value associated with the Opportunity in the Value field – this is a dollar amount that represents the revenue that is expected to be received if the sale is won.
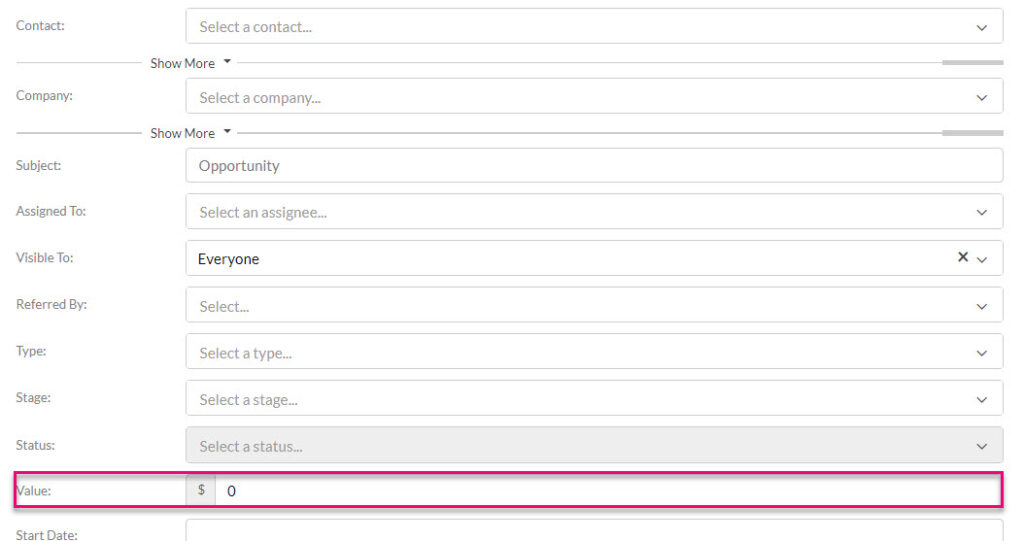
Adding this information to your records will help you to sort and prioritise your sales, as well as flowing through to Dashboards and Reports.

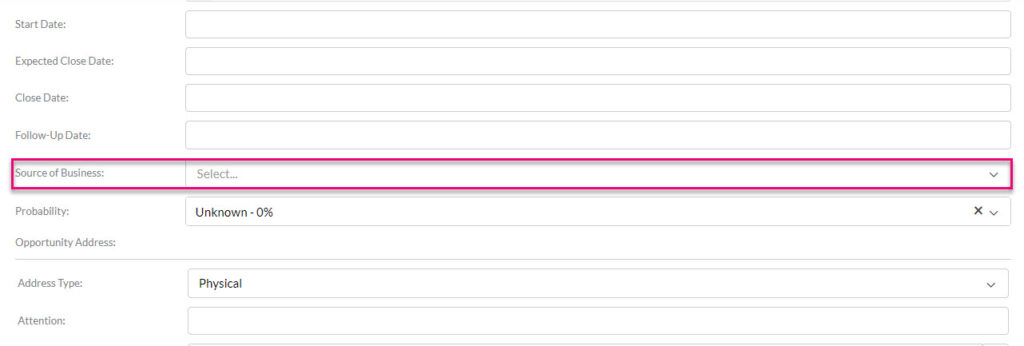
There are four date fields that help you to track sales within your pipeline: Start Date, Expected Close Date, Close Date and Follow-Up Date.
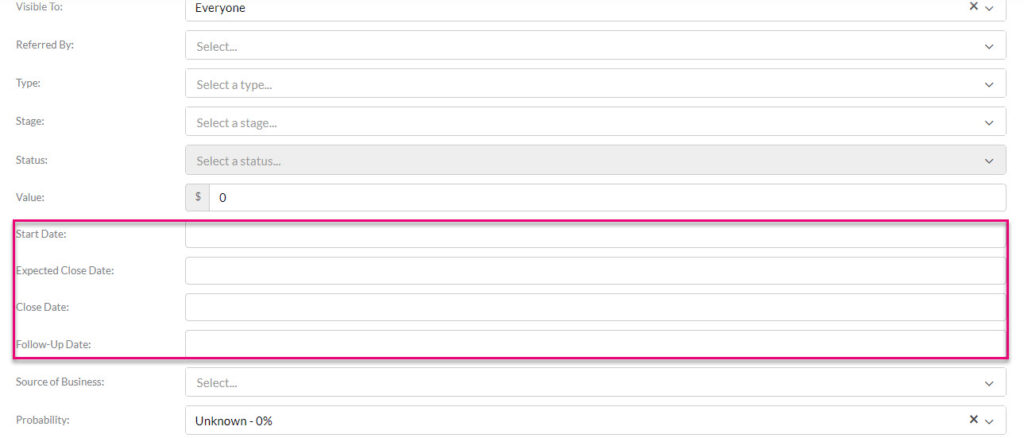
- Start Date – this is when you received or commenced the opportunity.
- Expected Close Date – this is the date when you reasonably expect the sale to be won.
- Close Date – this is the date the sale is actually marked as either won or lost. You can compare this date with the Expected Close Date to see how accurate your initial expectation was.
- Follow-Up Date – this is typically when the salesperson chosen in the Assigned To field will next need to take action on the sale. Learn more about Notifications & Reminders.
This is an important field because it will allow you to track where your leads and prospects are coming from e.g. your website, social media, referrals, marketing campaigns etc.
This field can be customised using this guide so that the options displayed are tailored to the needs of your business.
The Probability field is a drop-down field that allows you to select the likelihood of the sale being won. The choices you see here can be customised using this guide so that they are tailored to the needs of your business.

Adding this information to your records will help you to sort and prioritise your sales.
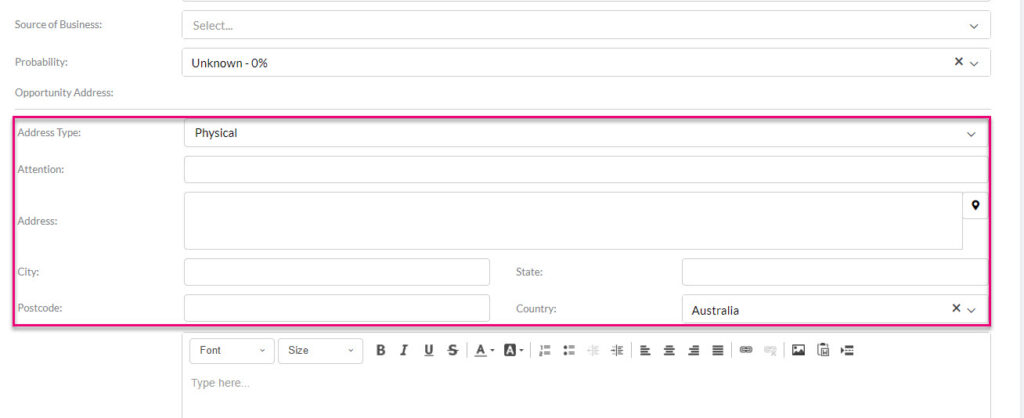
The location of the sale is set using the fields Address Type, Address, City, Postcode, State and Country and the complete address is used to track the location of your Opportunities in Map View (the Attention field is also an address field but it is not necessary to map a location).
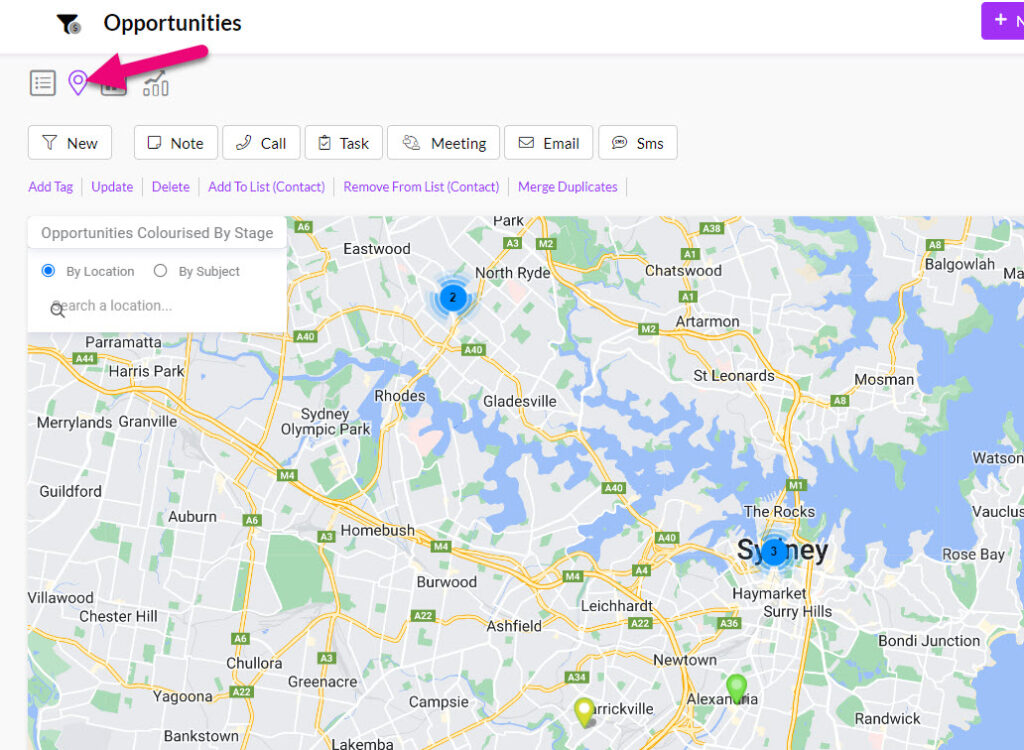
Opportunities in Map View
You can add and format notes for the sale using the Description box.
This field can be helpful for sales staff to enter in a brief that explains who the potential customer is, what they are interested in and include additional information like hyperlinks to customer websites or information online.
The formatting toolbar lets you customise your notes with the following features. Hovering over each of the buttons will reveal a description of the button function.
- Font – choose a font and size and have the option to apply bold, italics, underline or strikethrough to the text and change the colour.
- Text format – increase/decrease indent, add a numbered or bullet point list, align text to left, centre, right or justify.
- Description format – choose a background colour from the palette.
- Insert an image – from either a URL or file upload.
- Add or remove a link – available for URL, email, phone or link to an anchor in the email text.
Description box formatting toolbar
You can also have the details in this box pull through into a CRM notification – learn more about Notifications & Reminders.
Clicking on the paperclip icon will give you the option to select a file to be attached to the record. You will only be able to use this function once you have saved a record – it is not visible when you are creating a new Opportunity.
