- Companies
-
- Inventory
- Multi-currency for Purchasing
- Backorders
- Bay Locations
- Features
- Stock Tracking
- System Products
- Accounting details for Products
- Deactivating Products
- Products in Portal
- Suppliers
- Supplier Pricing
- Suppliers & Products
- Products
- Stock Transfers
- Barcodes
- Product Inventory Details
- Importing & exporting Product data
- Virtual Products
- Stock Adjustments
- Purchase Orders
- Enable or disable Stock-Tracking
- Training Products
- Units of Measure (UoM)
- Freight Products
- Working with Landed Costs
- Configuring Product Settings
- Stock Locations
- Stocktakes
- Product Batches
- Serial Numbers
- Different Price Types
- Purchase Orders
- Managing Stock
- Configurable Products
- Variable Products
- Time Billing
- Manufacturers and Suppliers
- FROM Location-based pricing
- TO Location-based pricing
- Requests For Quote
- Time Products
- Quantity-Based Price Breaks
- RFQ Web Templates
- PO Web Templates
- Location-based Price Breaks
- Customer-Specific Pricing
- Deleting Special Prices
Stock Transfers
If you have multiple Locations in CRM, you can move stock between them with Stock Transfers and Stock Transfer Shipments.
Create a Stock Transfer
The Stock Transfers module is accessed from Inventory > Stock Transfers – just click on the New Stock Transfer button.
![]()
When you create a new Stock Transfer, you can specify the From and To Locations – the system will reduce the stock in the From Location and increase the stock at the To Location.
While the stock is between locations, the system will place it in a Transit Location.
![]()
Add items
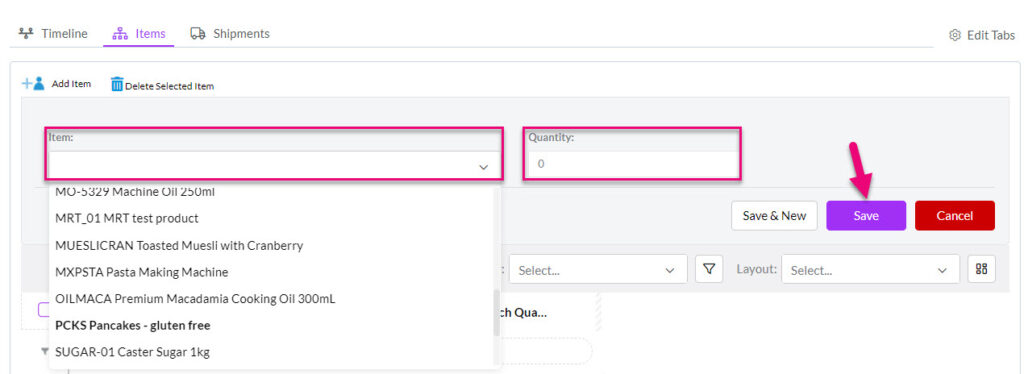
When you save the transfer form, you will be able to find and add the Products that you want to transfer on the Items tab.
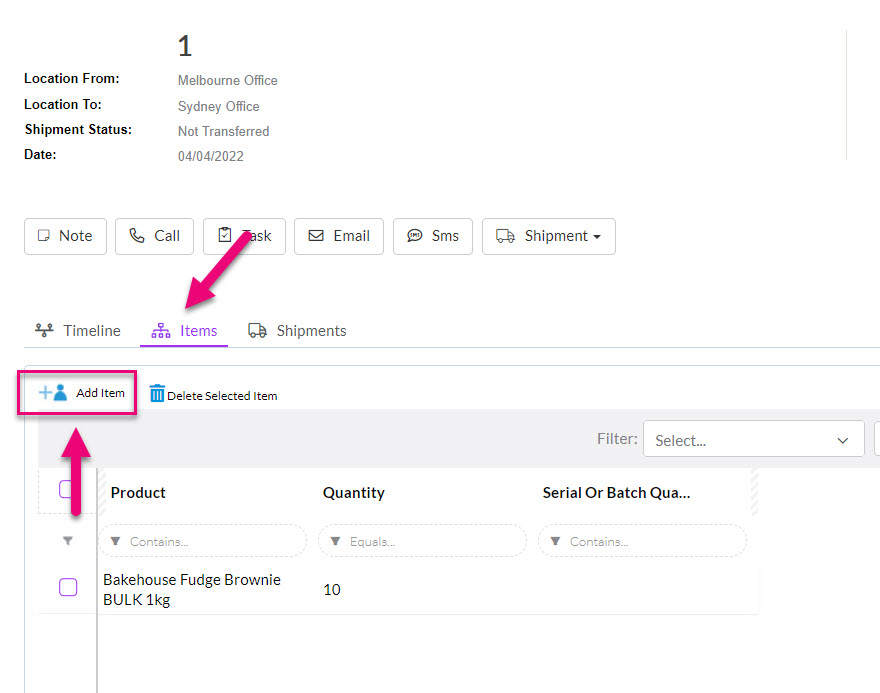
Select the item, add the quantity and click on Save to add it to the record.
Remove or edit items
If you need to remove an item, just select it and then click on the Delete button.
![]()
If you need to adjust the quantity of an item, select it and a new box will display that allows you to adjust the quantity – click on Save when done.
![]()
Ship the stock
Once you have added the items, you can click on Shipment to reveal options to:
- Generate Shipment which creates a Stock Transfer Shipment record.
- Mark as Completed which means that the shipment has already taken place or does not need to be tracked.

When you choose Generate Shipment, a record will automatically be created in the Stock Transfer Shipments module.
Click here to learn about Stock Transfer Shipments.