- Companies
-
- Inventory
- Multi-currency for Purchasing
- Backorders
- Bay Locations
- Features
- Stock Tracking
- System Products
- Accounting details for Products
- Deactivating Products
- Products in Portal
- Suppliers
- Supplier Pricing
- Suppliers & Products
- Products
- Stock Transfers
- Barcodes
- Product Inventory Details
- Importing & exporting Product data
- Virtual Products
- Stock Adjustments
- Purchase Orders
- Enable or disable Stock-Tracking
- Training Products
- Units of Measure (UoM)
- Freight Products
- Working with Landed Costs
- Configuring Product Settings
- Stock Locations
- Stocktakes
- Product Batches
- Serial Numbers
- Different Price Types
- Purchase Orders
- Managing Stock
- Configurable Products
- Variable Products
- Time Billing
- Manufacturers and Suppliers
- FROM Location-based pricing
- TO Location-based pricing
- Requests For Quote
- Time Products
- Quantity-Based Price Breaks
- RFQ Web Templates
- PO Web Templates
- Location-based Price Breaks
- Customer-Specific Pricing
- Deleting Special Prices
Stocktakes
You can update your stock levels by performing a physical stocktake at any of your Locations and then update your stock levels in CRM line with your actual levels on hand by creating a new Stocktake record.
You can also use a Stocktake as an opportunity to update the batch and serial numbers for your stock and/or perform Stock Adjustments in bulk.
Create a Stocktake
- In Inventory > Stocktakes, click on the New Stocktake button.

- Give the stocktake a Name, assign it to a User, add the Date the stocktake was performed and select the Location it relates to.
- Click Save & Close.
Creating a new Stocktake for a Location

A saved Stocktake
Adding items to a Stocktake
On the saved record, go to the Items tab. Here you have 4 ways that you can add items to a stocktake.
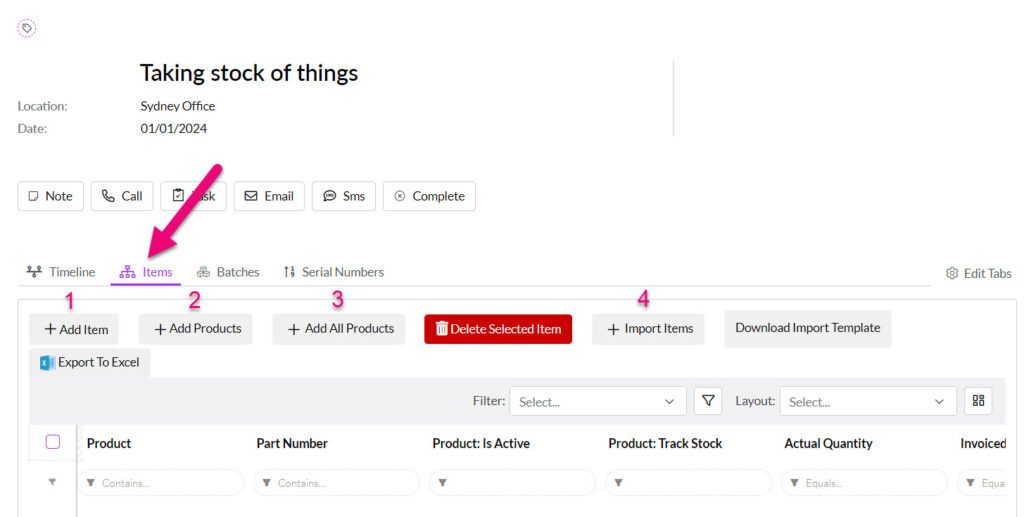
1 – Add Item
Let’s you select an item from the list, you can then enter in the new quantity of the item and press Save or Save & New to continue adding items.

You can also update the item quantities via import.
2 – Add Products
Brings up a search box that allows you to filter, sort and then select multiple items at once to add.
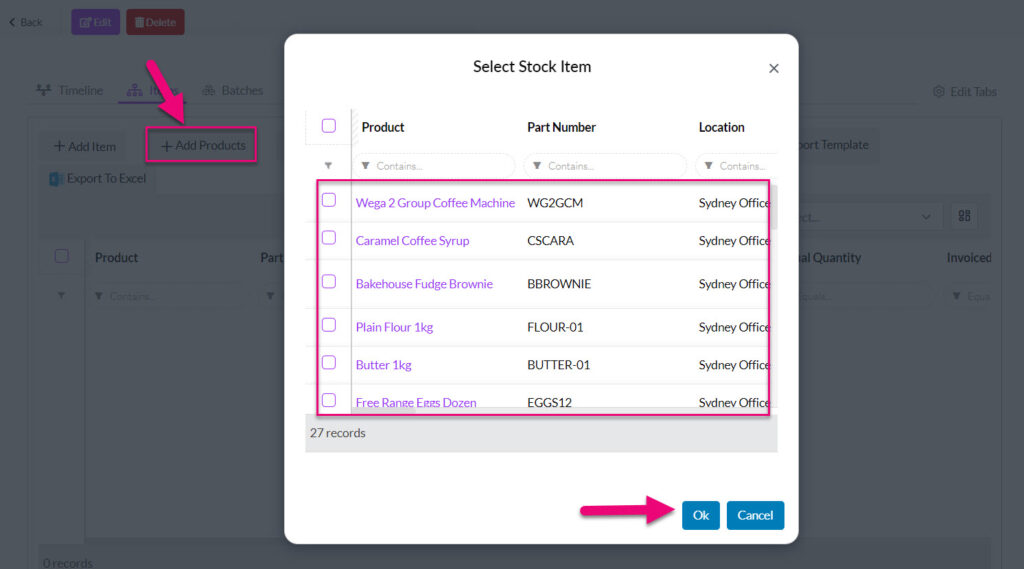
For each item you’ve added, you can click on it on the list to reveal the option to enter in the new quantity of the item and press Save or Save & New to continue adding items.

You can also update the item quantities via import.
3 – Add All Products
This will automatically add every stock-tracked item at the selected Location.

For each item you’ve added, you can click on it on the list to reveal the option to enter in the new quantity of the item and press Save or Save & New to continue adding items.
You can also update the item quantities via import.
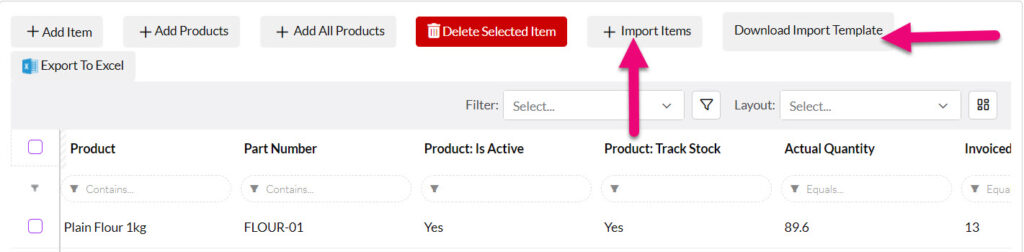
4 – Import Items
You can download an import template, add the relevant part numbers for items you are stocktaking and the new quantities and then import this into the record.
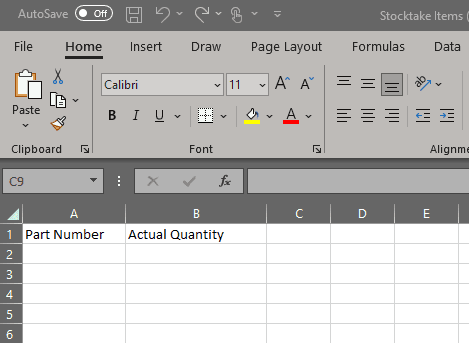
Import template sample
A quick way to populate the import template is to export the stocktake to Excel and then copy in the part numbers.
When you click on the Import Items button on the toolbar, the import window will open, and you can add your file.

Then click on Upload to start the import process.

You will see a progress indicator bar once the import has started.

When the process is complete, a message will display, and you can press Done to return to the Stocktake.

Batches and Serial Numbers
You can manage batch and serial numbers associated with stock from the named tabs.

See below for more detailed information.
On the saved record, go to the Batches tab. Here you have 3 ways that you can add items to a stocktake.

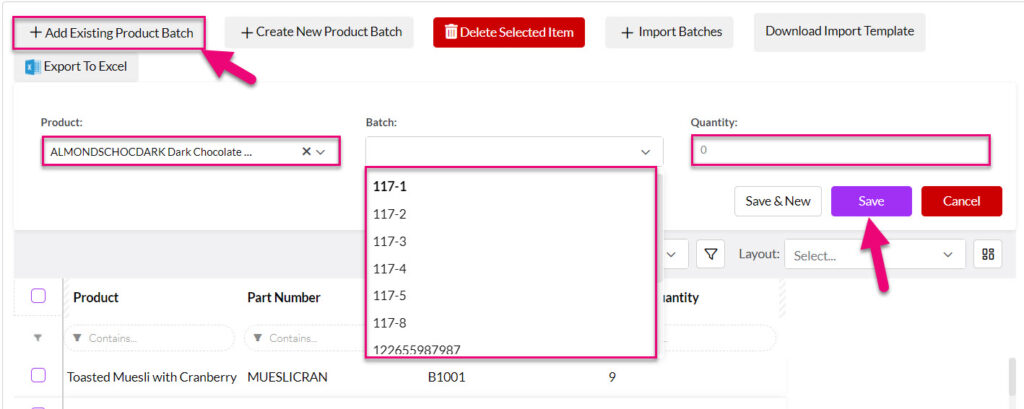
1 – Amend an existing batch item
Click on the Add Existing Product Batch button which will allow you to select an item, select from existing batch numbers and then input an updated quantity.
2 – Create a new product batch
Click on Create New Product Batch, which allows you to select an existing item and then enter in details to create a new batch.

3 – Import batch details
If you need to add new batches, numbers and quantities to the Stocktake, you can download the import template and then import the numbers into the record.


Batch import template sample
When you are ready to go, click on the Import Batches button on the toolbar and add your file.

Then click on Upload to start the import process.

When the process is complete, a message will display and you can press Done to return to the Stocktake.

On the saved record, go to the Serial Numbers tab. Here you have 3 ways that you can add items to a stocktake.

1 – Amend an existing serial item
If you want to add serialised items to the Stocktake, you can click on the Add Existing Product Serial Number button which will allow you to select an item, associate it with an existing serial number and input an updated quantity.

2 – Create a new serial item
Click on Create New Product Serial Number, which allows you to select an existing item and then enter in details to create a new serial.

3 – Import serial details
If you need to add new serialised items, numbers and quantities to the Stocktake, you can download the import template and then import the numbers into the record.

Serial import template sample
When you are ready to go, click on the Import Serial Numbers button on the toolbar and add your file.

Then click on Upload to start the import process.

When the process is complete, a message will display, and you can press Done to return to the Stocktake.

You can remove items from the Stocktake by selecting them in the Items tab and then clicking on the Delete Selected Item button on the toolbar.

Important: once you have marked a Stocktake as Complete, the record is locked and you cannot make any changes to it.
You can quickly export a Stocktake to Excel using the button on the toolbar of any of the tabs.


A Stocktake exported to Excel
When you have finished updating your Stocktake record, click on the Complete button to apply the changes to your system – your changes will then be reflected when you go back to the Stocks module.
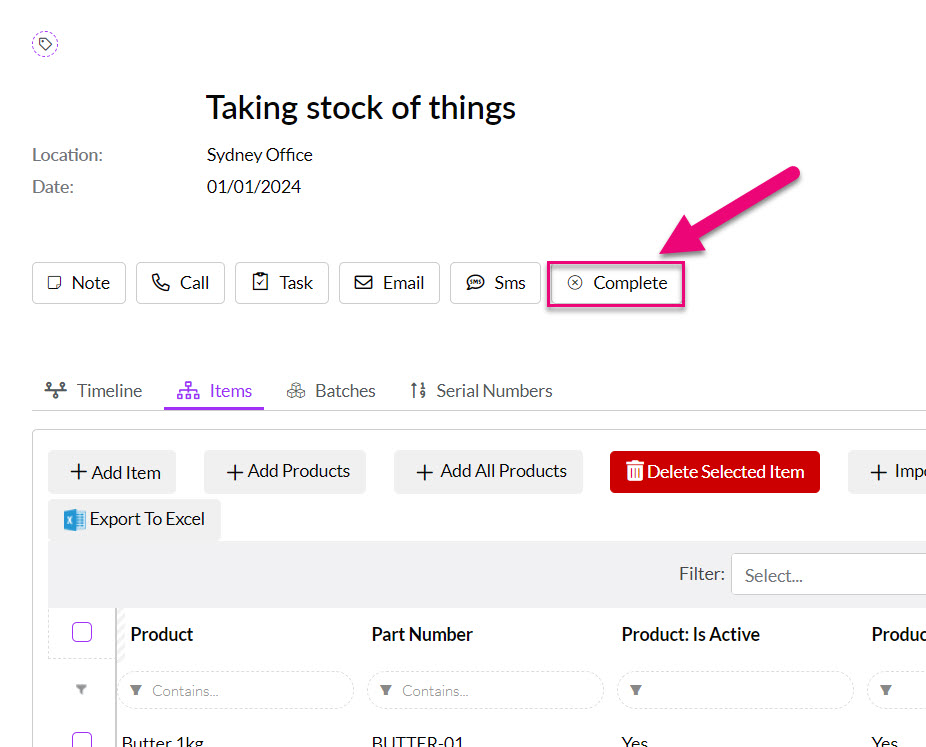
Important: once you have marked a Stocktake as Complete, the record is locked, and you cannot make any changes to it.
When you adjust the level of stock using a Stocktake, you can view the changes from a Product record using the Stock Movements tab.
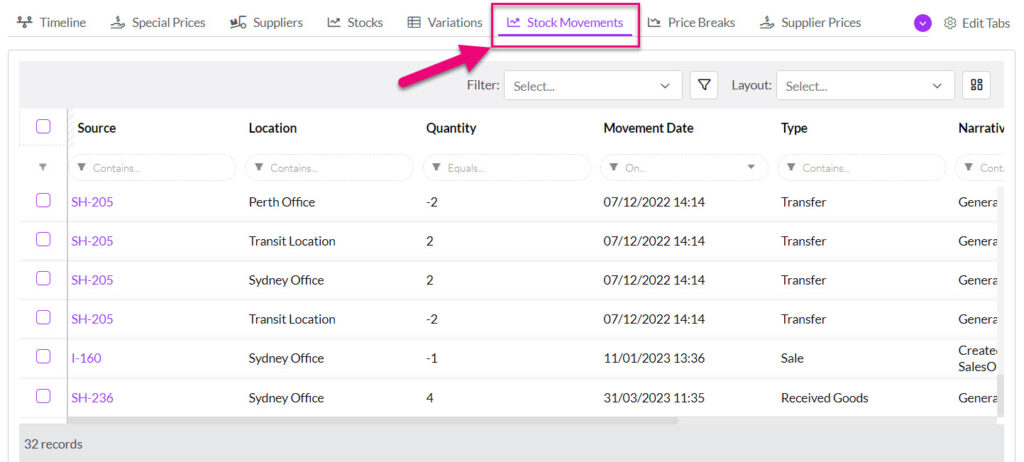
Stock Movements tab on in a Product record
Note that if the Product is batch or serial tracked, stock movements will be shown on the Serial Number Tracking or Batch Number Tracking tab instead.
You will also see the updated stock figures shown in the Inventory > Stocks area.

Before you push a Stocktake record to your accounting system manually, you must perform the following steps IN SEQUENTIAL ORDER:
- Export all your Invoices to MYOB/Xero.
- Export all your Supplier Bills for receipted goods to MYOB/Xero.
- Allow 5 minutes for these exports to complete.
- Then push your Stocktake record manually to MYOB/Xero.
You can push all your Invoices OUT to MYOB/Xero from the sync settings page by clicking on the MYOB/Xero logo and then choosing Export.

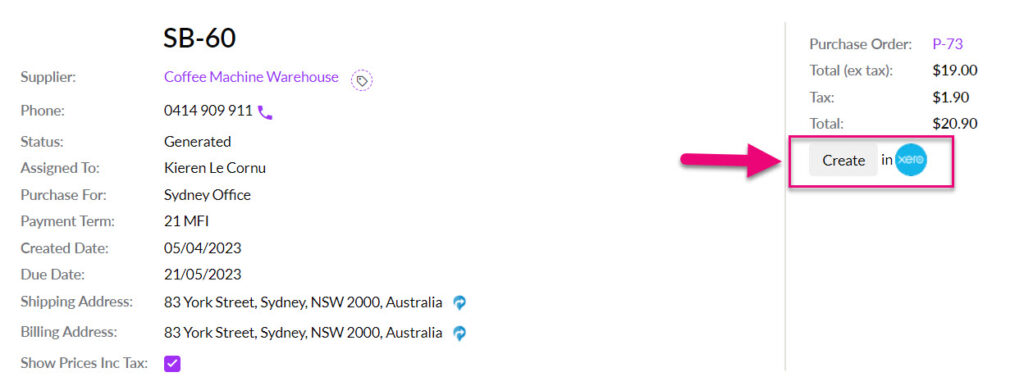
You can push your Supplier Bills for receipted goods to MYOB/Xero by opening a record and clicking on the Create button next to the MYOB/Xero logo.
Ensure you have followed the steps in the section above before you export your Stocktake.
Once the Stocktake record is marked as Complete, you can export the Stocktake to your accounting system using the Xero or MYOB button that will show on the form – this button will not be visible until the Complete button is clicked.
If your stock levels have not changed, the export to your accounting system will not take place.
Example of the button to push the Stocktake to your accounting system

The export to your accounting system will adjust stock in the following way:
- A supplier bill is created for products that have increased in quantity.
- A credit note is created for products that have had the quantity reduced.
The naming convention for the supplier bill/credit note is “TE STL <ID>” where <ID> is the the CRM CRM identifier of the Stocktake, for example:

Each line details how each product was adjusted in the format: “Stocktake: <name>, Qty: <final qty>”. The following line illustrates where a product had a quantity of 10 in CRM and four in the accounting system and six were created as a correction:
