- Companies
-
- Inventory
- Multi-currency for Purchasing
- Backorders
- Bay Locations
- Features
- Stock Tracking
- System Products
- Accounting details for Products
- Deactivating Products
- Products in Portal
- Suppliers
- Supplier Pricing
- Suppliers & Products
- Products
- Stock Transfers
- Barcodes
- Product Inventory Details
- Importing & exporting Product data
- Virtual Products
- Stock Adjustments
- Purchase Orders
- Enable or disable Stock-Tracking
- Training Products
- Units of Measure (UoM)
- Freight Products
- Working with Landed Costs
- Configuring Product Settings
- Stock Locations
- Stocktakes
- Product Batches
- Serial Numbers
- Different Price Types
- Purchase Orders
- Managing Stock
- Configurable Products
- Variable Products
- Time Billing
- Manufacturers and Suppliers
- FROM Location-based pricing
- TO Location-based pricing
- Requests For Quote
- Time Products
- Quantity-Based Price Breaks
- RFQ Web Templates
- PO Web Templates
- Location-based Price Breaks
- Customer-Specific Pricing
- Deleting Special Prices
Time Billing
Time Billing allows you to:
- Create a Time Product in CRM and set different billing rates for your customers; you can also set a standard rate across the board.
- Record your time spent in CRM via Activities (Tasks that have Time, Calls, Meetings, SMS and Emails) and segment the time into billable or not billable.
- Generate a Sales Order for a customer that will pull in billable data from their Activities. You can generate a bill from a customer record (Contact or Company), a Project or a Ticket.
Before you can use Time Billing, you will need to:
- Enable the feature in your database with this guide.
- Create a Time Product, as per this guide.
See also:
If you want to charge all your customers the same rate, you can skip this step and customers will all be billed the amount you set up as the Unit Sell Price.
To set up different billing rates for your customers, open any Time Product that you have created for billing and click on the Special Prices tab and click on Add Special Price.
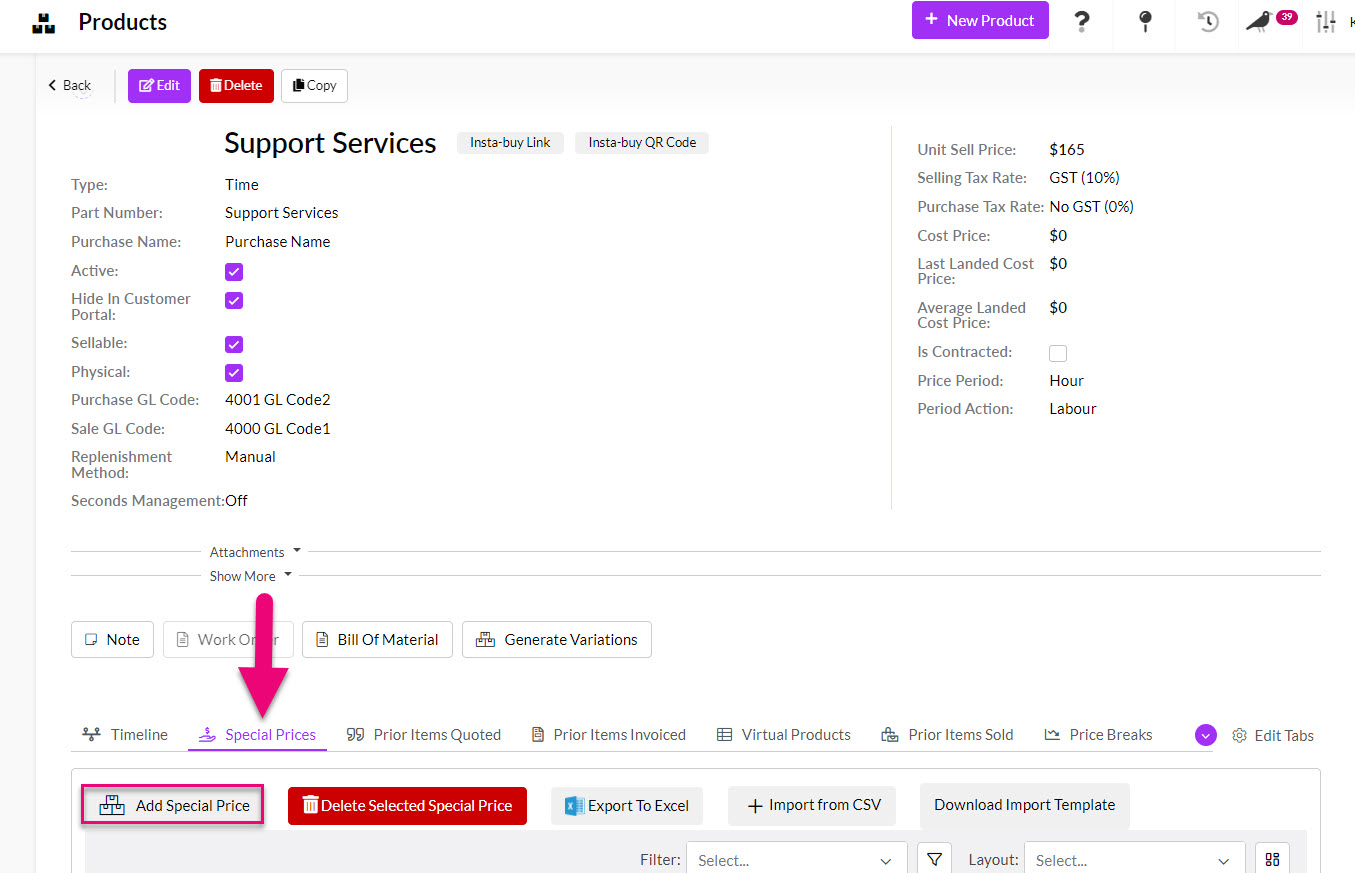
If you can’t see this tab it may be hidden, and you need to edit the record tabs to make it visible.
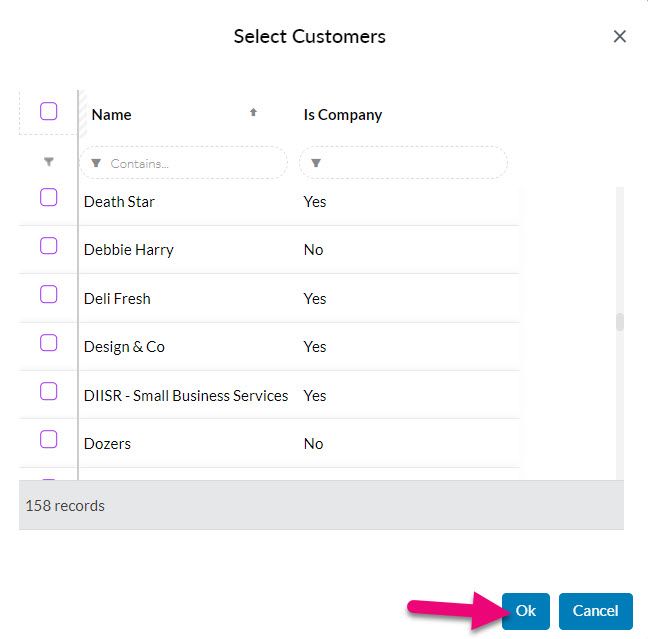
A window will open allowing you to select the customers you want to set up different billing charges for – click on OK when you have selected the applicable customers.
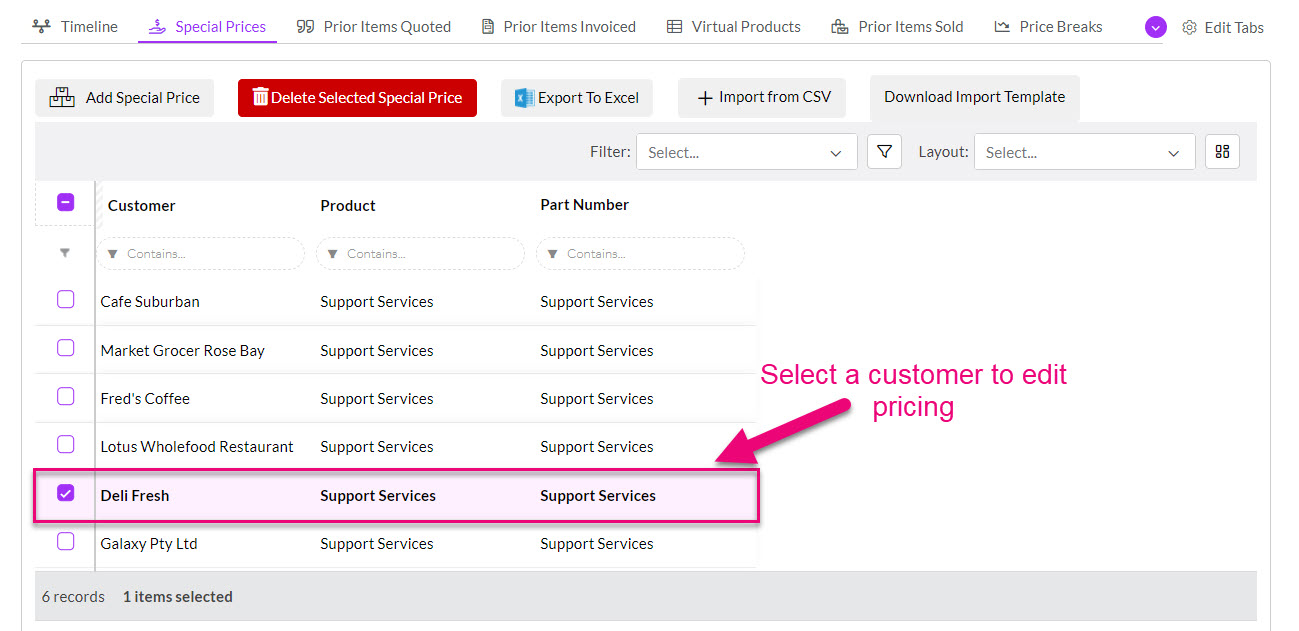
On the Special Prices tab you can now click on a customer to open a new window and configure their billing rates.
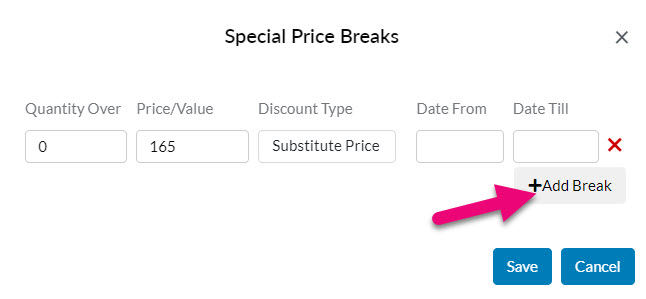
Here I can specify different price breaks so that the amount that customer is billed will reduce as the number of hours of support they use increases – I just click the Add Break button and it adds an extra row so that I can change the Quantity and Price figures.
You could also just have one rate for the customer and there is no obligation to add additional breaks.
You can also set a From Date and To Date for prices e.g. you may have a promotion running where customers get a discounted rate for a period of time and after the period ends, rates will return to normal.
Click on Save when you are done.
You can then continue the process by clicking on each customer you added to the Special Prices tab to set their billing rates.
Note that you can also add billing rates from a customer record, instead of doing it from the Time Product – click here to view the instructions.
When you create Activities for a customer (Tasks that have Time, Time, Calls, Meetings, Emails, SMS) you need to select a Time Product from the Billing Type field and then enter in the amount of time you have spent so that CRM can calculate how much to bill.
The process is slightly different for different types of Activities, as explained in the following sections.
Emails and SMS work a little bit differently – in the earlier step when you configured the Time Billing settings in Admin > General, the Default SMS/Email Billing Duration figure you entered will be automatically applied to both these types of Activities.
You just need to select a Billing Type from the dropdown list and CRM will then use the default time to calculate the cost of time spent on these types of Activities.
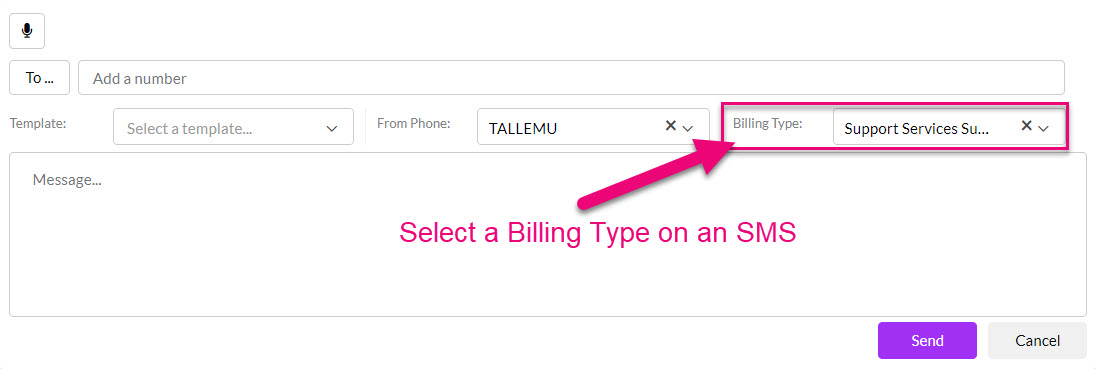
Entering billing details in an SMS
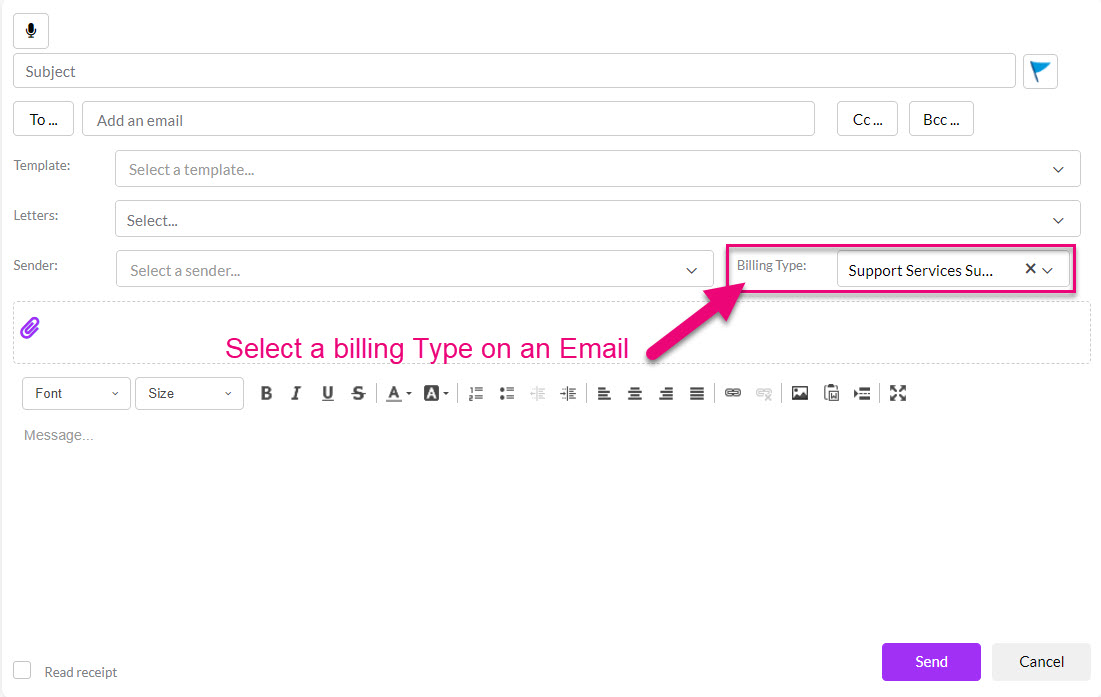
Entering billing details in an Email
On both Calls and Meetings there is a field called Billing Type where you need to select a Time Product from the dropdown list.
On Meetings you need also enter in Start and End times to record the time spent.
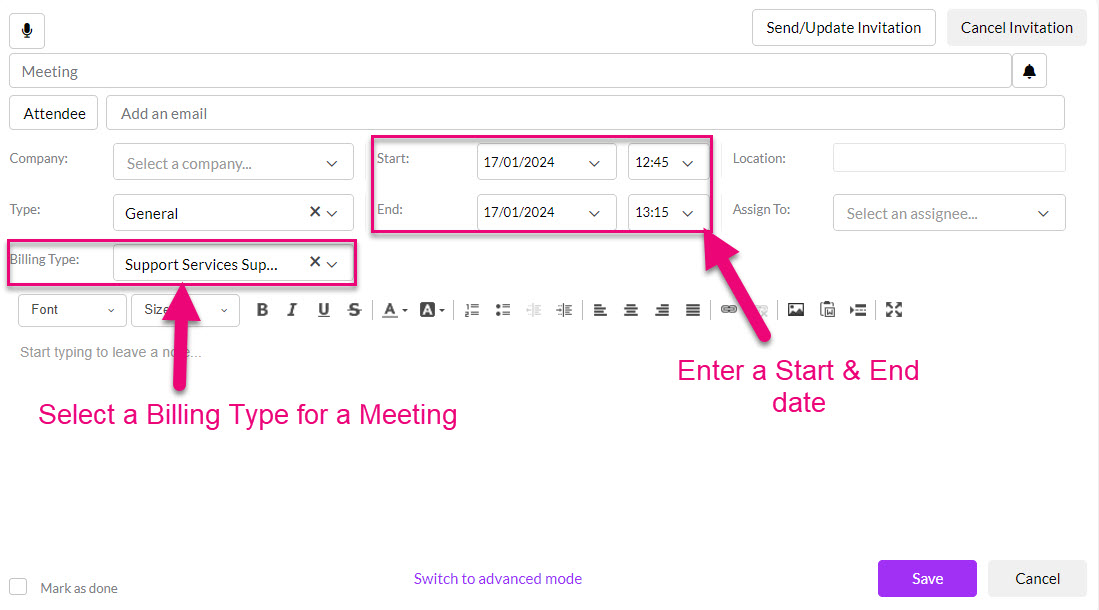
Entering billing details in a Meeting
For a Call you need to enter in a Duration to capture the time spent.
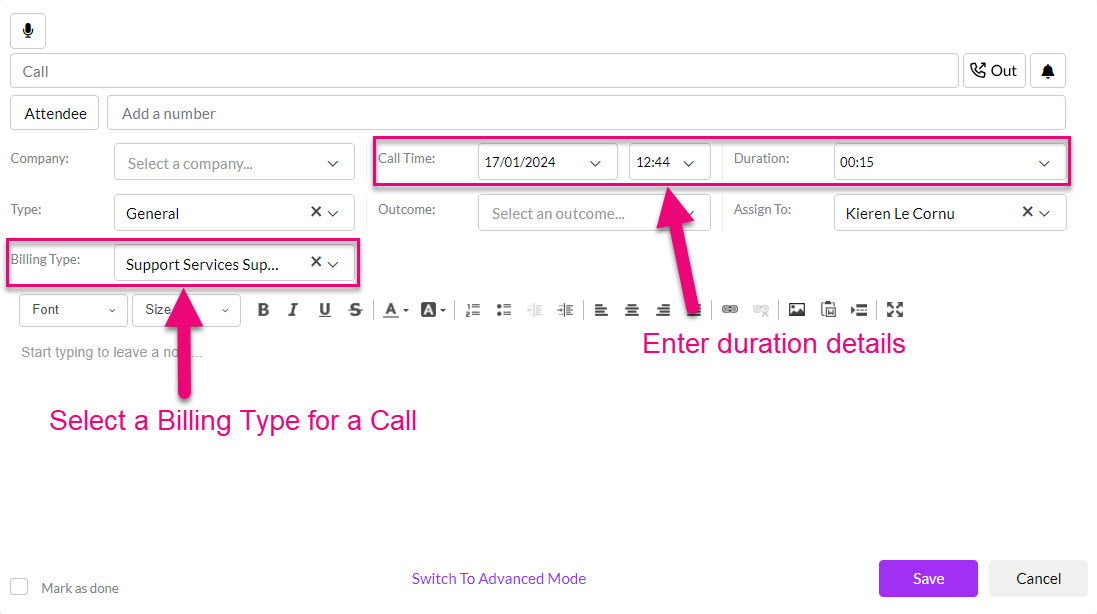
Entering billing details in a Call
Tasks work in conjunction with Time – you can have multiple Time entries that are added up to determine the total time spent on a Task. Click here to learn more about how to work with Tasks.
When you select a Billing Type for a Task, all Time entries that you create will default to the same Billing Type that you’ve chosen for the Task.
When you enter in a Time activity, you select the Task that it relates to and enter in the Start and End times and dates. If you want to change the Billing Type at this point, you can select a different option than the one that will pull through from the Task.
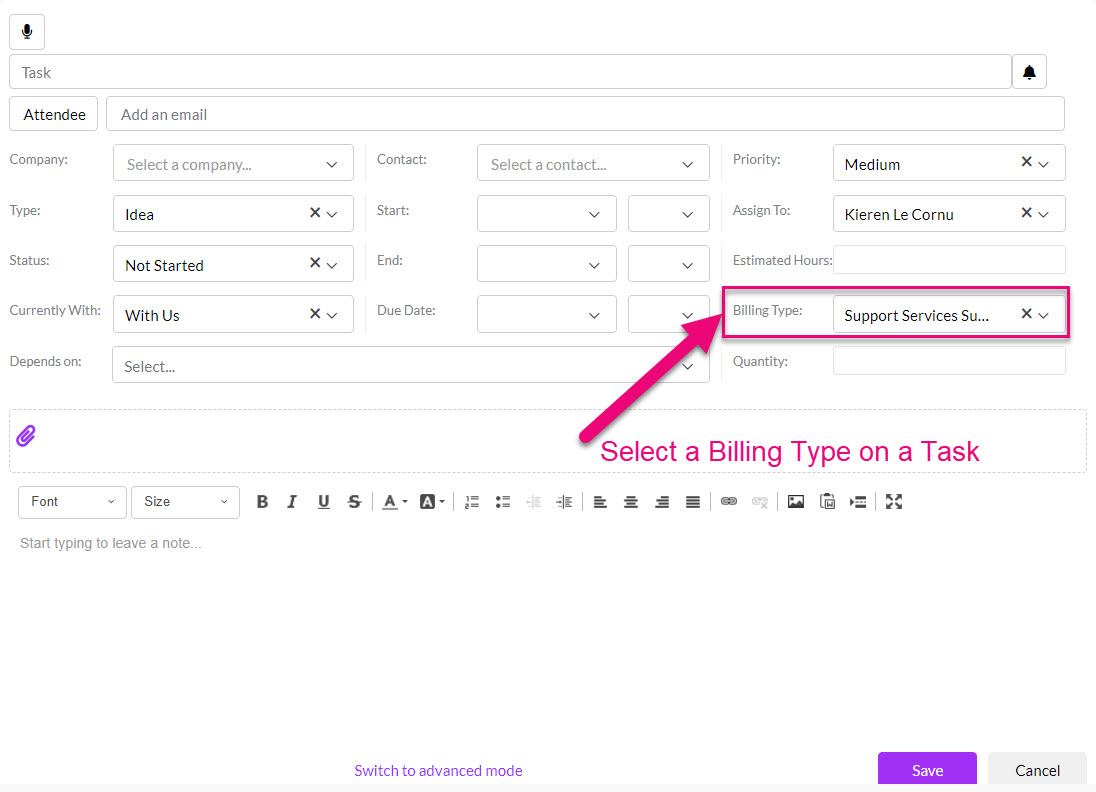
Billing Type field on a Task
You can add Time from Calendar & Activity > Time or from a Task in Advanced View.
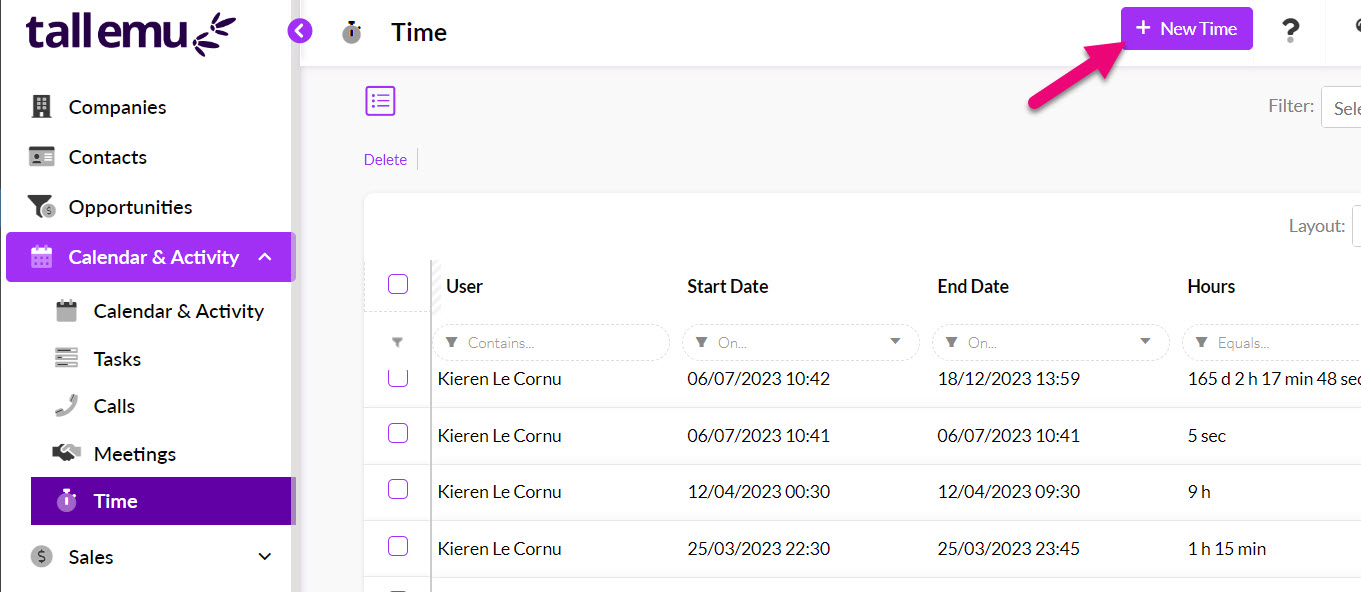
Adding Time from Calendar & Activity > Time
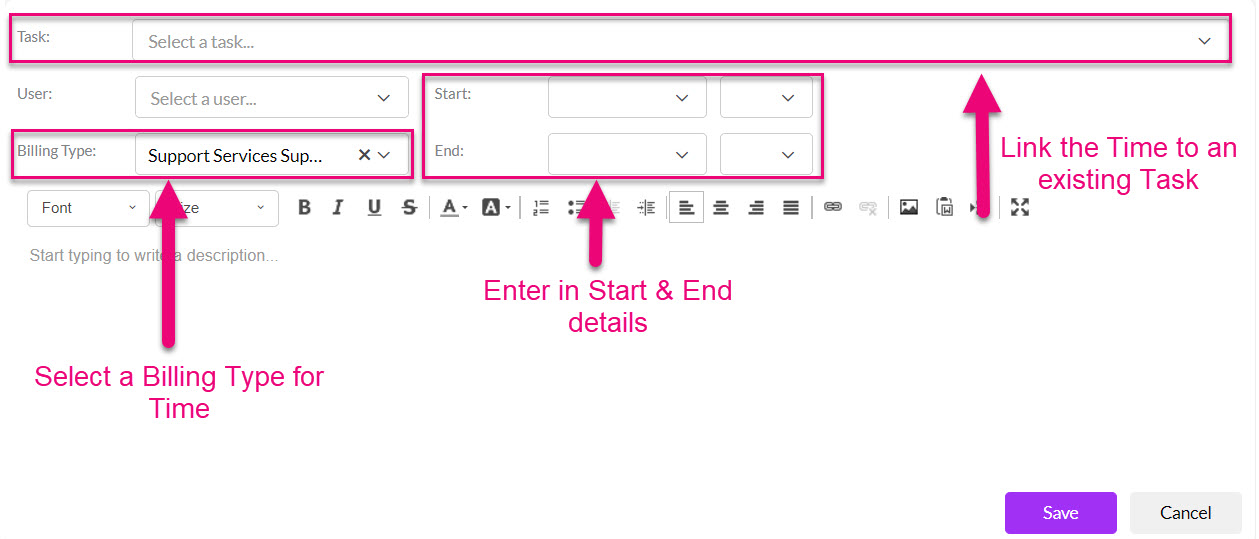
Entering in Time from Calendar & Activity > Time
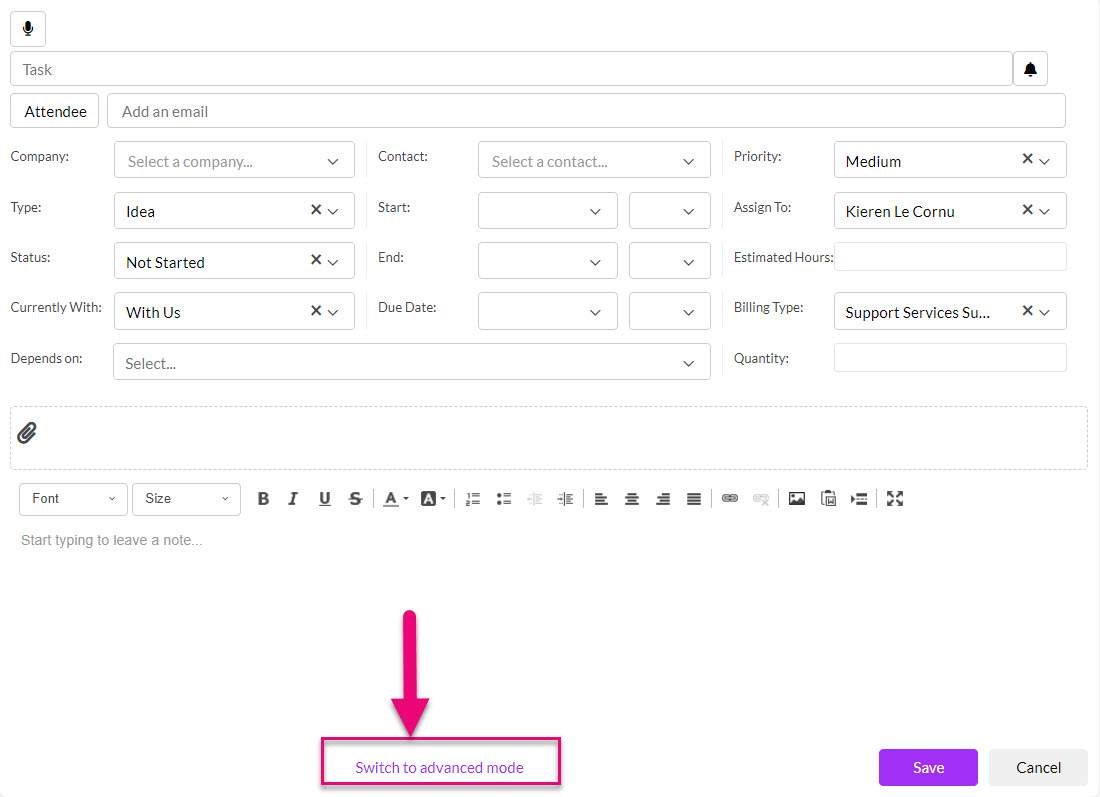
To put a Task into Advanced Mode, just click on the button at the bottom.
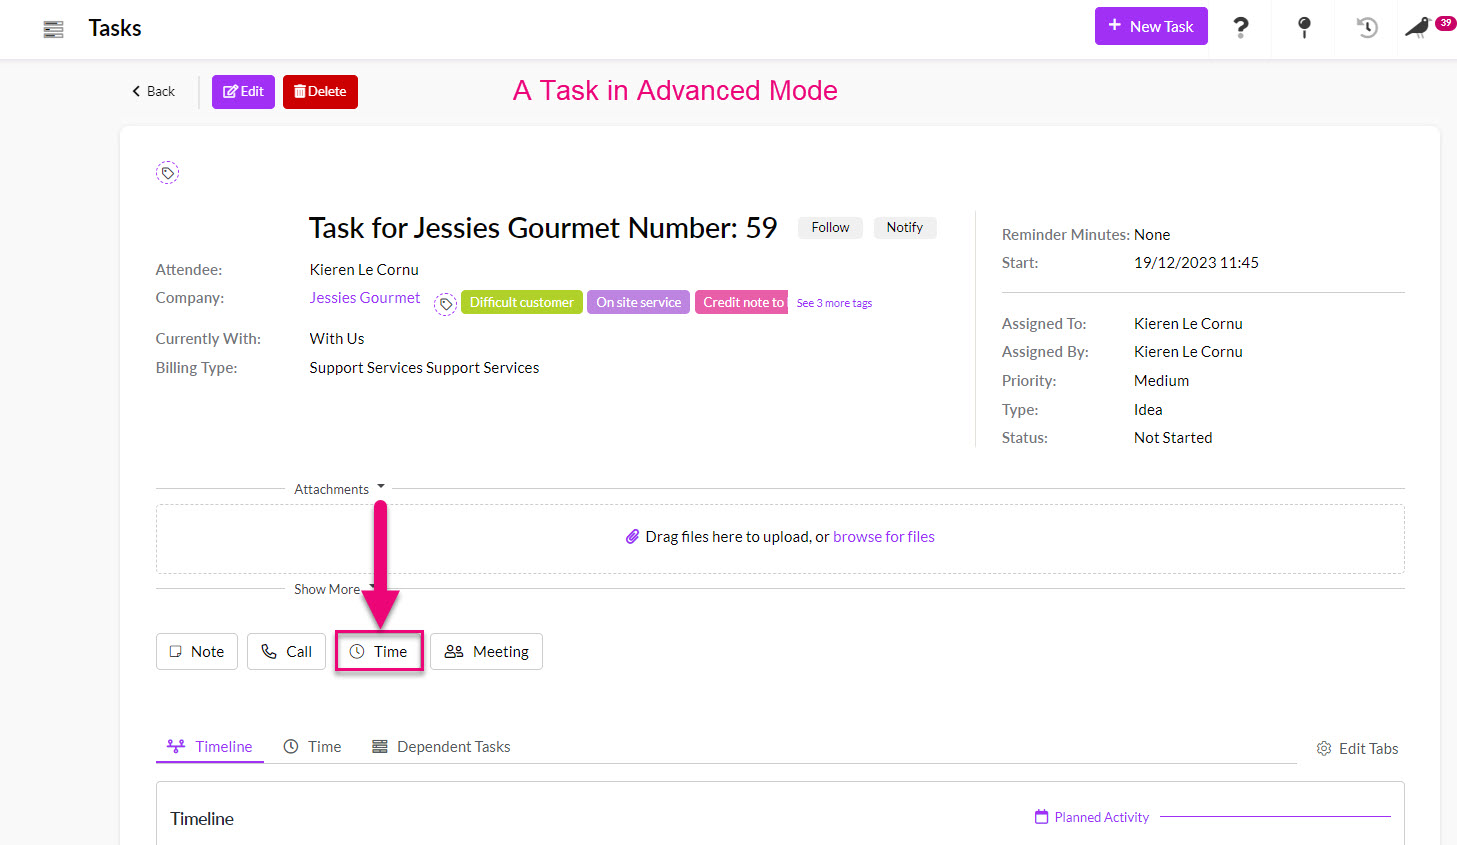
You can also view all the Time spent on a Task from the Time tab in Advanced View.
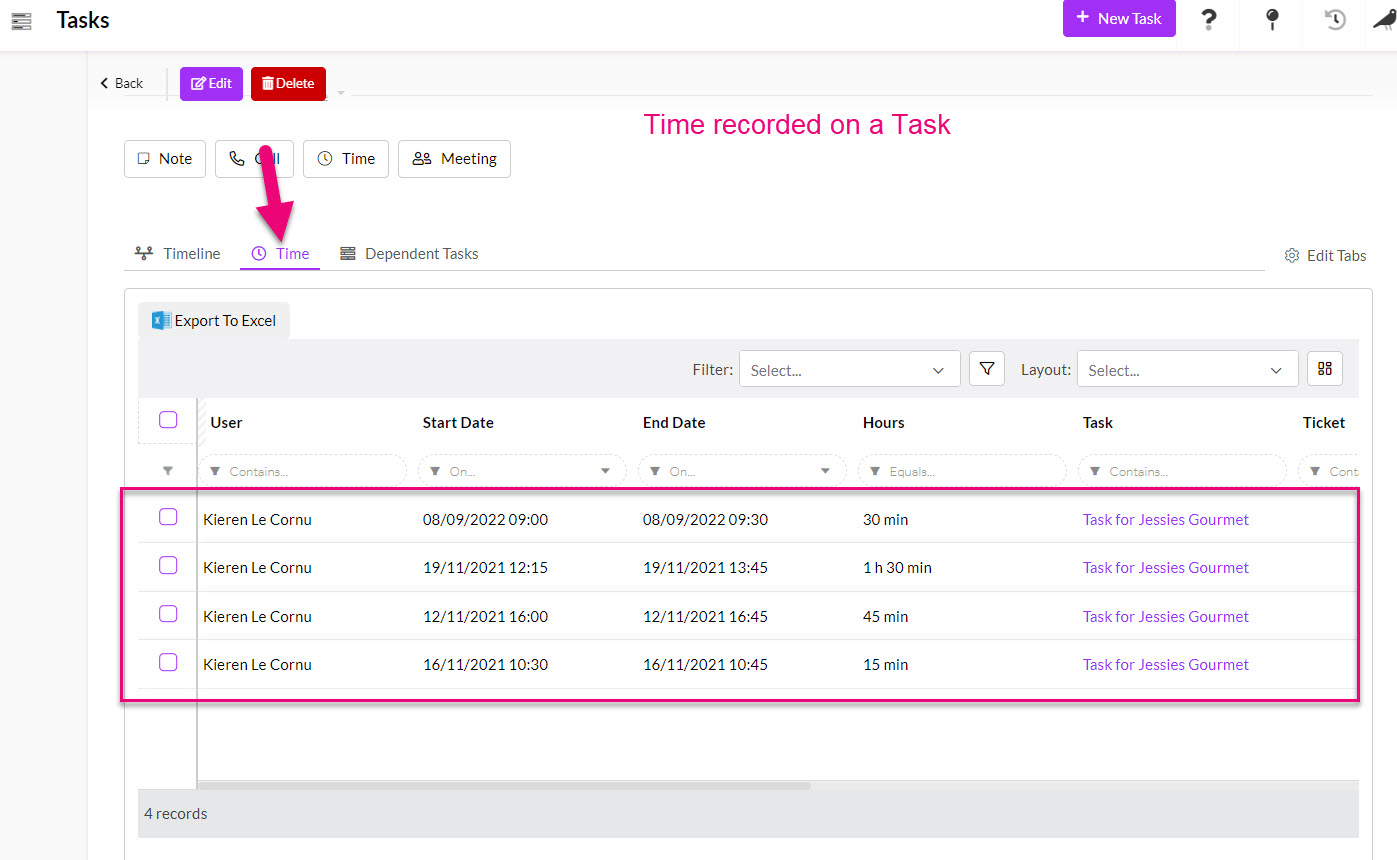
Note that the amount of billable time spent will be calculated based on the sum of the related Time entries and not the Start and End times entered on the Task.
For example, when I bill the customer for this Task, it will group all the Time entries and place it in a bundle with the headline Task.
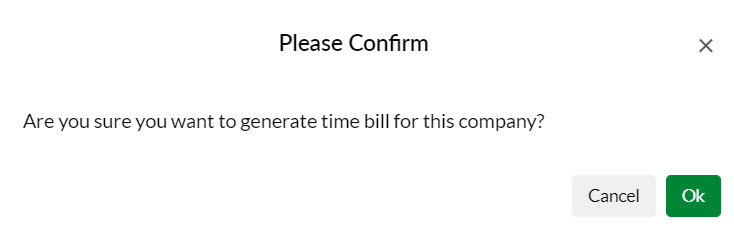
You can generate a time bill from a customer record (Company or Contact) or from a Project or Ticket from the activity bar using the Generate > Time Bill button.

You will be prompted to confirm that you want to proceed – click OK.
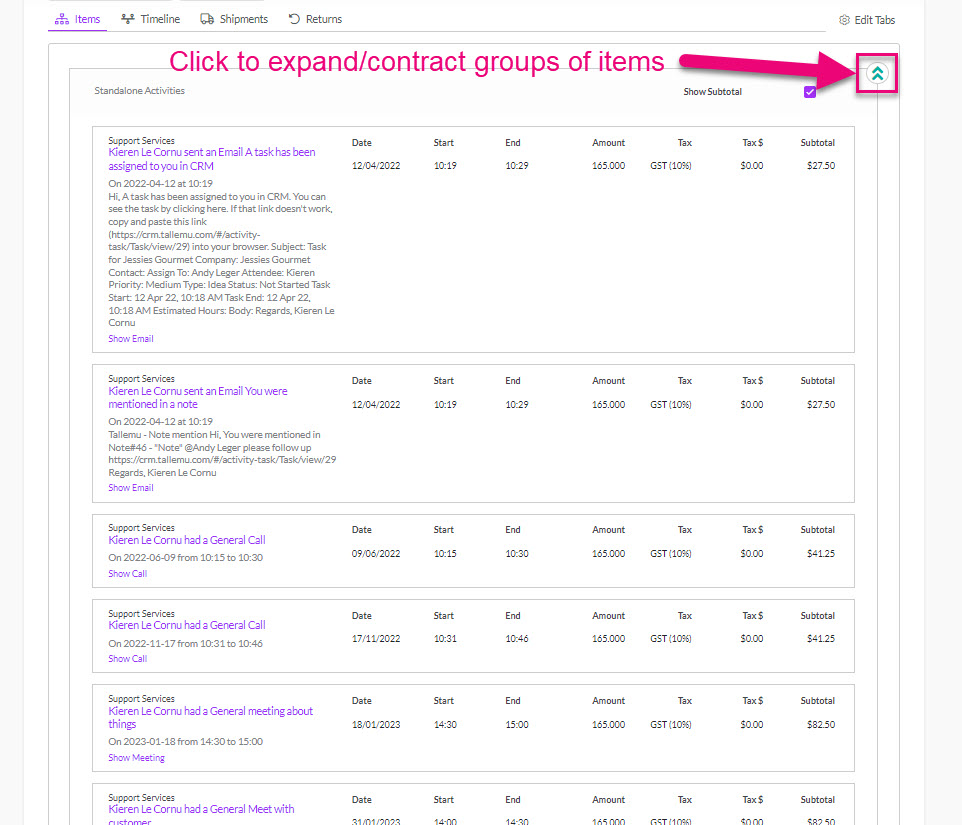
A Sales Order will then be generated, and you will be taken straight to the record which will display all Activities that have not been previously billed i.e. if the Activities have previously been billed, they cannot be billed a second time unless they are removed from the original bill.
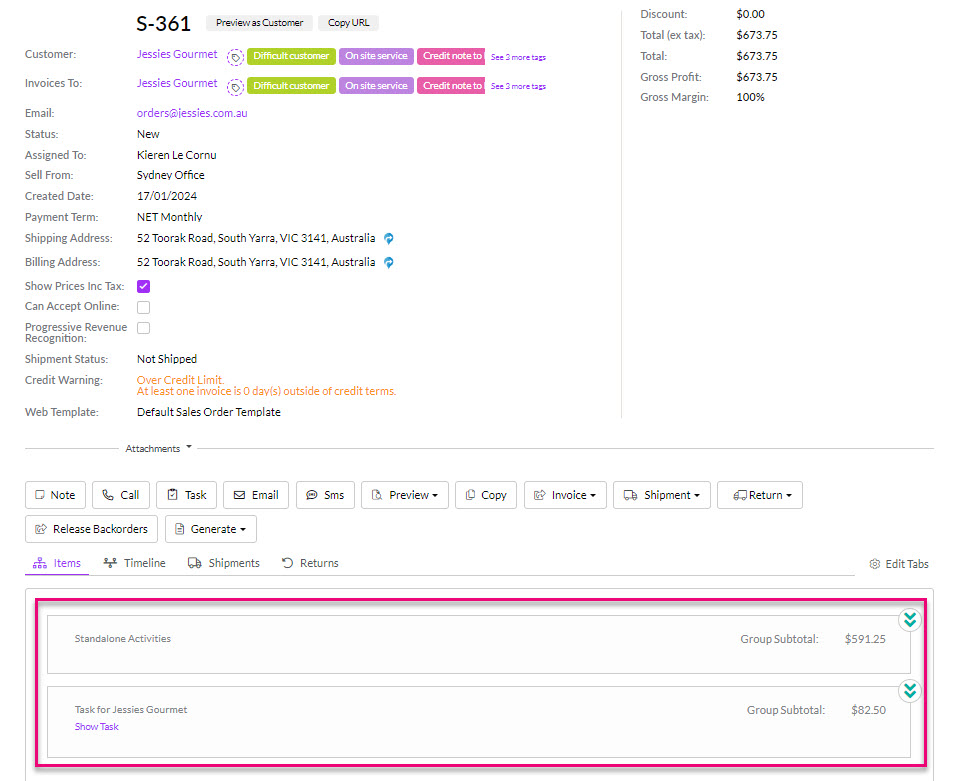
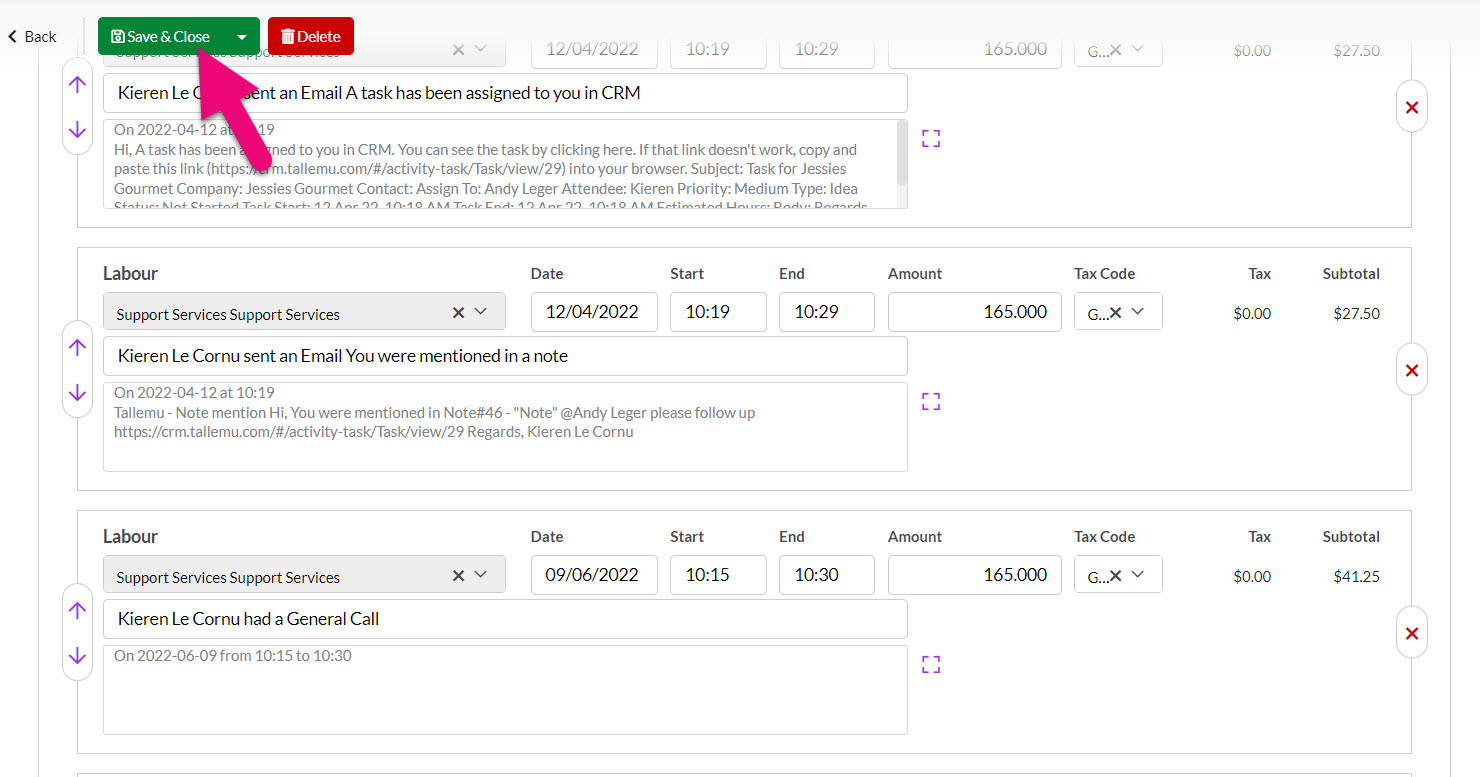
I can then expand the items on the order to see more detail about what is being billed – just click on the green arrows to expand or contract the list.
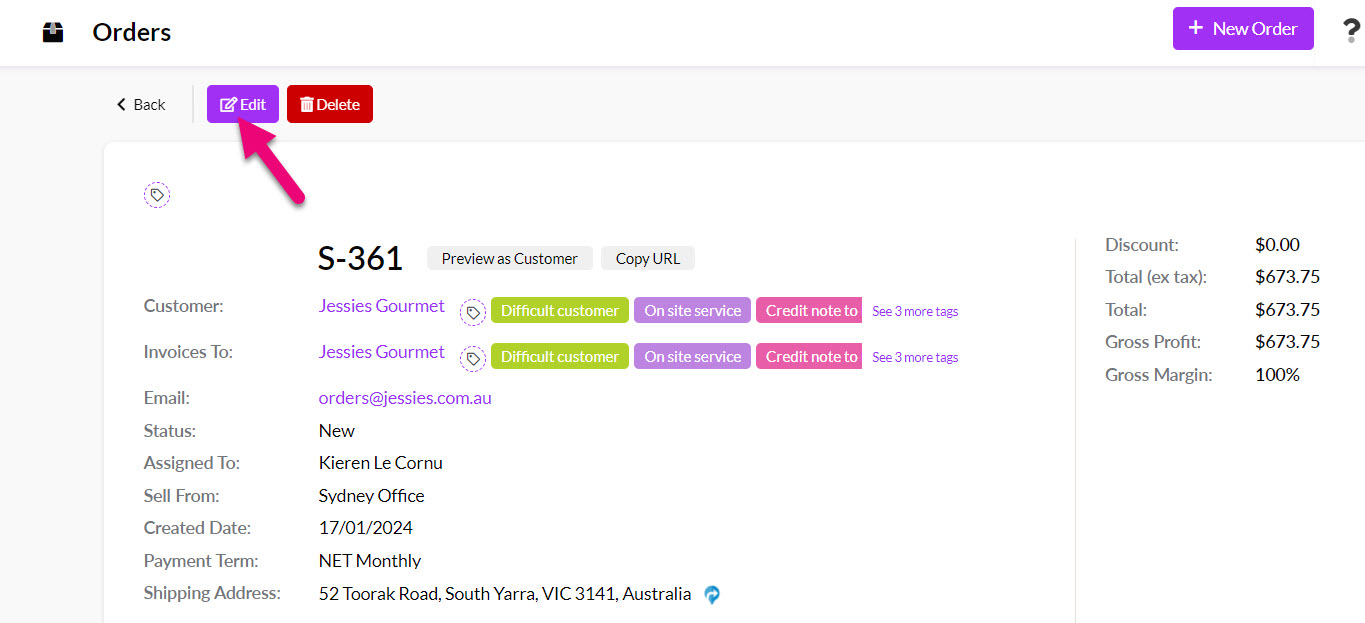
If you want to edit the items (to say override a charge), click Edit at the top of the record and make your adjustments then click Save & Close.
You can then remove items using the red “X” button.
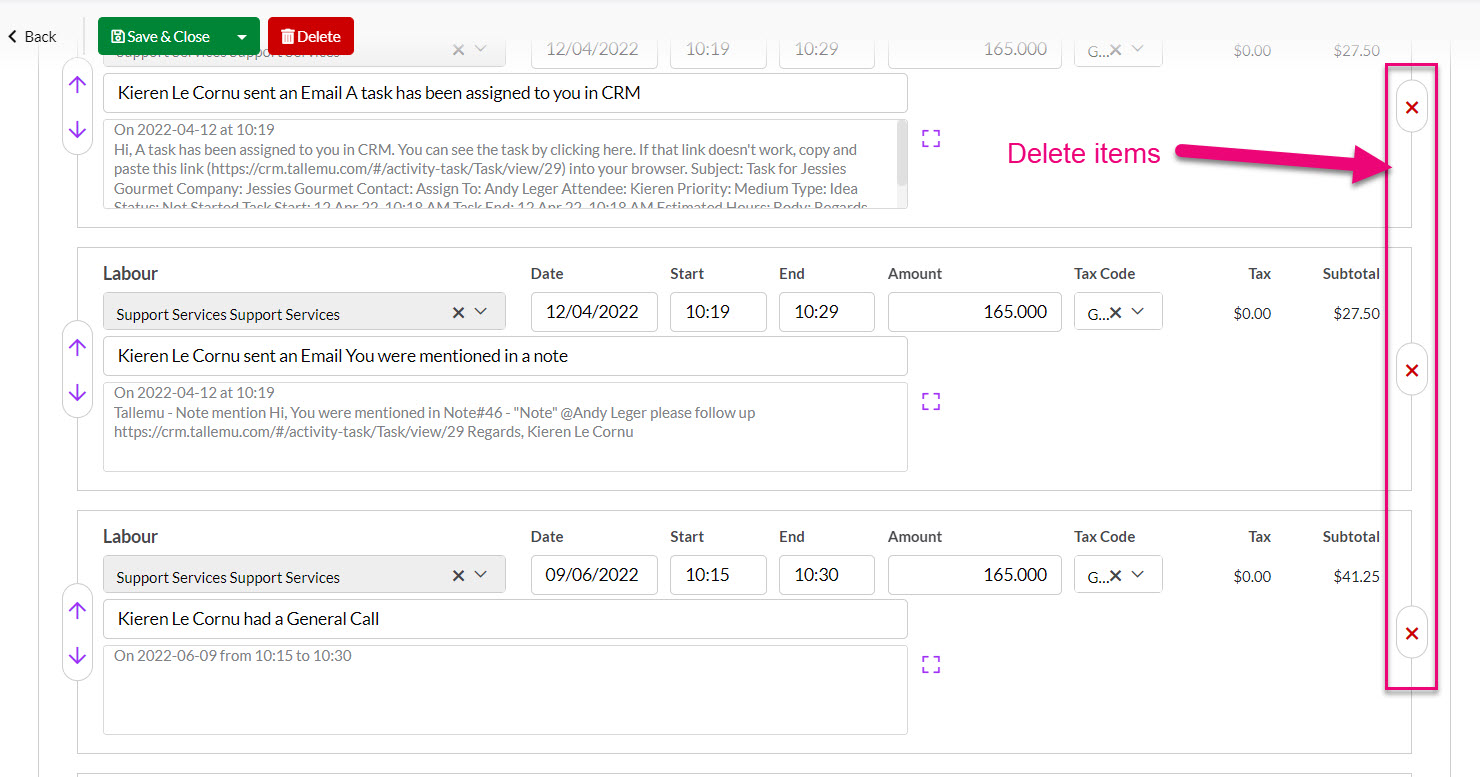
You can also edit the details of any item, including the price and quantity.
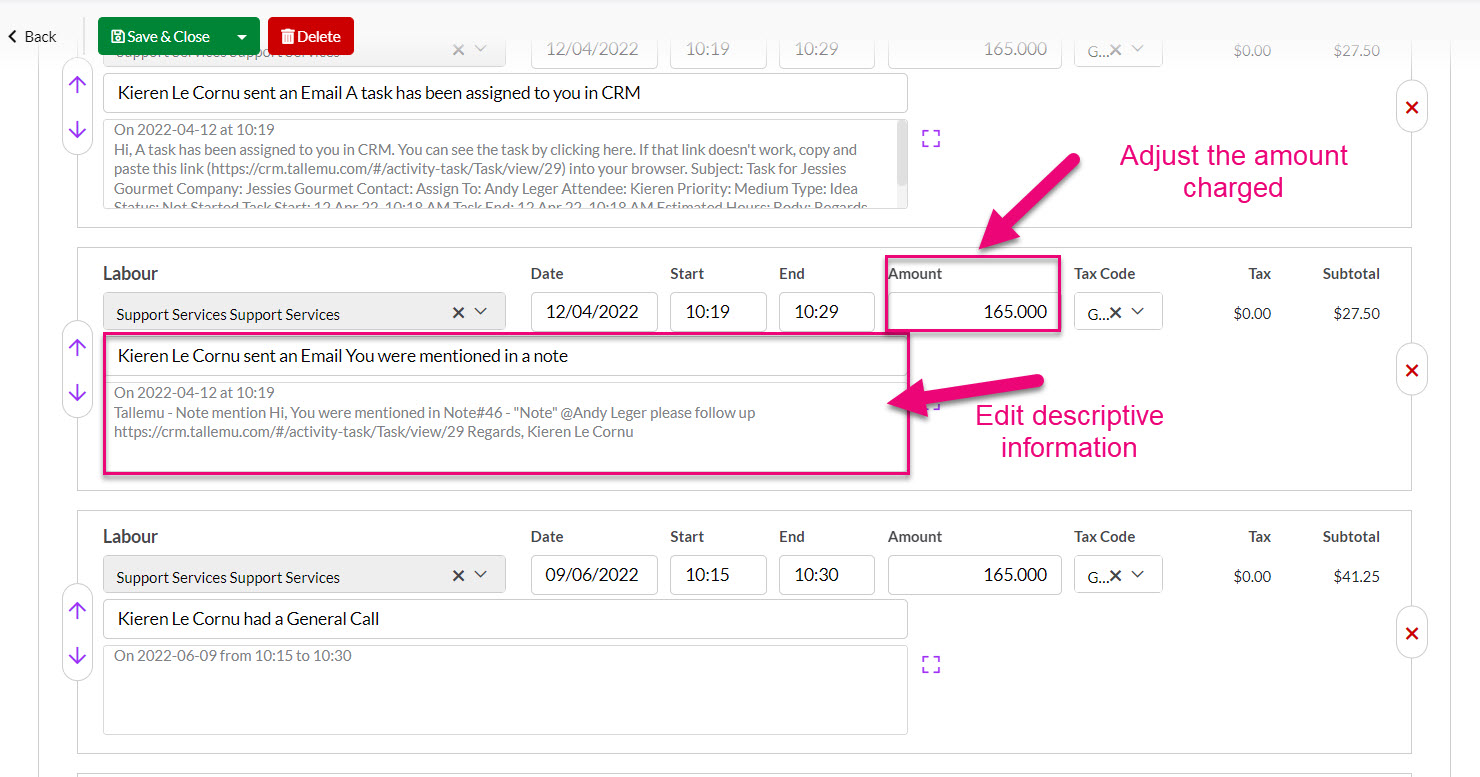
Then click on Save & Close to apply the changes.
You can then convert the Sales Order to an Invoice by clicking on Invoice > Convert To Invoice.

For further information, see our guide on Sales Orders.