- Companies
-
- Inventory
- Multi-currency for Purchasing
- Backorders
- Bay Locations
- Features
- Stock Tracking
- System Products
- Accounting details for Products
- Deactivating Products
- Products in Portal
- Suppliers
- Supplier Pricing
- Suppliers & Products
- Products
- Stock Transfers
- Barcodes
- Product Inventory Details
- Importing & exporting Product data
- Virtual Products
- Stock Adjustments
- Purchase Orders
- Enable or disable Stock-Tracking
- Training Products
- Units of Measure (UoM)
- Freight Products
- Working with Landed Costs
- Configuring Product Settings
- Stock Locations
- Stocktakes
- Product Batches
- Serial Numbers
- Different Price Types
- Purchase Orders
- Managing Stock
- Configurable Products
- Variable Products
- Time Billing
- Manufacturers and Suppliers
- FROM Location-based pricing
- TO Location-based pricing
- Requests For Quote
- Time Products
- Quantity-Based Price Breaks
- RFQ Web Templates
- PO Web Templates
- Location-based Price Breaks
- Customer-Specific Pricing
- Deleting Special Prices
Customer-Specific Pricing
Customer specific pricing lets you to assign special prices for certain products that you sell to a customer. It’s simple and effective – dramatically cutting down on admin.
You can add pricing from:
- A customer record i.e. Company or Contact, either individually or in bulk.
- A Product record, either individually or in bulk.
- In bulk from the main Product screen.
When adding pricing, you can add the following types:
- Quantity breaks.
- Location-based pricing.
- Date ranges i.e. a start and end date for a price to apply, after which time it will cease. For example, I could have a special that ran EOFY from 1st of June to 30th of June and then the price would automatically return to normal on 1st July.
- Discounts that are based on either:
- Dollars $ – add or subtract a dollar amount from the base price.
- Percent % – add or subtract a percentage amount from the base price.
- Substitute – manually enter in a discounted price in dollars $.
See also:
Add prices individually
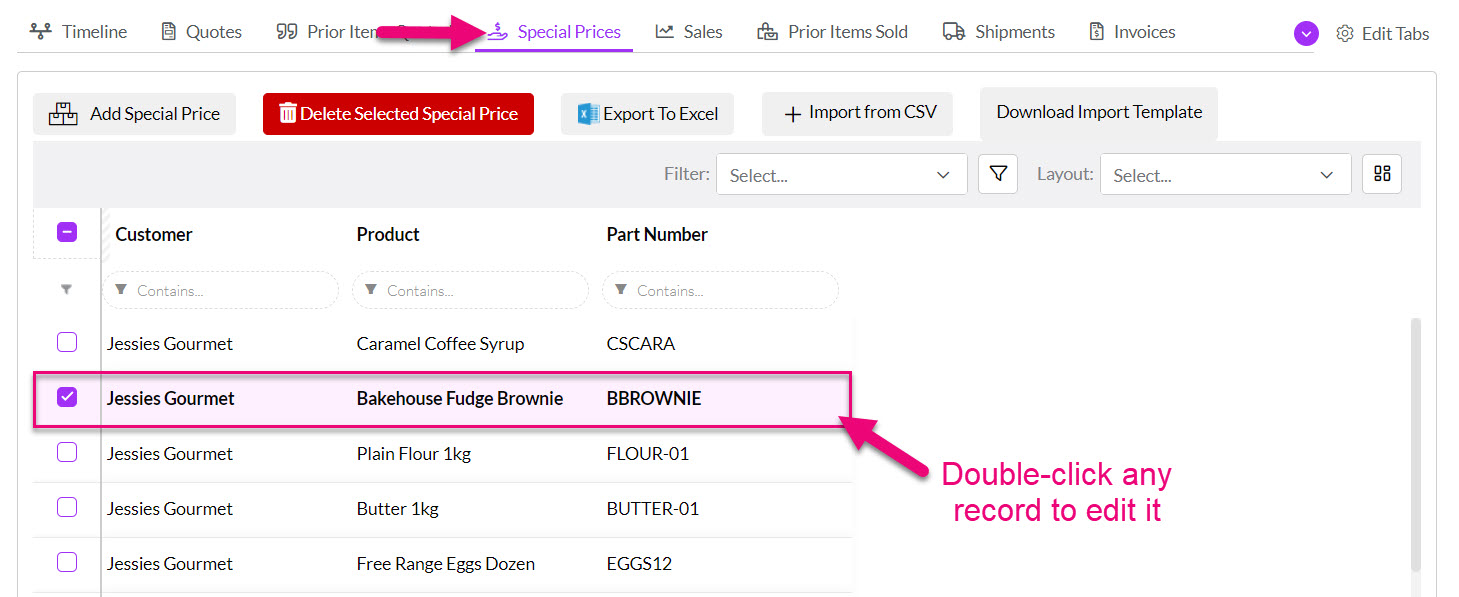
- From Companies or Contacts open any customer record and go to the Special Prices tab.
If you cannot see this tab, it may be hidden, and you need to edit the record tabs to make it visible.
- Click on the Add Special Price button.


- A window will then display that allows you to select the Product you would like to enter the pricing for.

- Select as many Products as you require from the list and click on OK to proceed.
- The Products will then show in a list on the Special Prices tab.

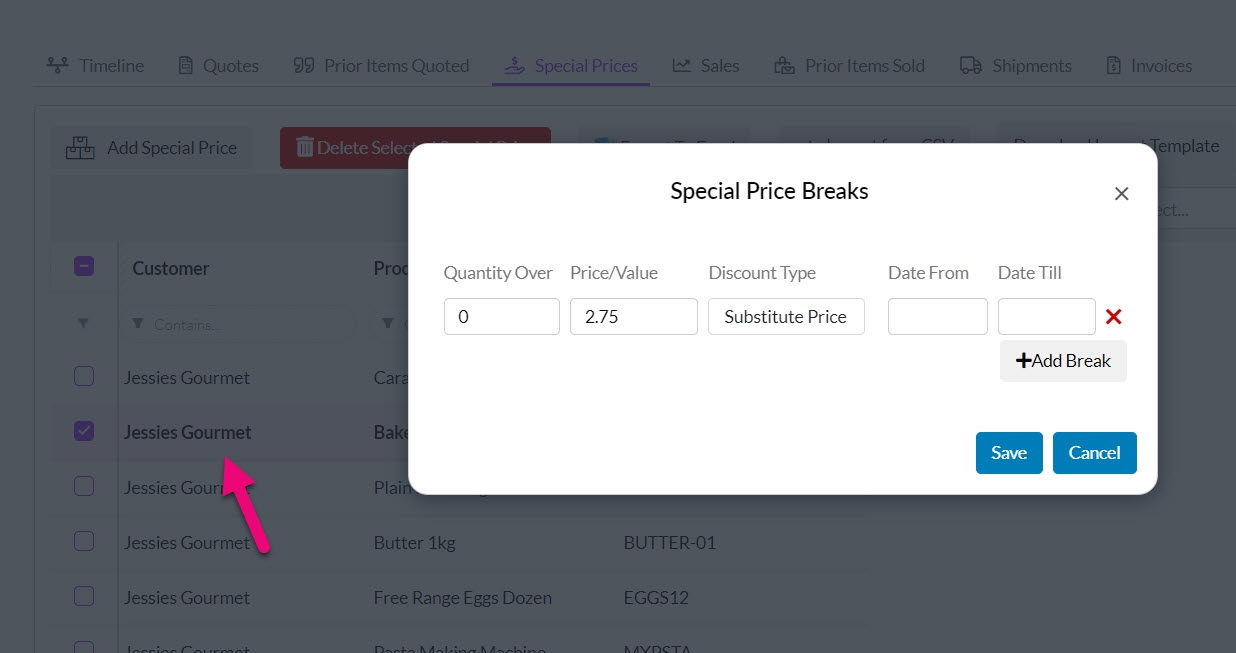
- Click on any Product to open a window to configure pricing.
- From this screen you can set up quantity breaks and also date ranges on prices for a Product.
- When you are finished, click on Save to apply the changes.
Add prices in bulk
- From Companies or Contacts open any customer record and go to the Special Prices tab.
- Click on Download Import Template.
- The template download will automatically start (if it doesn’t your browser may be blocking the download).

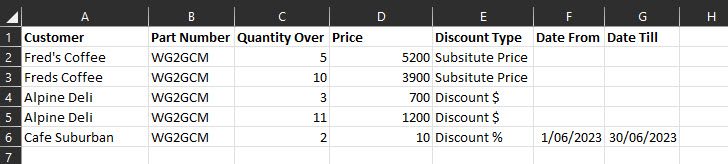
Following is a sample of price import CSV using several different methods – providing a Discount $, a Discount % and manually entering in a discounted price (Substitute Price), all using Quantity Breaks.
The last price for “Cafe Suburban” also includes a date range when the price will apply.
You can download a copy of the example file by clicking here.
-
- When you are ready to import, you can click on Import from CSV to open the importer.
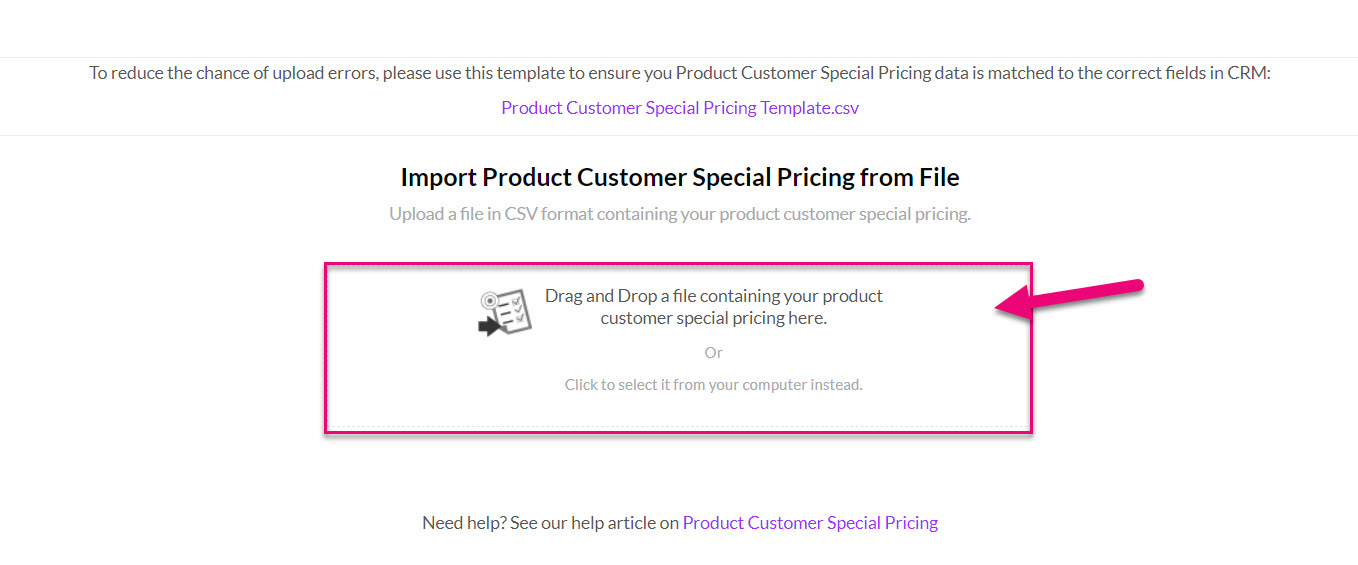
- Then drag & drop or select your CSV file.
- When you are ready to start the import, click on Upload.

- Once the import has been completed, a confirmation message will show, and you can click on Done to exit.

- You can then go and click on a Product to see the updated pricing.
Exporting prices for a customer
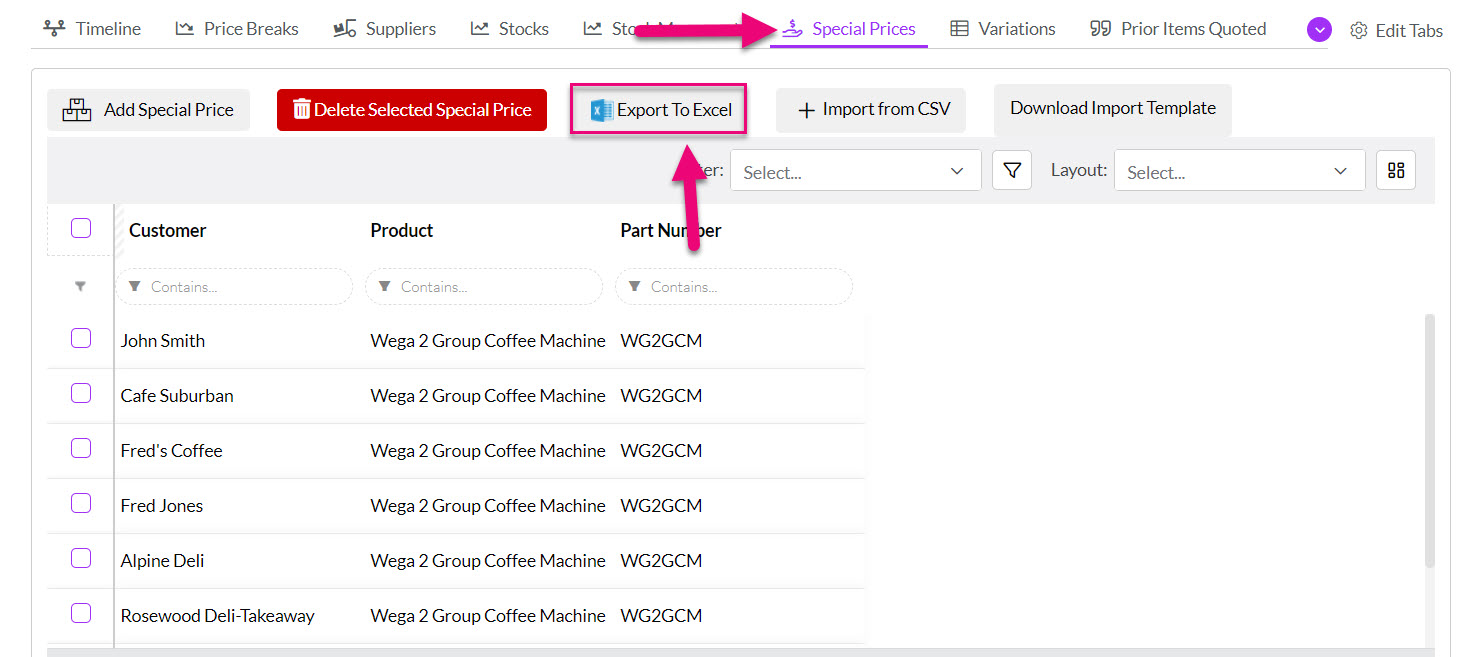
- From Companies or Contacts open any customer record and go to the Special Prices tab.
- Click on the Export To Excel button and a download will automatically start (if it doesn’t, your browser may be blocking the download).
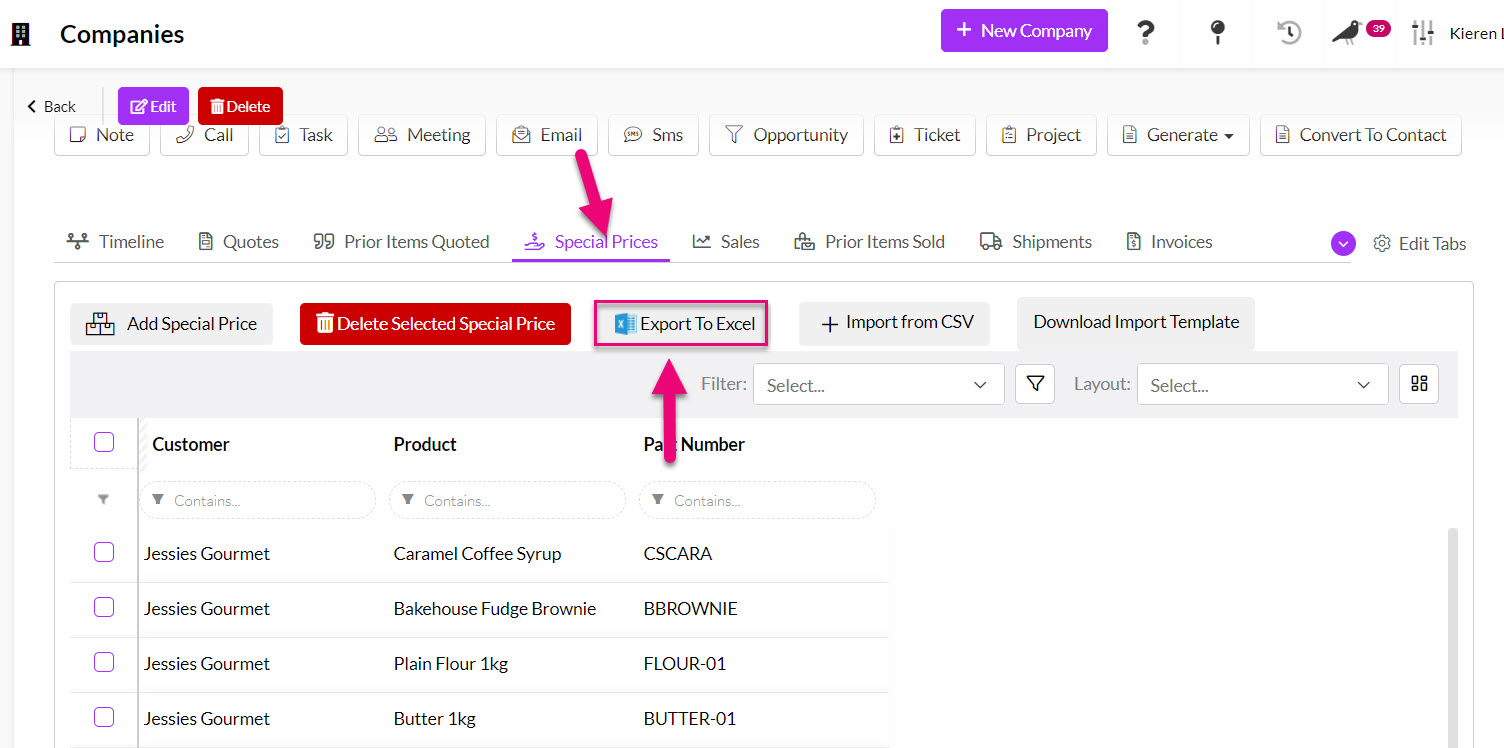
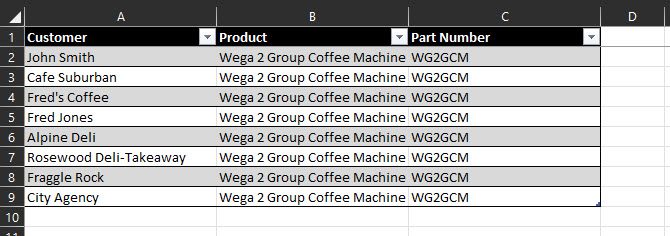
- Following is an example of exported customer price data from a customer.

Add prices individually
- From Inventory > Products, open any Product record and go to the Special Prices tab.
If you cannot see this tab, it may be hidden, and you need to edit the record tabs to make it visible.

- Click on the Add Special Price button.

- A window will then display that allows you to select the customer you would like to enter the pricing for.

- Select as many customers as you require from the list and click on OK to proceed.
- The customers will then show in a list on the Special Prices tab.
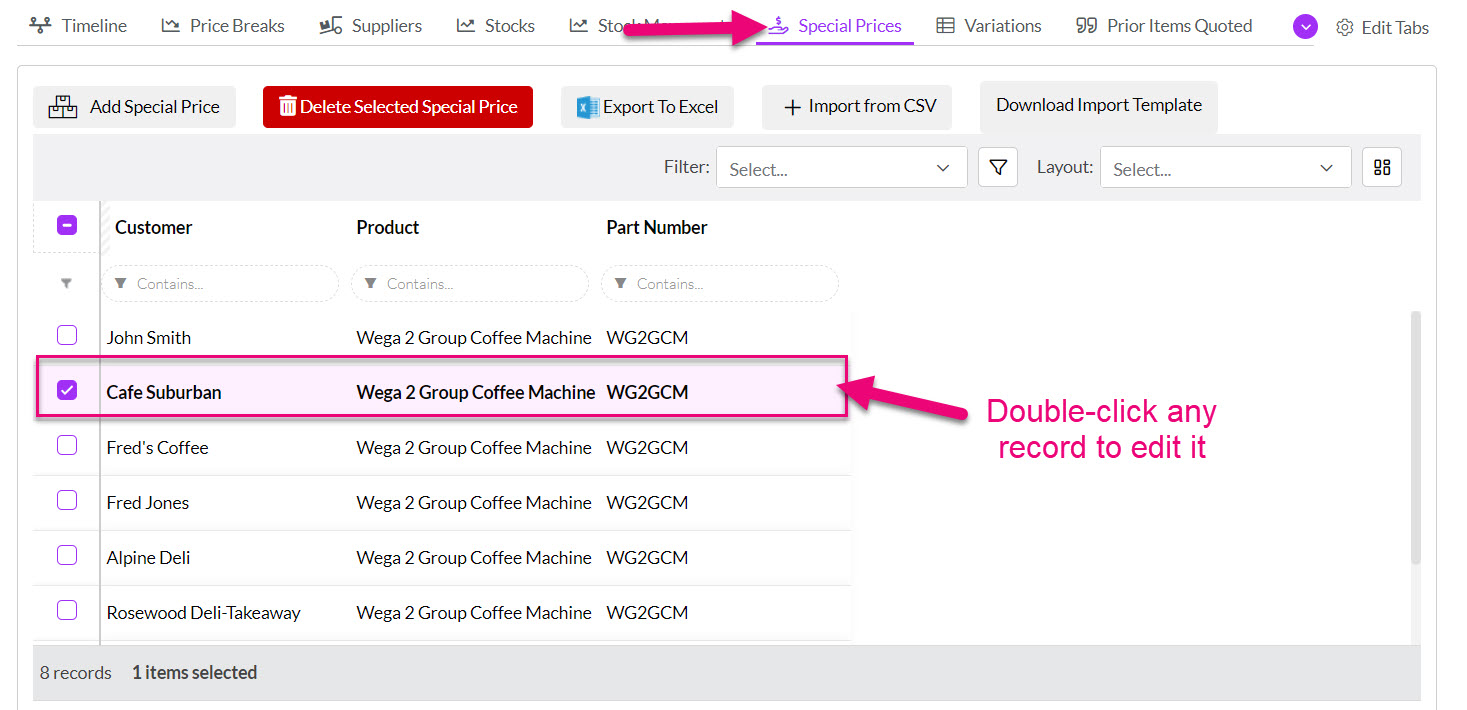
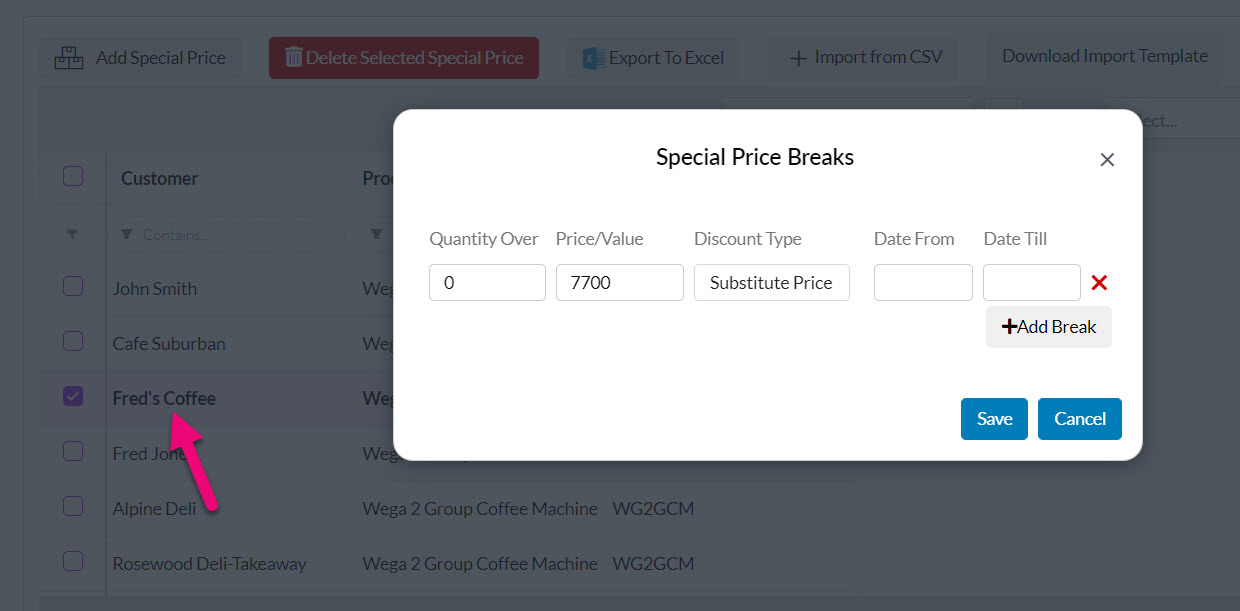
- Click on any customer to open a window to configure their pricing.

- From this screen you can set up quantity breaks and also date ranges on prices for a customer.
- When you are finished, click on Save to apply the changes.
Add prices in bulk
- From Inventory > Products, open any Product record and go to the Special Prices tab.
- Click on Download Import Template.
- The template download will automatically start (if it doesn’t your browser may be blocking the download).

Following is a sample of price import CSV using several different methods – providing a Discount $, a Discount % and manually entering in a discounted price (Substitute Price), all using Quantity Breaks.
The last price for “Cafe Suburban” also includes a date range when the price will apply.
You can download a copy of the example file by clicking here.
- When you are ready to import, you can click on Import from CSV to open the importer.
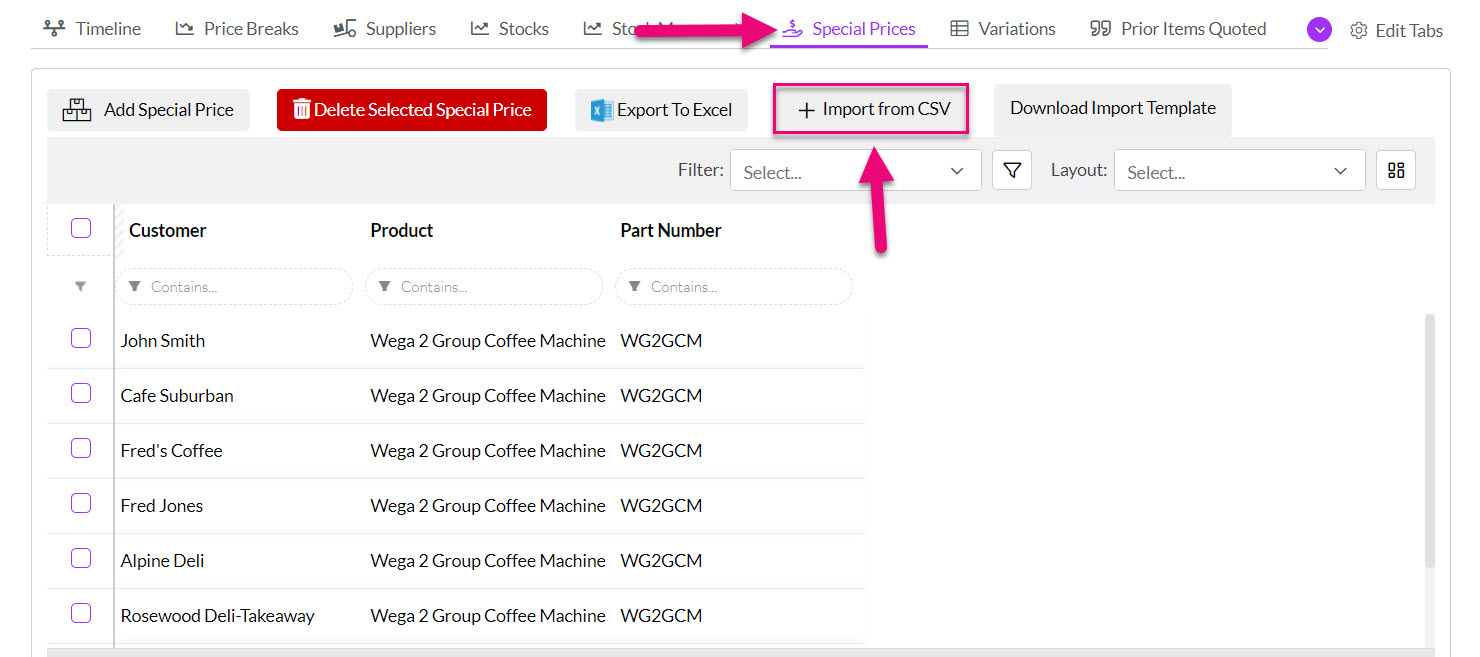
- Then drag & drop or select your CSV file.

- When you are ready to start the import, click on Upload.
- Once the import has been completed, a confirmation message will show, and you can click on Done to exit.
- You can then go and click on a customer to see their updated pricing.
Exporting prices for a customer
- From Inventory > Products, open any Product record and go to the Special Prices tab.
- Click on the Export To Excel button and a download will automatically start (if it doesn’t, your browser may be blocking the download).
- Following is an example of exported customer price data from a Product.
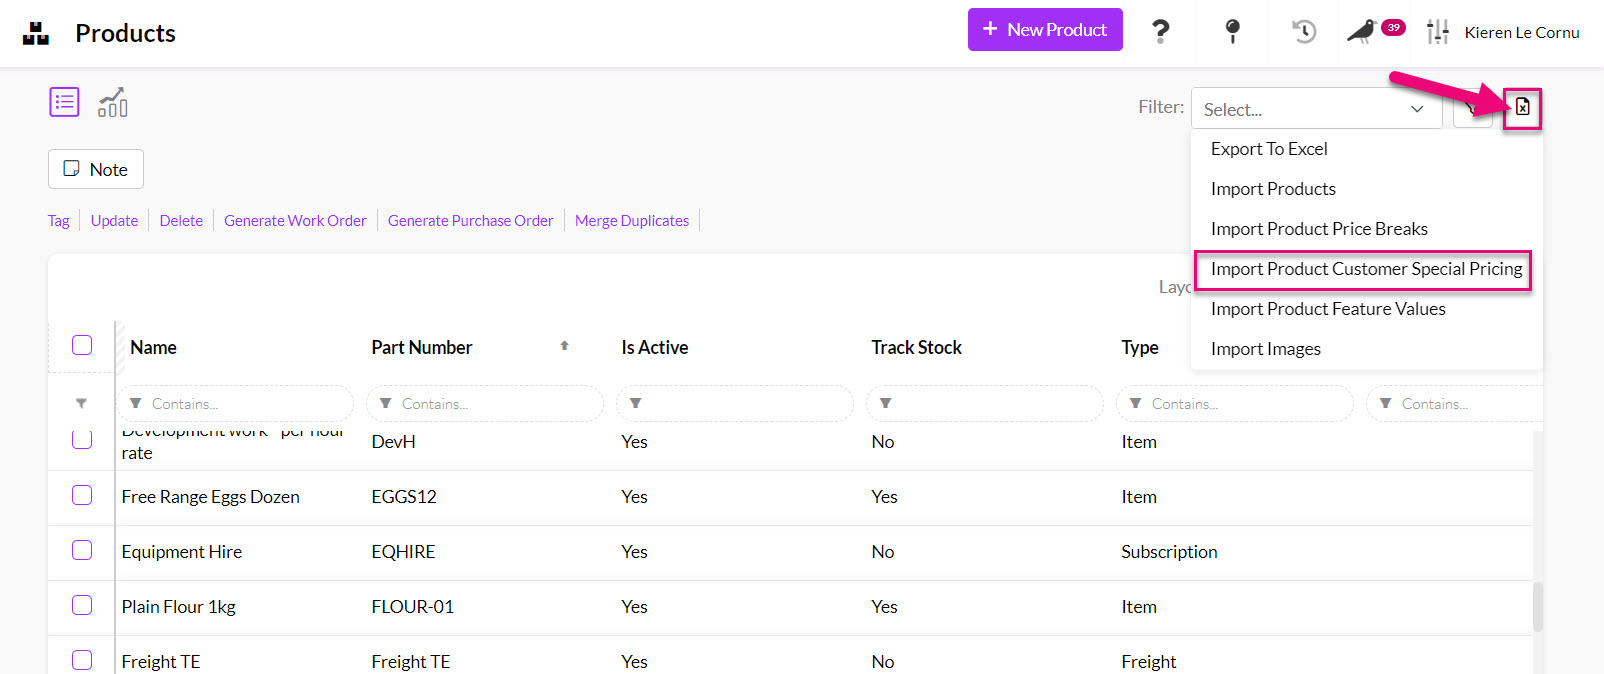
From Inventory > Products you can import prices for many Products and customers at once.
- You will need to download the import template first and add your data to it.
- In the top right-hand corner of CRM, click on the Excel icon and select Import Customer Price Breaks.
- You can download a copy of the import template here using the link.
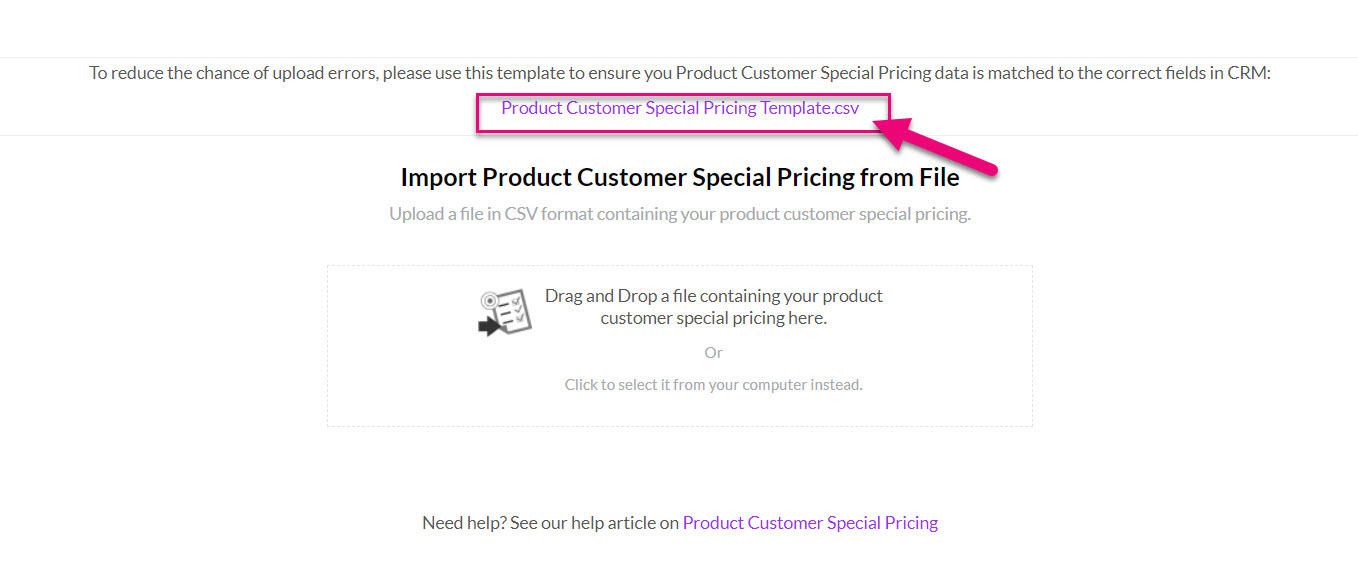
- You can then to drag & drop your completed file here or select it.
- You can then click on Upload when you are ready to start the import.
- When the import is finished, a completion message will show, and you can click on Done to exit the screen.
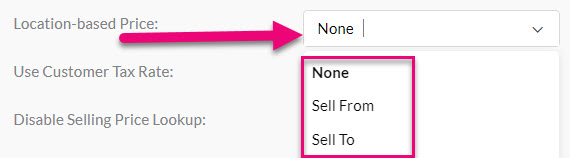
You first have to have enabled the setting for Location-Based pricing in your database, from Admin > General > Pricing > Location-based Price.
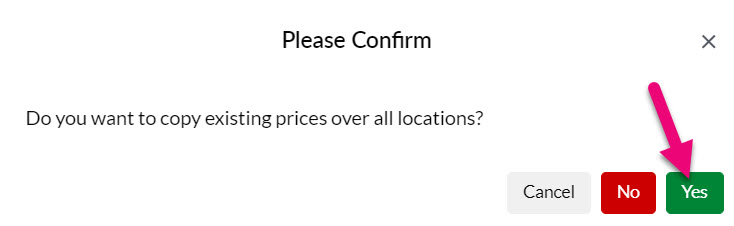
Then from a customer or Product record, when you go to add pricing, you will have an additional option to do so for different Locations – just de-select the Same Price For All Locations option.

- Then confirm that you want to copy over prices to all Locations.
- You can then expand/contract each Location to add pricing.

Then just hit Save and your pricing will update automatically during Quote, Invoice and Sales Order generation.