- Companies
-
- Inventory
- Multi-currency for Purchasing
- Backorders
- Bay Locations
- Features
- Stock Tracking
- System Products
- Accounting details for Products
- Deactivating Products
- Products in Portal
- Suppliers
- Supplier Pricing
- Suppliers & Products
- Products
- Stock Transfers
- Barcodes
- Product Inventory Details
- Importing & exporting Product data
- Virtual Products
- Stock Adjustments
- Purchase Orders
- Enable or disable Stock-Tracking
- Training Products
- Units of Measure (UoM)
- Freight Products
- Working with Landed Costs
- Configuring Product Settings
- Stock Locations
- Stocktakes
- Product Batches
- Serial Numbers
- Different Price Types
- Purchase Orders
- Managing Stock
- Configurable Products
- Variable Products
- Time Billing
- Manufacturers and Suppliers
- FROM Location-based pricing
- TO Location-based pricing
- Requests For Quote
- Time Products
- Quantity-Based Price Breaks
- RFQ Web Templates
- PO Web Templates
- Location-based Price Breaks
- Customer-Specific Pricing
- Deleting Special Prices
Creating Products
There are a number of different Types of Product you can create – click on the links to learn in more detail about each Type.
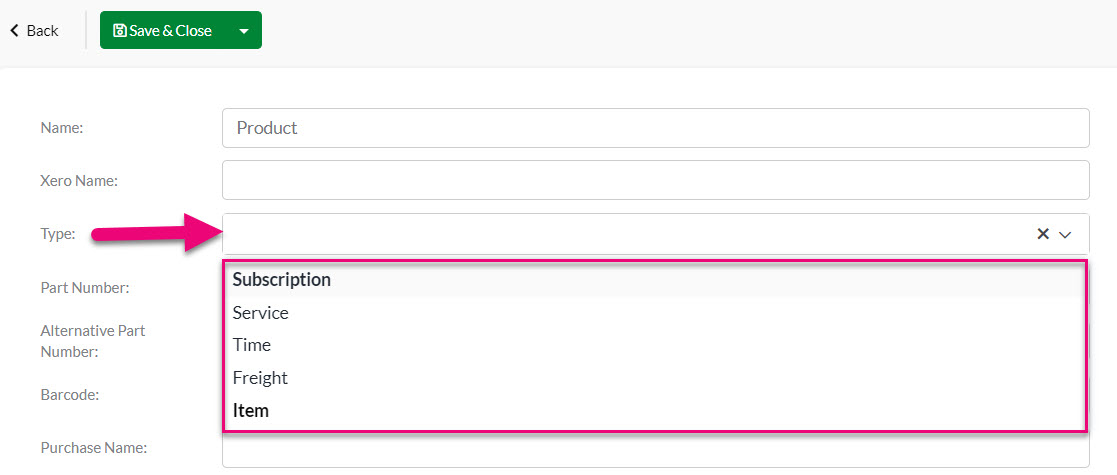
- Item: think of an Item as a general Product, which you can configure with a number of specific options.
- Time: allow you to be able to charge for labour or travel services based on a period of time i.e. hour, day, week, month, quarter or year.
- Service: equipped with a few additional fields for their intended purpose, this ‘Service’ specification adds a level of additional detail to general product records so they’re more suited to service and Job management.
- Subscription: allows you to manage your ongoing sales, whether they be subscriptions or donations, and automate regular customer payments.
- Freight: as MYOB and Xero treat freight differently to standard items in your inventory, CRM has the capability to add equivalent freight Products that can be added to your sales and purchases.
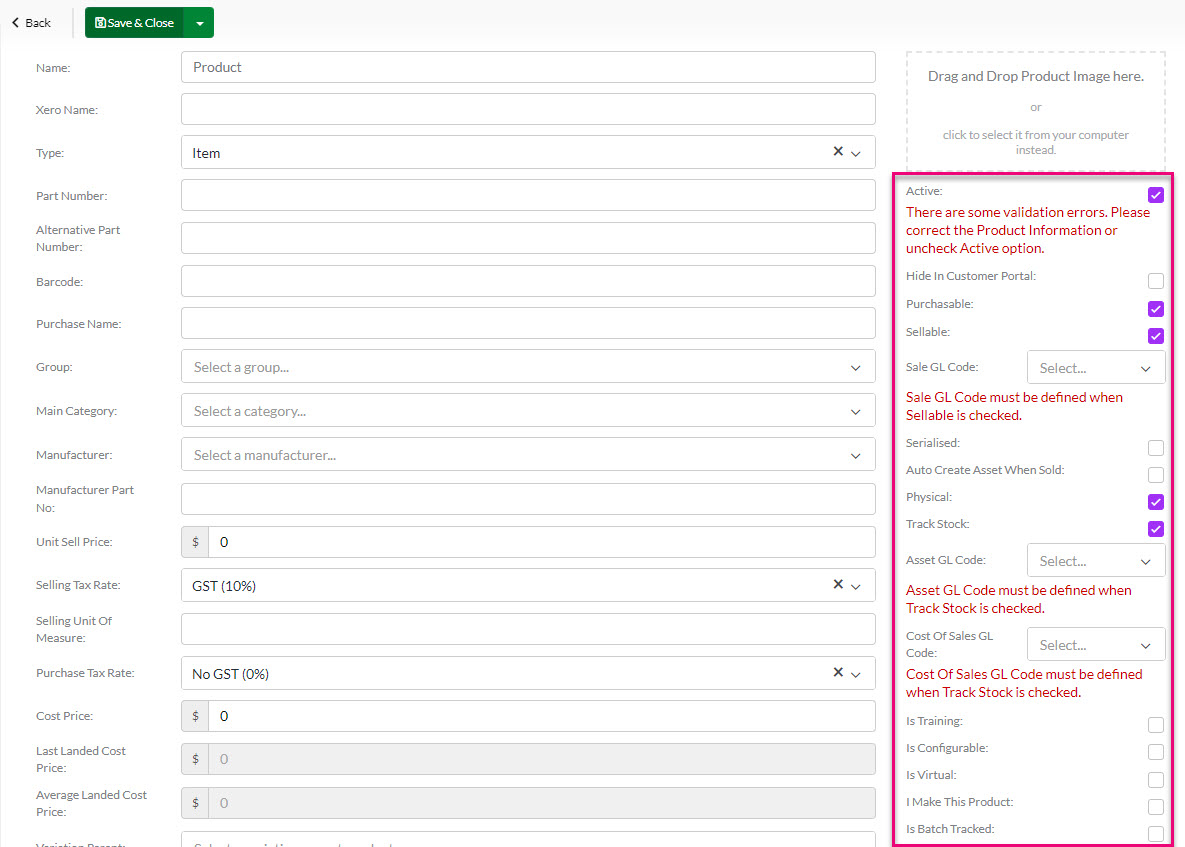
Depending on the type of Product you are creating, there are a number of different options and configurations you can apply, as follows.
The options that show here will vary, depending on how the Product is configured.
See also:
- CRM Product Guide
- Service Products
- Variable Products
- Configurable Products
- Subscription Products
- Time Products
- Stock-Tracked Products
- Time Billing Products
- Batch-tracked Products
- Serialised Products
- Manufactured Products
- Virtual Products
- Training Products
- System Products for Deposits & Freight
- To make a copy of an existing Product record, click the copy button.
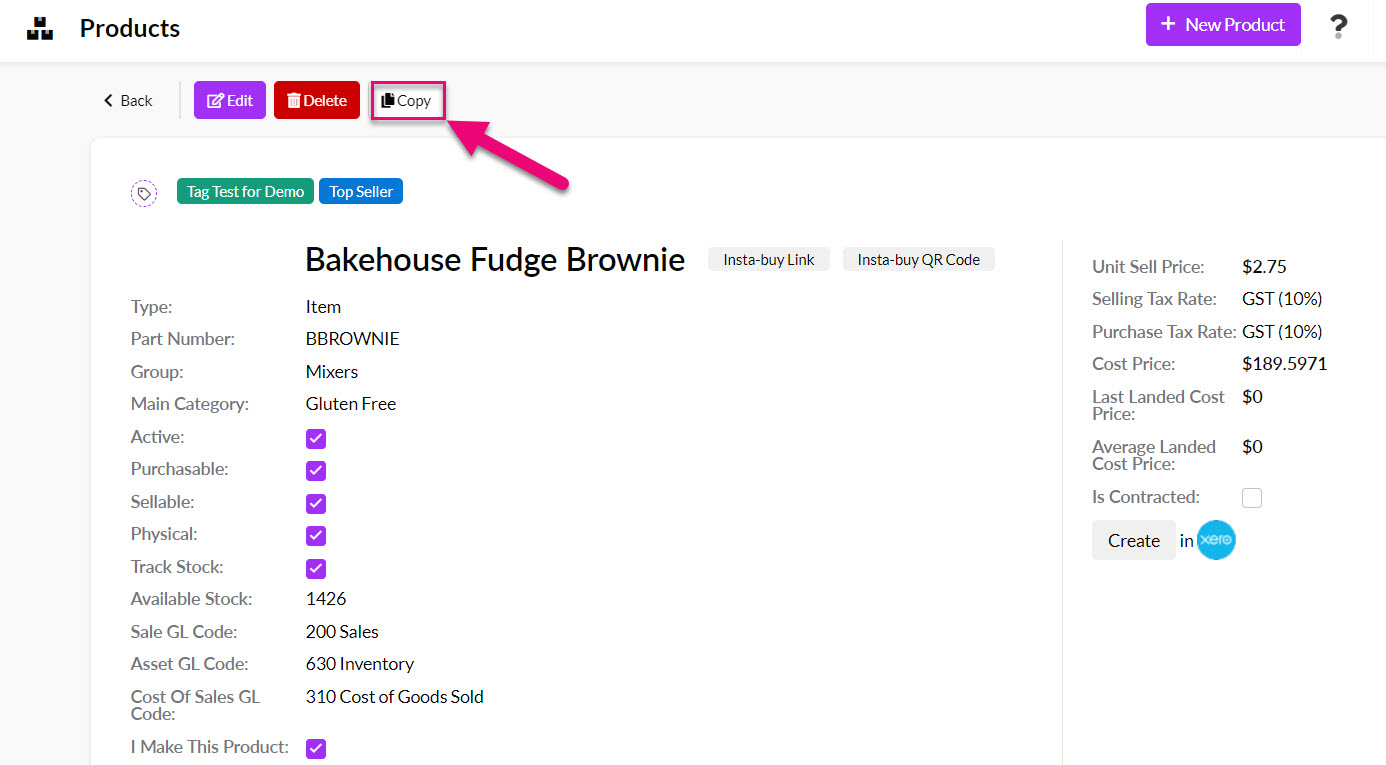
Once copy is selected, the system prompts for a new Part Number to be entered for the new Product (as this is unique).
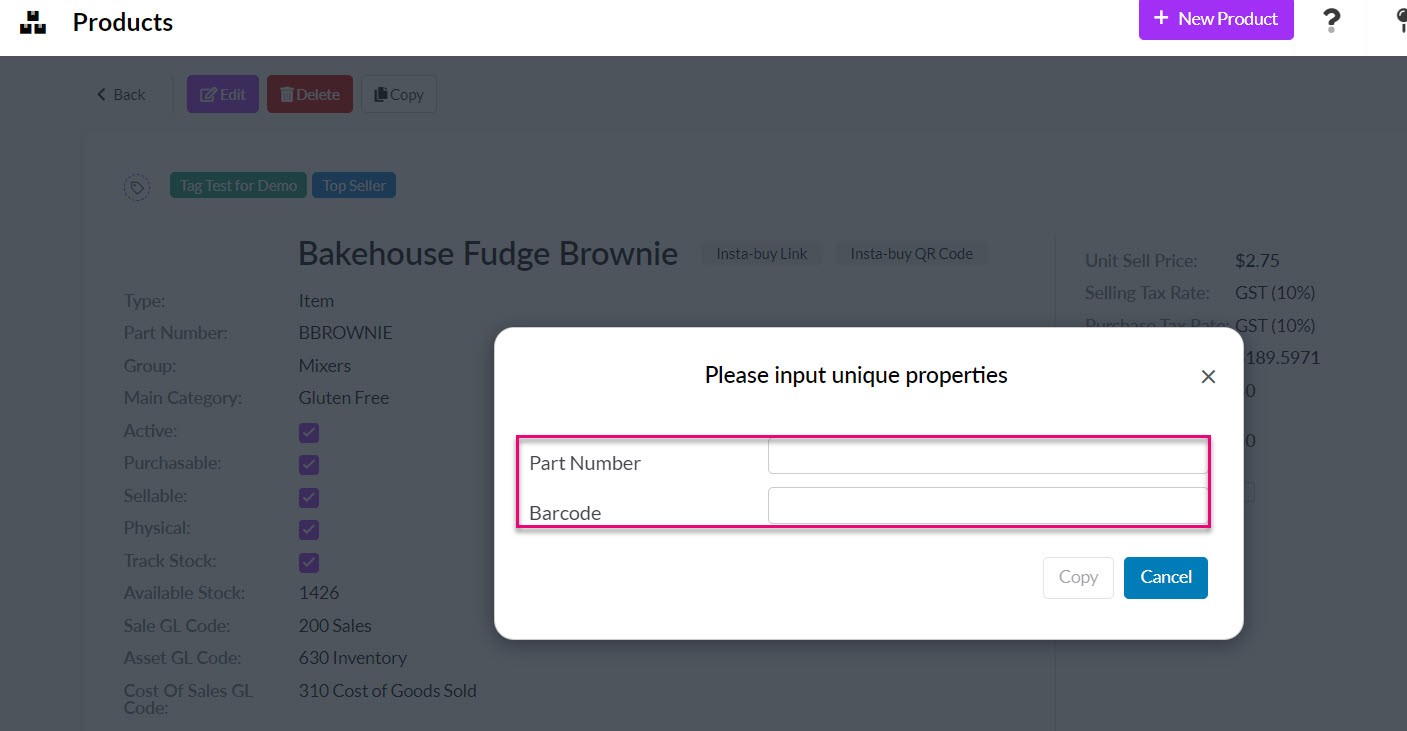
- A copy of the Product is then created with the new Part Number and the following information is transferred over along with the main item information:
- Price Breaks
- Suppliers
- Supplier Price Breaks
You can add images of your products to the record, either individually as you create Products, or in bulk.
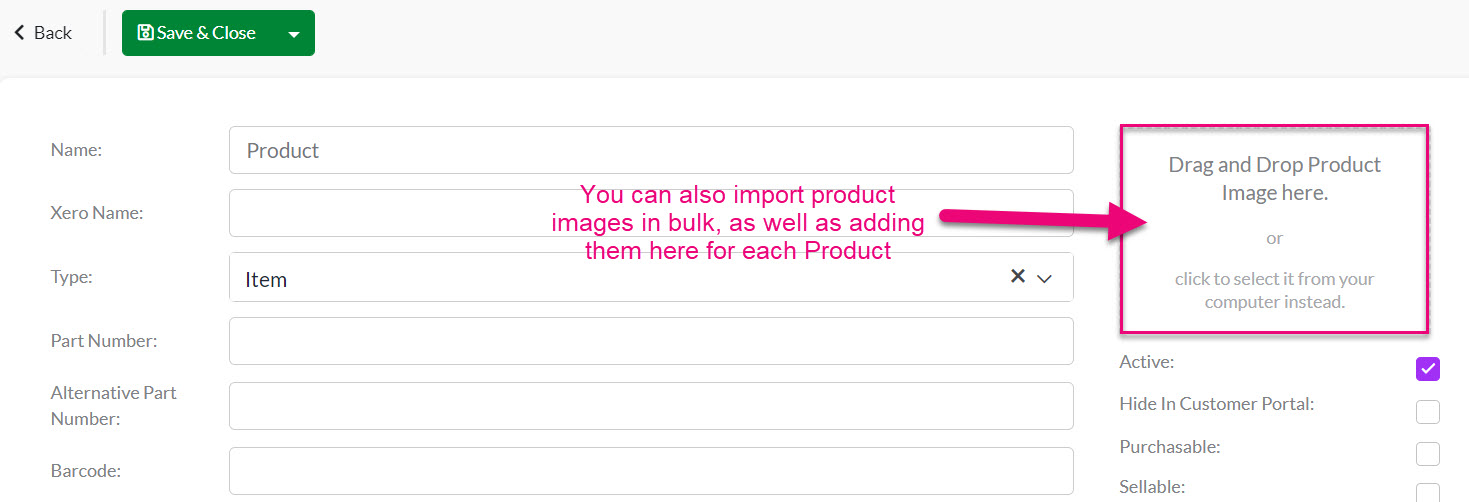
For more information, see importing product images in bulk.
Rather than deleting a Product along with its sales/purchase history, you can de-select the Active box so that it can no longer be sold or purchased.

You can then create Filters so that you can quickly differentiate from Active and Inactive Products.
CRM provides a Free Branded Customer Portal, allowing you to give your own customers a login to see the things online that are crucial to your relationship with them and allow them to place orders online (like a private Shopping Cart with their pricing).
Products will be visible in Customer Portal by default, but you can change this by selecting the Hide In Customer Portal box.

Click here to learn more about Customer Portal and how to configure your Portal.
You can check the Purchasable box to make the Product available for use with Requests For Quote, Purchase Orders or Supplier Bills.
Once you select this box, you need to enter in both a Purchase GL Code and Purchase Tax Rate before you can save the record (this information will be pulled across from your accounting system to select here).

Note that if a Product is not marked as Purchasable, you will not be able to add it to Requests For Quote, Purchase Orders or Supplier Bills.
You can check the Sellable box to make the Product available for use with Quotes, Sales Orders and Invoices.
Once you select this box, you need to enter in both a Sale GL Code and Selling Tax Rate before you can save the record (this information will be pulled across from your accounting system to select here).

Note that if a Product is not marked as Sellable, you will not be able to add it to Quotes, Sales Orders and Invoices.
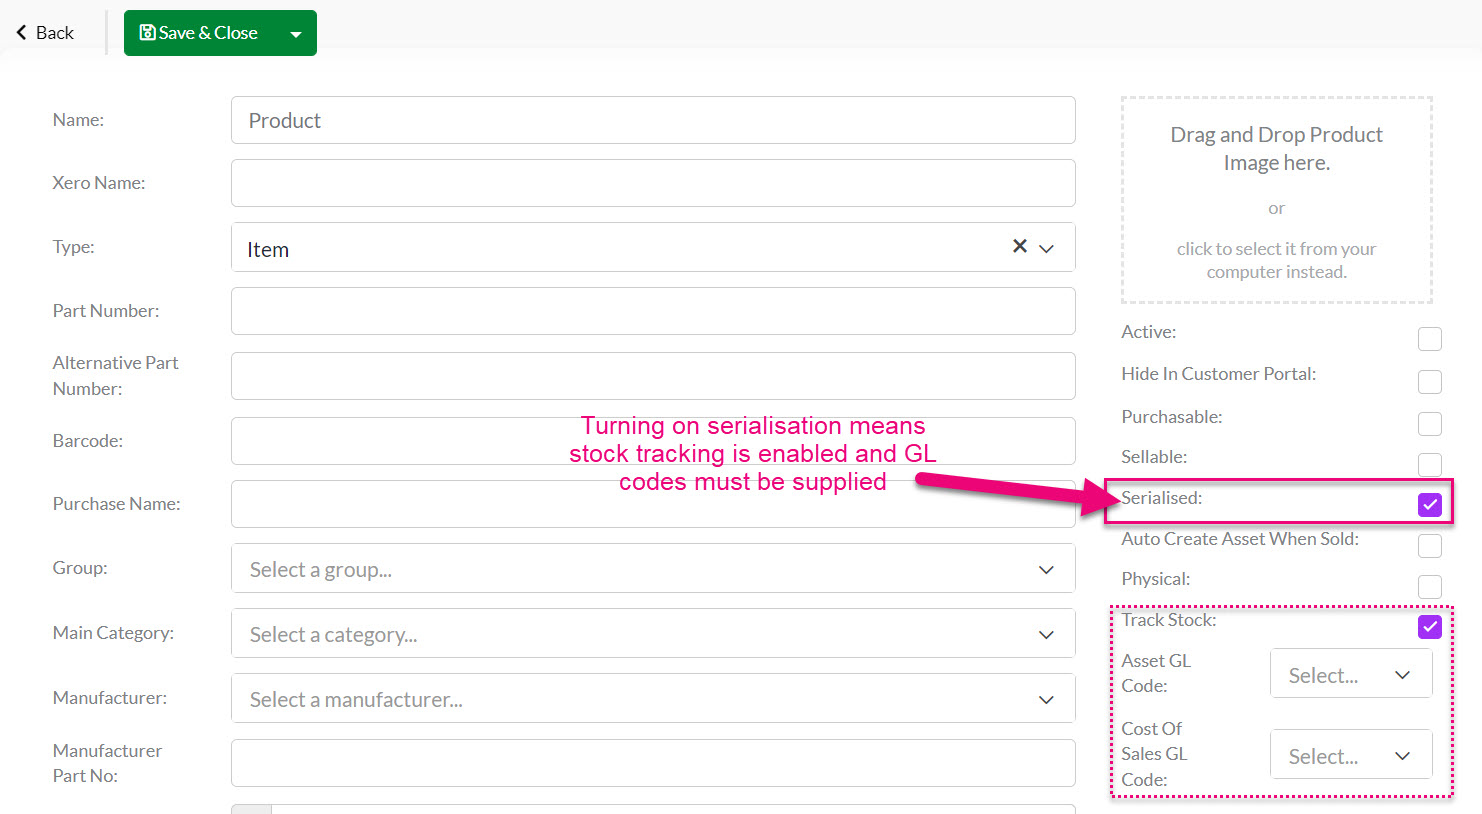
When you create a new Product, you can specify whether serial numbers are required by ticking the Serialised box – this enforces the creation and ongoing management of serial numbers for the Product. You can also update the Serialised field on existing Products when you edit them.
Click here to learn more about Serial Numbers.
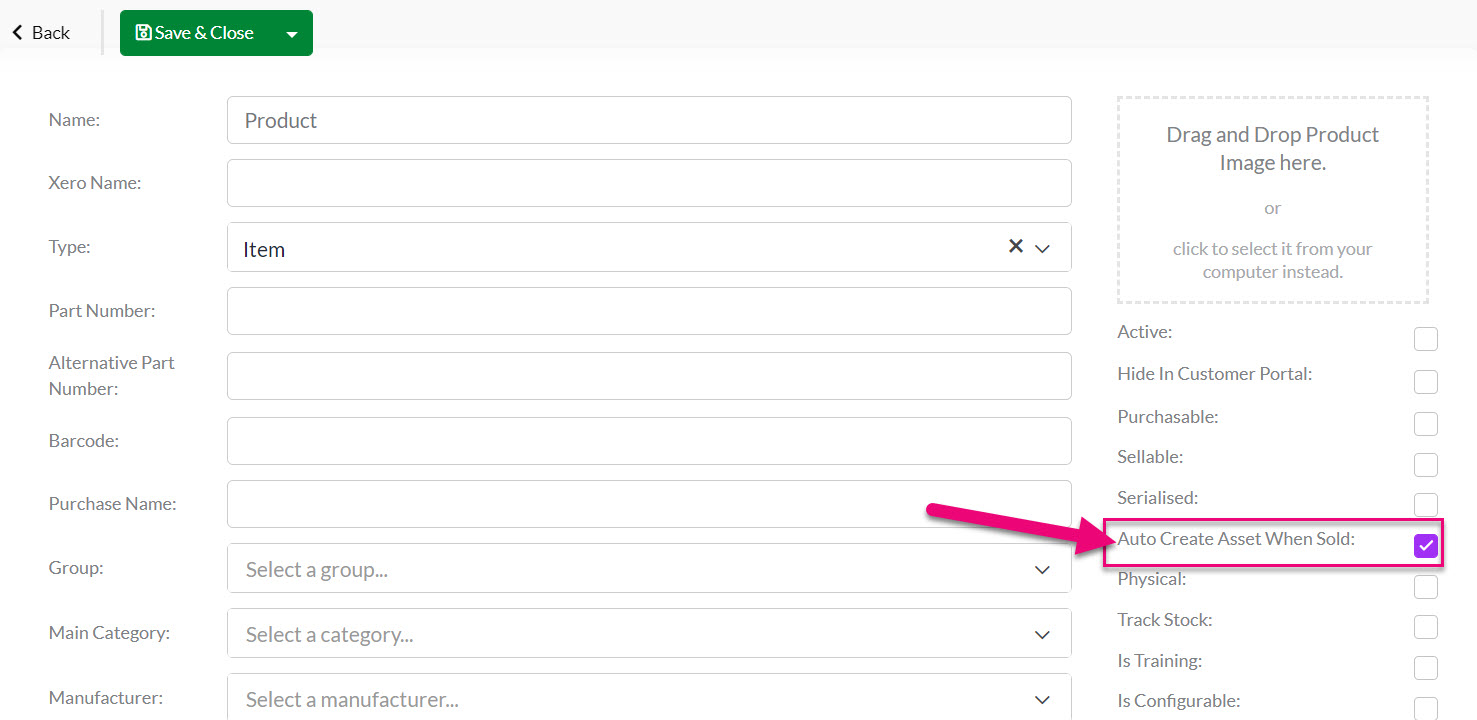
To enable the Asset auto-creation feature, you can open any Product record, put it into Edit mode and then ensure that the Auto Create Asset When Sold box is checked. Then click on Save & Close to apply the change.
You can quickly check which of your Products are set to automatically create Assets by adding the column for Auto Create Asset When Sold to your Layout and then searching for a “True” value in the column search.

At a system level you can also choose to have all of your Products or specific ones create Assets automatically. From Admin > General > Assets you can set your preferences for the system to automatically create Assets.
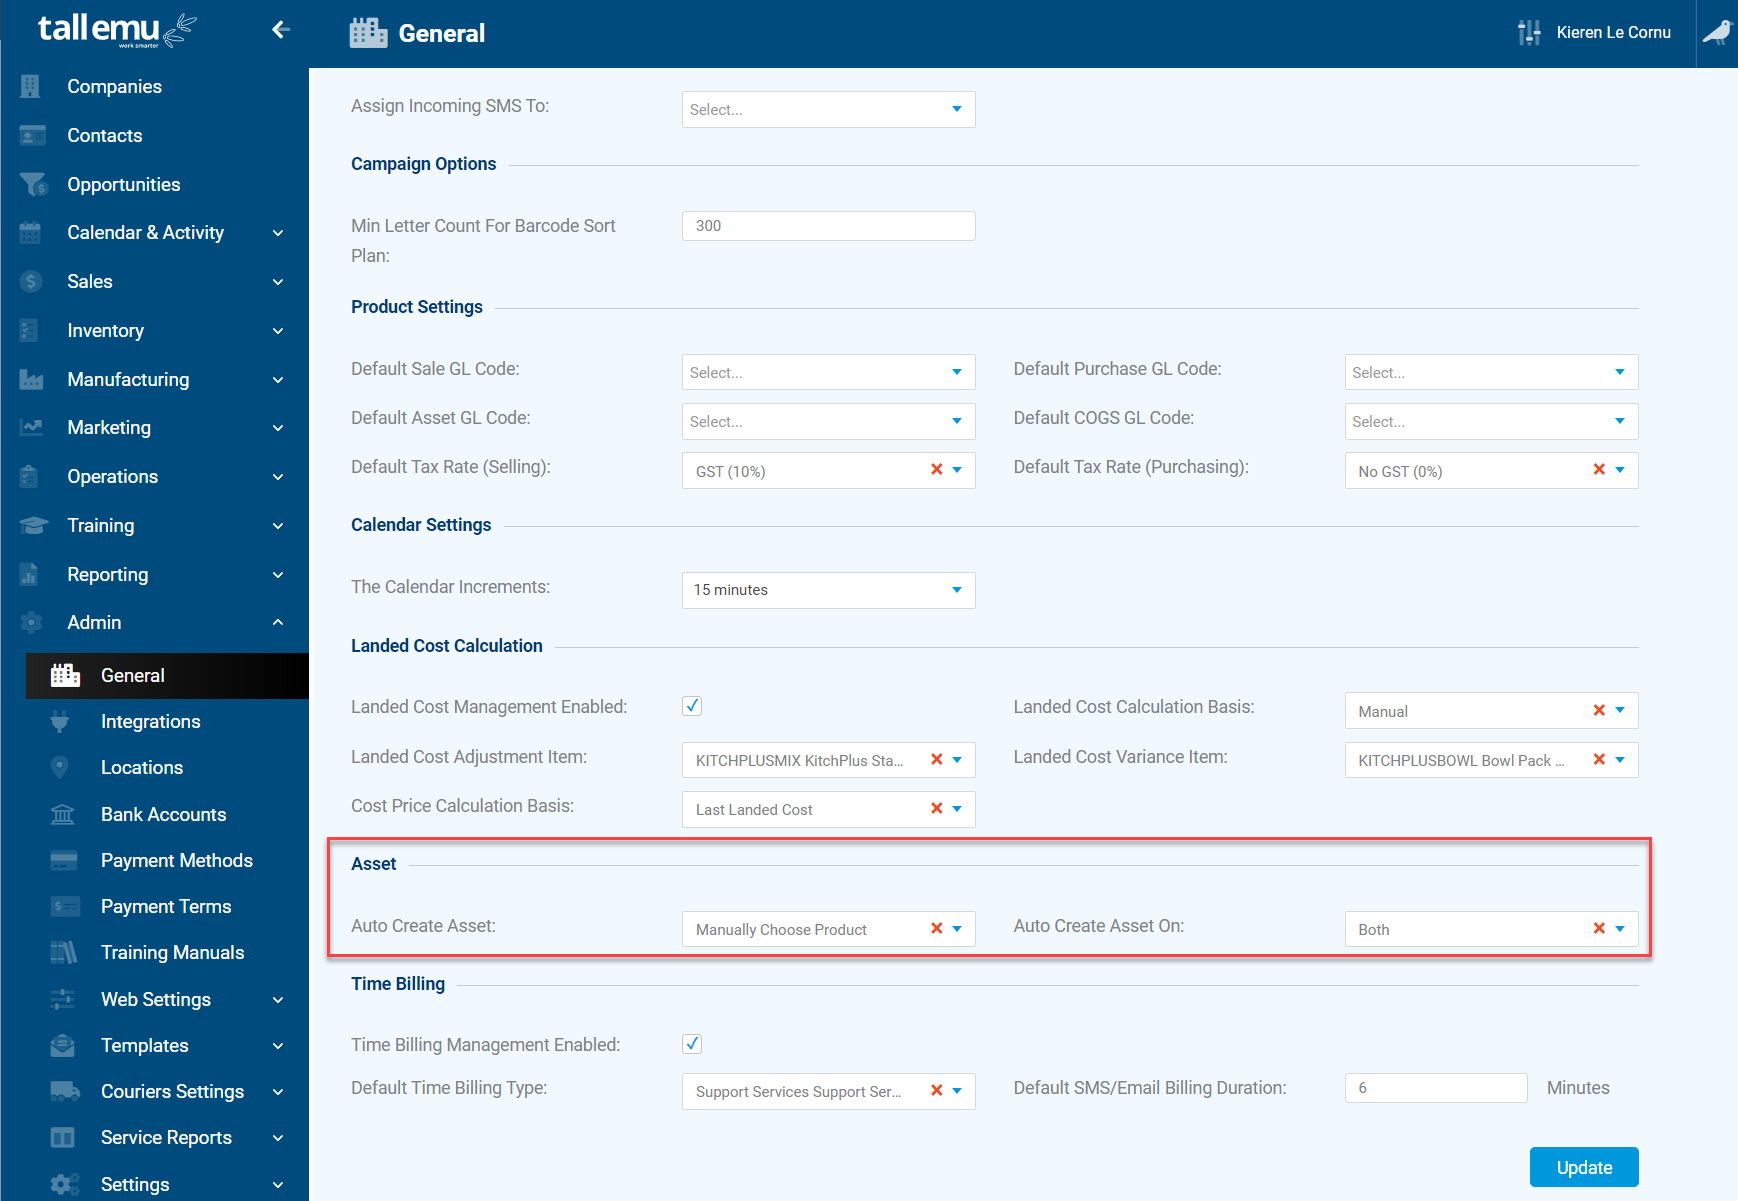
- Auto Create Asset – here you can choose which Products will auto-create Assets. You can Manually Choose Product, set it to happen on All Products or have it only apply to Serialised Products.
- Auto Create Asset On – here you can choose the trigger/s for creation from either Shipment, Invoice or Both.
Click here to learn more about Assets.
If you enable the Physical box, it means that the item can be included in both Inbound Shipments and Outbound Shipments.

If this option is not selected and you try to ship an item, you will receive an error message, (as per the following example) or you will be prevented from initiating a shipment as the system cannot detect and physical items i.e. if there’s nothing physical, there’s nothing to ship.

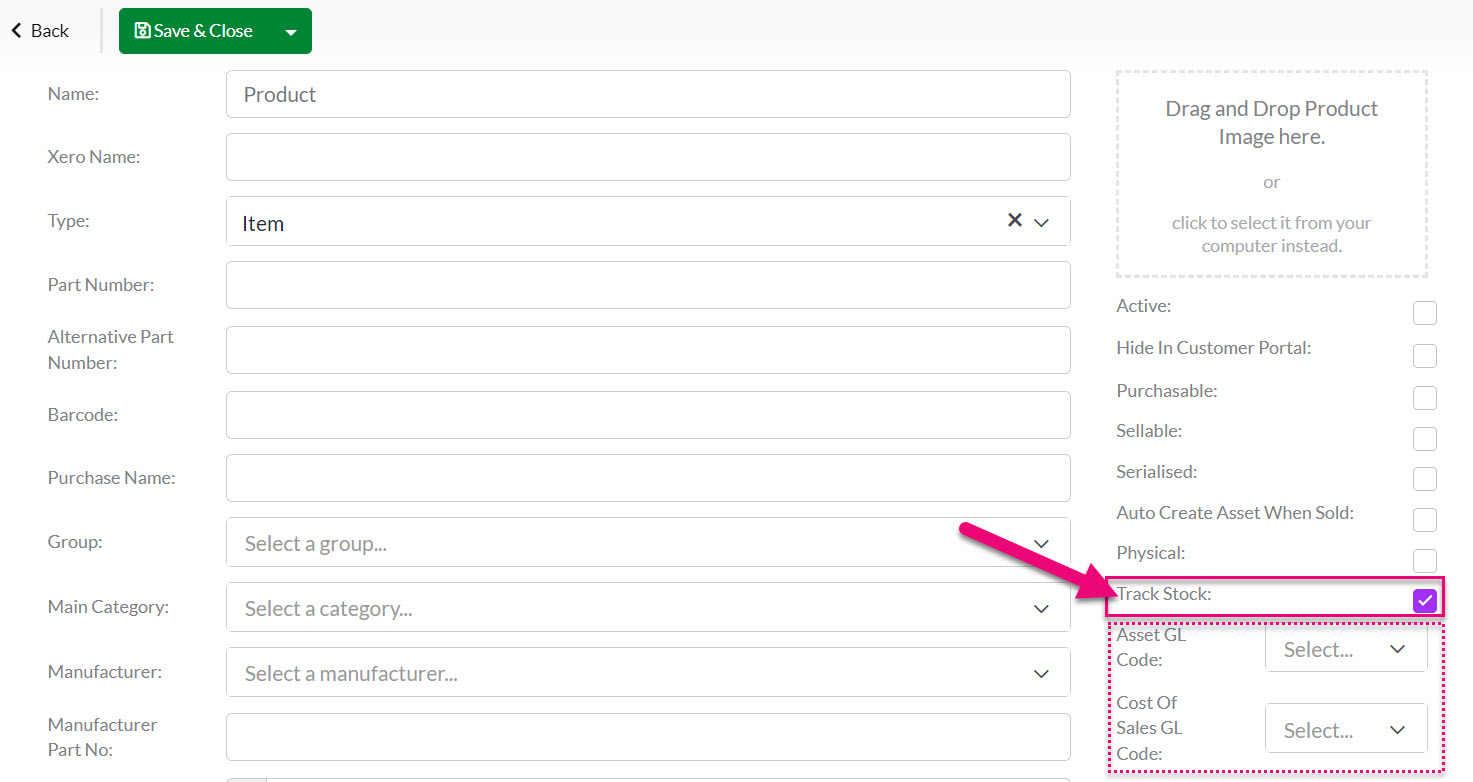
If you enable the Track Stock option on a Product, CRM will track all stock movements e.g. sales, purchase receipts, shipments, manufacturing stock consumption and creation etc.
When you select this box, you need to also provide an Asset GL Code and Cost of Sales GL Code (this information will be pulled across from your accounting system to select here). You can learn more about stock tracking and accounting here.
From Inventory > Stocks you can then see a current picture of your levels for all stock tracked Products.
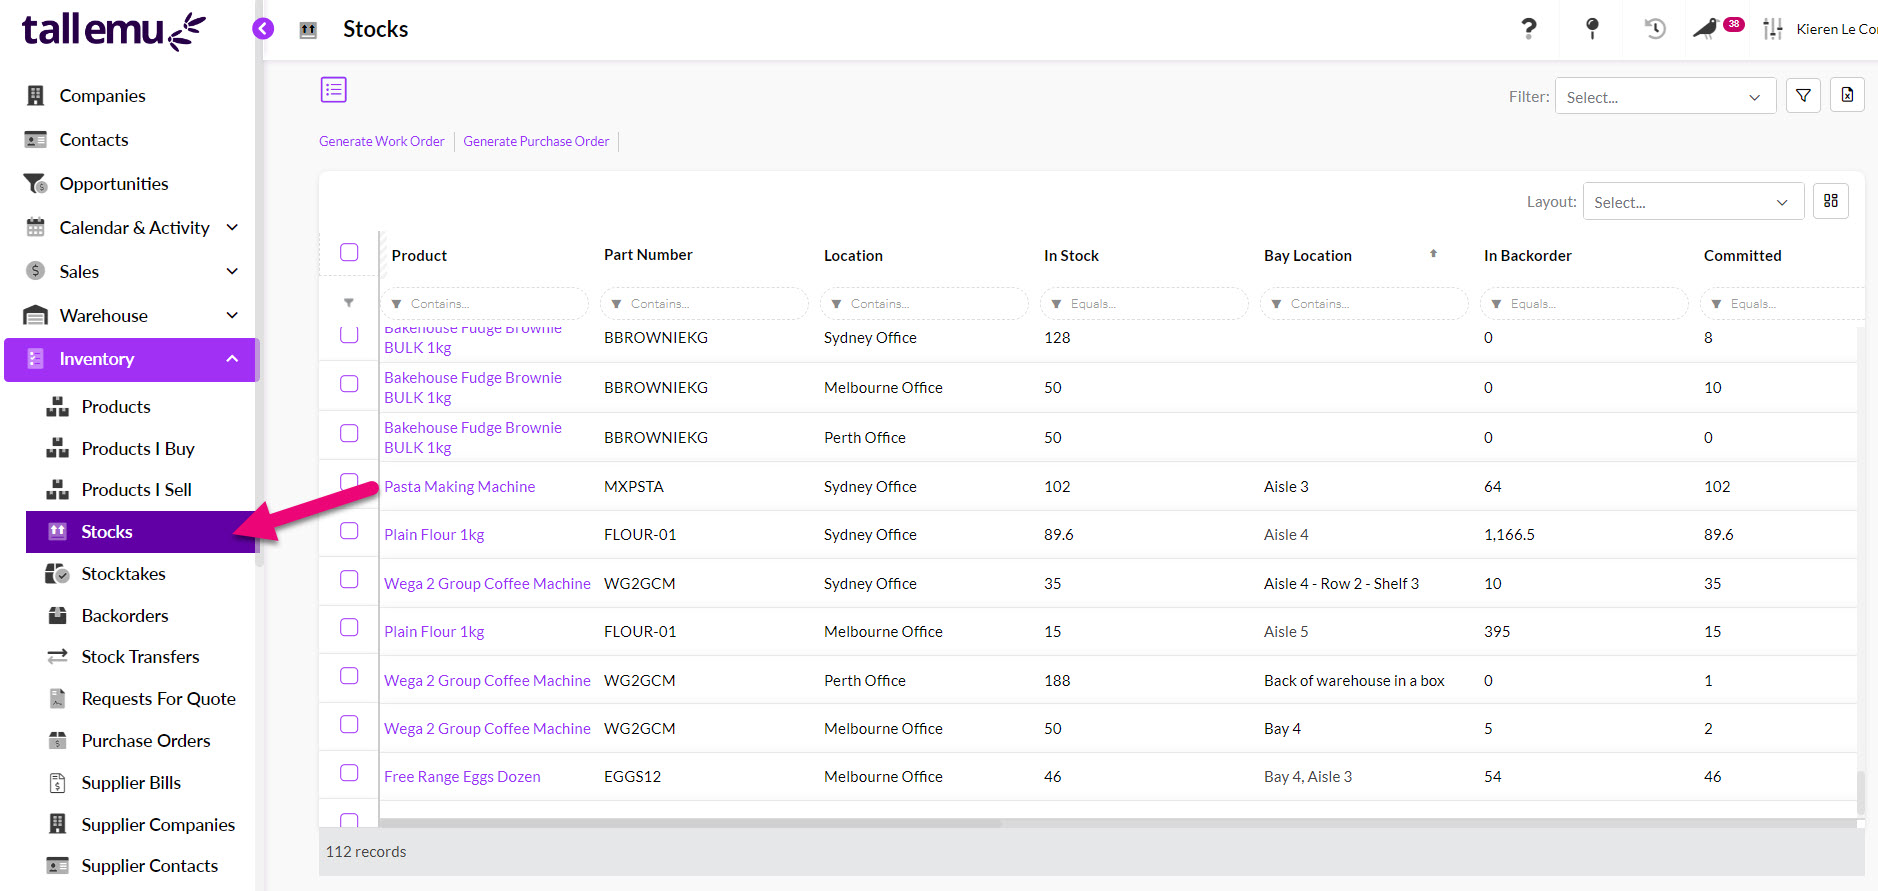
Example of the Stocks module
From a Product record you can navigate to the Stocks tab to see the current stock level.

You can also use the Stock Movements tab to see a history of movements.
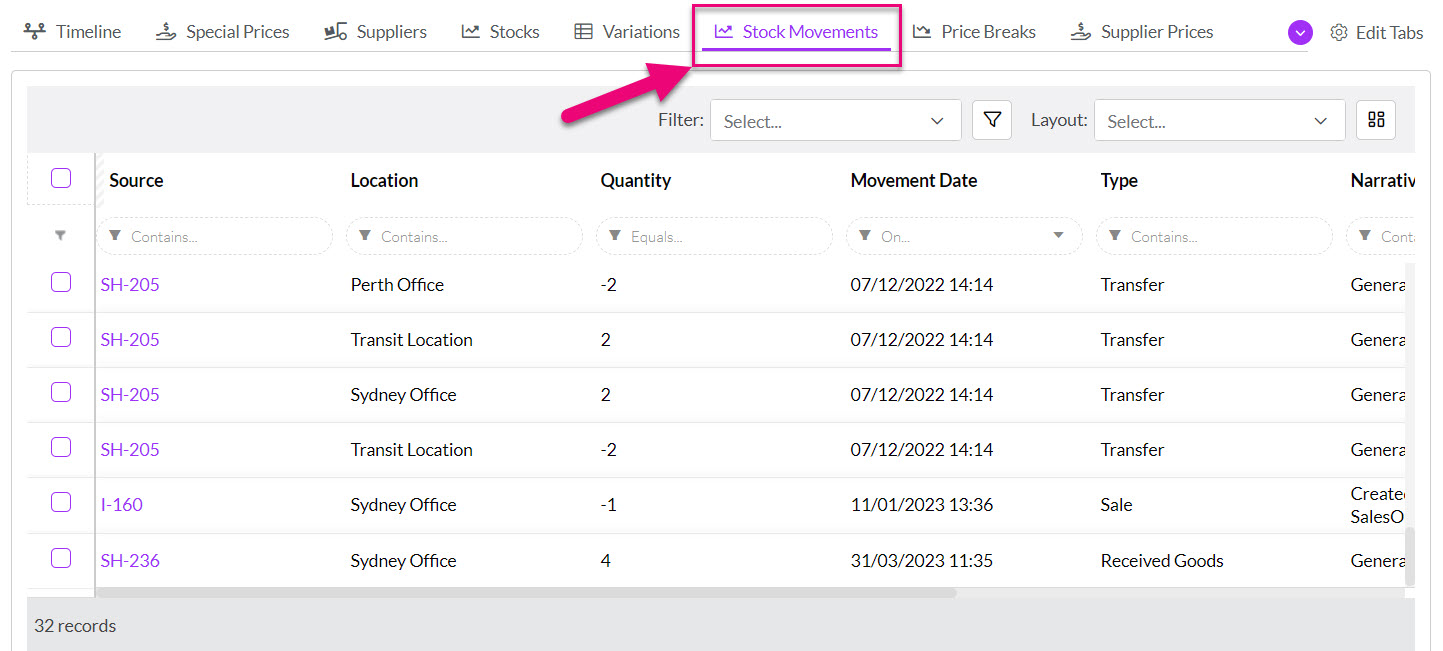
Stock Movements tab on in a Product record
When you add a Product to a Sales Order the system will give you stock information specific to each item.

You will also be able to see current stock information on the Input Items tab when using Work Orders.

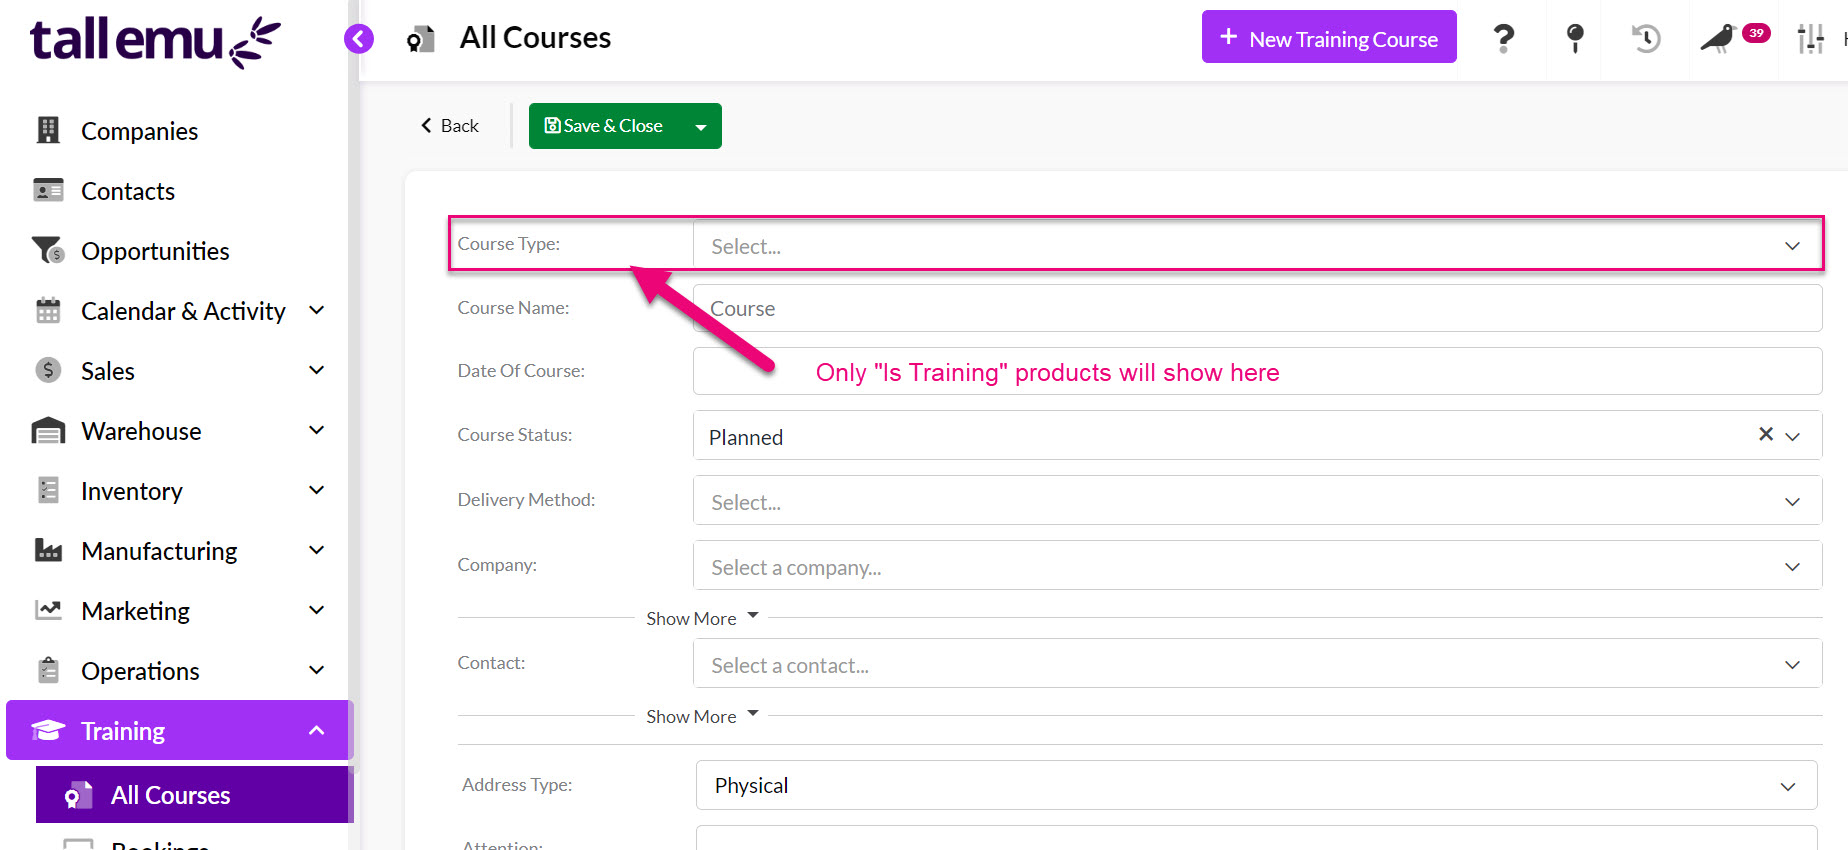
You can create Training Products for use in the Training modules in CRM.
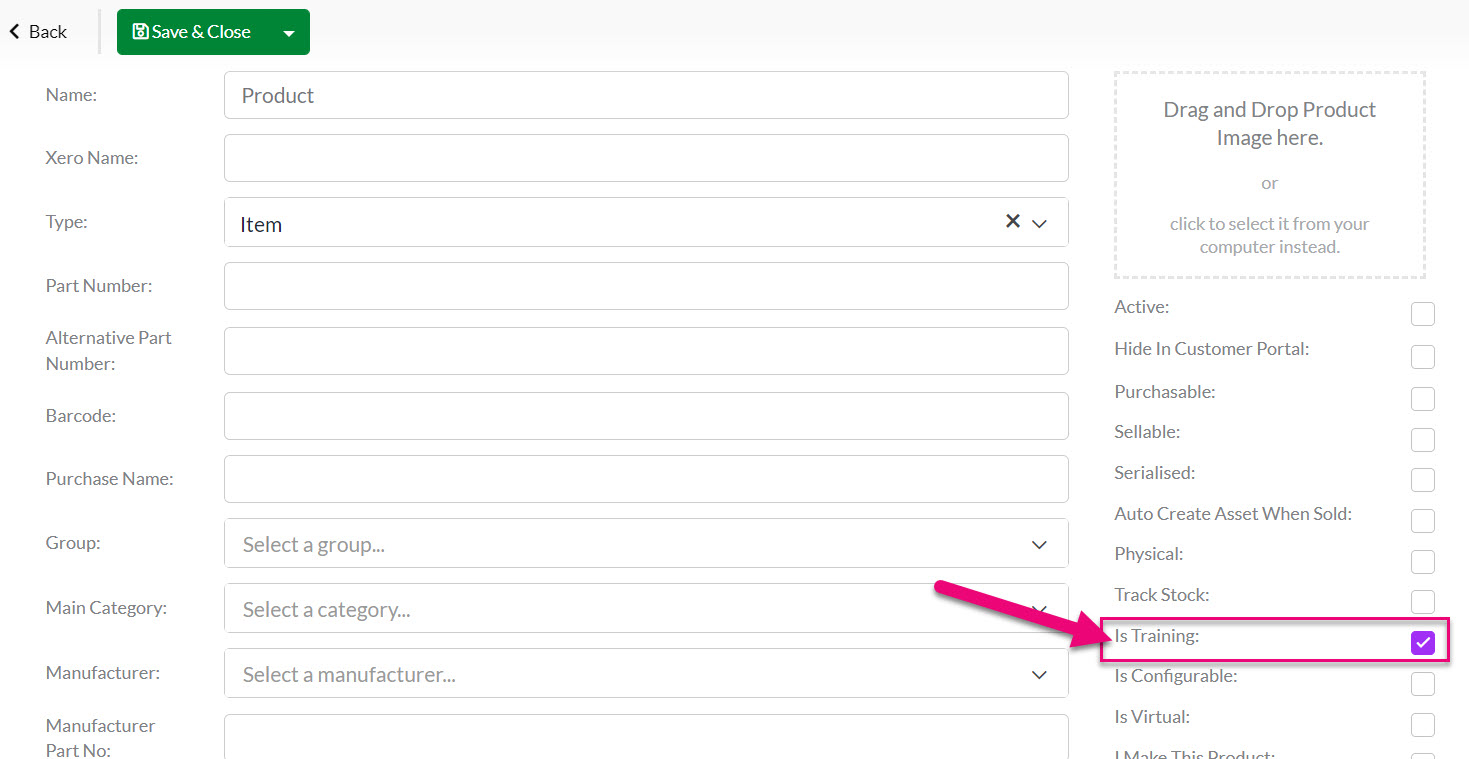
If this option is not selected, you won’t be able to utilise the Product in Training Courses.
You can set up Products in CRM with configurable elements so that you can sell items with add-ons or options.

Click here to learn more about Configurable Products.
You can set up Products in CRM with variations so that you can quickly see what other forms or types an item comes in when it is being sold.

Click here to learn more about Variable Products.
Enabling the Virtual option allows you to have one underlying Master Product that can be sold with a number of different labels.
For example, I could have a stock tracked Master Product for “Car Tyre” and then a number of virtual products linked to this for “Tyre for Ford Falcon” and “Tyre for Holden Commodore” – in each case I’m selling the “Car Tyre” (and reducing my stock of that item), just with different labels.
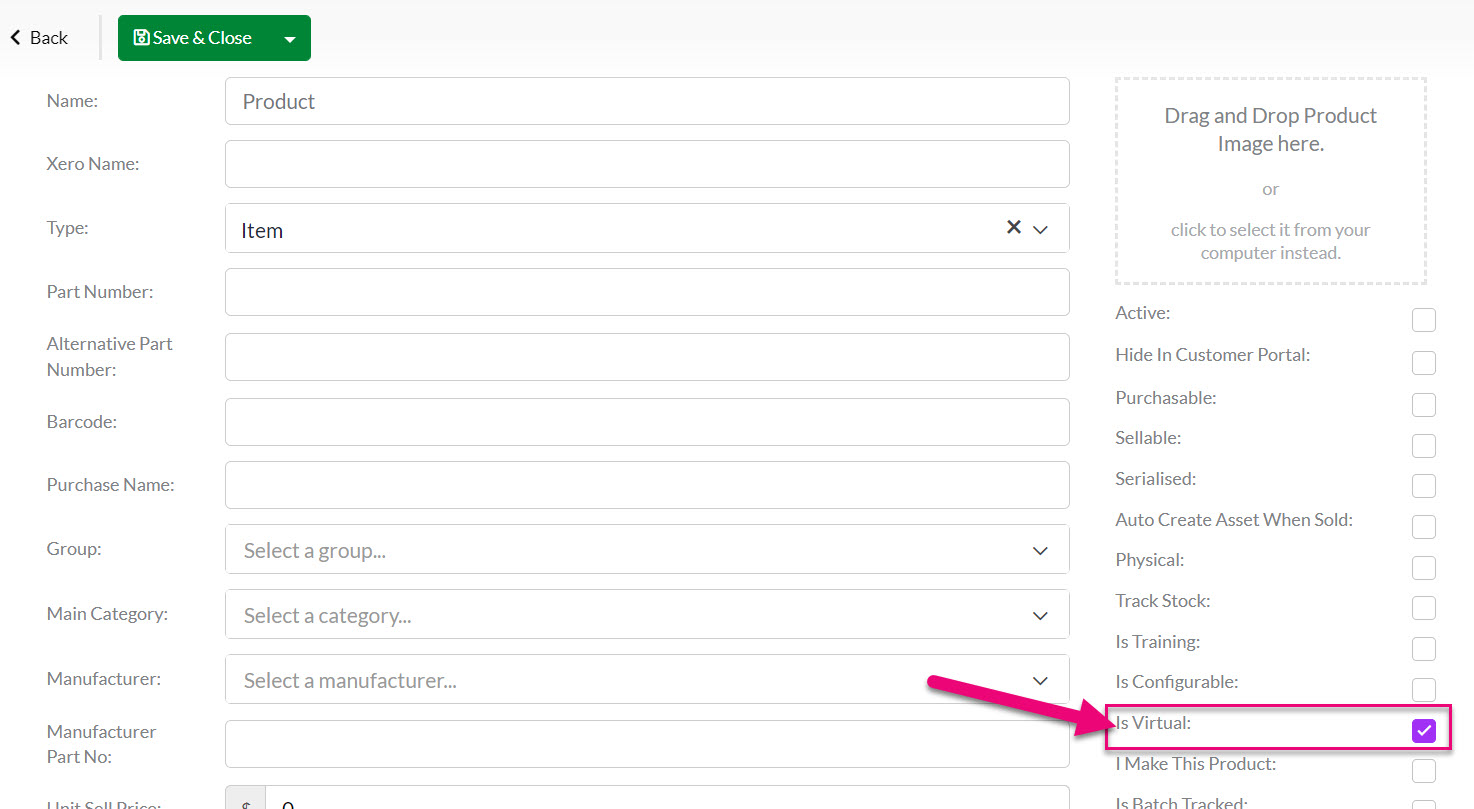
Once this option has been enabled, a field for Master Product will be displayed on the main form, allowing you to select the underlying item that will be sold.

Manufacturing involves the transformation of some kind of raw material(s) into a finished product(s). The first step in setting up manufacturing within the CRM is to create/define your input and output Products so that you can start using Bills of Material and Work Orders.
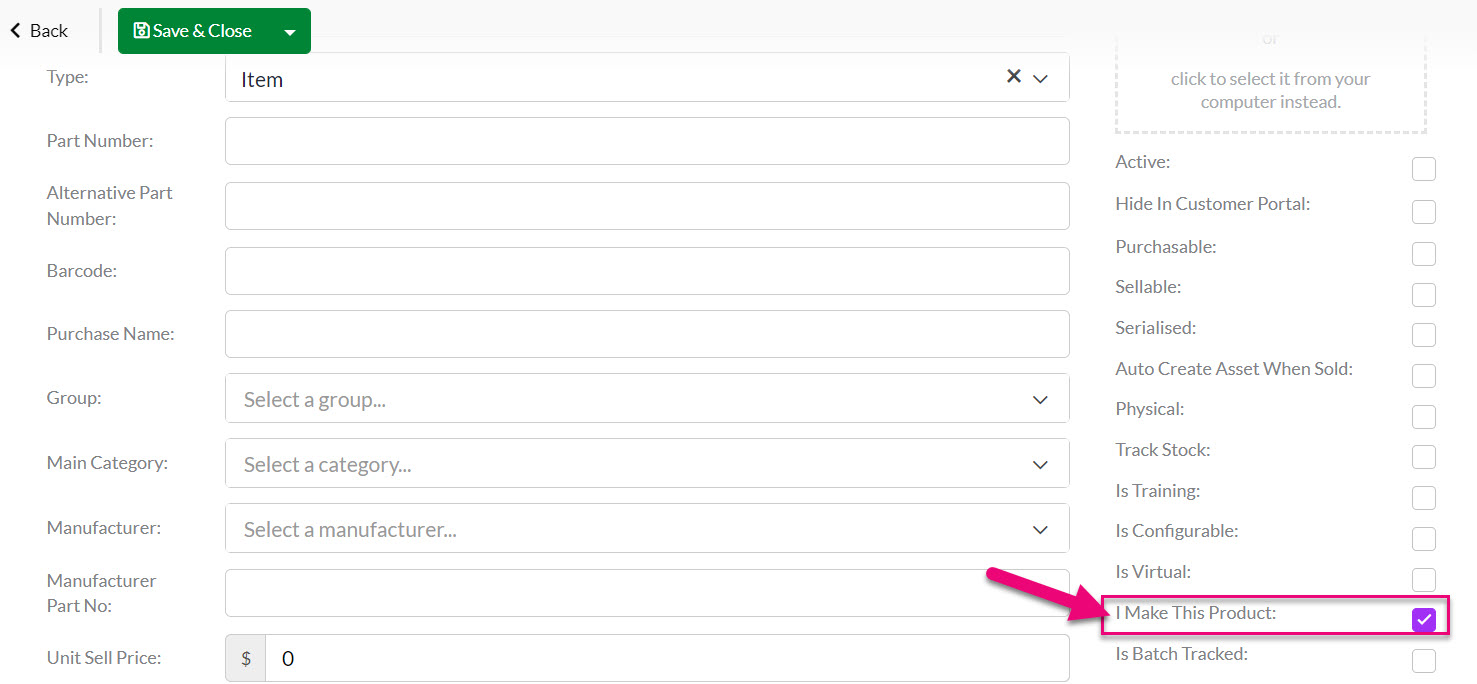
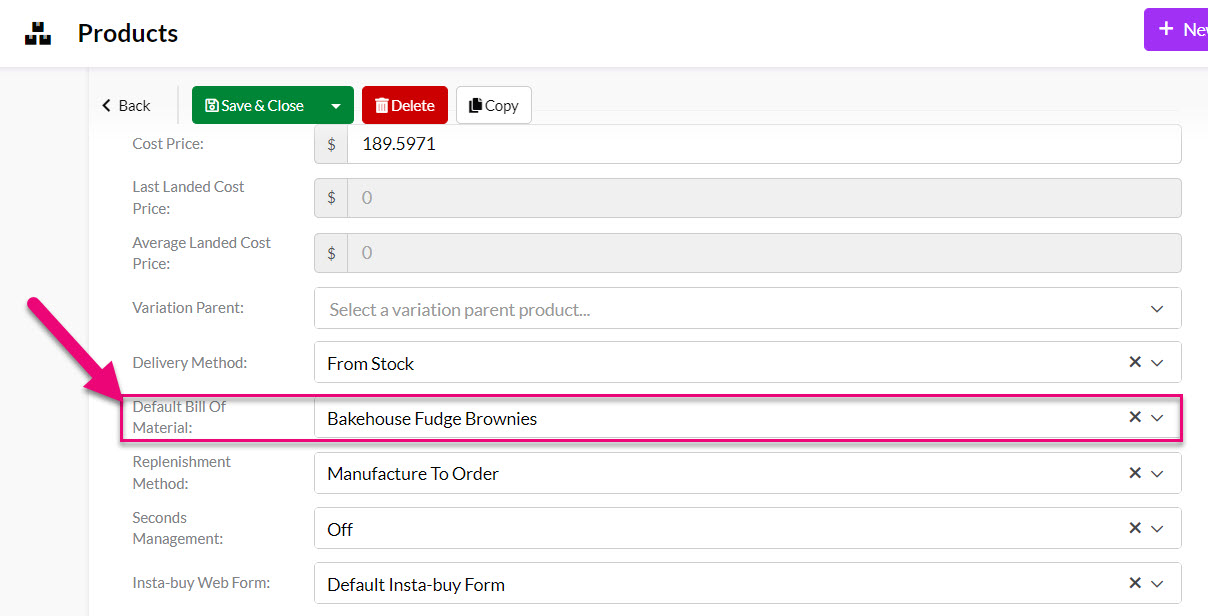
Click here to learn more about Manufactured Products.
When you create a new Product, you can specify whether batch tracking is required by ticking the Is Batch Tracked box – this forces the creation and ongoing management of batches for the Product. You can also update the Is Batch Tracked field on existing Products when you edit them.
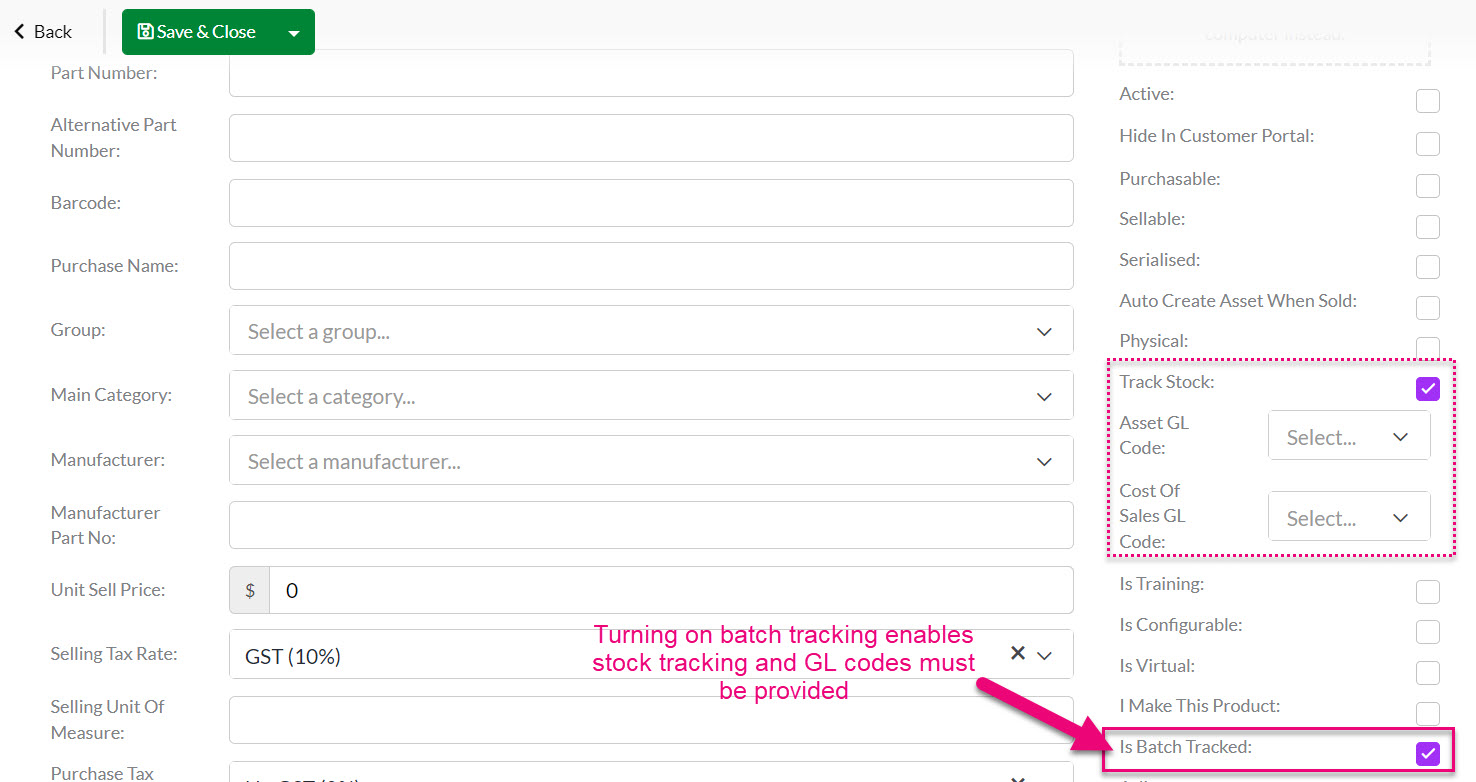
Click here to learn more about Batch Numbers.
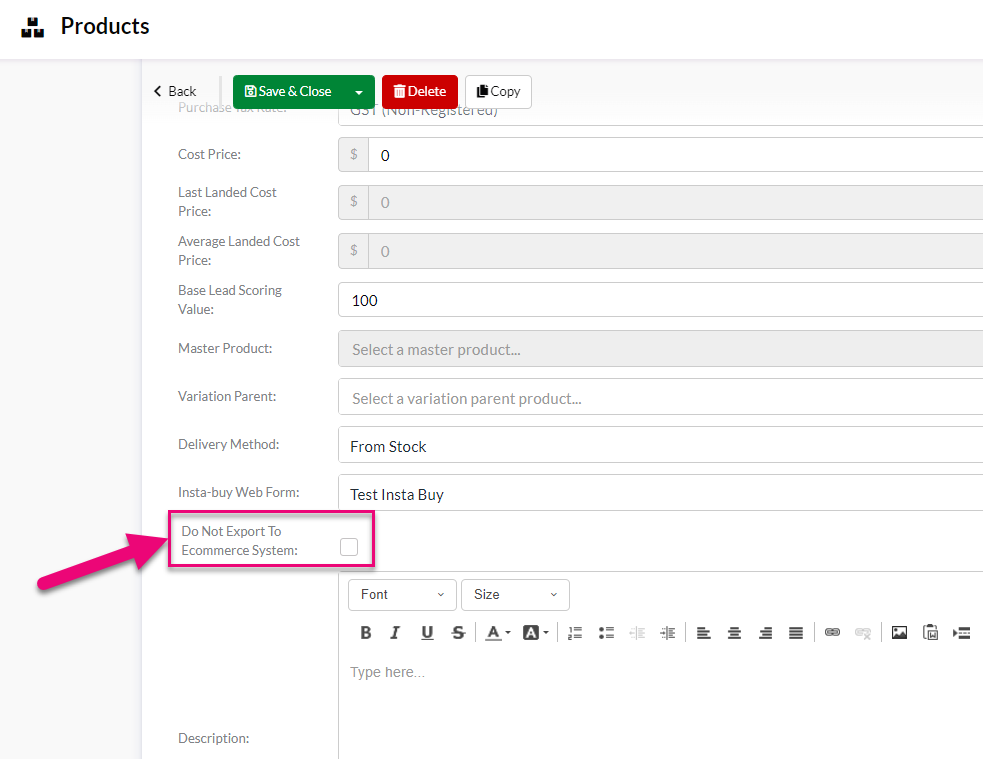
*** NEW FEATURE – COMING SOON ***
On the Product form, there is a box for Do not export to Ecommerce System – enabling this option means that the record will not sync with your ECommerce System e.g. WooCommerce.