- Companies
-
- Admin
- Account Options
- Pricing settings
- PDF and Email Template system preferences
- Locations
- Brand Customisation
- Product Categories
- Product Groups
- Enable Time Billing
- Customising Assets
- Custom Fields
- Delivery Resources
- Delivery Options
- Reporting Preferences
- Sales & purchase settings
- Calendar Settings
- Messaging settings
- Repeated Invoice frequency
- Company Settings
- Credit Settings
- Sales Regions
- Asset Settings
- Ticket settings
- Relationships
- Proposal-based Quotes
- Customising Training
- Prefix/Sequences settings (Record Numbering)
- Creating SMS Templates
- Invoice Settings
- Creating Email Templates
- Creating Letter Templates
- Using Letter Templates
- Using SMS Templates
- Using Email Templates
- Setting up Teams
- System security
- Users
- Activate a new User account
- Log into a User account
- Managing Connections
- Calculating Landed Costs
- Resources
- Payment Methods
- Payment Terms
- Couriers
- PDF Templates
- Service Reports
- Quote Form Templates
- System Quote Preferences
- Credit Control
- Setting up Teams
- Regional Settings
Setting up Users
There are two ways that you can set User permissions:
- Add a user to an existing Team, directly from their User record.
- Create or amend a Team record and attach Users to it.
Users will receive permissions based on the Teams that they belong to; in which order you do this is completely up to you.
If you invite a User to CRM and they are not attached to a Team, they won’t be able to see or do anything.
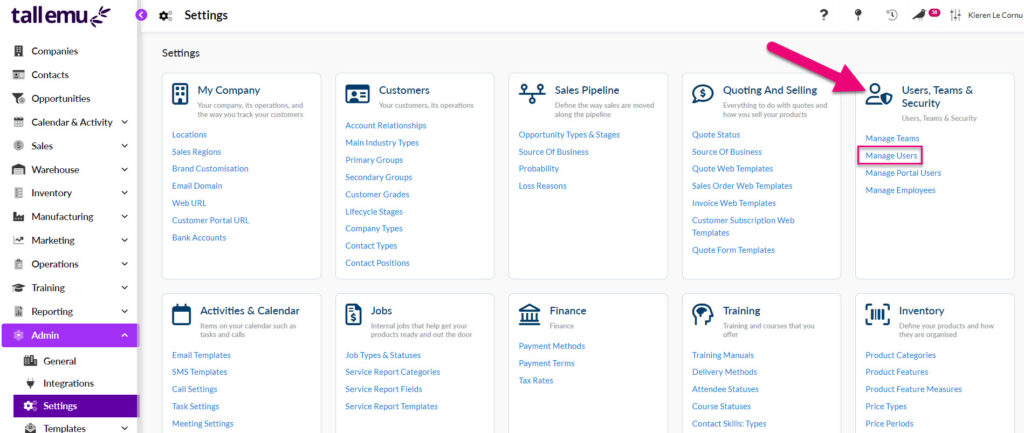
You can manage your Users from Admin > Settings > Users, Teams & Security > Manage Users.
You may also be interested in other system security options available in CRM.
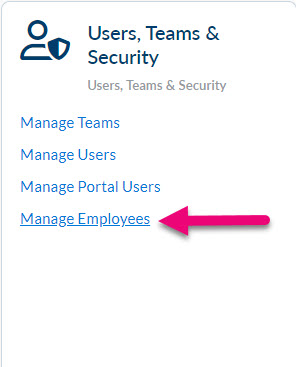
In Admin > Settings > Users, Teams & Security you’ll notice a section to Manage Employees.
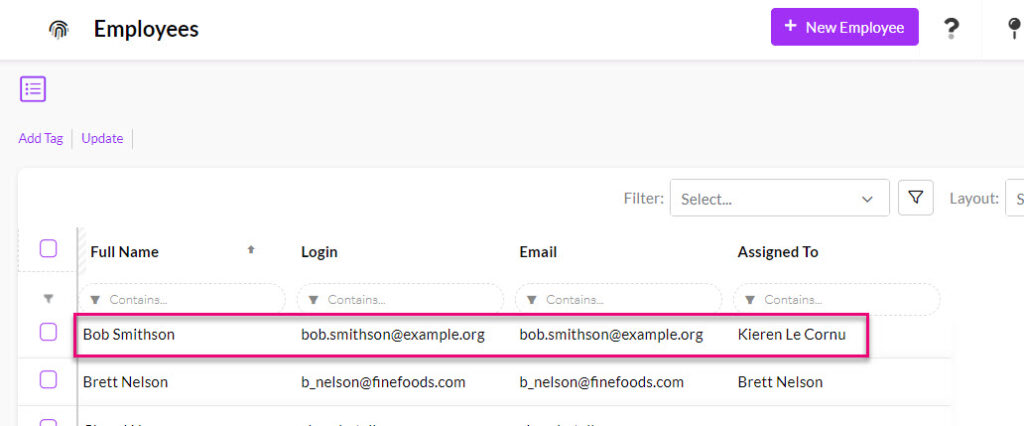
When you connect your accounting system, all past and present employees are brought into CRM and placed in the Employees area in CRM. None of these people have access to CRM – you control who becomes a User (gets a licence) and what permissions they will have.
See the next section for how to quickly turn an Employee into a User.
Go to Admin > Settings > Users, Teams & Security > Manage Employees.
Select a person from the list that you would like to make a User in CRM, click on their record to open it.
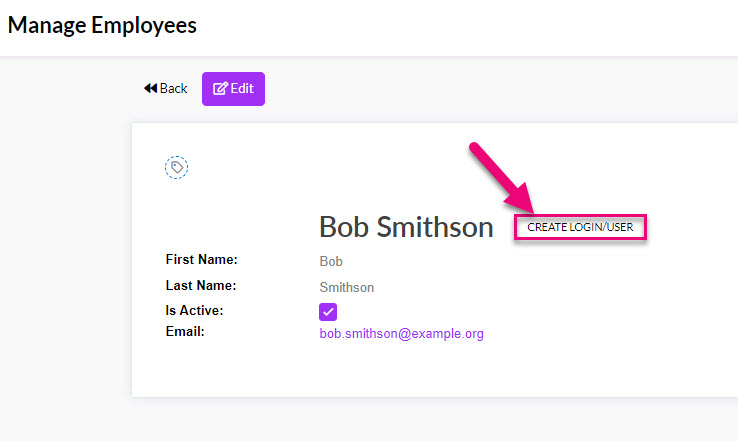
Click the Create Login/User button on the record – this creates a User record that you will be taken straight to.

You can now proceed to the next step to edit the record, add the User to a Team and send out an invitation to access CRM.
EDIT
To edit an existing User, select a person from the list and click to open the record, then select the Edit button.
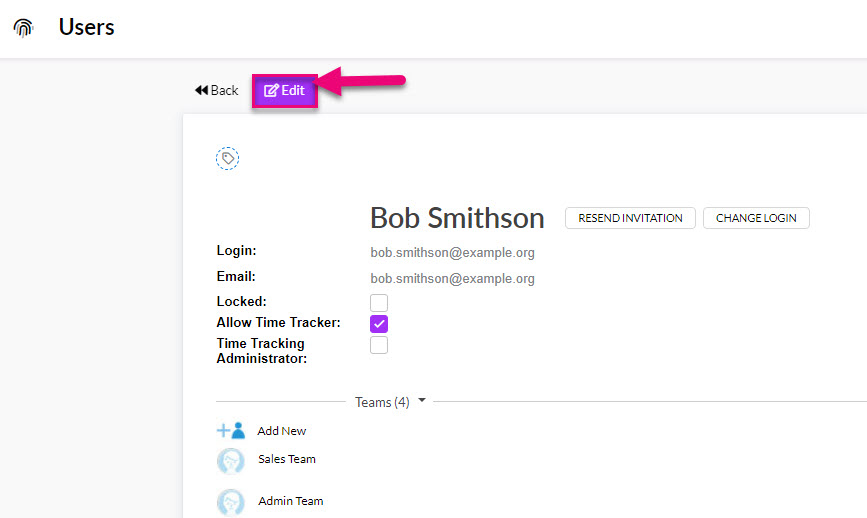
Make your changes and click on Save & Close to apply them.
CREATE
To create a new User, navigate to Admin > Settings > Users, Teams & Security > Manage Users.
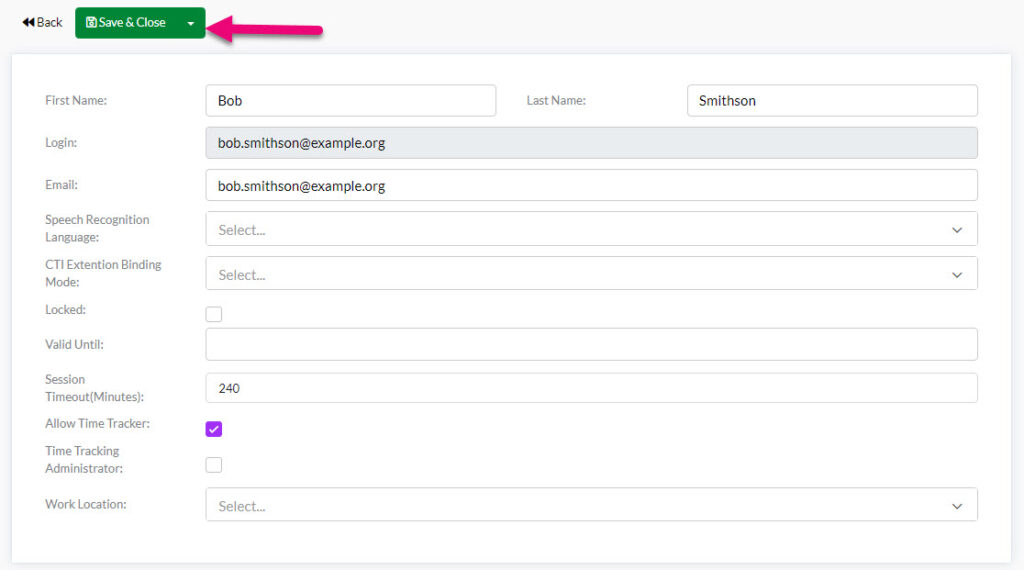
- Click the New User button in the top right corner.

- Fill in the fields for First Name, Last Name, Email and ensure the that the Locked box is not ticked.
- You can set the user’s preferred language by choosing from the dropdown list in the Speech Recognition Language field, but this is not essential at this stage. This will default to English if no selection is made.
- The CTI Extension Binding Mode field will only apply if you have integrated a phone system (this is where you select their extension).
- In the event that you want to automatically deactivate the user account on a certain date, you can use the Valid Until field to determine when the login will expire.
- Session Timeout (Minutes): the default value (and also the maximum value) for this field is 240 minutes (4 hours) and means a User will remain idle for this time before being logged out and needing to reauthenticate/log back into CRM. You can adjust this period to a shorter interval if required.
- Allow Time Tracker means that the User will be able to access the Time Tracker integration.
- Time Tracking Administrator means that the User will have system administrator permissions for the Time Tracker integration.
- Work Location – if you have multiple Locations in your database, you can specify where a User is based.
- Ensure you click Save & Close to generate the new user.
You now need to ensure that the User is added to a Team so that they have permissions within CRM.
- In the User record you can see any existing Teams they are a member of or add the User to new Teams by searching the ones you have set up earlier.
- Users can be members of multiple Teams.
- Remember to click Update to apply the changes you have made to the User record.

Note that once you have a Team record open, you can also add Users to it from there.
If you invite a User to CRM and they are not a member of a Team (i.e. they have no permissions) they will not be able to access anything and will see an error message that refers them to their system administrator.
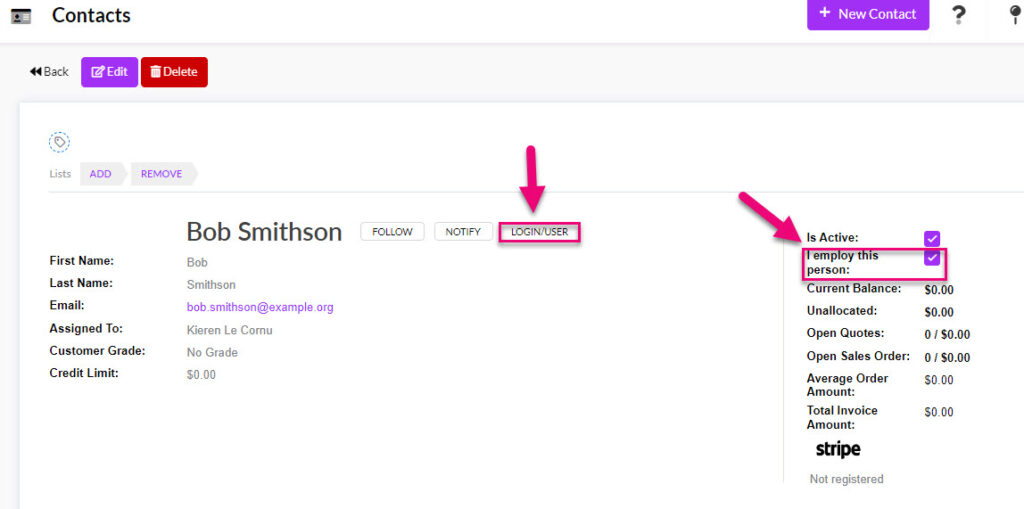
- When a new user is created, a Contact record is automatically created for them.
- These Contacts are automatically marked as employees by way of an I employ this person check-box.
- The employment indicator box and the Is Active box information will both populate from the employee’s user record.
- You can quickly access an employee’s User record directly from their Contact by clicking the Login/User button, which will open the associated User record.
If you don’t want anyone to be able to access these records, you can use record visibility to control who can see them.
To invite a User to access CRM:
- Click to open their record (you can search for a specific user with the Filter box).
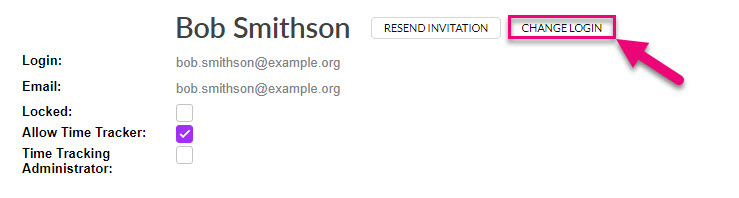
- Check that the Login field contains their current email address (rather than a name).
- Check that the Locked box is not ticked.

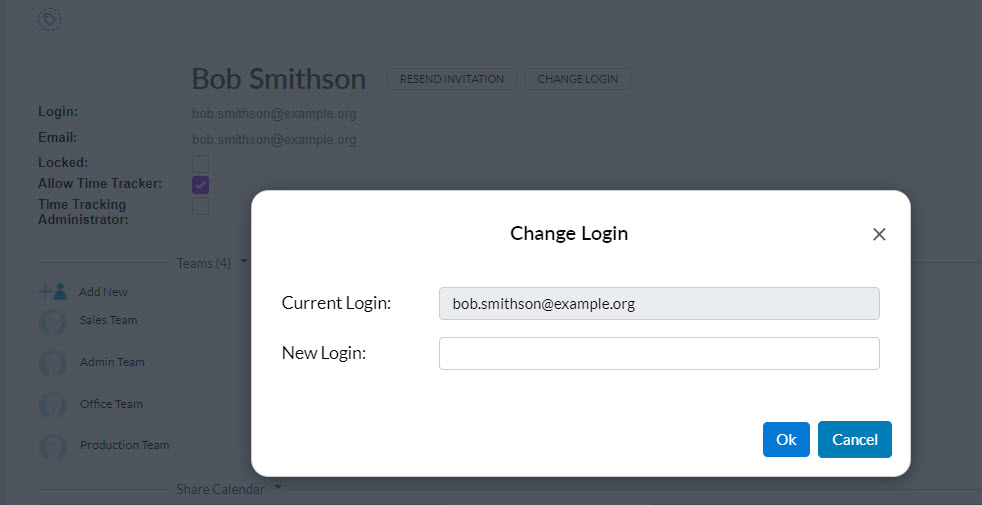
- If you need to amend the Login field, click on the Change Login button next to the user’s name to update the field to a valid email address.
- You now need to check that they are added to the relevant Teams so that they have the correct system permissions applied to their login.
- Scroll down to the Teams section – here you can see any existing Teams they are a member of and add them to new Teams by searching the ones you have set up earlier.
- Remember to click Save to apply the changes.
- Once you’ve ensured all the user’s details are correct, send them an invitation by clicking the button directly next to the user’s name.

- Users will receive an activation email that invites them to the CRM and asks them to set a password.
- Your users can log in from https://crm.tallemu.com – they can bookmark this in their web browser, and add it as a button on their smart phone screen.
Note that sometimes the activation email can get trapped in junk/spam folders, so it’s always a good idea to check there.
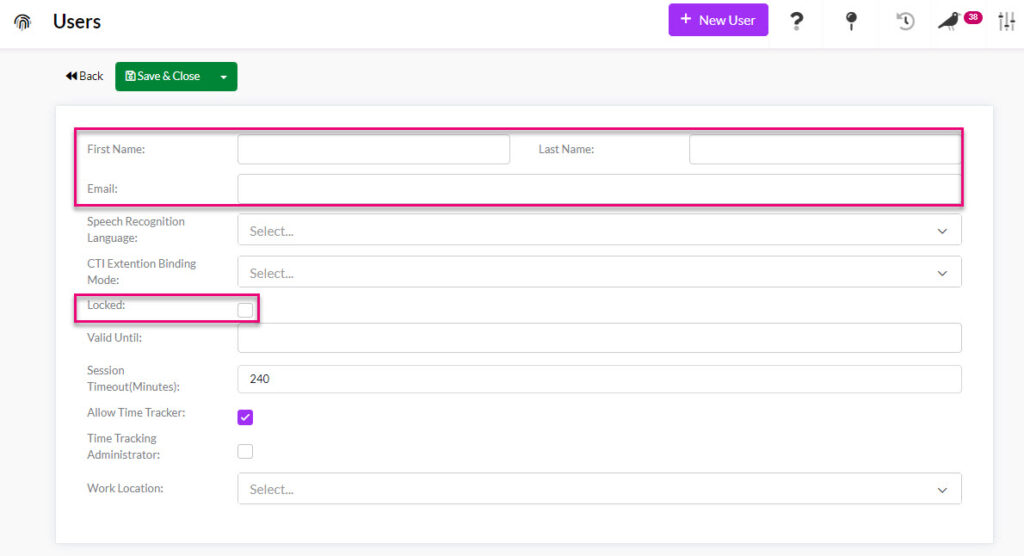
To revoke a licence from an existing User, navigate to Admin > Settings > Users, Teams & Security > Manage Users.
- Click on the record for the User you want to deactivate.

- Click on Edit.
- Ensure the that the Locked box IS ticked.

- Click Save & Close to apply the change.
The licence will now be taken away from this User and they will no longer be an active User in CRM.
See the step above for how to revoke a licence from an existing User and deactivate them.
Once this is done, you can create a new User and assign a licence to them, as per the instructions in the 1st step.
It is always preferable to perform these steps, rather than rename an existing User record.
If you need to send emails from CRM using generic email addresses such as sales@ or info@ you don’t need to have a specific User for this. Instead, you can use Team to add this address into CRM so that you can send emails from it.