-
- CRM Integrations
- Customer Portal
- Novum Networks
- Connecting with WooCommerce
- Time Tracker
- Connecting with PayWay
- VOIPLine
- Setting Up Emails
- Google Maps
- Novum Networks
- WooCommerce integration
- WooCommerce integration settings
- Customer Portal for customers
- Connecting with BurstSMS
- Payment Gateways
- Connecting Stripe
- Troubleshooting the Outlook Add-In
- Syncing Your Outlook Emails, Calendar & Contacts
- Installing Inbox Insights
- Connecting with WooCommerce
- Connecting with Mailchimp
- Connecting with Machship
- Connecting with Ezidebit
- Connecting with eWay
- Connecting with Campaign Monitor
- Jobs, Assets & Service Management
- Manufacturing
- Operations
- Reporting
- Training
- Workflow Management
- Quoting & Selling
Customer Portal Admin
Customer Portal is exactly that – a window into your CRM that is tailored for your customers and suppliers. To watch a quick video demo of Customer Portal click here.
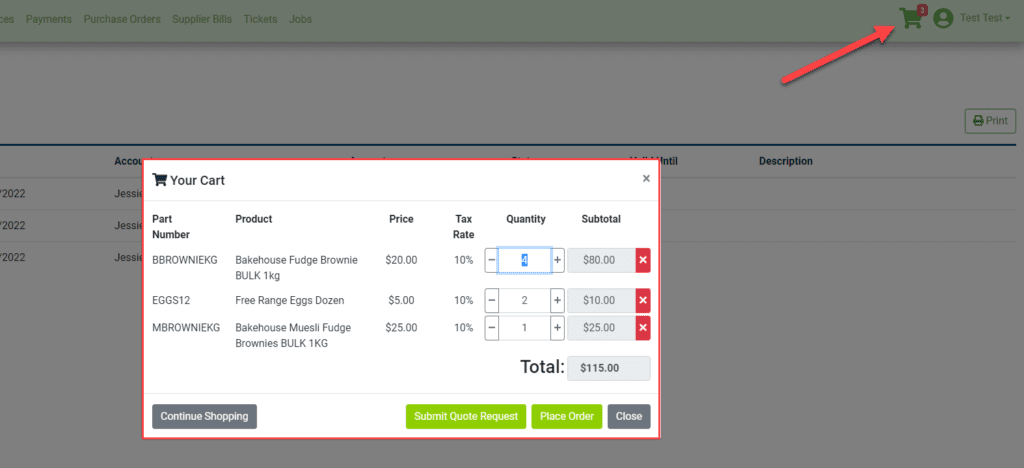
- When you create a Quote, Sales Order or Invoice for a customer in CRM, they will immediately be able to view these in Customer Portal.
- From CRM, you can customise the look and feel of your Customer Portal, control which of your customers have access, and which features they have access to.
- Set up notifications to alert people when a quote is requested, or an order is placed online.
You can learn more about what your customers can do in Portal here.
Customising your Portal
You can configure your Customer Portal from Admin > Integrations > ECommerce > Customer Portal – just click on the Settings button.
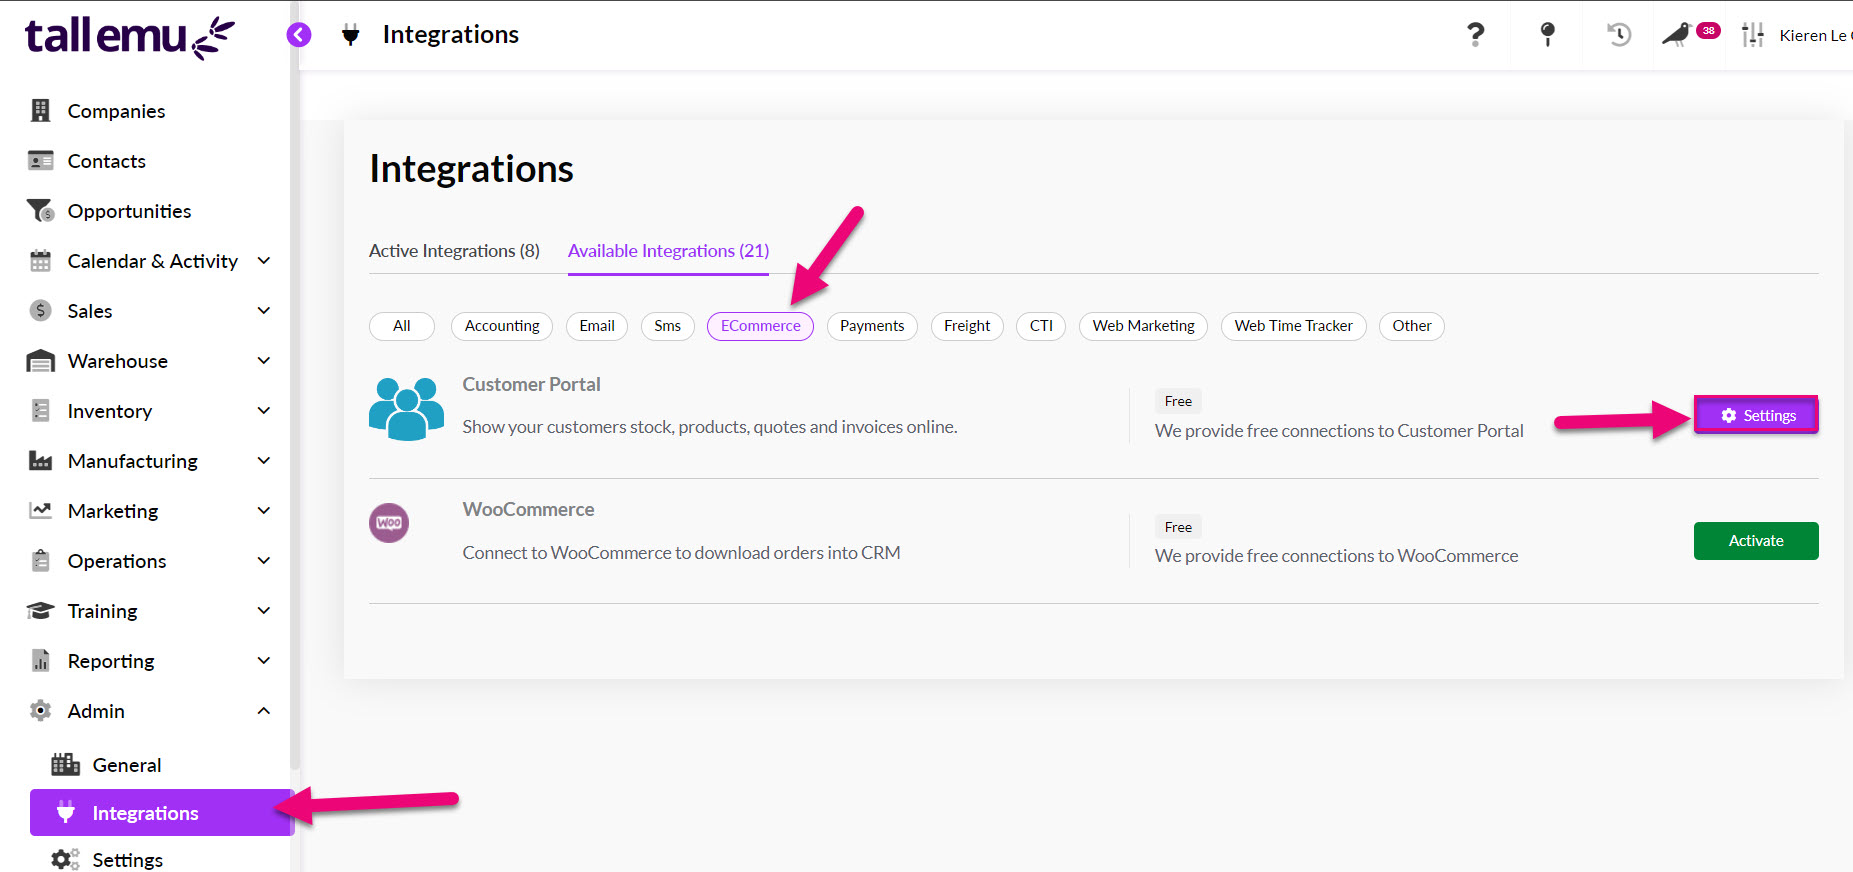
This page gives you access to all the key settings and options.

As you make changes, just remember to click on Save at the bottom to apply them.
Custom domain
If you’d like the customise the domain that is used, you have two options.
- A Custom Subdomain – ensure this box is ticked, type in your preference and click Test.
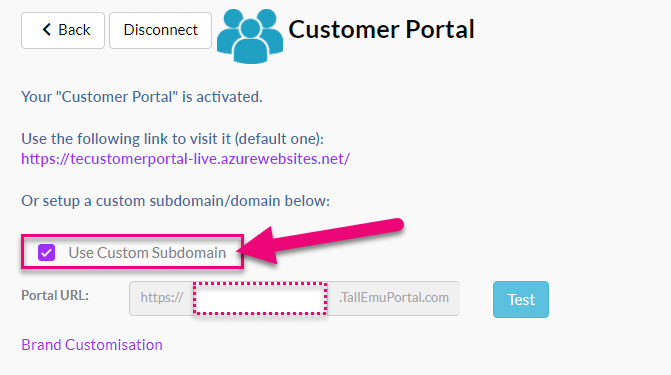
- A Custom Domain – you can create one from Admin > Brand Customisation or click on the Brand Customisation link on the page to take you there.
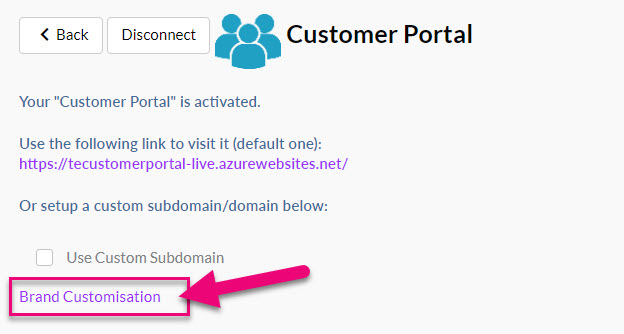
Make sure that you save your changes and test your configuration by using the buttons at the bottom of the screen.
Note that you can also add your domain to various customer facing URLs using Brand Customisation.
Branding your Portal
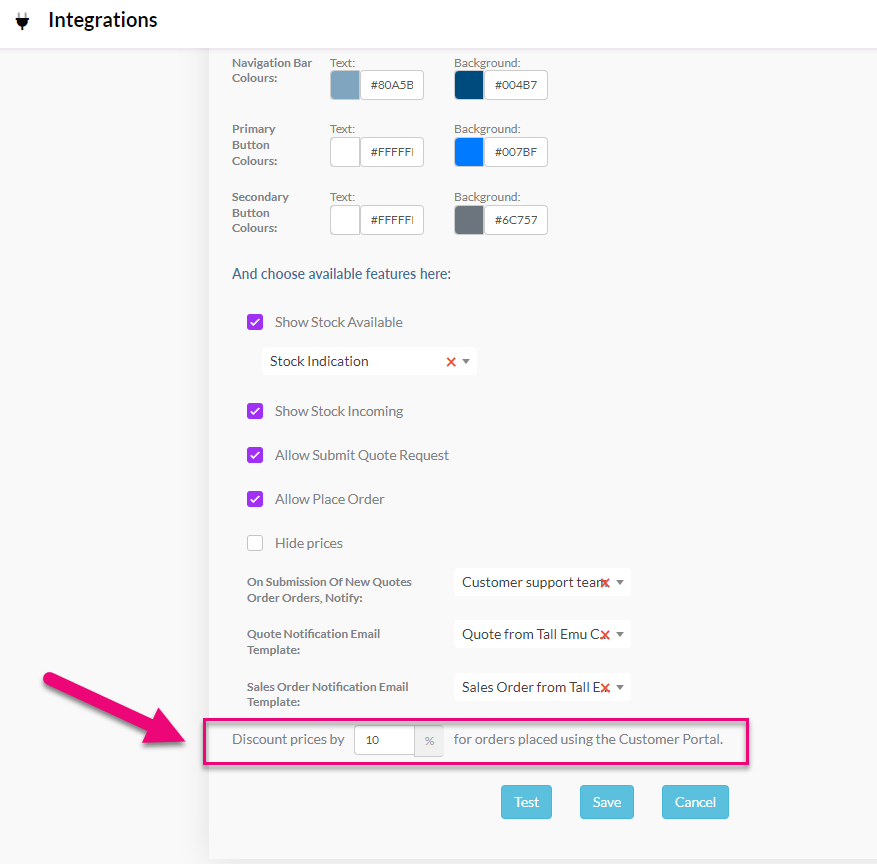
Here you can customise the look and feel of your portal by adding a logo and selecting the colour scheme you would like to apply.

Following is an illustration showing how different elements will be displayed in your portal.
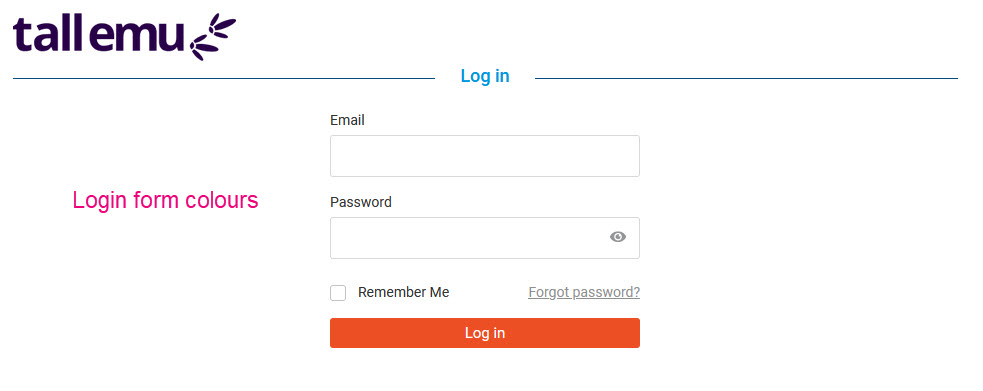
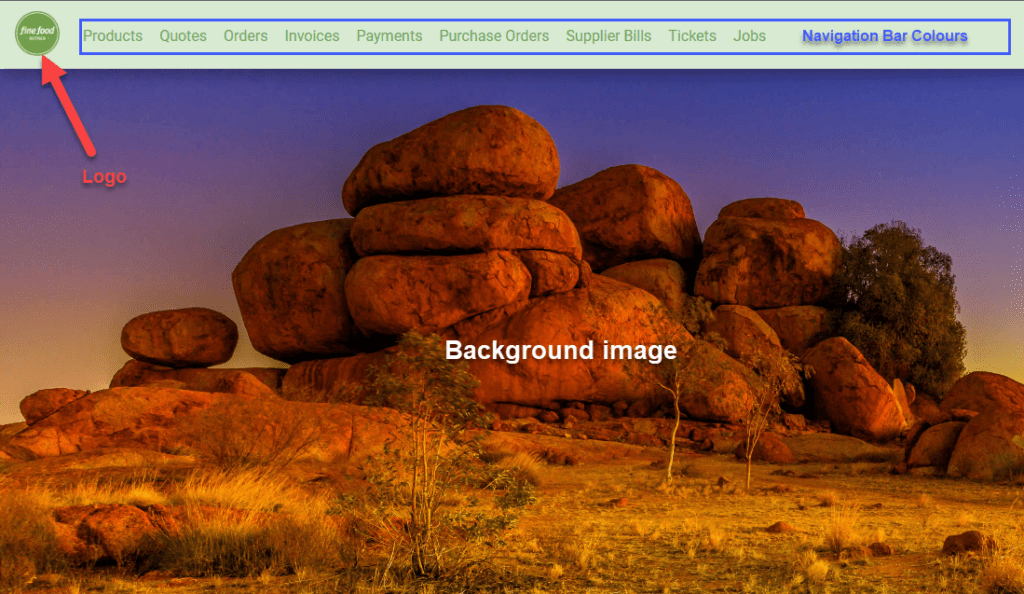

Make sure that you save your changes using the button at the bottom of the screen.
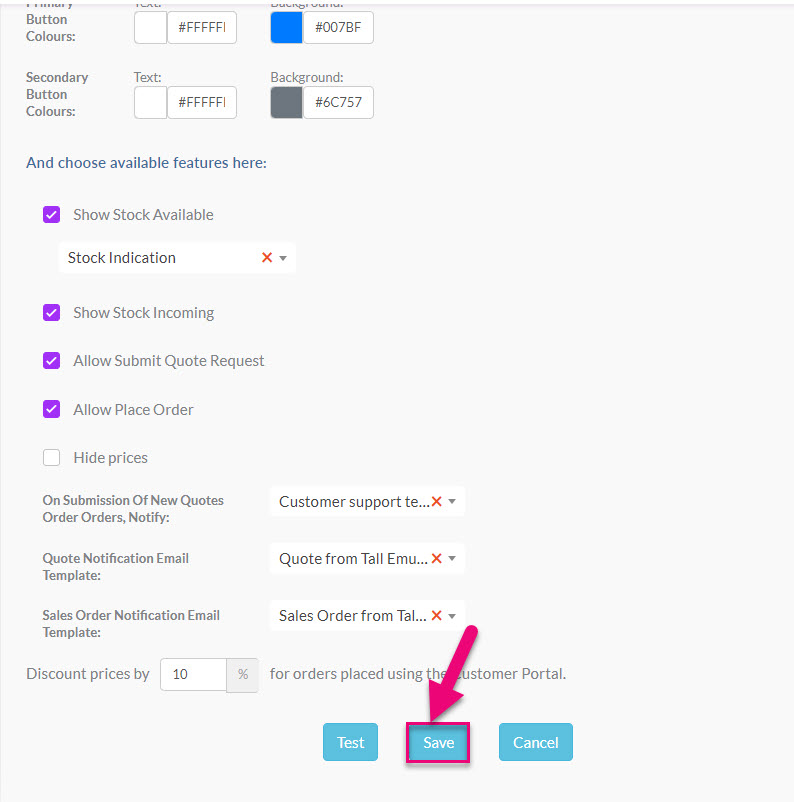
Manage Portal features
Here you can select the features that your customers will have access to in the portal – tick to add the features to your portal.
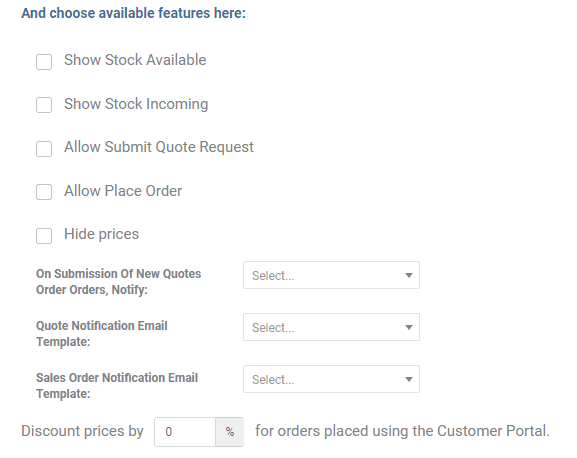
Show Stock Available
Selecting this option means that you can choose to show either:

- Stock Number: will display the actual figure in stock (or incoming). If there are no items in stock or incoming, nothing will be displayed.

- Stock Indication: whether or not the item is in stock (or incoming).

Show Stock Incoming
This means that incoming stock will be shown, either as a figure or indication, depending on which option you have chosen in the field above.


Allow Submit Quote Request
This means that rather than buying items from the cart, a request for a quote can be submitted by the customer instead.

Allow Place Order
This will enable the online cart feature and allow for orders to be placed online.
Hide Prices
This means that prices for all products will be hidden in the portal and display as $0.

Configure Portal notifications
Here you can choose the User or Team that is notified when new Quotes or Sales Orders are placed via portal.
You can also select the Email Template that is used for each type of notification.
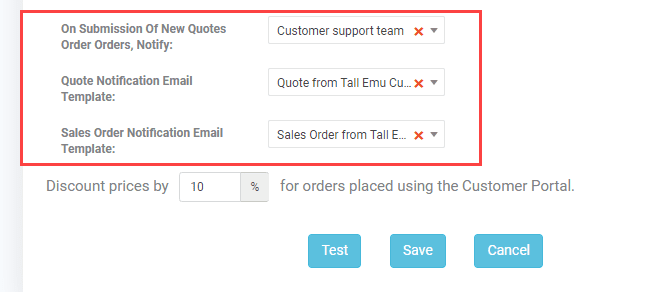
Remember to click on Save to apply your changes.
There are two ways that you can offer discounted prices to customers who buy products via portal:
- In your portal settings, you can set a blanket discount on all Products for all customers.
- On specific customer records you can set a discount on all products they buy via portal.
Also note that if you have set up Price Breaks on your Products, these will be automatically applied in portal.
To manage which Products are visible in your portal, see this guide.
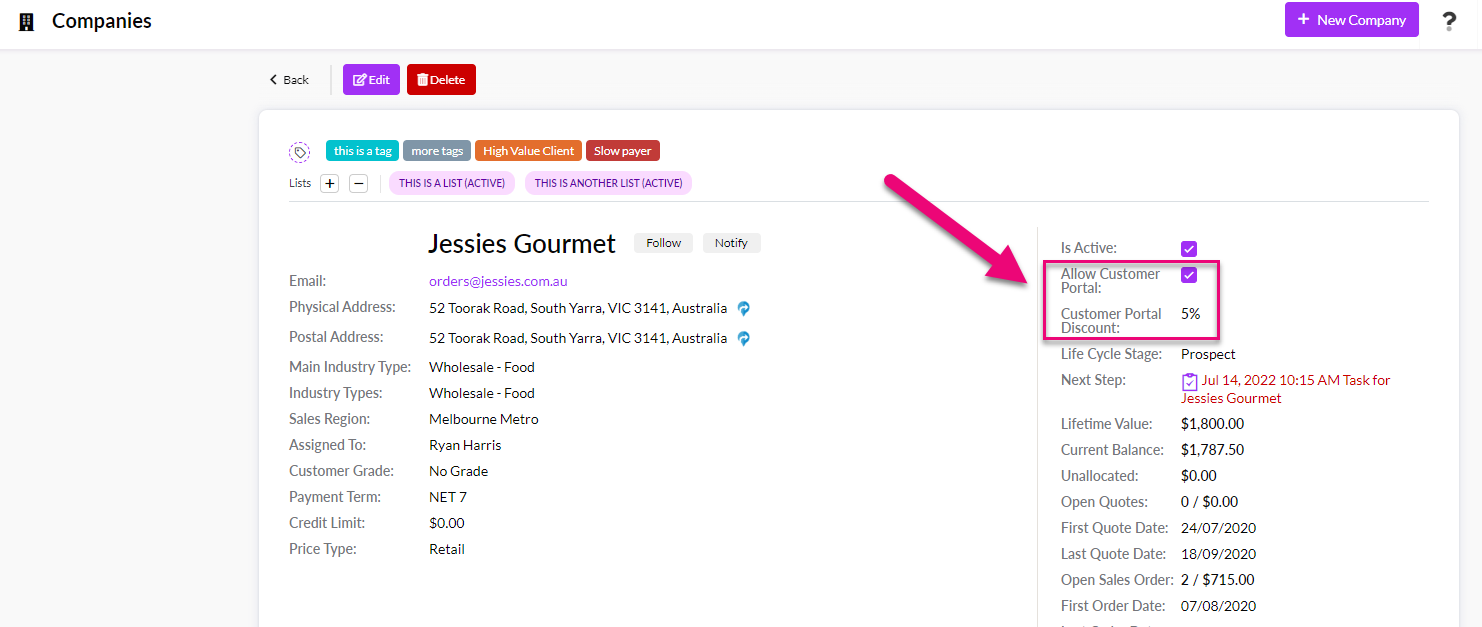
- Select and open the desired Company record.
- Click on Edit.
- Tick the box next to Allow Customer Portal.
- Click on Save & Close.
The Company will now have access to Customer Portal and you can now create logins for specific Contacts so that they can access the portal.
Note that you must have first given the Company access to the portal before you can create logins for Contacts.


Note that you can only give customers access to Portal if they have a Contact under a Company record. Individual Contacts cannot be given access to Portal unless they are linked to a Company.
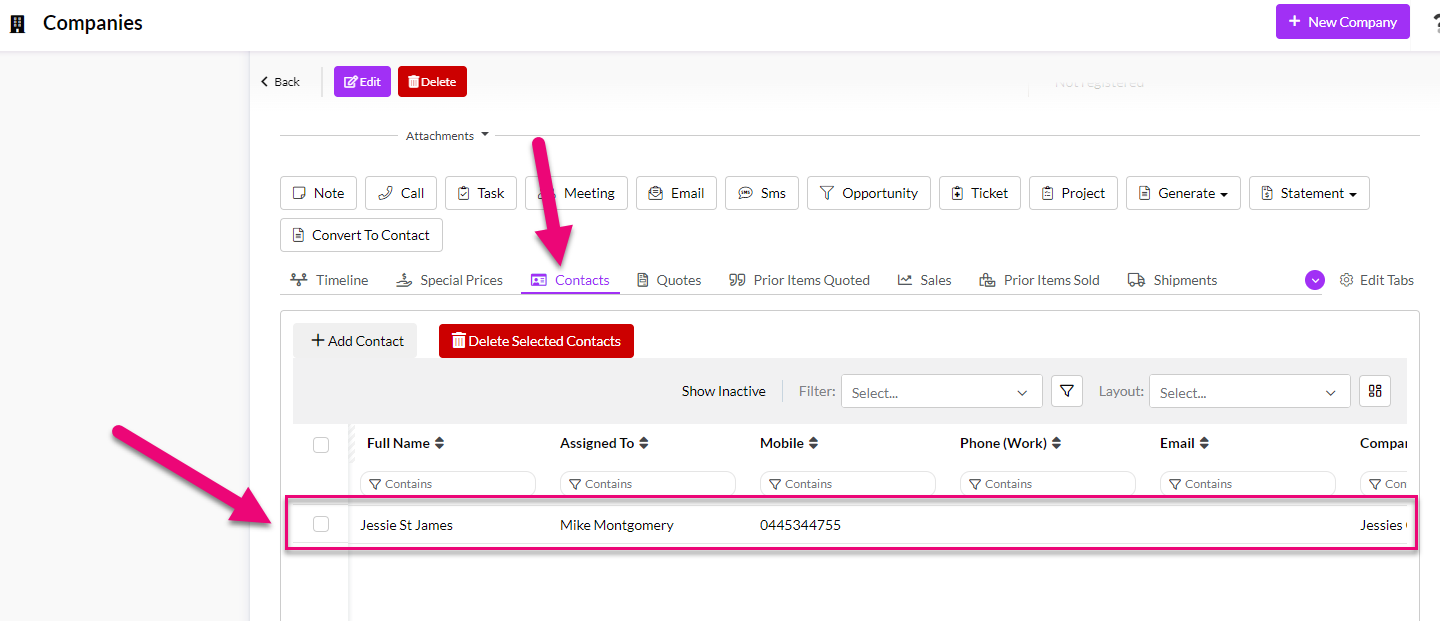
In the Company record, navigate to the Contacts tab and select the person you’d like to create a login for.
Note that you can only give customers access to Portal if they have a Contact under a Company record. Individual Contacts cannot be given access to Portal unless they are linked to a Company.
When the Contact record opens, you will see a new button to Create Portal Login – click this to provide the person with a login. You can repeat this process for each Contact that you want to have a portal login.
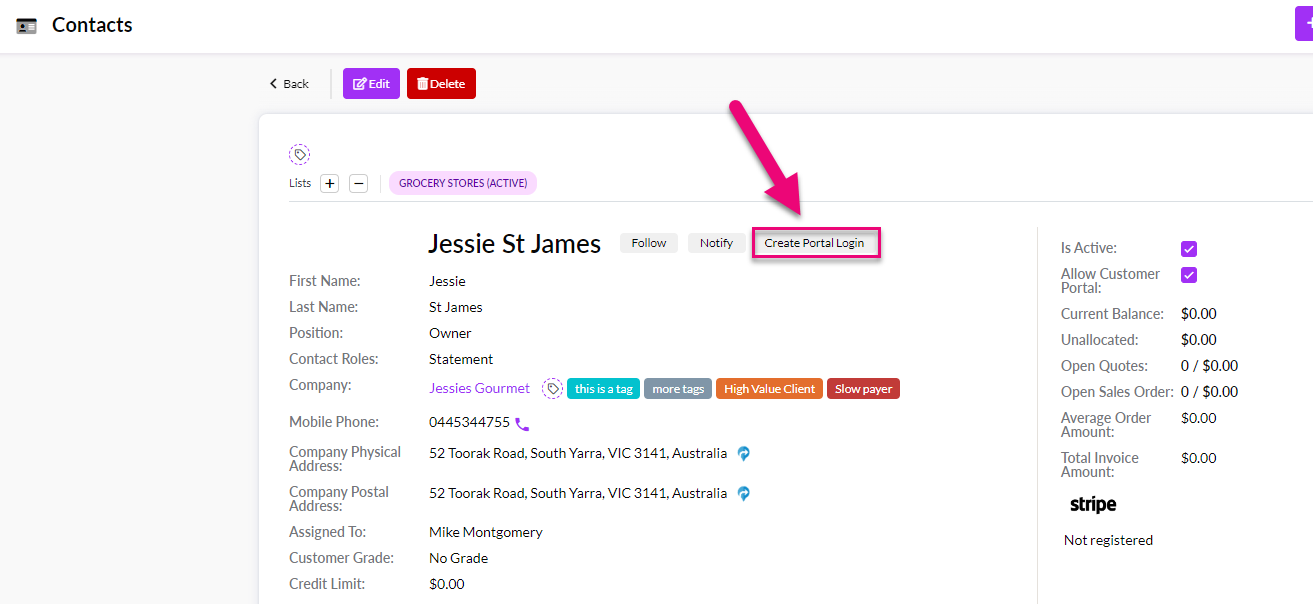
The Contact will then receive an email granting them access to Customer Portal – they just need to click on the Accept Invitation button in the email.
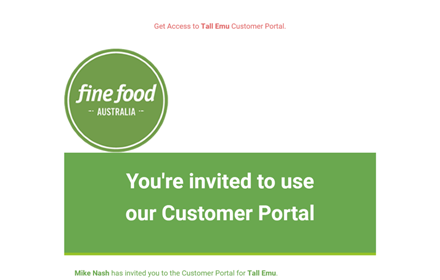
Example portal login email for a Contact

Contacts click here in the email to accept the portal invitation
Once the invitation is accepted, the Contact will then be taken to set up their portal password.
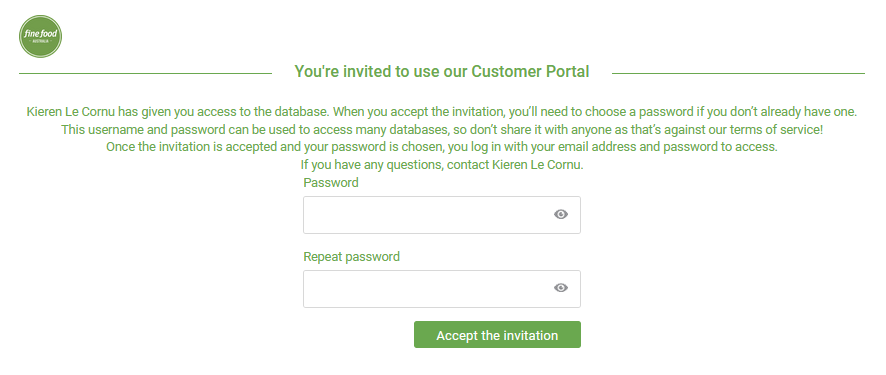
Creating a portal login password
Once the password has been created, the user will be taken directly to your portal login page where they can log in with their email (the login email will be the one that the initial invitation email was sent to) and password.

Customer Portal login page
You can learn more about what your customers can do in Portal here.
In Teams, you will have a two Teams that are created by default.
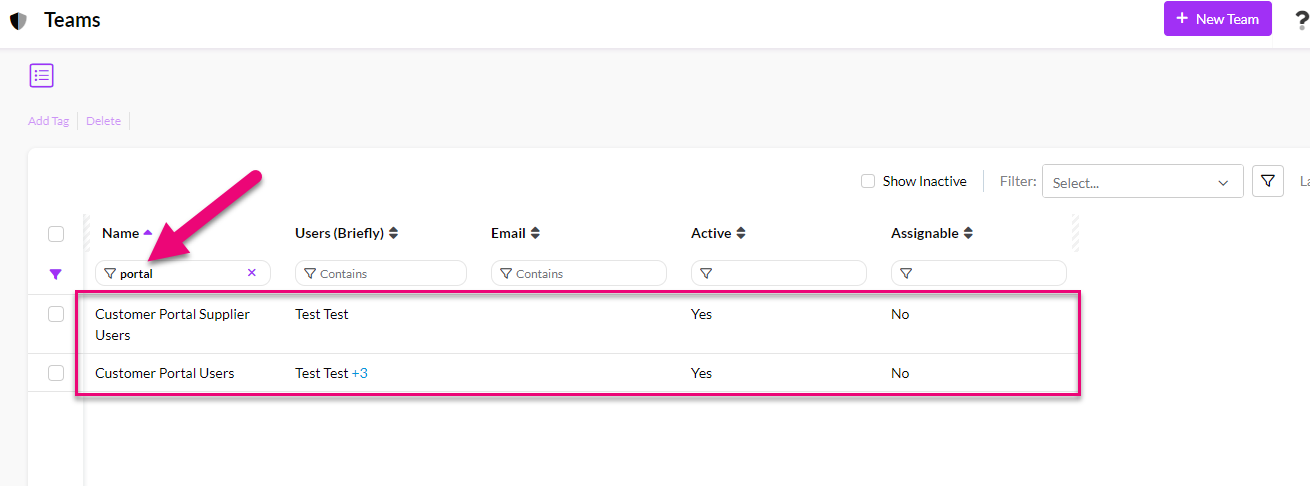
- Customer Portal Users – this is intended to give access to the sales capabilities of portal for your customers.
- Customer Portal Supplier Users – this is intended for providing access to your suppliers so that they can see Purchase Orders and Supplier Bills via portal.
Portal users can belong to both Teams.
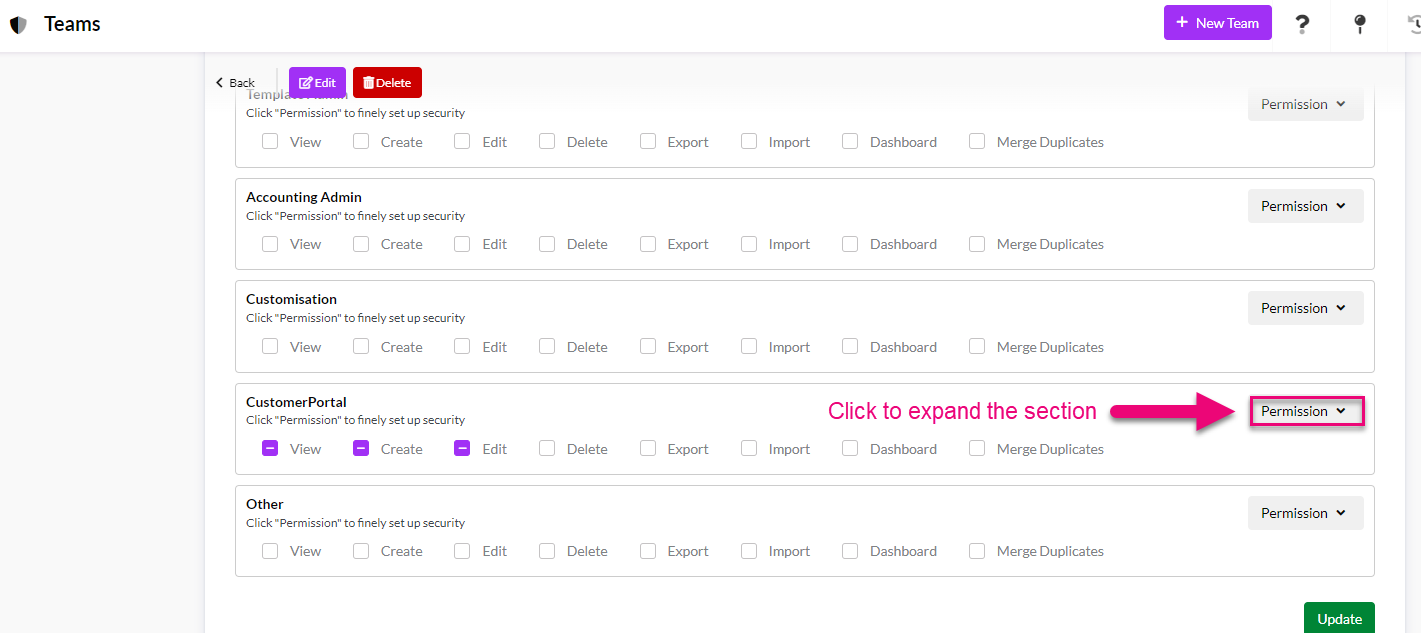
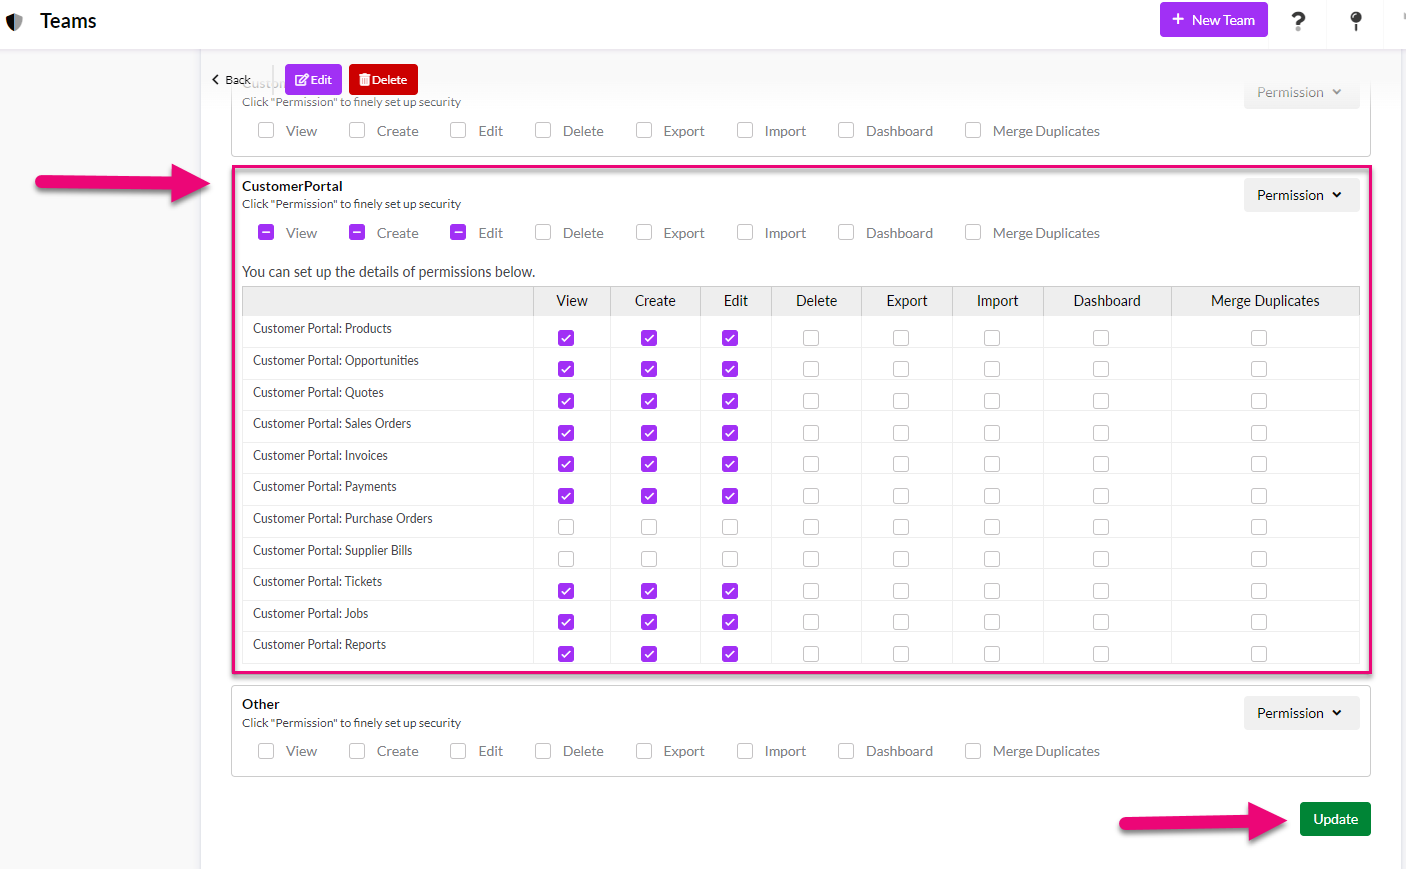
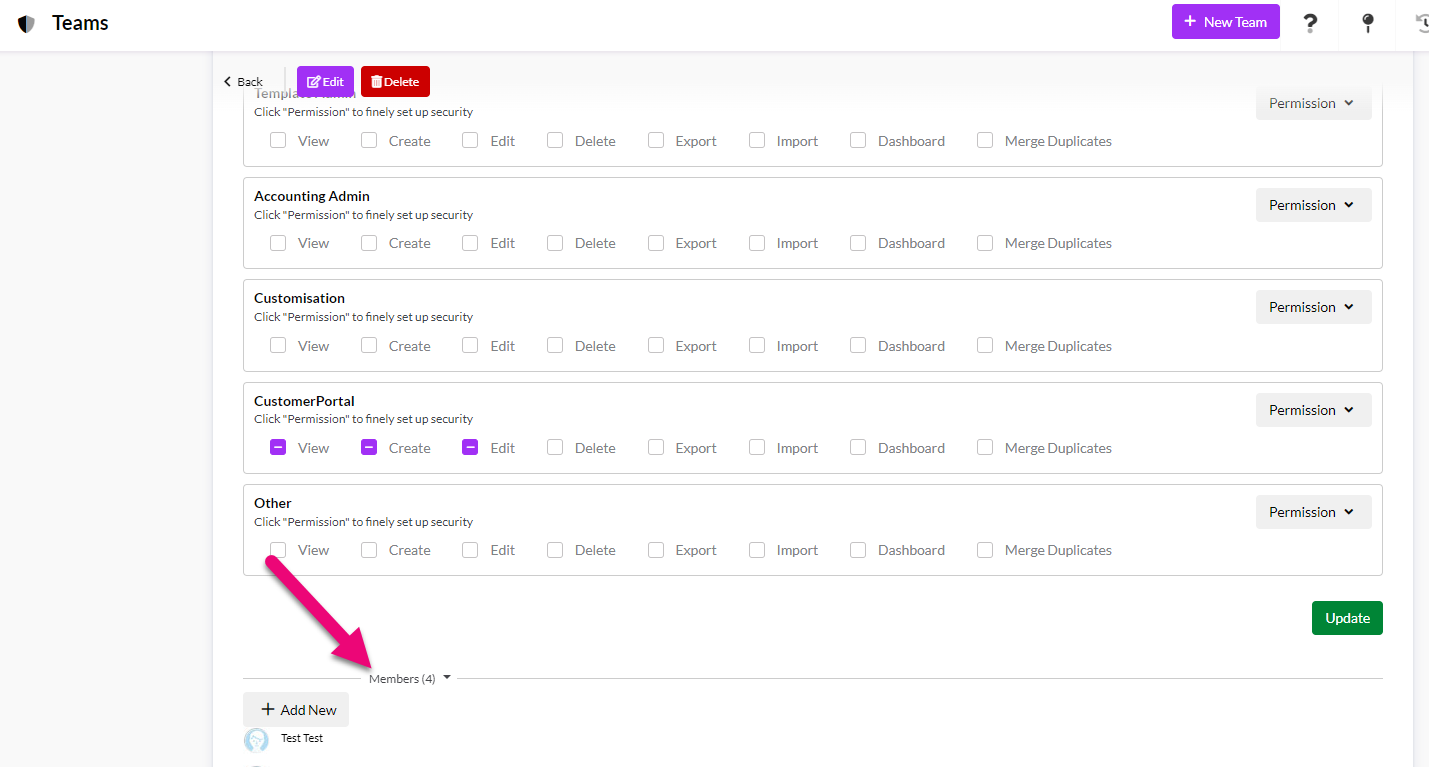
If you scroll to the bottom of the permission list, you will see that there are options specifically for Customer Portal – you can determine what your customers and suppliers can see and do by adjusting these permissions.
Ensure that you click on Update to apply any changes you make.
At the bottom of the Team form, you can see and manage all the members/users that have access to your Customer Portal via this Team.