-
- CRM Integrations
- Customer Portal
- Novum Networks
- Connecting with WooCommerce
- Time Tracker
- Connecting with PayWay
- VOIPLine
- Setting Up Emails
- Google Maps
- Novum Networks
- WooCommerce integration
- WooCommerce integration settings
- Customer Portal for customers
- Connecting with BurstSMS
- Payment Gateways
- Connecting Stripe
- Troubleshooting the Outlook Add-In
- Syncing Your Outlook Emails, Calendar & Contacts
- Installing Inbox Insights
- Connecting with WooCommerce
- Connecting with Mailchimp
- Connecting with Machship
- Connecting with Ezidebit
- Connecting with eWay
- Connecting with Campaign Monitor
- Jobs, Assets & Service Management
- Manufacturing
- Operations
- Reporting
- Training
- Workflow Management
- Quoting & Selling
Connecting with Mailchimp

The following steps will guide you through connecting your CRM to Mailchimp.
Data that syncs with the integration
When you connect Mailchimp to CRM, the following data will sync between systems:
Data that syncs IN to CRM
- Your Subscriber Lists, Campaigns and Subscribers will all be brought into CRM.
- Underlying details about Subscriber Lists and Campaigns will also be brought into CRM e.g. unsubscribes, bounces, reads etc.
- CRM will look for an existing match for Subscribers in Companies and Contacts and if a match is not found, a new record will be created.
- CRM automatically checks with Mailchimp every hour for new or updated data and brings it into CRM.
Data that syncs OUT to Mailchimp
- You can select whether your Lists in CRM sync out Mailchimp sync on a regular basis.
- You can select which Lists in CRM sync out to Mailchimp.
- You can also not schedule a regular sync and just manually push Lists from CRM out to Mailchimp, as required.
Note that once a Campaign that has been pulled into CRM from Mailchimp is complete, you will not be able to delete the record in CRM.
See also:
You’ll need to generate an API key with Mailchimp before you start:
- Log into Mailchimp.
- Access your account settings by clicking on your profile icon in the bottom left corner to reveal a menu, then choose Account.
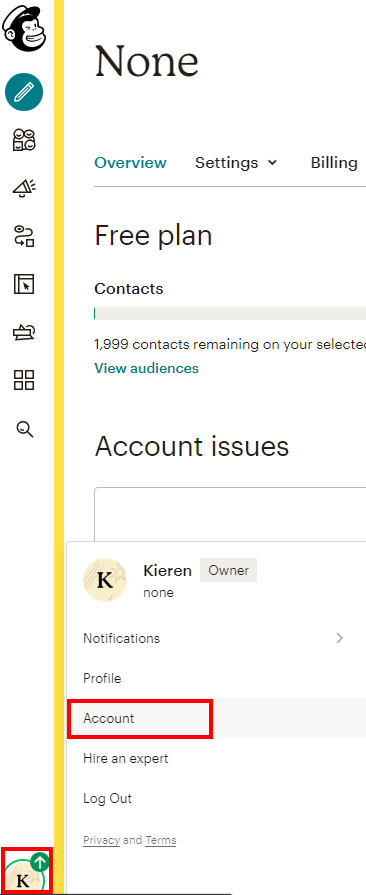
Access your Mailchimp account
- Expand the Extras menu and select API keys.

- Scroll down and click on Create A Key.

Create an API Key in Mailchimp
- This will generate an API key for you that you should copy to your clipboard.

Copy the API Key to your clipboard
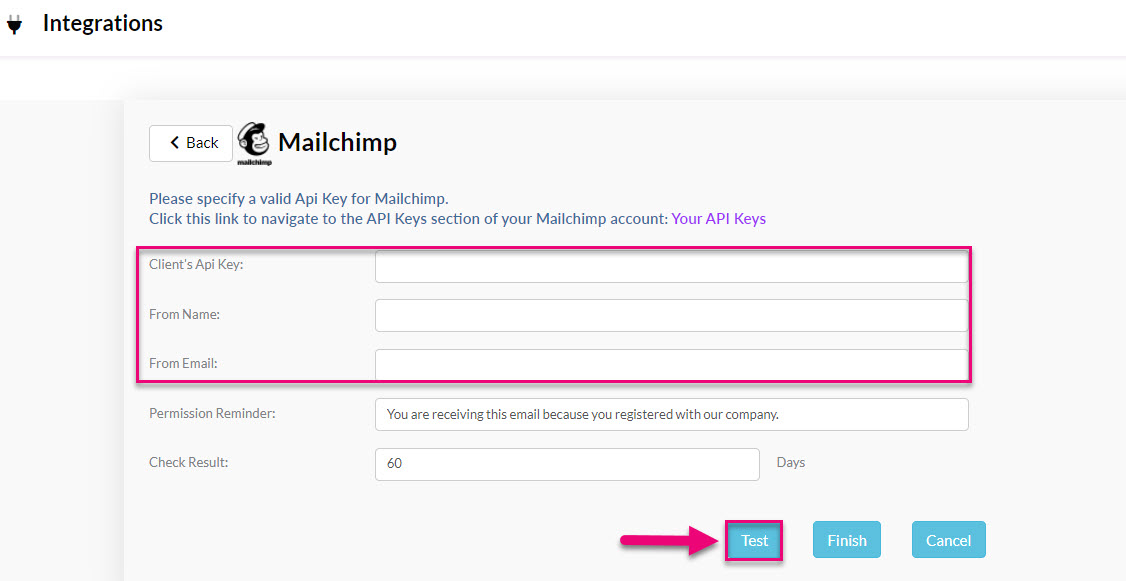
- Head to Admin > Integrations > Email and click on Activate next to Mailchimp.

- Enter in the API key you generated in Mailchimp.
- From Name is the sender’s name that will appear on your emails.
- From Email is the address that your emails will be sent from.
- Check result is how many days’ worth of Mailchimp data that will be brought over to your CRM.
- Click the Test button.
- When your test shows as having been successful, click Finish.
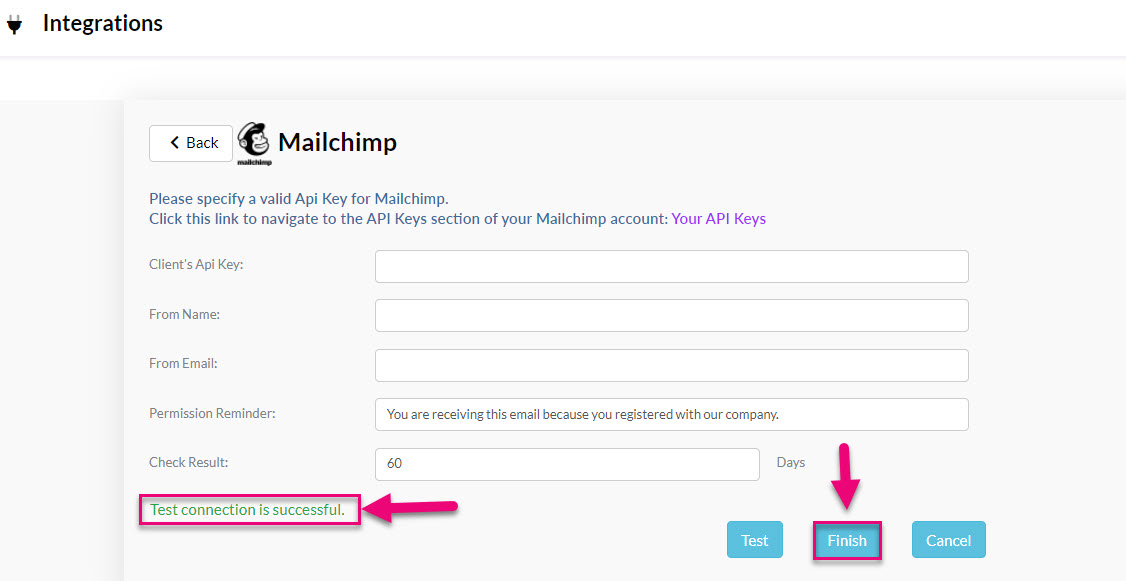
Note that if you currently have another campaign system attached to your CRM, the Mailchimp integration will override this and disable any other services.
- A prompt will then display for you to start the data download to your CRM, click on Start Download.

When complete, you will be able to see a summary of the data that has been imported.

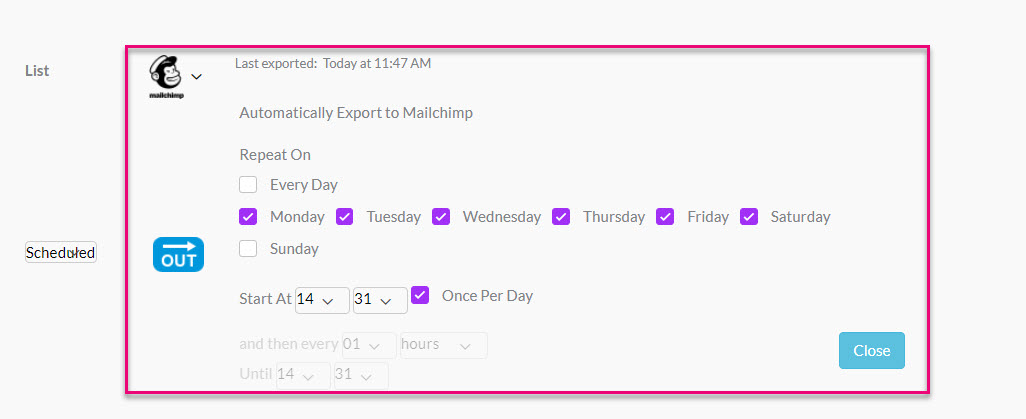
Once the integration is established, you can set the ongoing sync frequency of your Lists from CRM OUT to Mailchimp here as either Manual or a Scheduled.

- If you select Scheduled, you can amend the schedule by clicking on the days and time to reveal the option to change the existing details. You also need to then select which Lists you want to sync – see below for details.
- Click Close to apply the changes.
If you have your sync setting as Scheduled, you first need to tell CRM which Lists you want to sync to Mailchimp. To do this, go to the List and press the Upload to Mailchimp button – this initiates the connection and means the List will upload in future automatically, as per your sync schedule. You only need to press this button once.
If you have your sync setting as Manual, you will need to go into the List and press the Upload to Mailchimp button whenever you want to push the list out to Mailchimp.
