Managing your own deliveries
From the Sales Order module, you can view and manage your order deliveries and allocate Resources to shipments – this will be for shipments you are using your own Resources for (e.g. cars/trucks/bikes etc.) and are not outsourcing the shipment to a freight company.
Calendar showing scheduled truck deliveries
At present you can only manage your own deliveries via the Sales Order module and not from any of the shipment modules e.g. Outbound Shipments.
This guide will explain how to set up your system to use Sales Orders to manage your own deliveries.
Click here to see our full guide on Delivery Resources.
You can add Resources and Resource Groups to your system to manage internal resources like cars, vans, motorbikes and trucks and then add them to your Shipments.

Delivery assignment field on a Sales Order
When you create a new Resource or Resource Group, you can tick the Add on Calendar box to make the information available to view in the Calendar module.
This feature allows you to visually track and adjust the scheduled use of your Resources.
Calendar showing the delivery truck Resources
Click here to learn how to use Resources for Manufacturing.
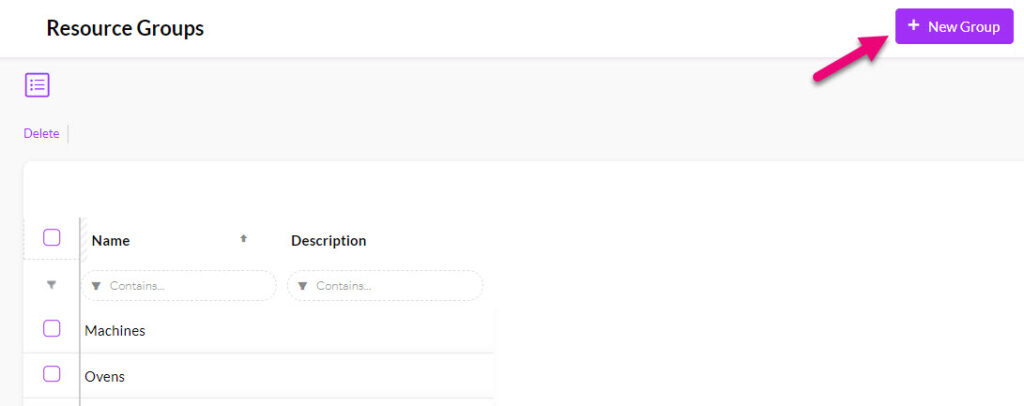
Resource Groups
These are high-level groups that you can add any number of Resources to.
- Go to Admin > Settings > My Company > Resource Groups.
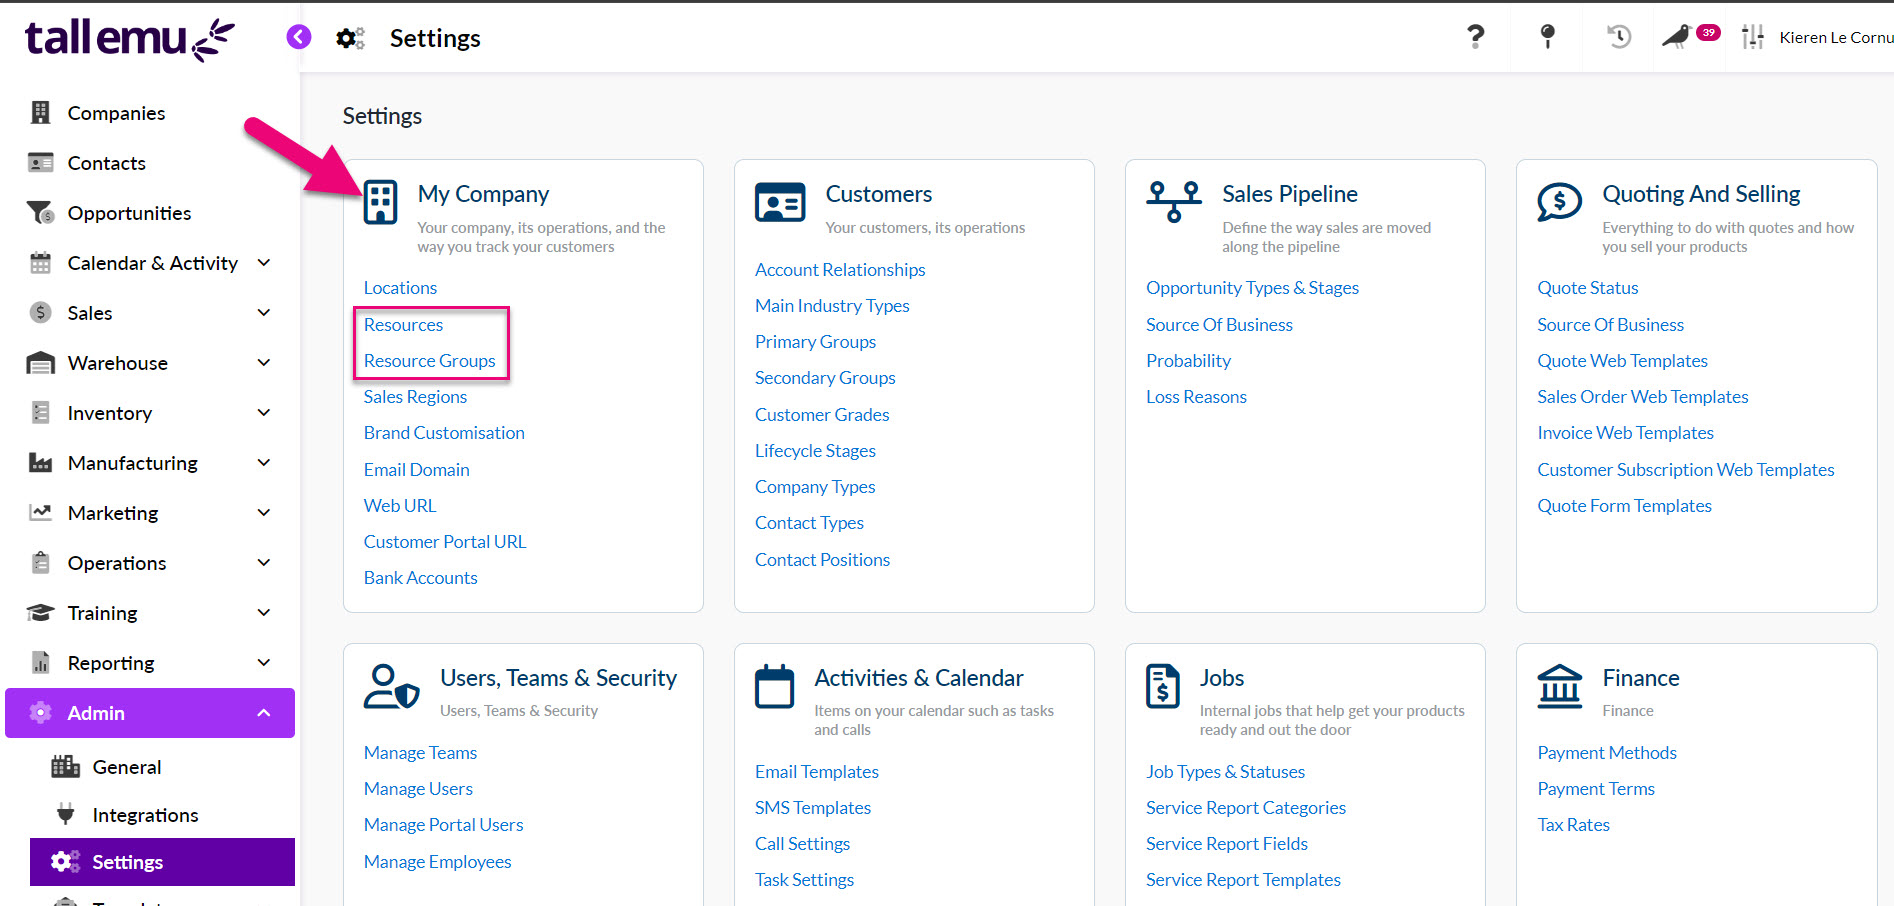
- Click on the New Group button.
- Give the group a Name e.g. cars, trucks, vans etc. and then ensure the Show On Calendar box is ticked. You can also add in a Description with further details about the group (this is optional).
- Click on Save & Close when done.

The example below shows a group for delivery trucks that will used to ship orders to customers – you can add any type of resource groups your business uses.
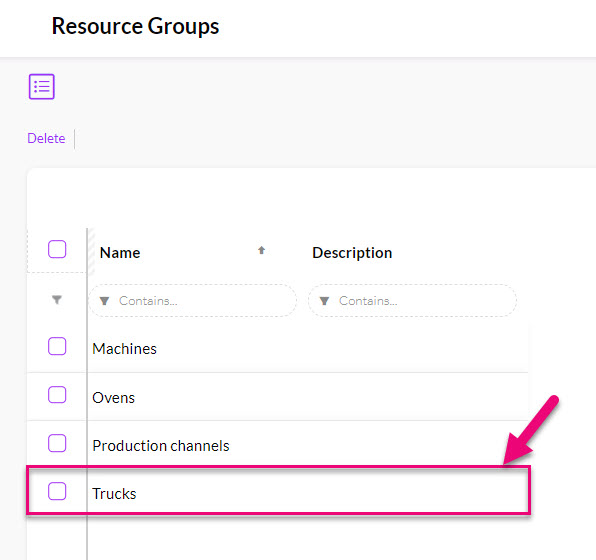
Resources
The example below shows the Resource Group ‘Trucks’ and Resources ‘Melbourne Delivery Truck’ and ‘Sydney Delivery Truck’.
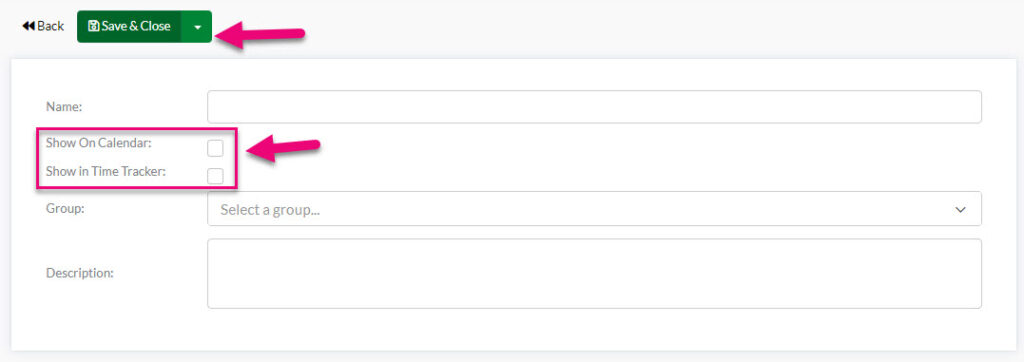
- You can create any number of Resources and associate them with Resource Groups from Admin > Settings > My Company > Resources.
- Just click on the New Resource button to create a new Resource.

- Give the resource a Name e.g. Sydney Truck, Red delivery van, purple Ute etc.
- Ensure the Show On Calendar box is ticked.
- If you want to be able to perform stop/start time tracking for your deliveries, tick Show in Time Tracker.
- In the Group field, select the Resource Group you created earlier e.g. “Trucks”.
- You can also add in a Description with further details about the group (this is optional).
- Click on Save & Close when done.
The example below shows 2 trucks that have been linked to the Resource Group “Trucks”.

Click here to see our full guide on Delivery Options.
From Admin > General > Delivery Options you can set preferences to do with managing your own deliveries using Sales Orders.
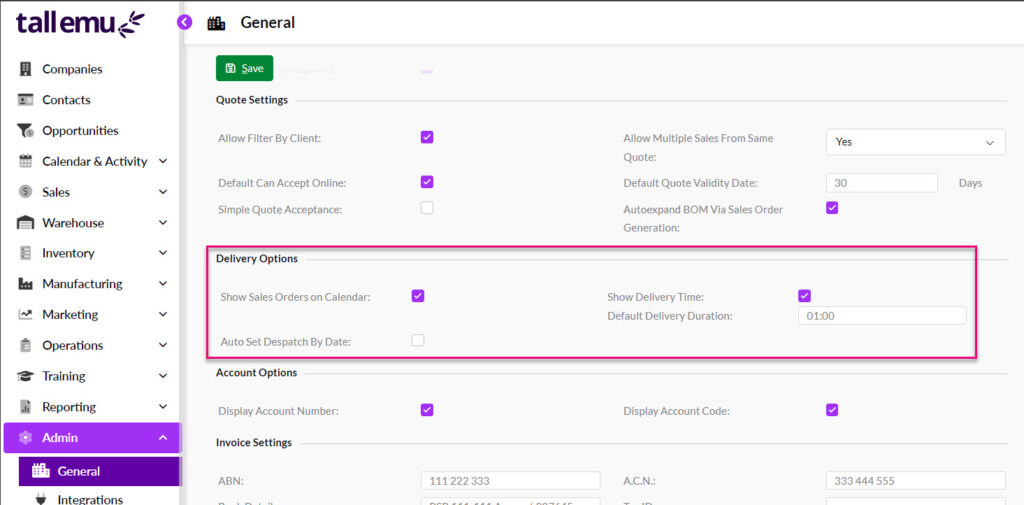
Following is the purpose of each field:
- Show Sales Orders on Calendar – ensure this box is ticked so that you can view and schedule your deliveries in Calendar View within the Sales Order module.
- Show Delivery Time – ensure this box is ticked so that the Delivery Date and Delivery Time fields are shown on the Sales Order. Values added to these fields, in conjunction with the Default Delivery Duration field value will mean that the time allocated to the delivery is shown as a calendar Meeting.
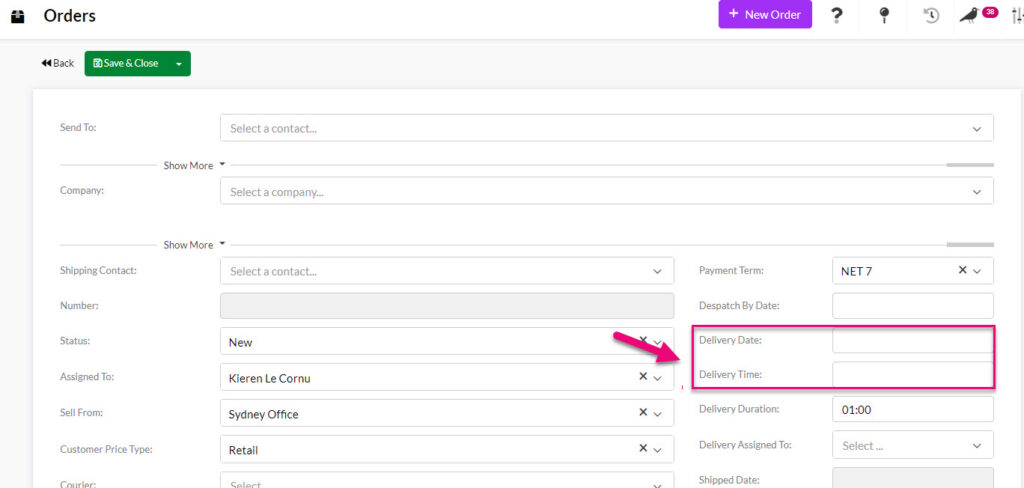
Delivery Date & Time fields on a Sales Order
- Default Delivery Duration – this field is in HH:MM format and allows you to select a period of time that will apply as default for each delivery in the Delivery Duration field on Sales Orders.
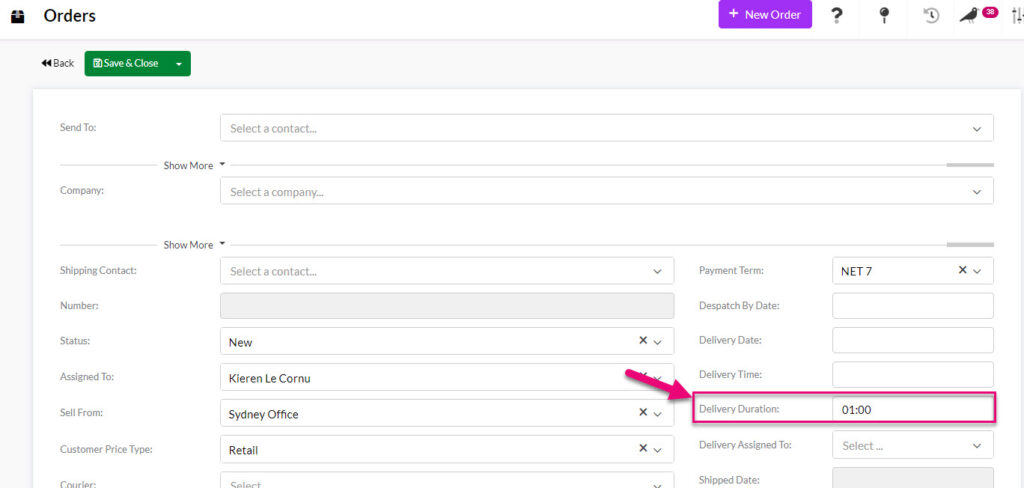
Delivery Duration field on Sales Orders
- Auto Set Despatch By Date – once this box is ticked, the field for Default Despatch Lead Time will be visible and you can input a number of days.

The value input here will populate into the Despatch Date field on Sales Orders.
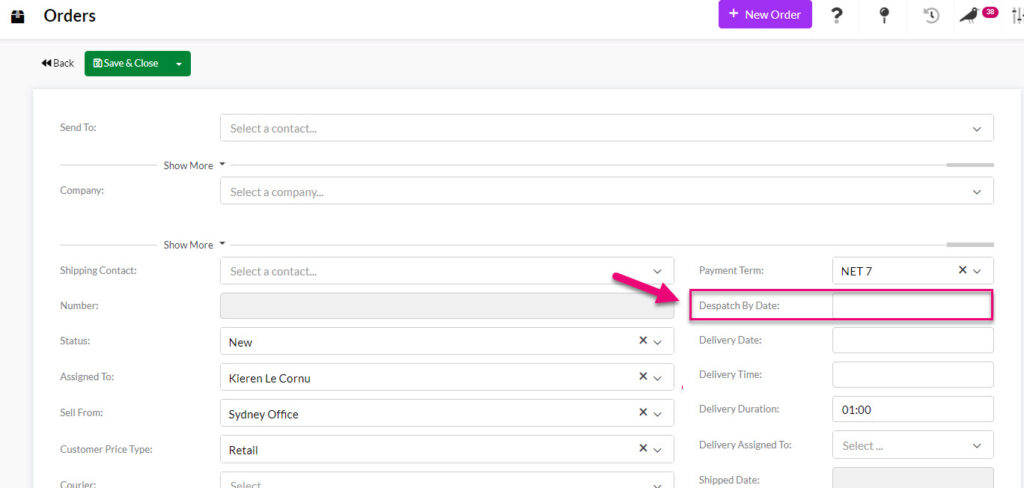
Despatch By field on a Sales Order
To manage your deliveries in Sales Orders, you must have:
- Added the appropriate dates and times to the Sales Order fields Delivery Date, Delivery Time and Delivery Duration (HH:MM format).
- Correctly assigned your Resources to the Sales Order i.e. in the Delivery Assigned To field you must choose a Resource (e.g. car or truck) that will deliver the order.
The information you input into these fields will then feed through to Sales Orders in Calendar View.
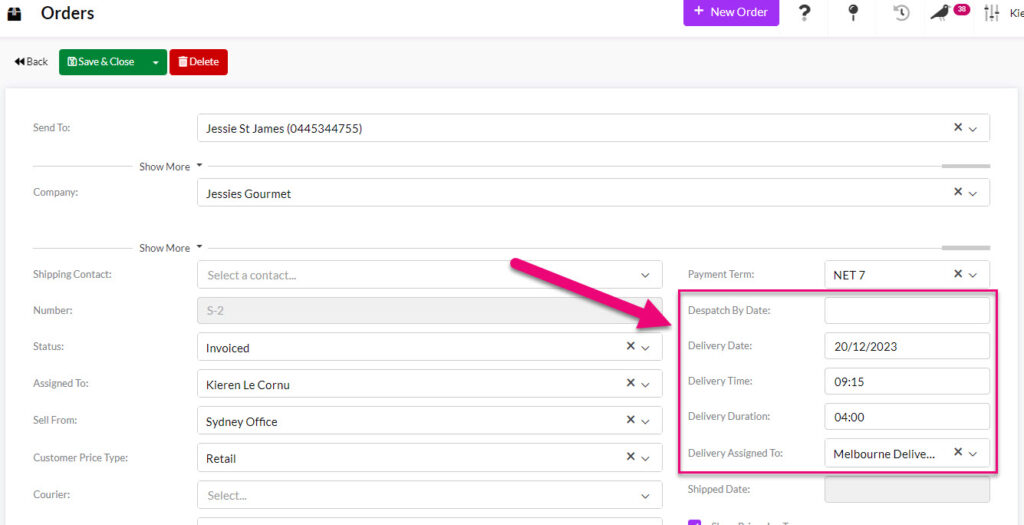
Delivery fields on a Sales Order
When in List View, you can add these fields as columns in your view or add a new Filter or Layout to allow you to view and sort these field values.
If you want to assign deliveries to specific people in your team, you can do this using the Assigned To field (e.g. this could be the driver/rider that will be in charge of using your Resource to deliver the order).
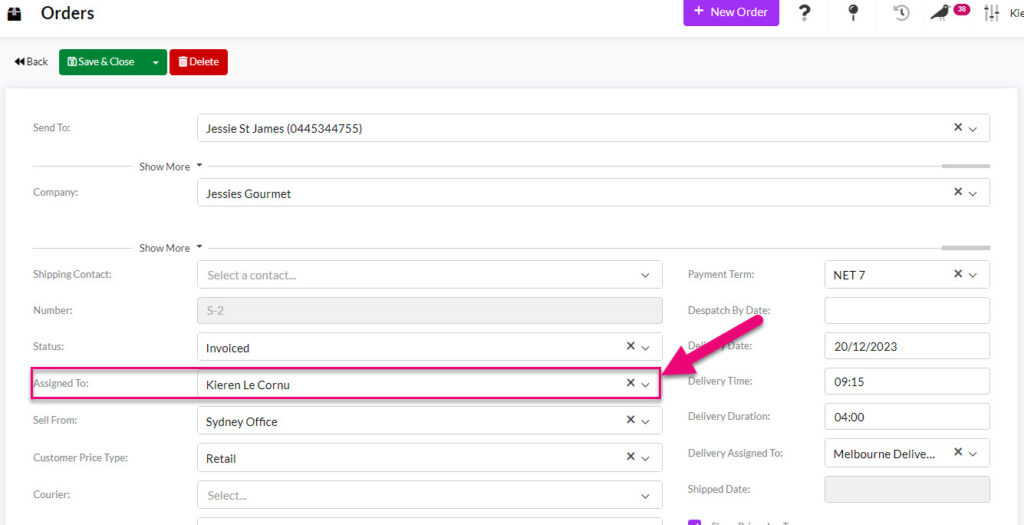
Assign a delivery to a CRM User
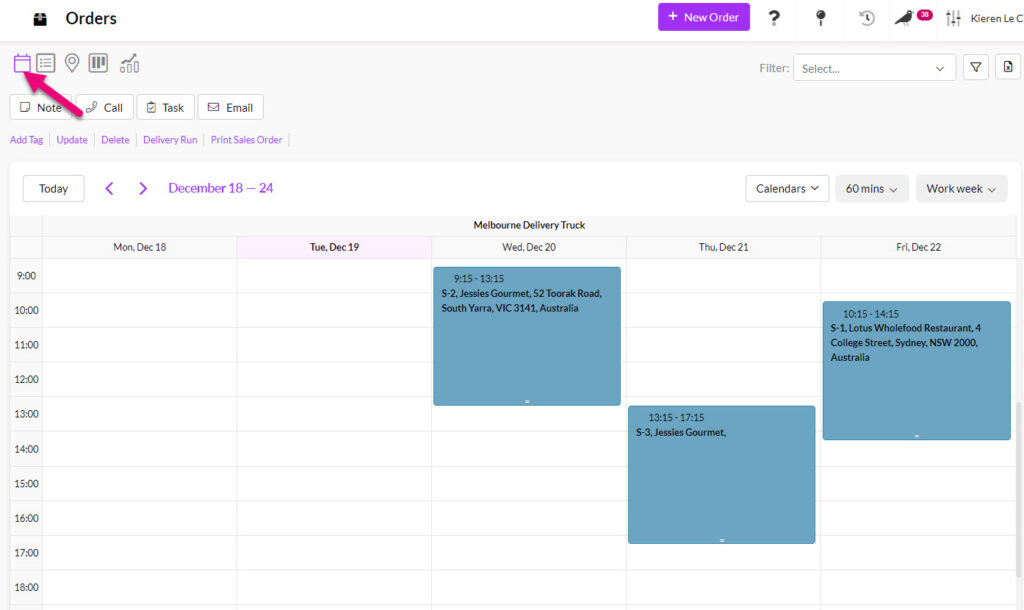
You can view all your deliveries from Calendar View in Sales Orders. To access this view, click on the Calendar icon above the toolbar.

You will then need to go and select the calendars for the Resources and/or Users you want to view – which calendar a delivery will show in is determined by the choices made in the Assigned To (i.e. a CRM User) and Delivery Assigned To (i.e. a Resource) fields in a Sales Order.
If you don’t see any of your Resources here, you may not have enabled the ‘show on calendar’ setting for your Resources and Resource Groups when you set them up – you will need to enable this first.

You can adjust the timeframe for your view – the example below uses the Work Week option and shows deliveries for the selected Resources within this timeframe. When in Calendar View, you can also:
- Hover over a calendar event to reveal further information about the delivery.
- Double-click a calendar event to open the Sales Order.
- Drag & drop an event on the calendar to reschedule the delivery to a different time, date or Resource calendar.
Calendar showing the delivery truck Resources
The placement of each calendar event is determined by the fields Delivery Date (what day the event is on), Delivery Time (what time the delivery will start) and Delivery Duration (how long the delivery will take, starting from the Delivery Time field value) and which Resource has been selected.
You can print a Delivery Run sheet from the Sales Order module by clicking on Delivery Run beneath the toolbar.

A new window will open where you can specify the Resource and Delivery Date and then click Submit to generate a run sheet. You can also save, print or search within the run sheet using the options on the toolbar.

Creating a Delivery Run sheet for a Resource

Example Delivery Run sheet
Some of the Sales Order fields work with and are automatically updated by actions in the Outbound Shipments module – because managing your own deliveries sits outside of this system relationship, to mark your Sales Order deliveries as complete, you will need to update the Status field to either Sent or Completed.

Status field on a Sales Order