Emails
After you have set up your Email integration, you will be able to send Emails from within your CRM.
Emails sent from CRM are automatically tracked in the system, allowing you to view Emails as part of an activity history for all the records in your CRM.
This page will take you through the available features of Emails in your CRM.
See also:
- Our Outlook integration
- Failed Emails
- Mailchimp integration
- Campaign Monitor integration
- Working with Activities
Where you can send Emails
The Email function is available in most areas of CRM.
- From List View in most modules: if you create a new Email from List View in any module, it will only be linked to the Contact and/or Company record/s you select as recipients. There will be a button on the module toolbar in List View where Email is available.

- Directly from a record in most modules: if you create a new Email directly from a record in any module of CRM, it will apply to both the record you are in, as well as the Contact and/or Company record/s you select as recipients. For example, if you created an Email from an Invoice record and selected a Company and/or Contact as recipients, the Email will show up on all three timelines (i.e. the Invoice, Company and Contact timelines). There will be a button on the record toolbar where Email is available.

You can only send an Email to a recipient that has a record in CRM.
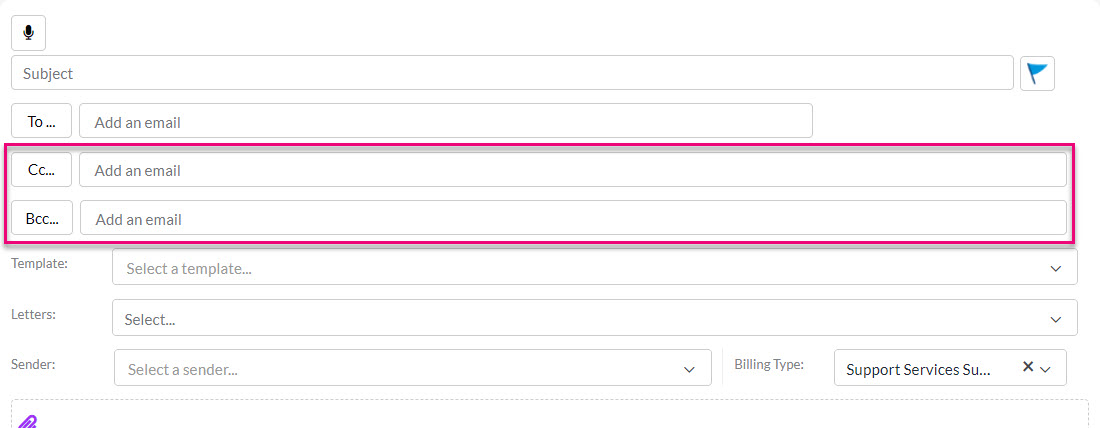
You can send Emails to multiple recipients as either primary, Cc or Bcc recipients. To view the Cc and Bcc fields in a new Email – just click on the buttons to display the full area.
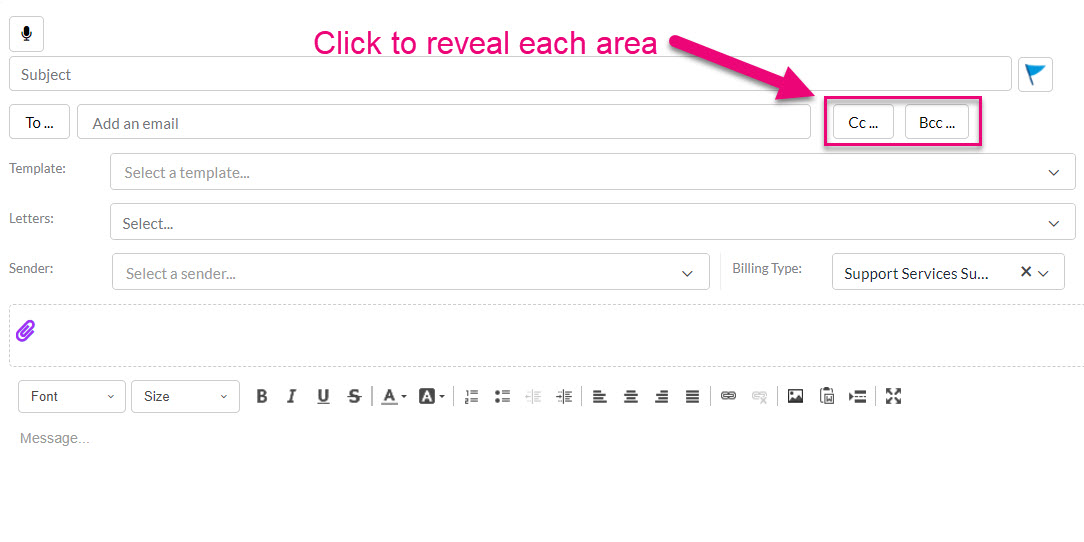
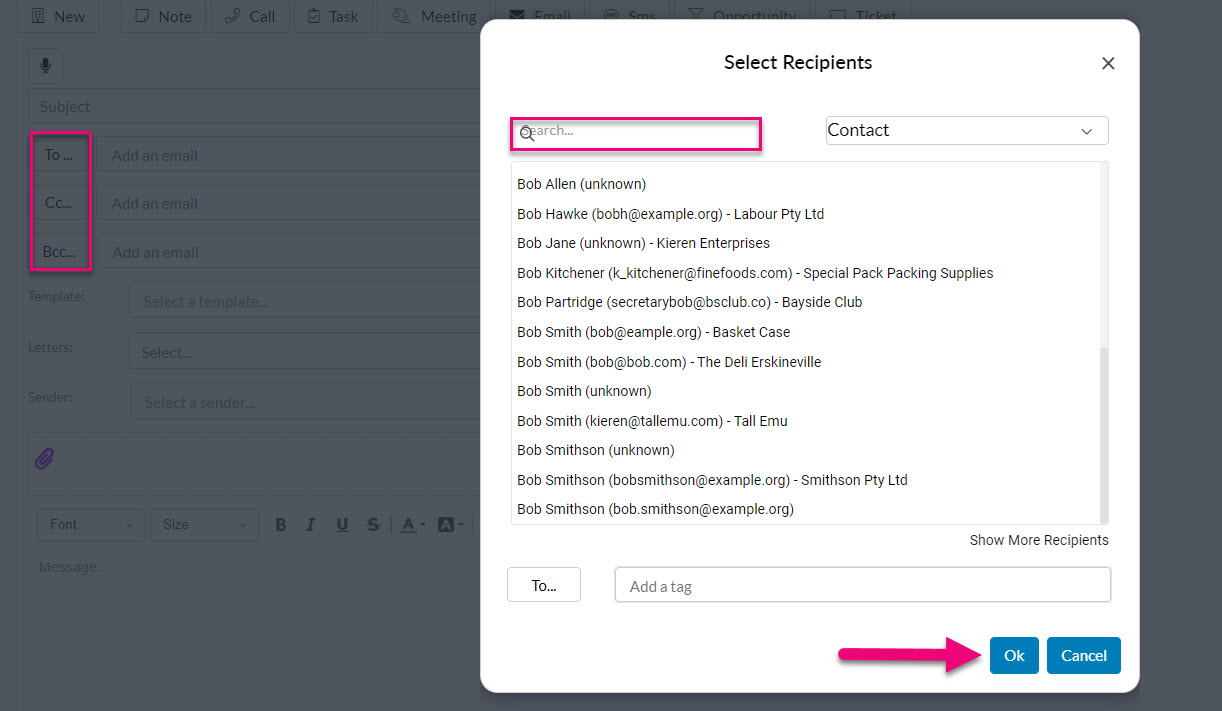
To choose your recipients, click on any of the To, Cc or Bcc buttons to show a pop-up box that allows you to choose or search for recipients.
When you send an Email from within CRM, you can see the status of the delivery from the Planned Activities area of the Timeline.
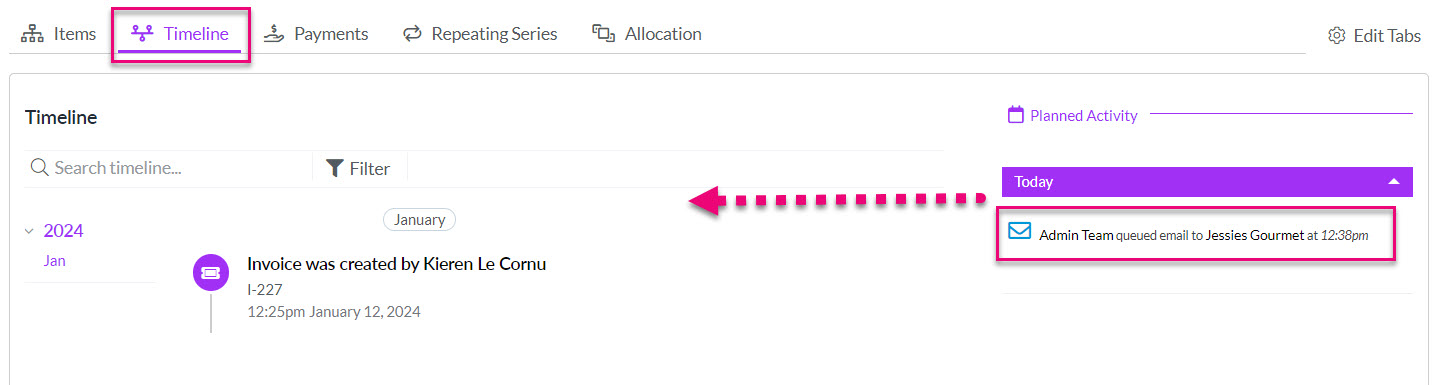
When you press Send on a new Email it will show in the Planned Activities area to the right of the Timeline as being queued for delivery. Once the email is sent, it will be added to the Timeline of the record.
If your Email has failed to send, it will also be shown in the Planned Activities area.

When you send an Email, it may remain queued for a few minutes before it is sent and appears on the record Timeline. You may need to refresh the record to update it.
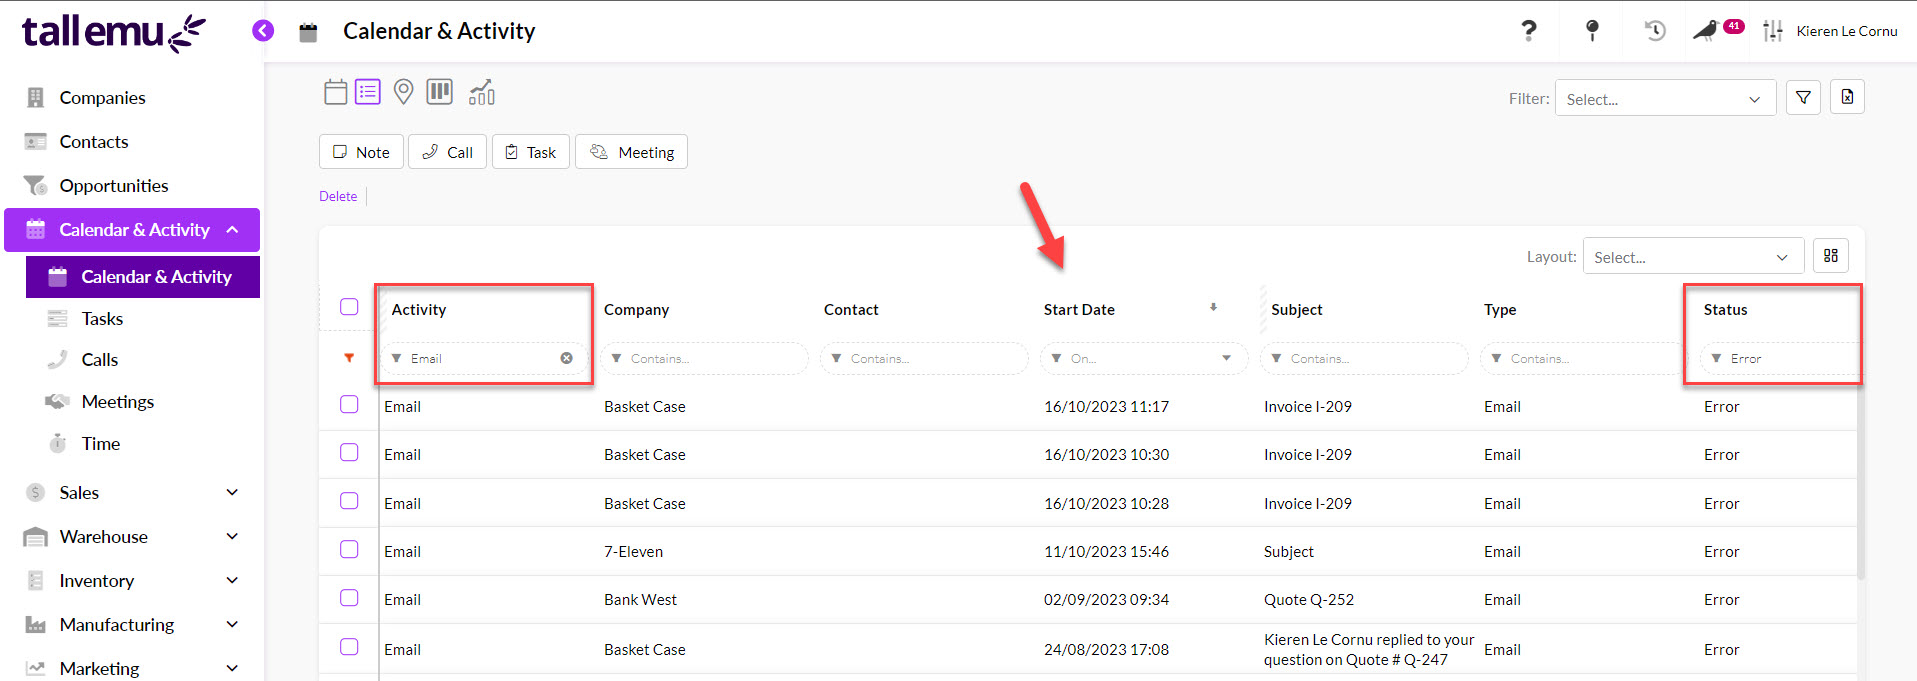
You can also see emails that have failed to send from the Calendar & Activity > Calendar & Activity area by filtering the Status column for “Error”.
See also:
From a record Timeline
When you send an Email from anywhere within CRM, an activity is automatically created on the associated record/s in the Timeline area, forming part of the record history, for example:
- If you sent an Email from an Invoice record to both a Company and Contact as recipients, the Email will show up on all three timelines (i.e. the Invoice, Company and Contact timelines).
- If you send an Email to multiple recipients e.g. Contacts or Companies, the Email will appear as an activity on the Timeline in each of the recipient records.
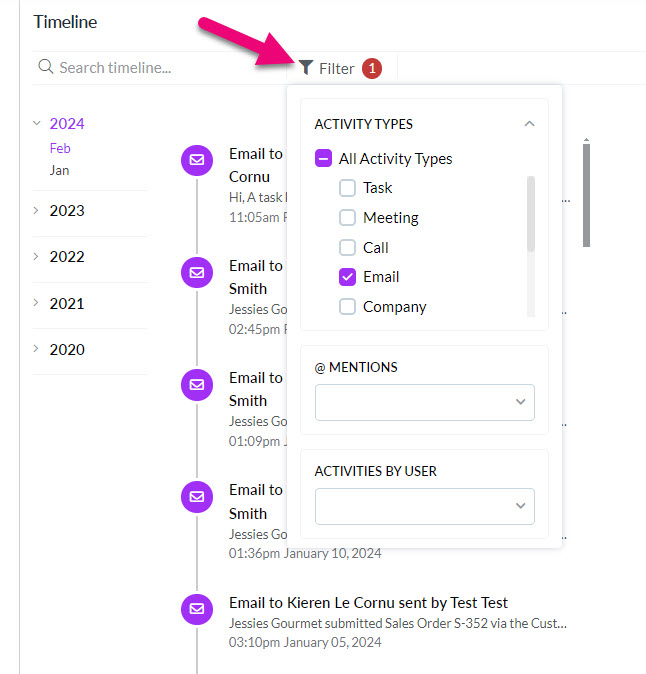
- On any record Timeline, you can filter out the Activities by Email.
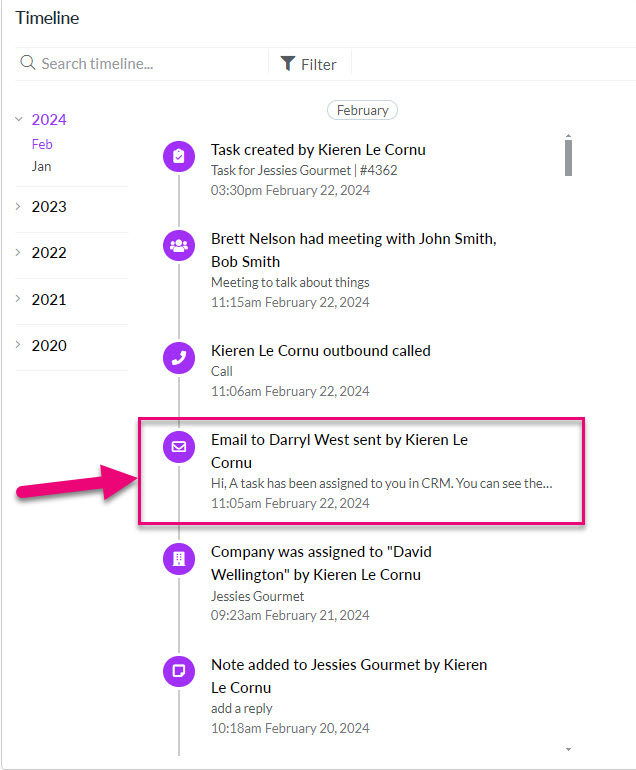
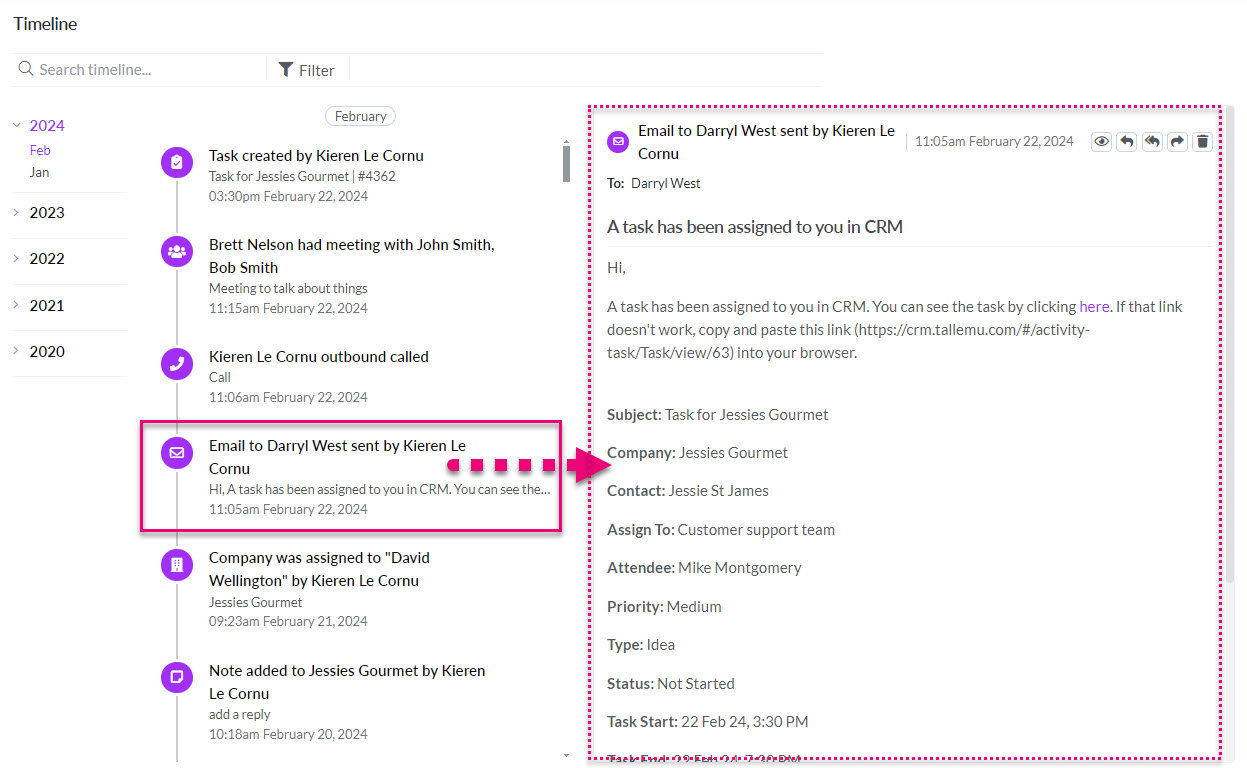
- To see the detail of the email, click on the Email on the Timeline and it will then be shown in the area to the right.
See also:
From the Calendar module
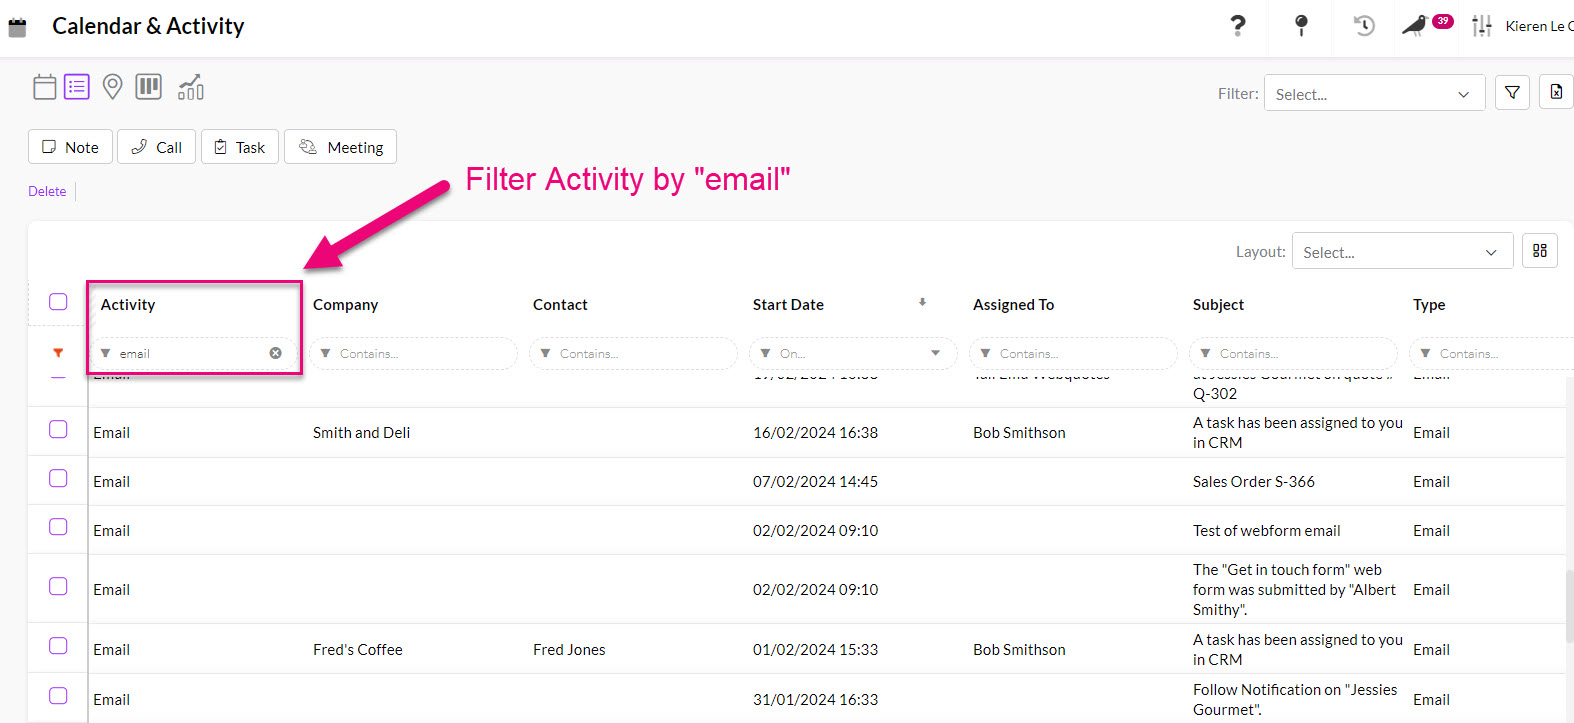
You can also see emails that have been sent from anywhere in your CRM from the Calendar & Activity > Calendar & Activity area by filtering the Activity column for “email”.
See also:
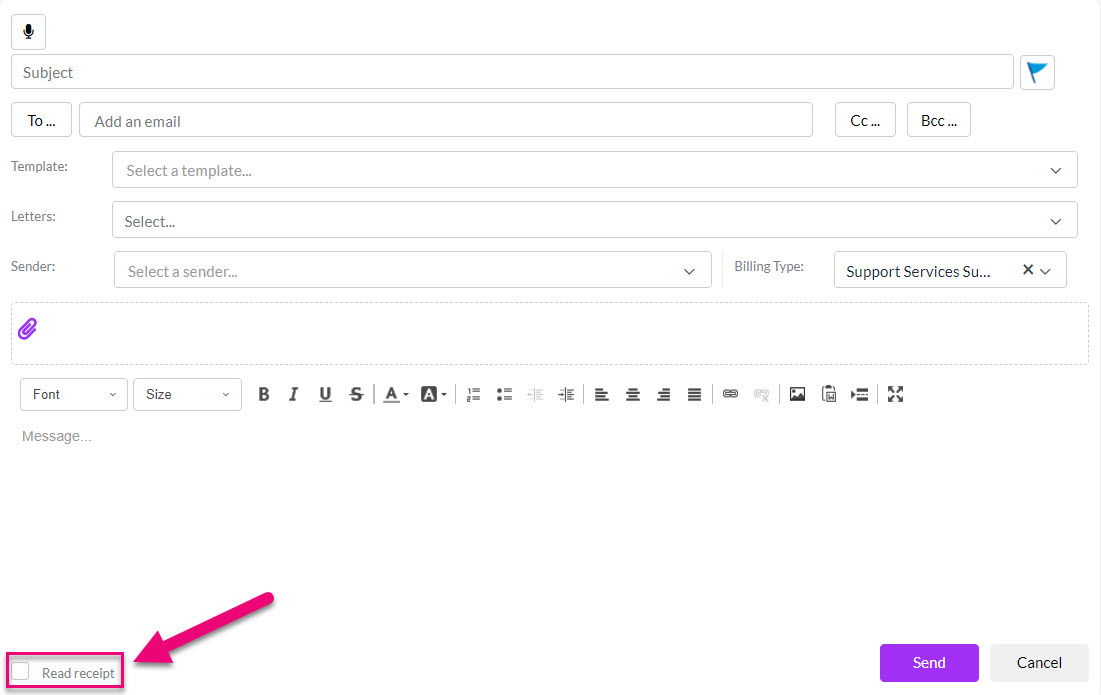
You can request a read receipt to be sent with your Email, just tick the Read Receipt box in the bottom left corner when composing a new Email. This triggers the following actions:
- When the Email is received, the recipient may be prompted to allow a read receipt to be sent.
- When the read receipt is generated, it will be sent to the email address of the Sender that was specified when the Email was composed.
The Email form includes a formatting toolbar, providing you with the ability to customise your email body with the following features. Hovering over each of the buttons will reveal a description of the button function.
- Font – choose a font and size and have the option to apply bold, italics, underline or strikethrough to the text and change the colour.
- Text format – increase/decrease indent, add a numbered or bullet point list, align text to left, centre, right or justify.
- Email format – choose a background colour from the palette.
- Insert an image – from either a URL or file upload.
- Add or remove a link – available for URL, email, phone or link to an anchor in the email text.
Email formatting toolbar
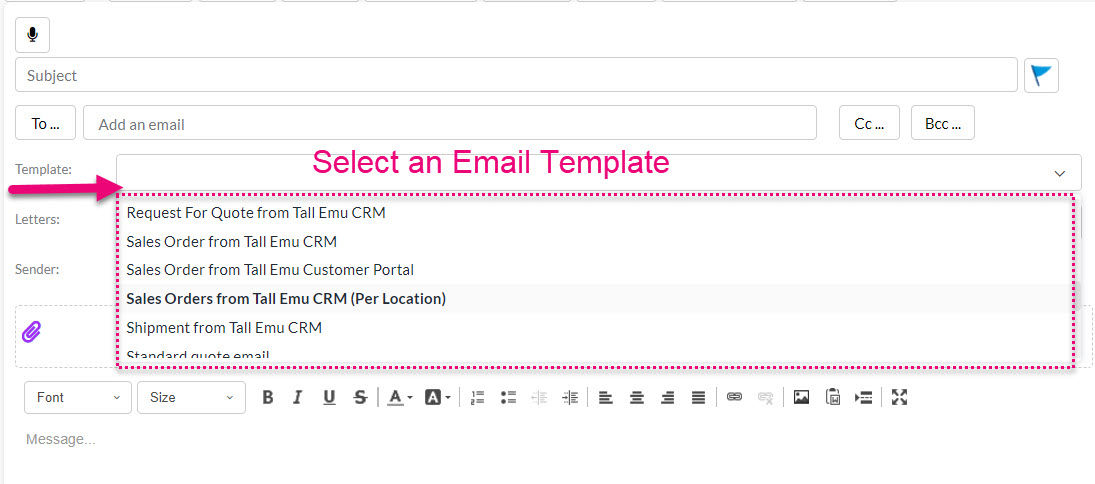
You can utilise an existing Email Template you’ve created by selecting it from the Template drop-down field when you are creating a new Email – the selected template will then populate your Email so that you can review it before sending.
- For more on how to create Email Templates, see our guides to Creating Templates
- To understand how and when you can use your Email Templates, see Using Templates
You should also note that when you are sending an Email directly from certain record types in CRM (e.g. Invoice or Quote), an Email Template may already apply by default – you can change this by either selecting a different Email Template or clearing the applied template by using the red cross in the Template field, as shown below.
![]()
Attach files
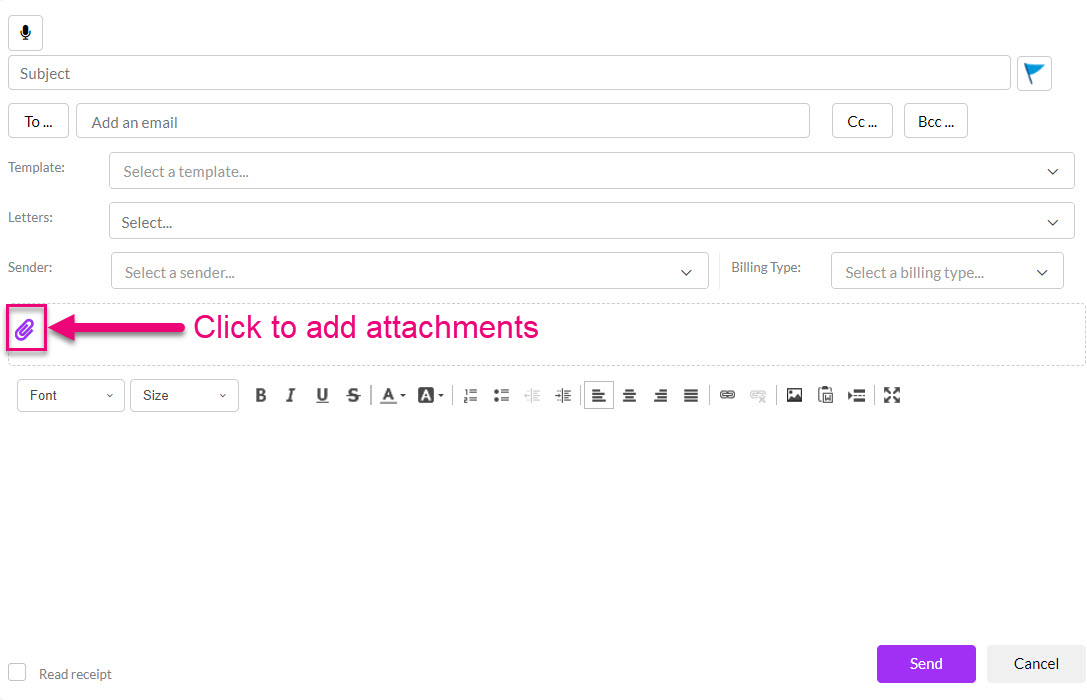
Just click on the paperclip icon to add the required files to the Email as attachments.
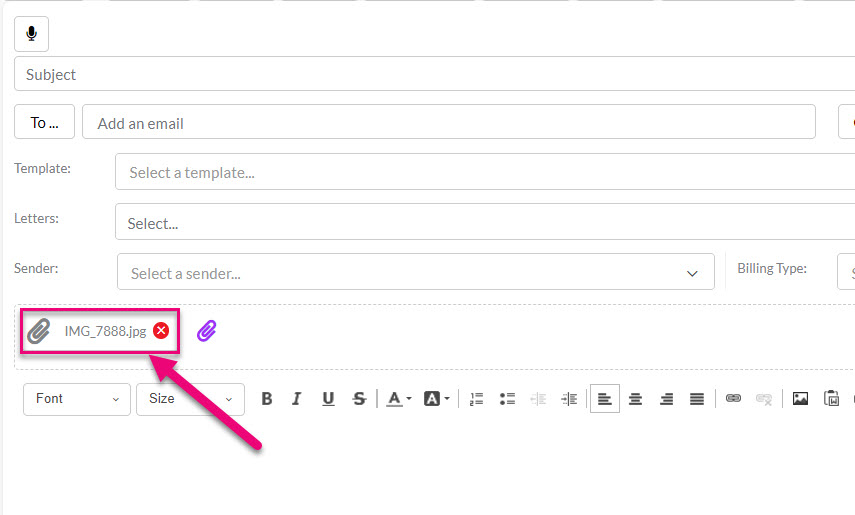
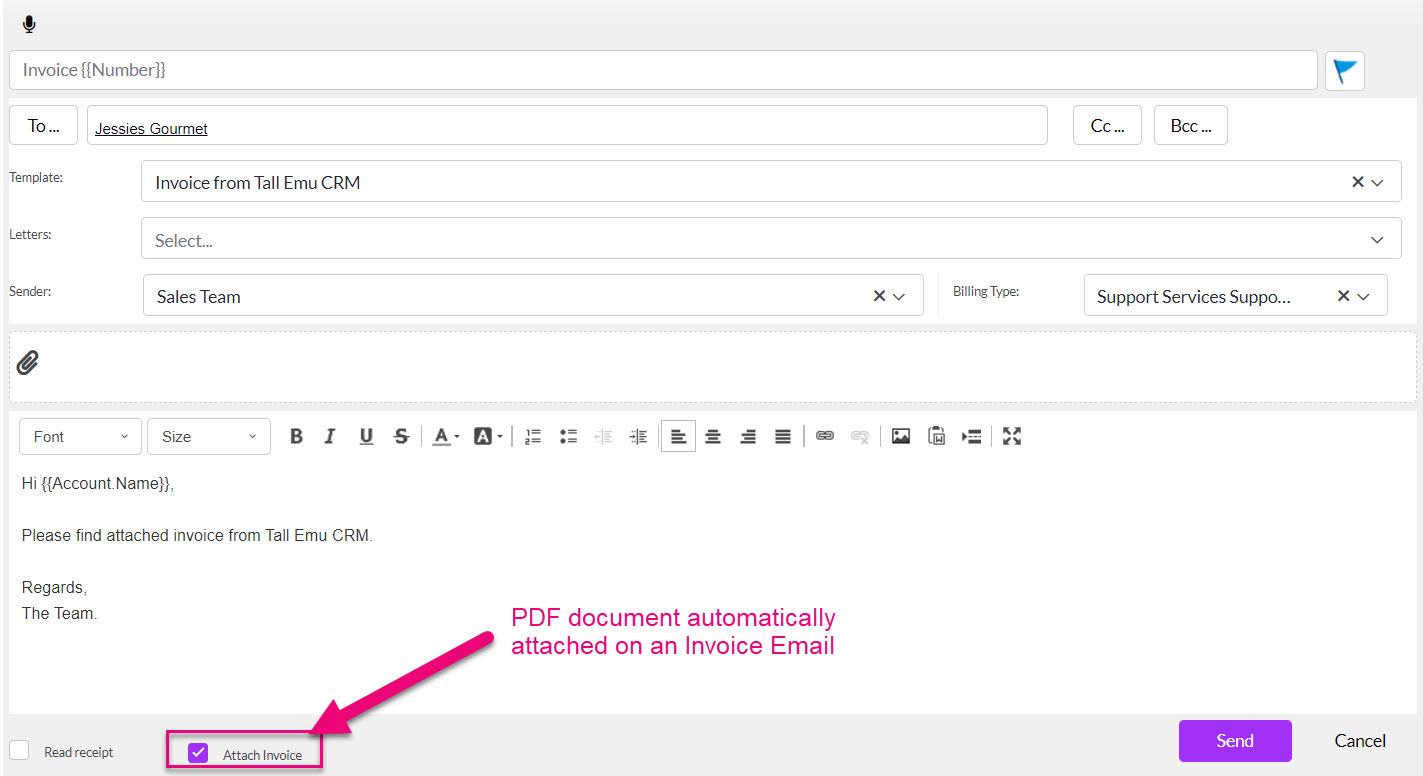
In some cases, Emails you send will automatically include a PDF attachment e.g. Quote, Sales Order, Invoice etc. You can de-select this option if you don’t want to include the attachment.
If there are files you want to attach to a certain Email every time you send it, you can do this using an Email Template.
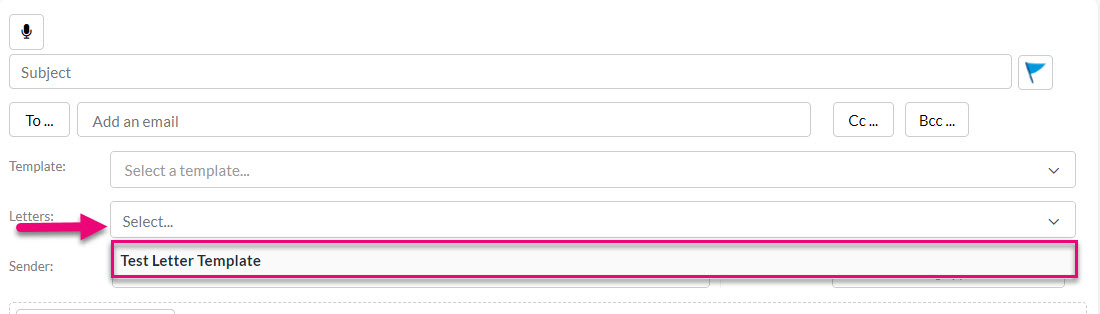
Attach a Letter
You can utilise an existing Letter Template you’ve created by selecting it from the Letters drop-down field when you are creating a new Email.
The selected Letter will be attached as either a Microsoft Word or PDF document, depending on the options you have chosen when the template was created.
For more on how to create Letter Templates, see our guide to Creating Templates.
If there is a letter want to attach to a certain Email every time you send it, you can do this using an Email Template.
Rather than typing an Email, you can use the native voice transcription feature to turn your voice into text.
While you are speaking, the system will record your audio and you will have the option to save the recorded audio as an attachment so that it will form part of the Email activity on the applicable record Timeline – note that the attachment will not be sent in the Email.
To begin voice transcription, press the microphone icon when you are creating a new Email and start talking – the system will begin transcribing your speech (there may be a slight delay in the text appearing in the message body).
![]()
If your browser does not already have permission for CRM to use your microphone, a prompt will display, and you will need to choose Allow.

Example of browser permission to enable a microphone
When the voice transcription starts, the microphone icon changes to a square – click on the square to stop the voice transcription.
![]()
When you end the voice transcription, you will have the option to save your recorded audio as an attachment to the Email activity (it will not be sent) or select Cancel to abandon the recording.

If you choose to save the audio file, you will see it attached to the Email next to the microphone icon.

You can now edit any of the text that has been transcribed before you send the Email.
Although you have the ability to record and attach an audio file when you create a new Email, this will not be sent to the Email recipient – the audio attachment will remain in the Email activity on the applicable record Timeline. You could utilise this feature if you wanted to add further information or an explanation (using audio) to accompany the Email activity record.
Note that for each User in your system, you can set a default preference for the Speech Recognition Language used.
![]()
See also:
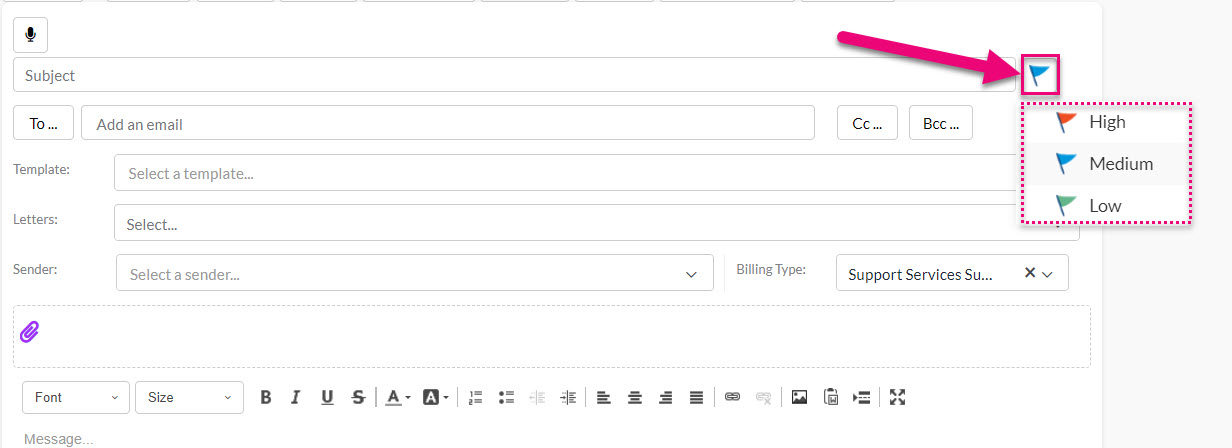
You can set the priority of Emails to either Low, Medium or High. By default, Emails are sent with a Medium priority applied.
Click on the flag icon in the top right corner of the Email to change the priority.
You can also customise the priorities that show here from Admin > Settings > Activities & Calendar > Email Settings.

You can then click on Priority to reveal the current values and edit them to suit your requirements.
