- Companies
-
- Sales
- Multi-currency for Sales
- Invoicing items that aren’t in stock
- Drop shipping workaround
- Managing your Quote pipeline
- Direct Debits
- Sending Statements
- Backorder Invoices
- Progressive revenue
- Subscriptions
- Bulk send Invoices
- Credit Notes
- Taking a Deposit
- Creating Invoices
- Create Freight Quotes
- Getting Started with Web Quotes
- Sales Orders
- Card Payments
- Payments
- Repeating Invoice Placeholders
- Creating Repeating Invoices
- Online Invoice Templates
- Online Sales Order Templates
- Set Up Web Quote Templates
- Quotes
- Quotes
Managing your Quote pipeline
This guide will take you through the number of ways that you can work with all the Quote data in your system.
See also:
Creating workflow lists via Advanced Filters & Layouts
Using Advanced Filters and Layouts you can create customised searches in Quotes, Companies and Contacts to quickly and easily segment your data for workflow and reporting.
What are Advanced Filters?
- An Advanced Filter in a permanent search you can customise.
- You can have as many as you need.
- You can choose whether they are shared with other Users or only able to be seen by you.
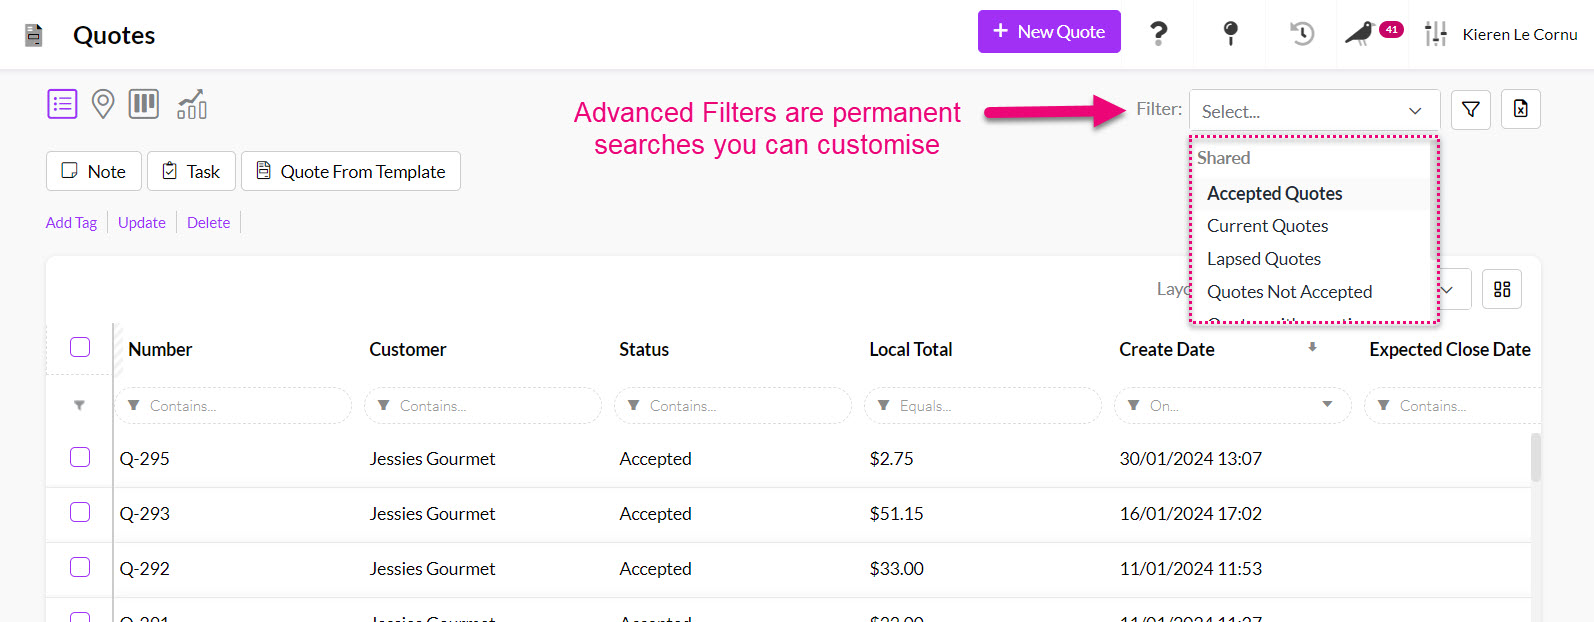
Filters in Quotes
See also:
What are Layouts?
- A Layout determines which columns are show in the view.
- You can have as many as you need.
- You can choose whether they are shared with other Users or only able to be seen by you.
- It is a good idea to pair a Layout with an Advanced Filter i.e. you can then see the data you want, filtered by the conditions you want.
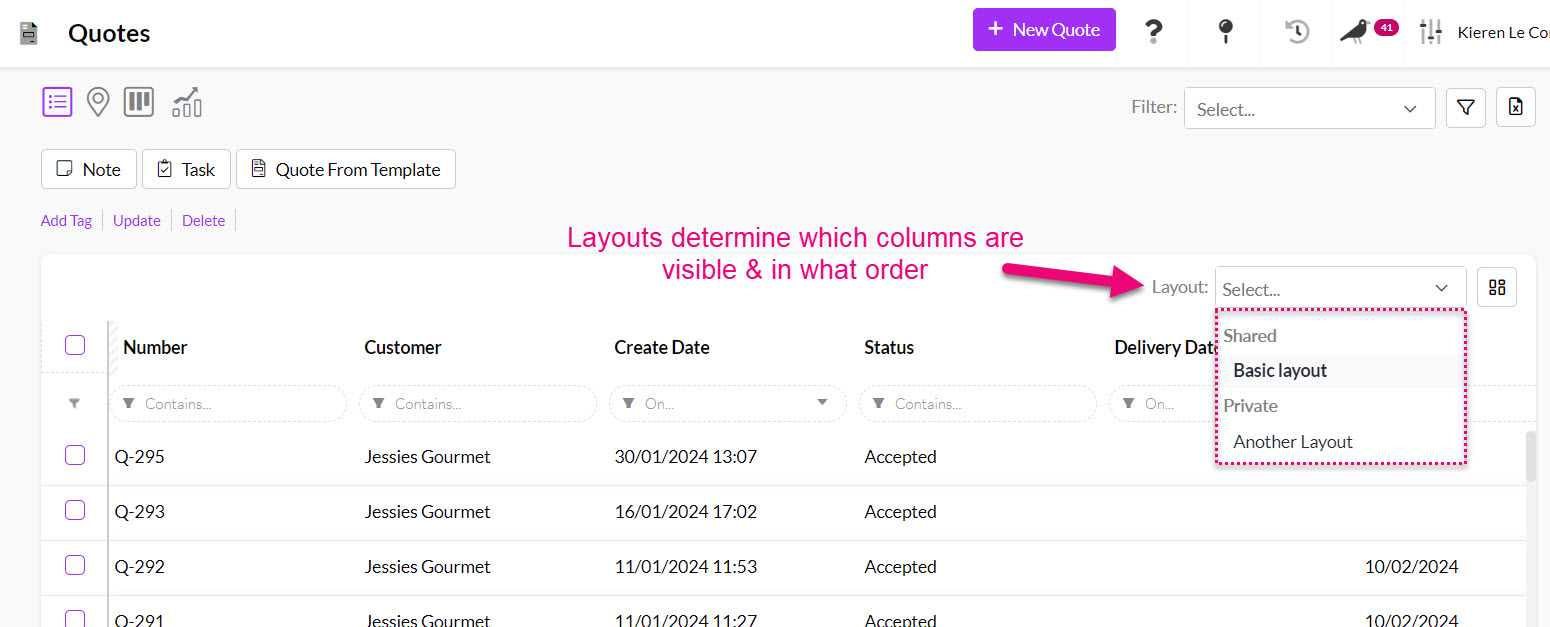
Layouts in Quotes
See also:
Create a Layout for customer records
- In Companies and Contacts you can use the search box to find useful columns to display; in this case we will search for anything with the word “quote” in it, which brings up 4 columns that can be added to the view.
- Double-click on a column name to add it to the view or select a column and use the blue button to add it to the view.
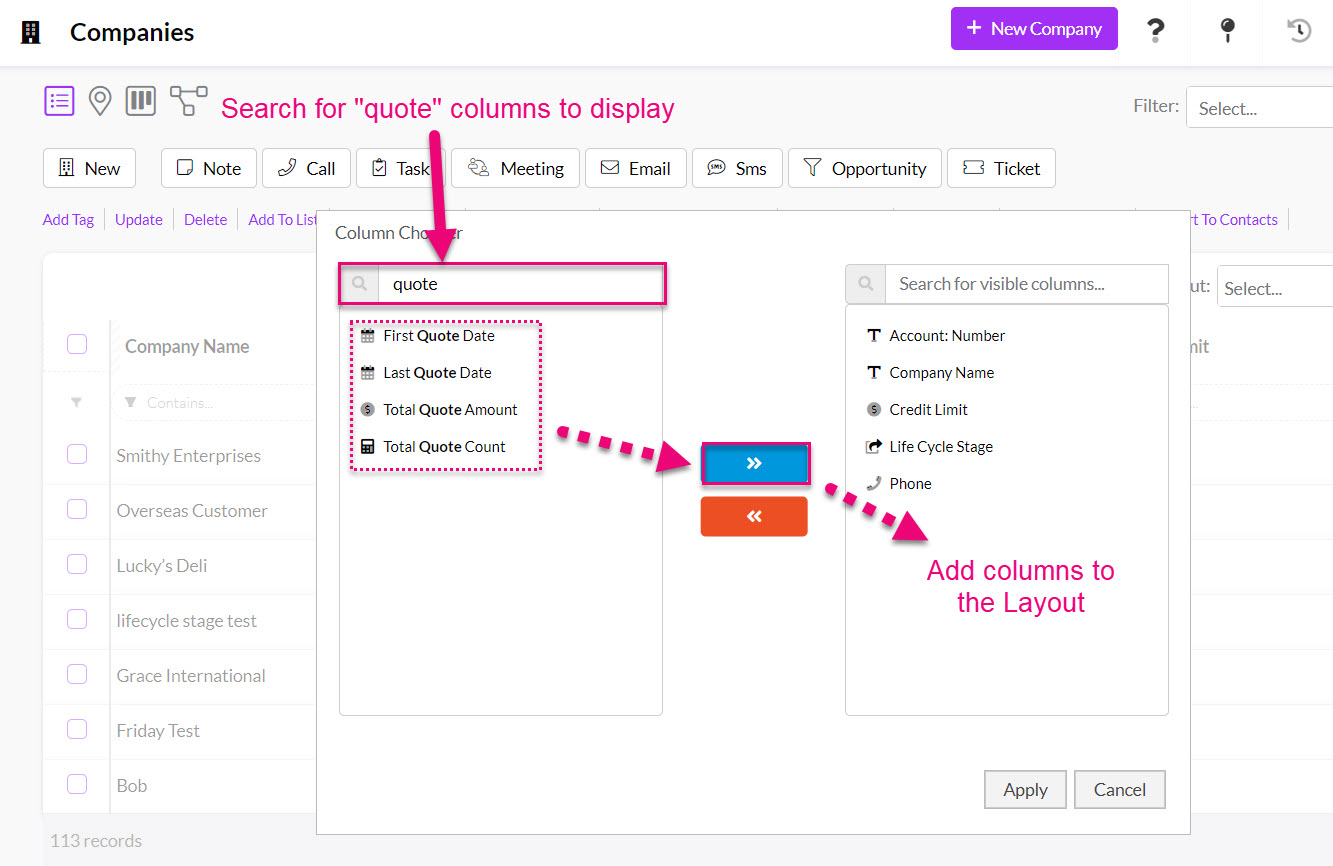
Adding Quote columns to List View in Companies
- Once the columns have been added to the view, you can reposition them, so they show in the order you want.
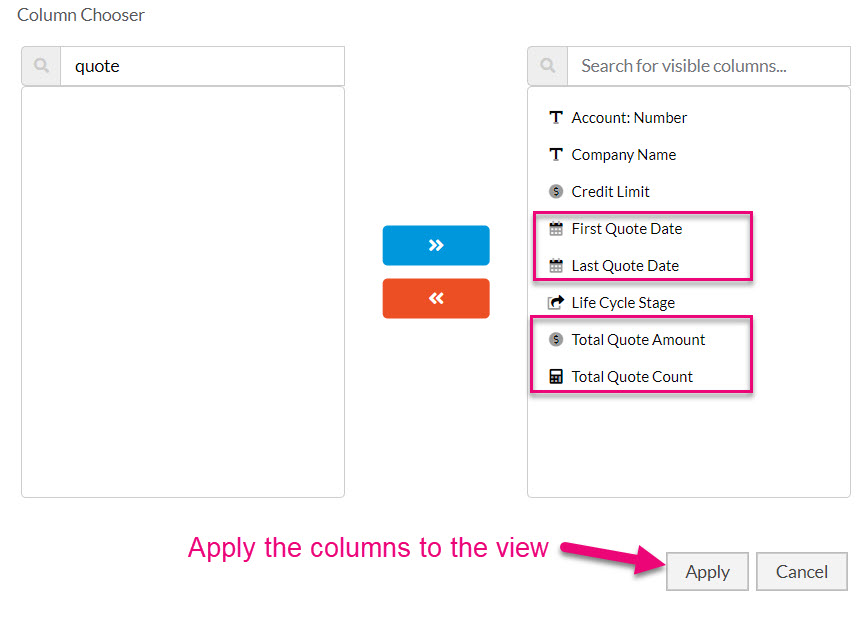
Applying new columns to a view
- You can click on the gear icon next to a column name to reveal further options, just select the appropriate option from the Move To list.

Moving a column to a new position
- You can also drag & drop a column into a new position.
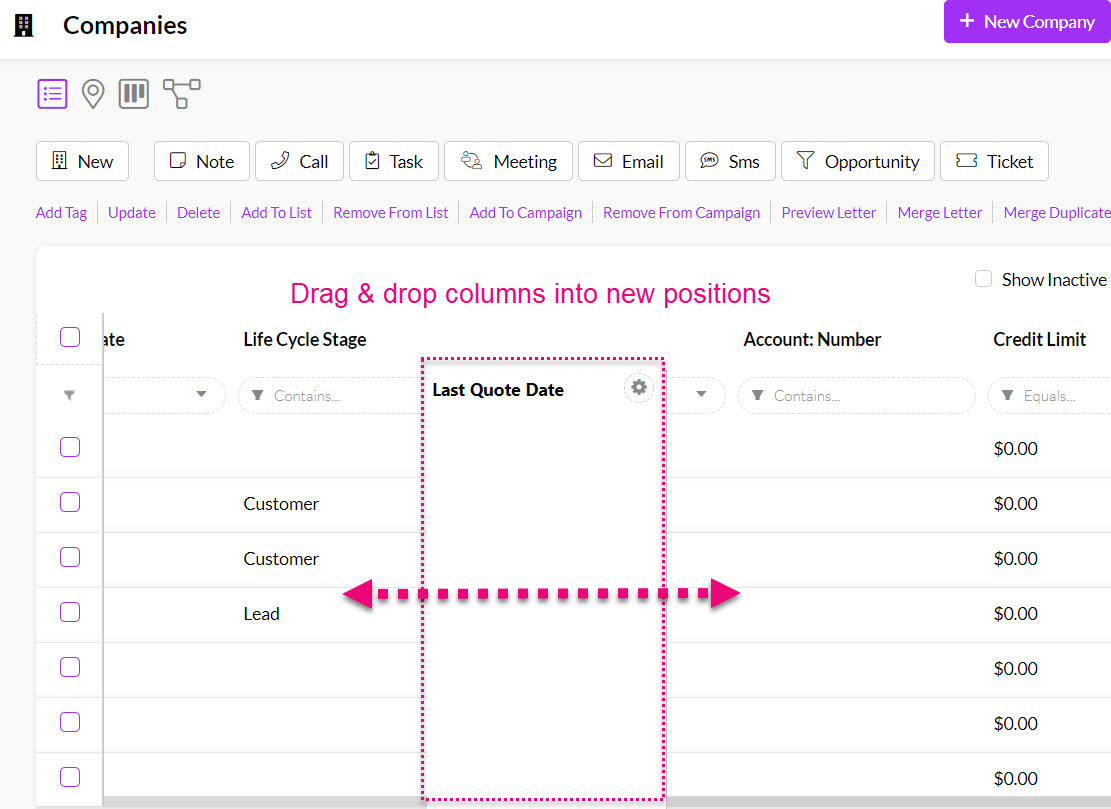
Dragging & dropping a column into a new position
- Once you have the columns you want, in the order you want, you can now save this as a Layout.
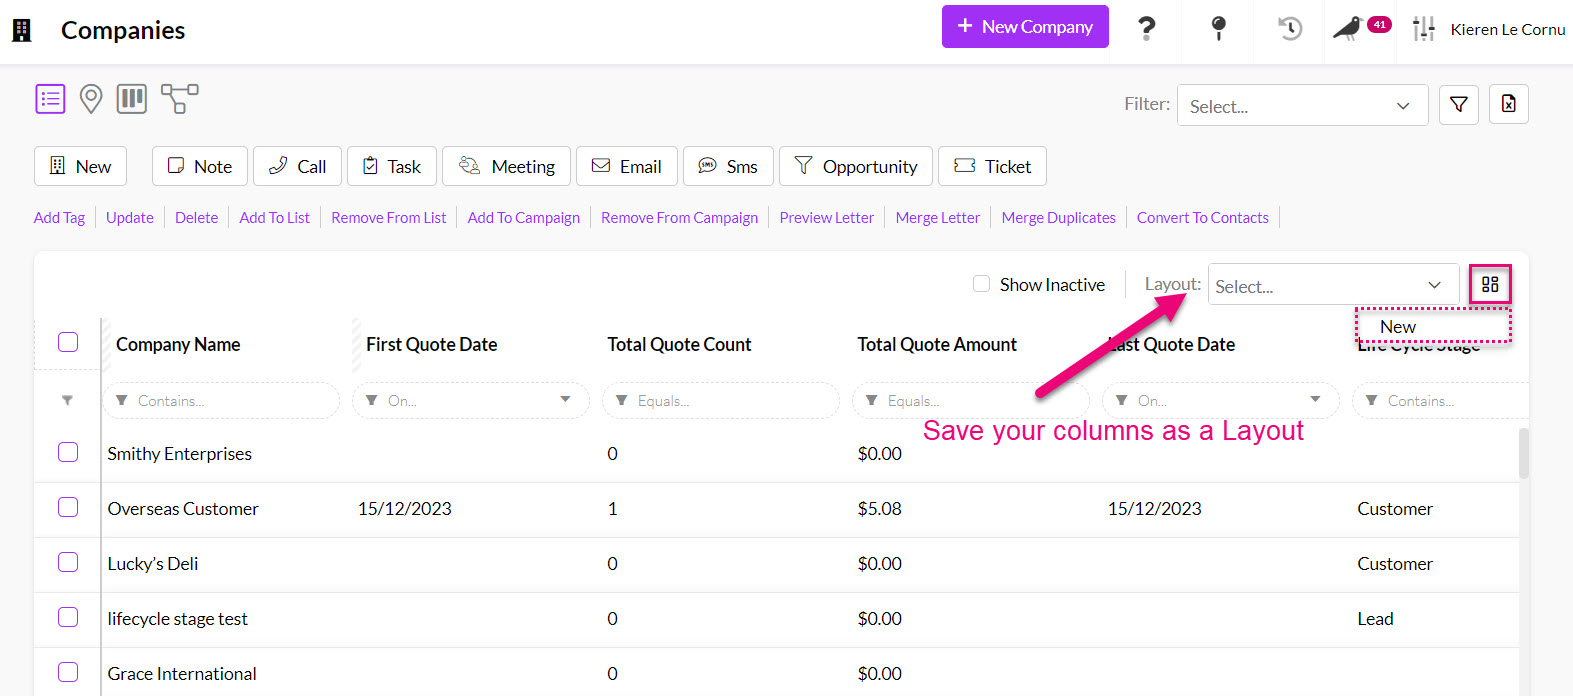
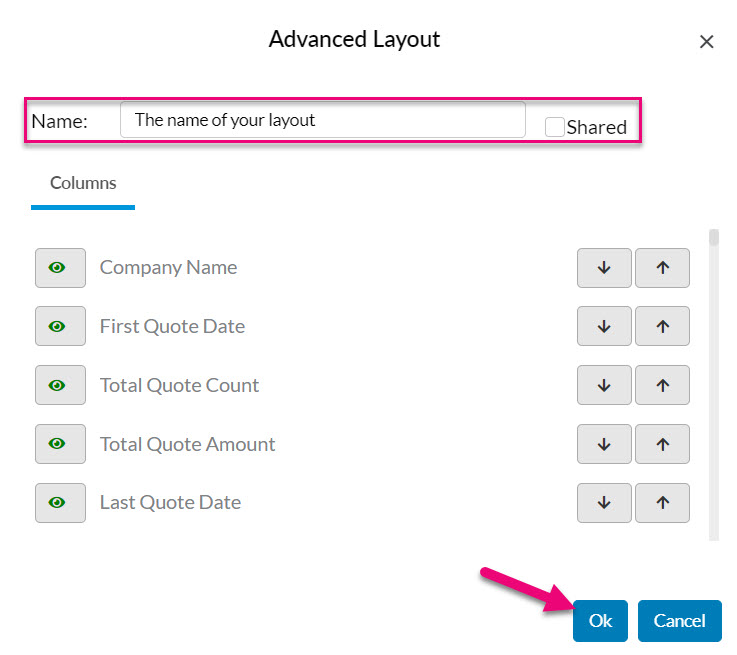
Creating a Layout
- Just give it a Name and then decide whether or not to share it with other Users – click OK when you are done.
See also:
Create an Advanced Filter for customer records
Now that we have sorted out the columns to be shown, it’s time to tell CRM which records we want to see.
- To create a new Advanced Filter anywhere in CRM, you can click on the funnel icon next to the filter box and select New.
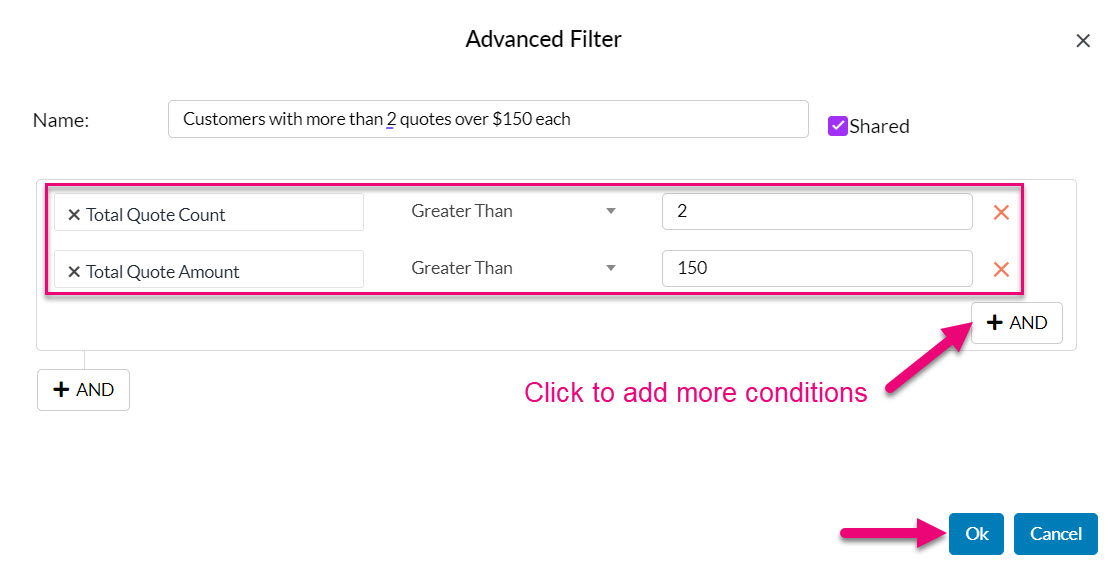
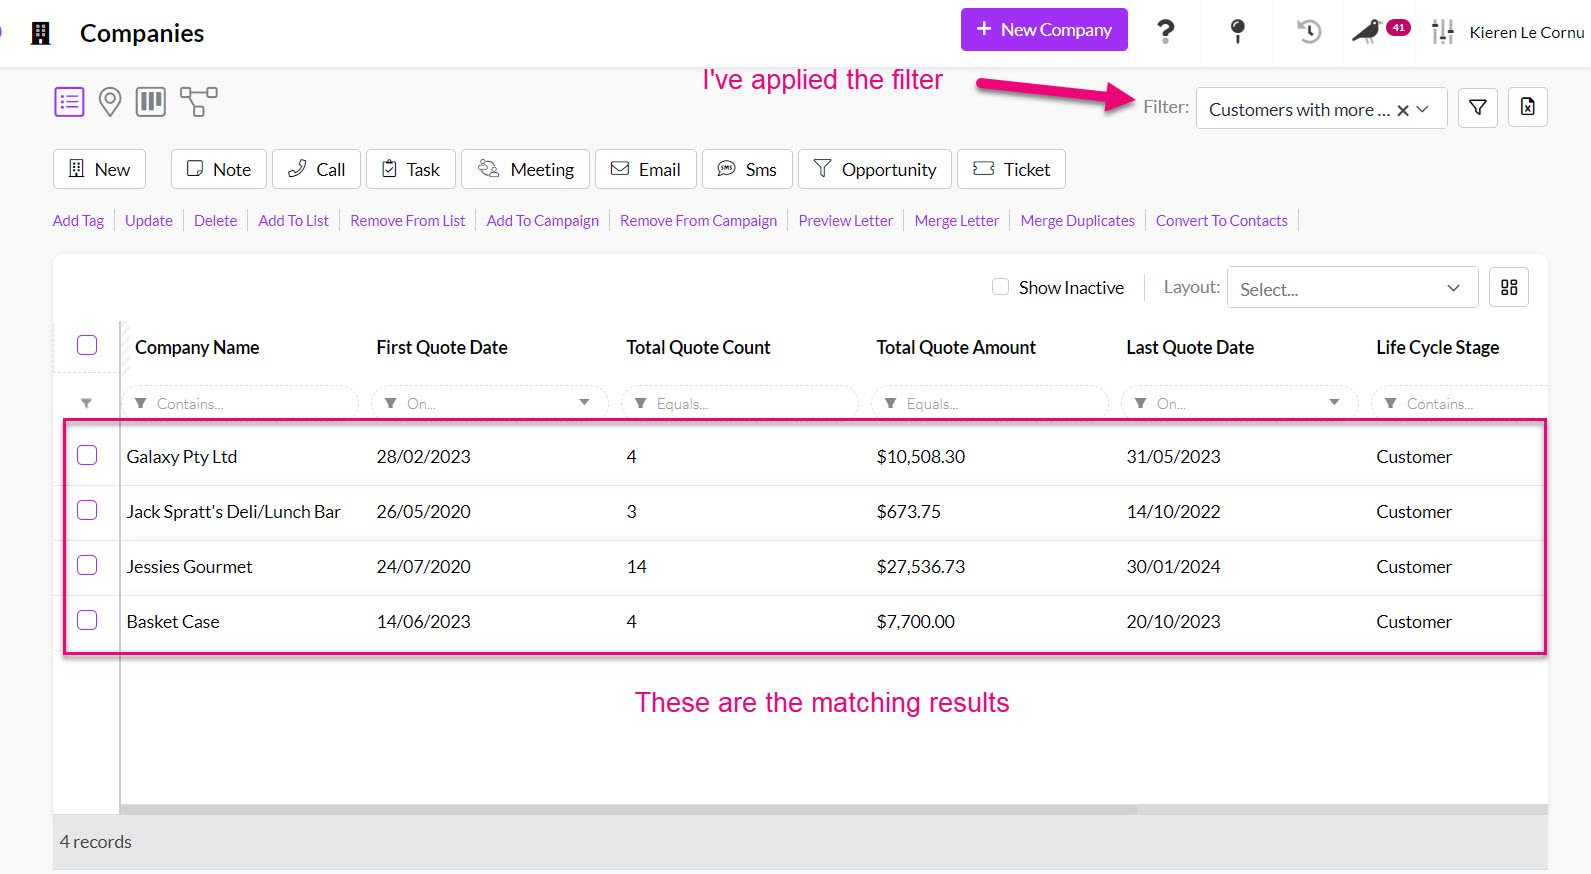
In this example, we’re going to create one in Companies that shows everyone that has more than 2 quotes, where the quote amount is more than $150.

Creating an Advanced Filter in Companies
- The first thing to do is give the filter a Name and decide if it’s going to be shared with other Users or not.

- Now we need to tell CRM the conditions that the records need to meet to be included in the filter.
- This is done by selecting a field and then the value or condition that the field must meet.
- In this case I’ve said that the Total Quote Count for the Company must be greater than 2 AND the Total Quote Amount must be greater than 150 – I then click OK to save the filter.
- If I then apply the filter, CRM will show me the records that match the criteria I set up.
- I can deploy this filter at any point in future and CRM will perform a search to find matching records each time.
See also:
Create Advanced Filters for Quotes
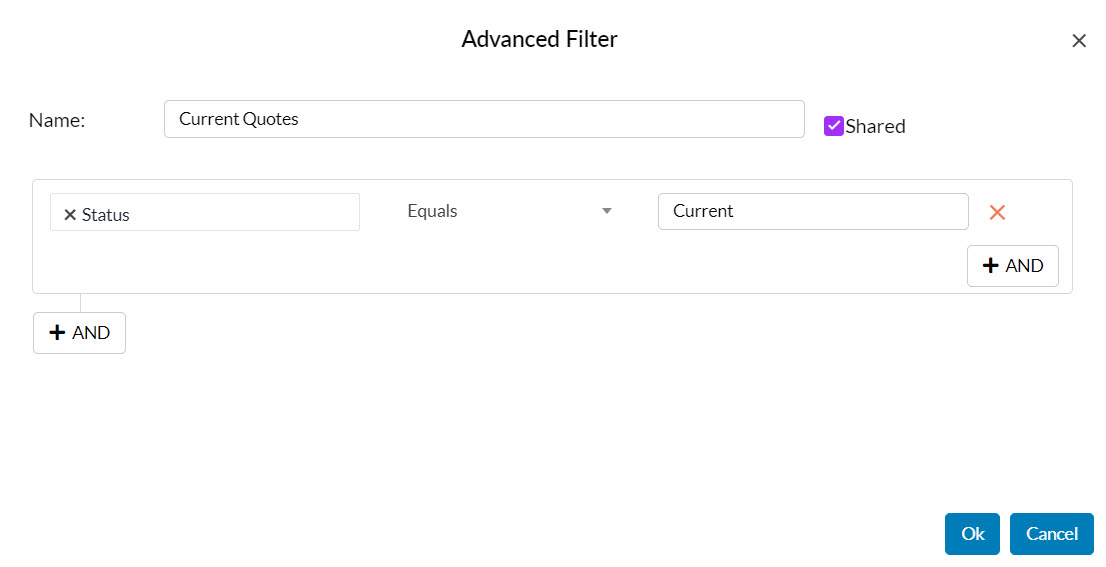
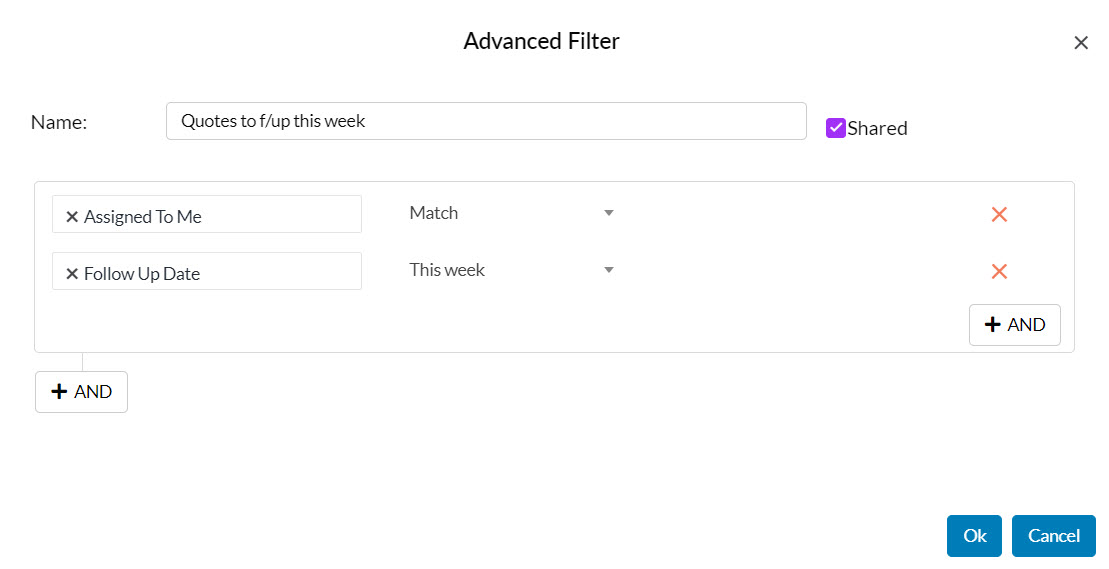
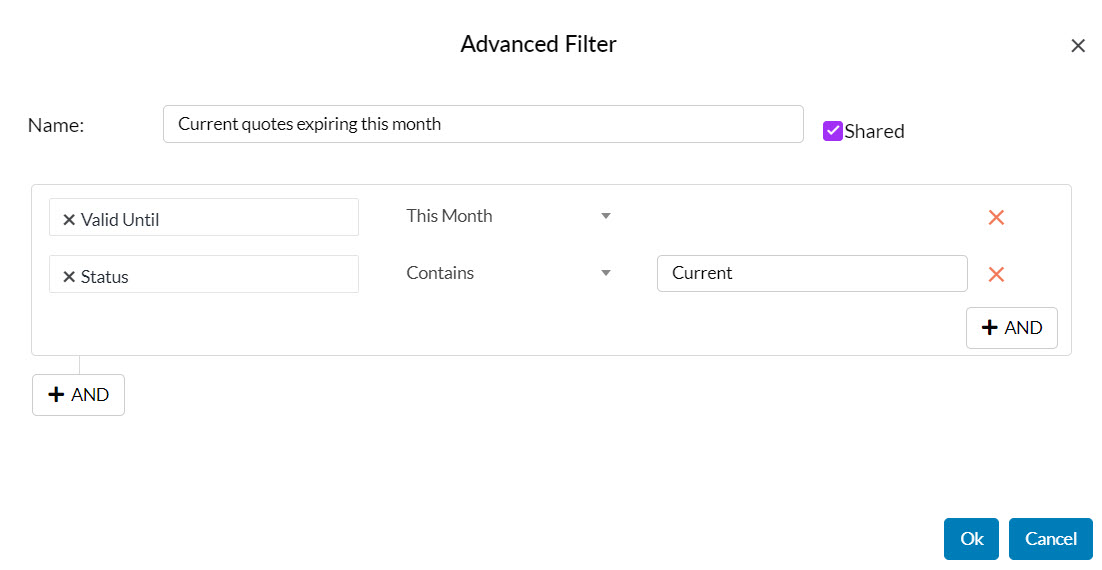
Now that you understand the basics of creating Advanced Filters, there are some that we recommend you set up in your system to slice and dice your Quote pipeline.
You should also give thought to what you and other Users need to see each day in CRM and create relevant filters for those purposes.
- Accepted Quotes

- Lapsed Quotes

- Current Quotes
- Quotes to f/up this week – note that this filter will automatically adjust the results to match the User currently logged in i.e. everyone can use this filter, instead of needing to have a different one for each User.
- Current quotes expiring this month
You should then also create a range of Layouts to show you the columns you want to see for each filter.
See also:
Kanban view
- You can use different views such as Map or Kanban to visualise your data – just select an option from the view indicators at the top of the screen.
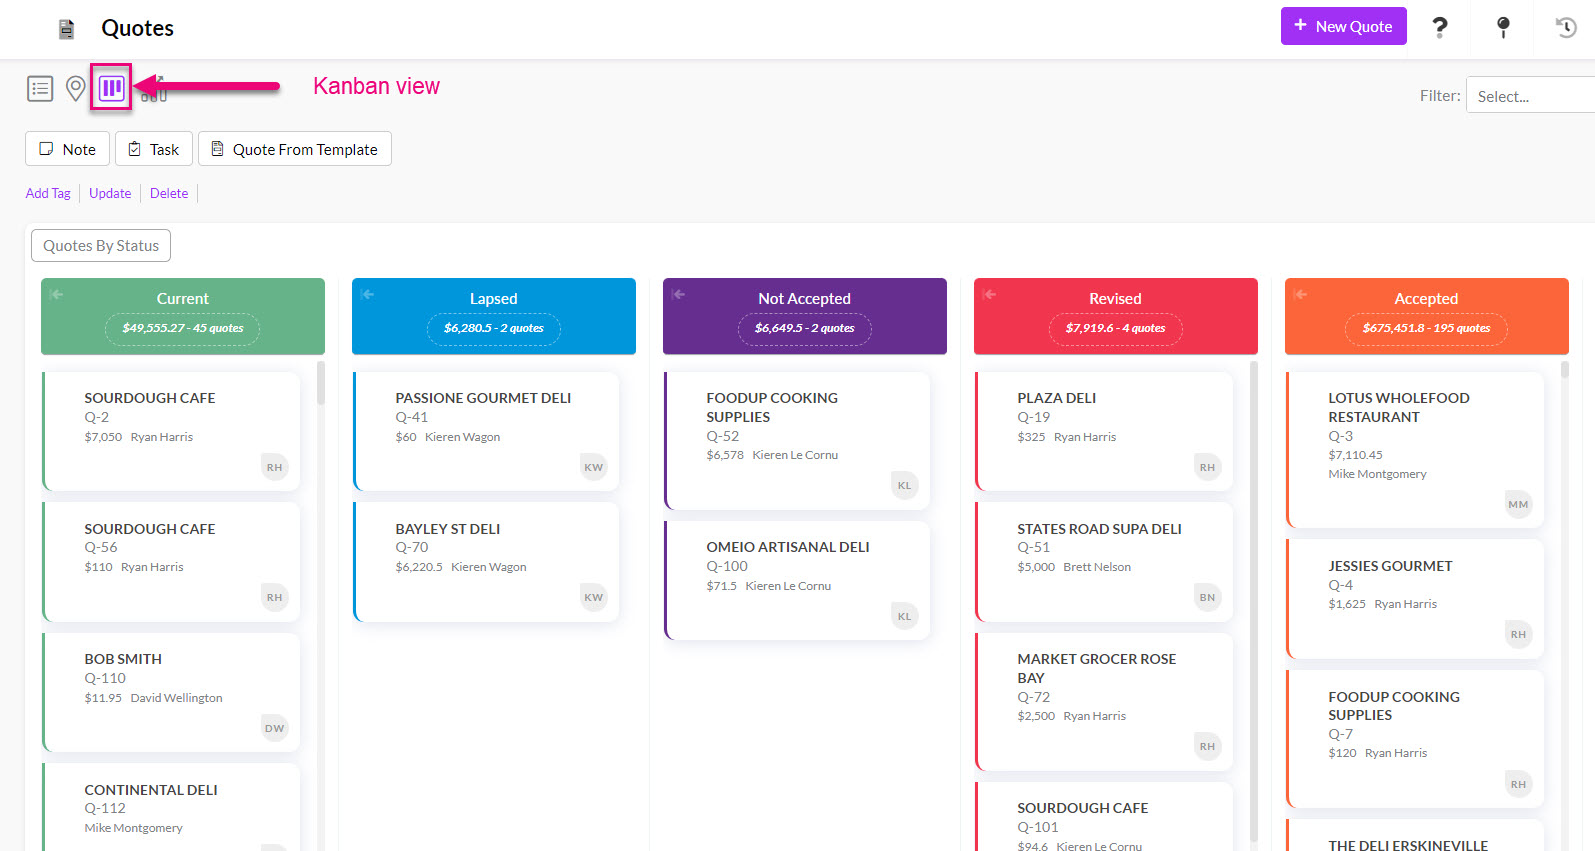
Quotes in Kanban View
- You can also drag & drop Quote records into a different Status from Kanban view.
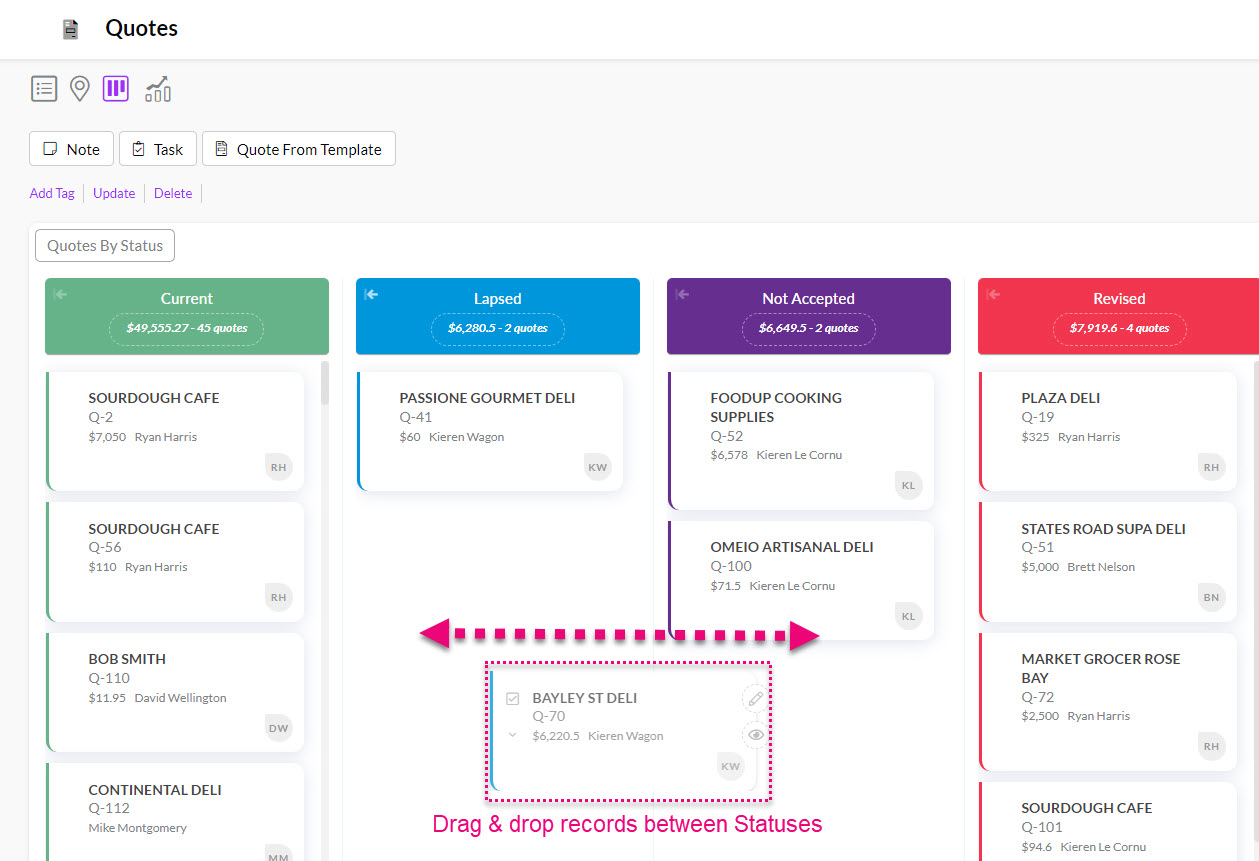
Dragging & dropping a Quote record between Statuses
- Clicking on the gear icon on the right-hand side of the screen reveals the option to select which Statuses are visible in the view.
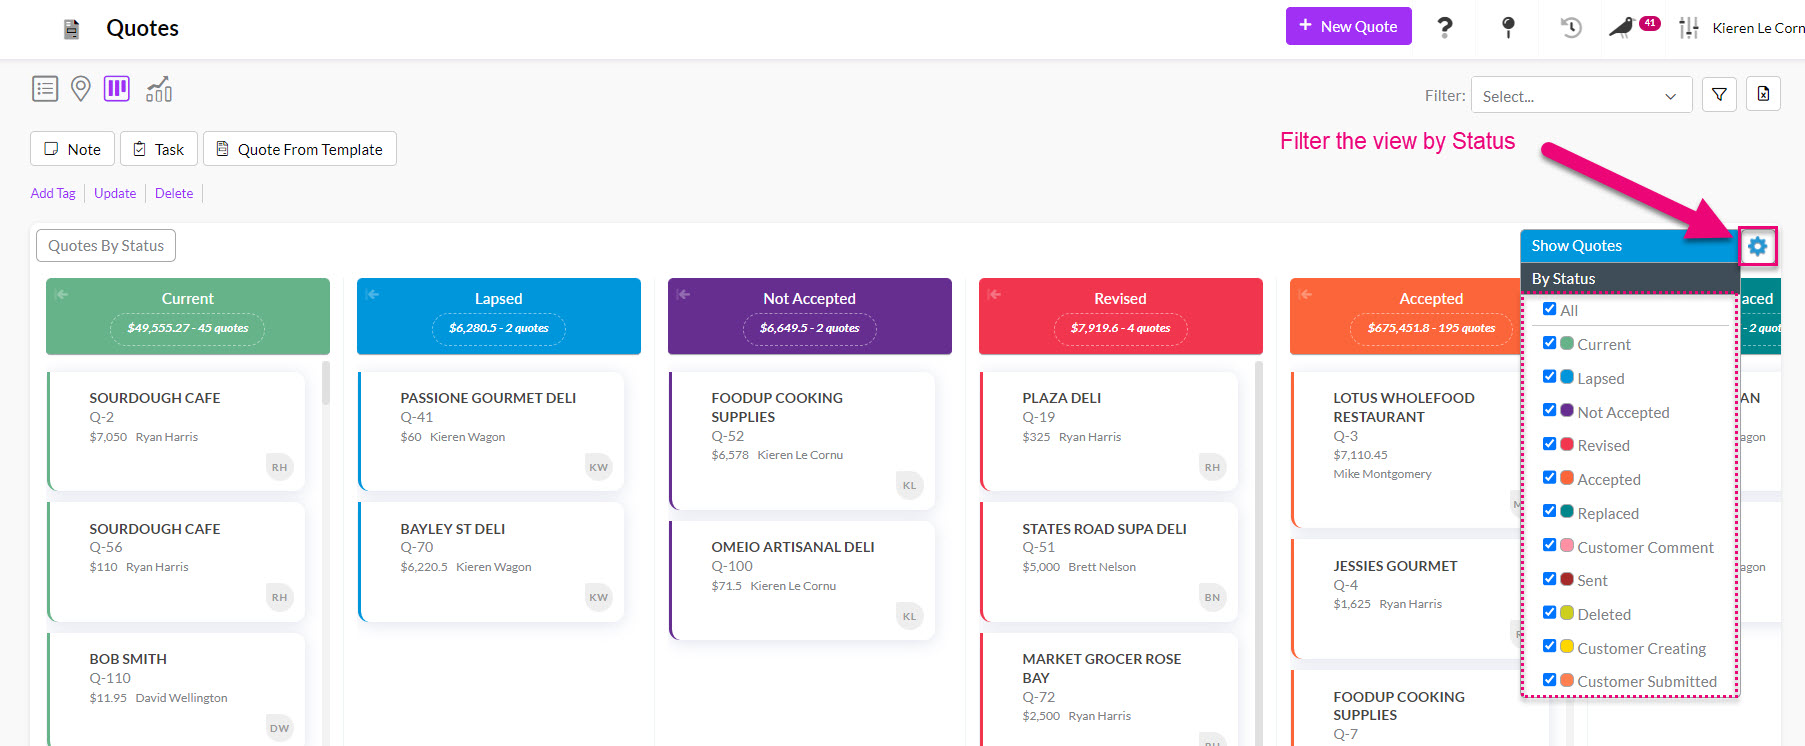
Filtering Kanban view by Quote Status
- Hovering over a record provides the option to quickly open the record.

Opening a Quote from Kanban view
See also:
Map view
- From map view you can visualise each Quote at the customer/lead’s physical address – just click on the map pin icon in the view selector at the top of the screen.
- Clicking on a pin on the map reveals more information about the Quote at that location.
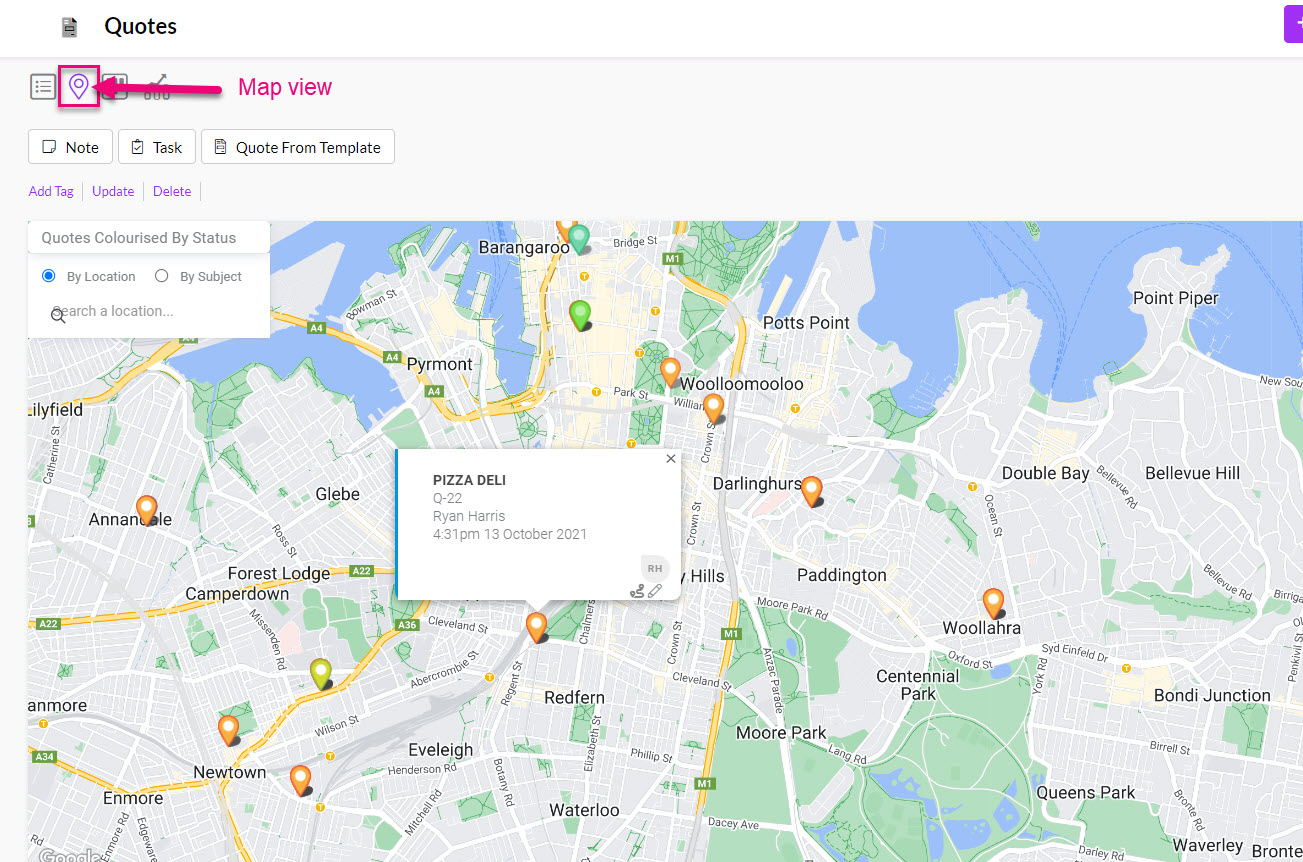
Quotes in Map View
- You can also quickly open the Quote record or get driving directions (via Google Maps) to the location.
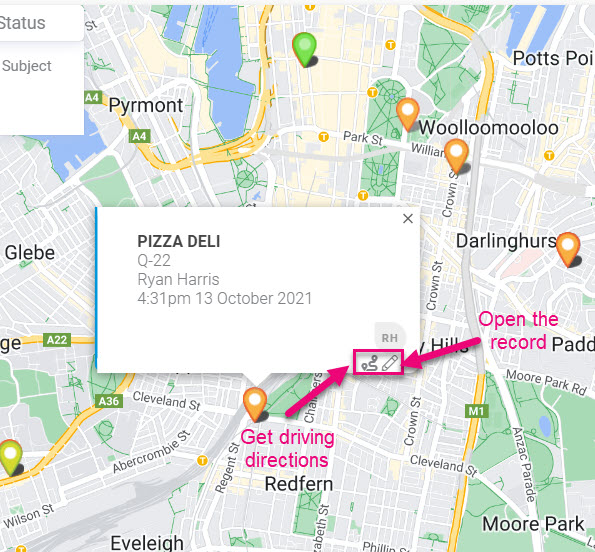
Accessing Quote details from Map view
- Clicking on the gear icon on the right-hand side of the screen reveals the option to select which Statuses are visible in the view.
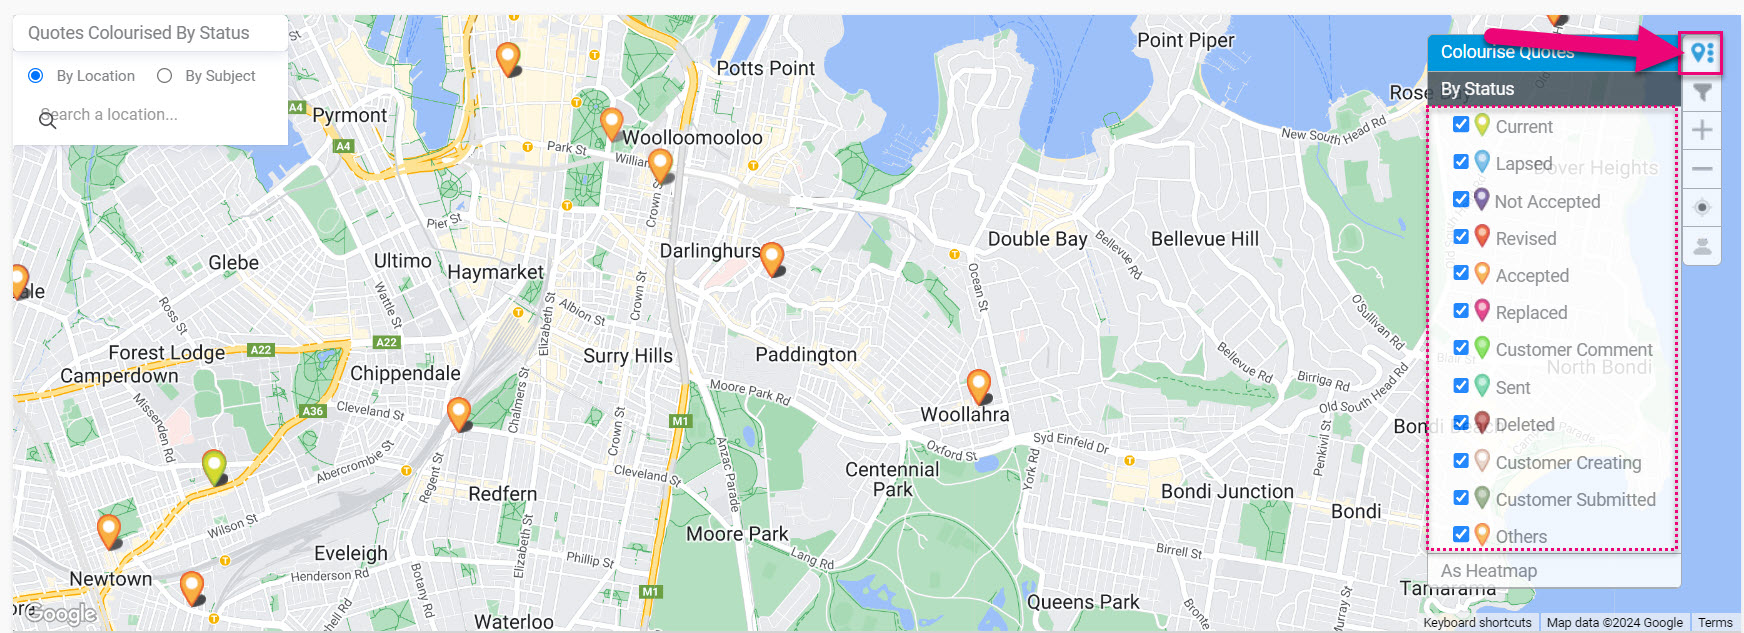
Filter Map view by Status
See also:
Dashboards
- You can use Dashboards to drill down into your data – just select the appropriate view icon at the top of the screen.

Quotes in Dashboard view
- You can also select from other Dashboards and change the date range for the displayed information.
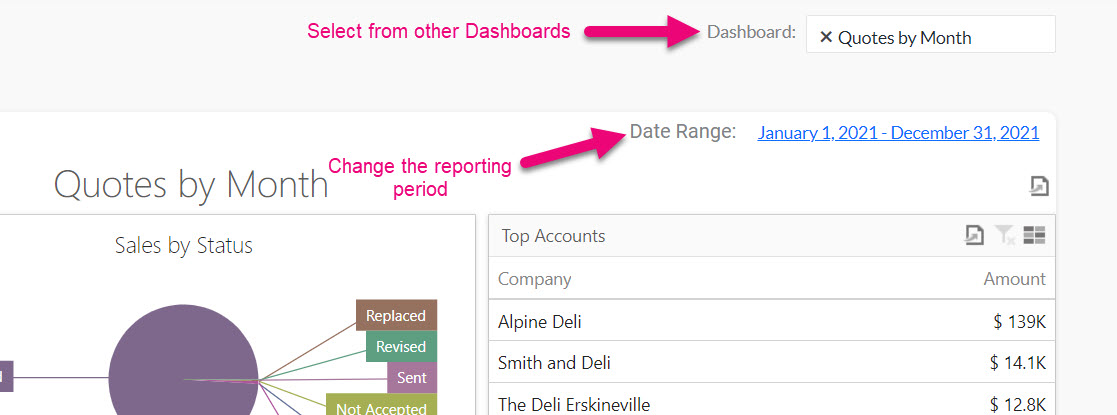
Adjusting Dashboard view in Quotes
- Dashboards are interactive, so you can click on any of the displayed data to drill into the data.
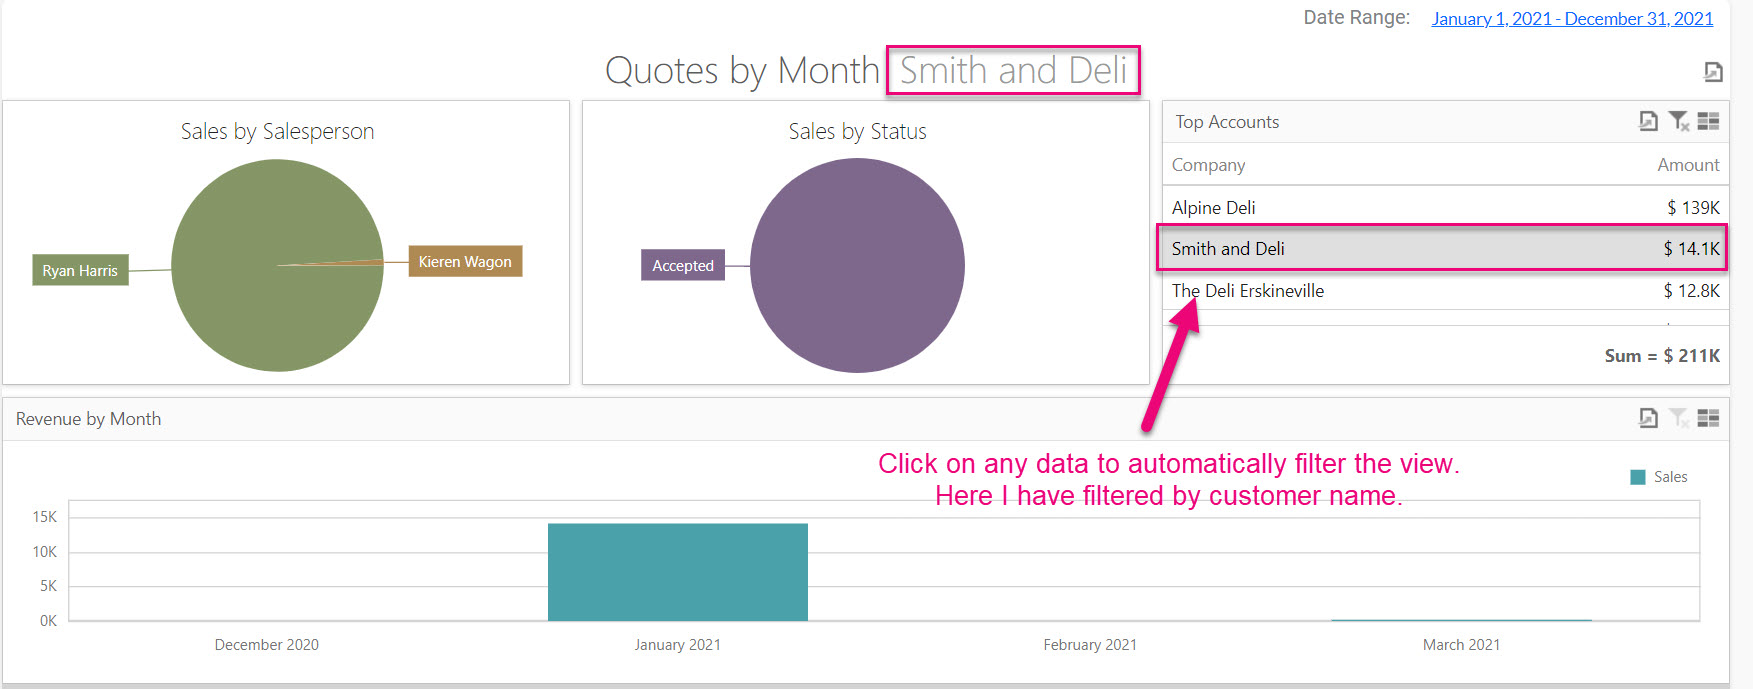
Filtering a Quote Dashboard by clicking on data
- You can also quickly export data using by clicking on the export icon to reveal export format choices.
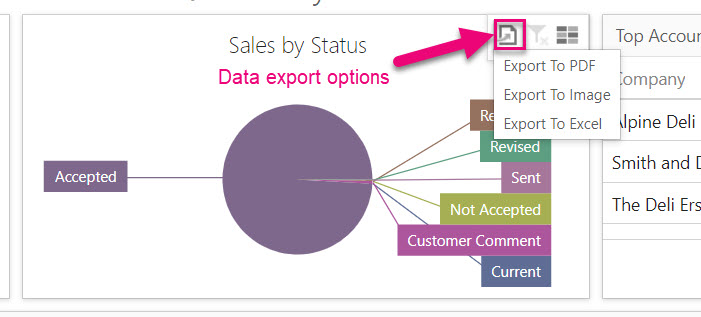
Exporting data from a Dashboard section
- You can also access all Dashboards for Quotes from Reporting > Dashboards – just run a quick filter on “quote” the in the Source Name box.
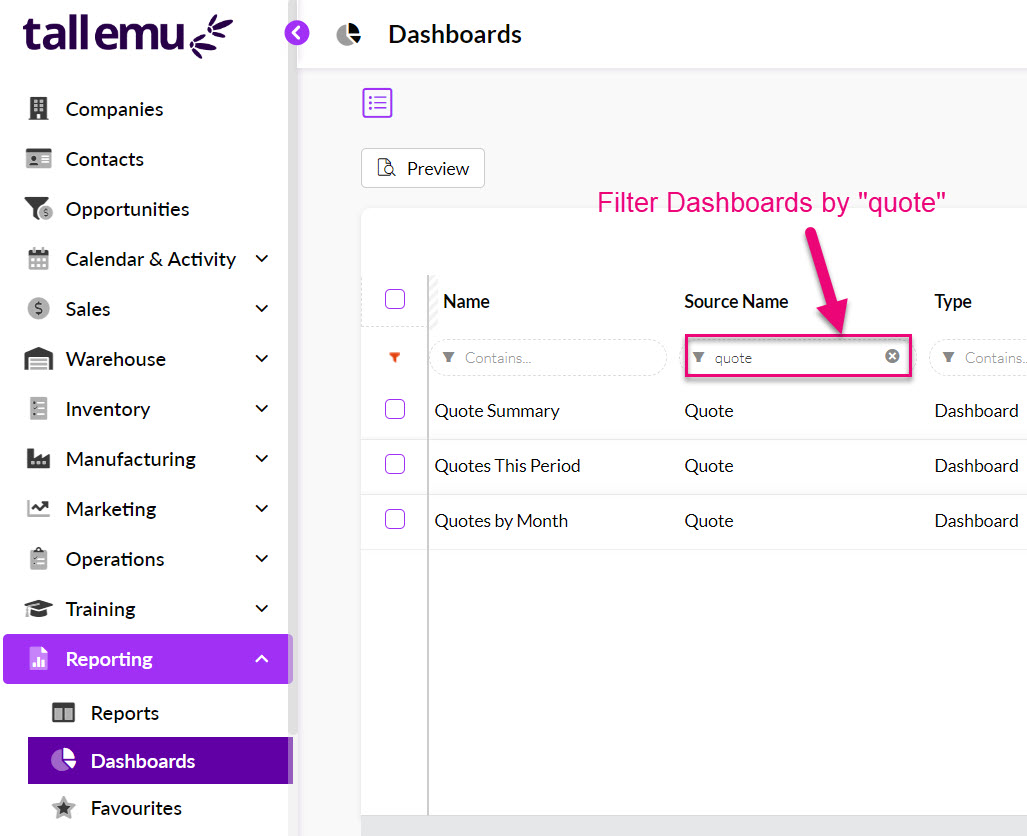
Filtering Dashboards by Quote
- Click on any record to open a screen that provides the option to view the Dashboard or add it to your Favourites list.
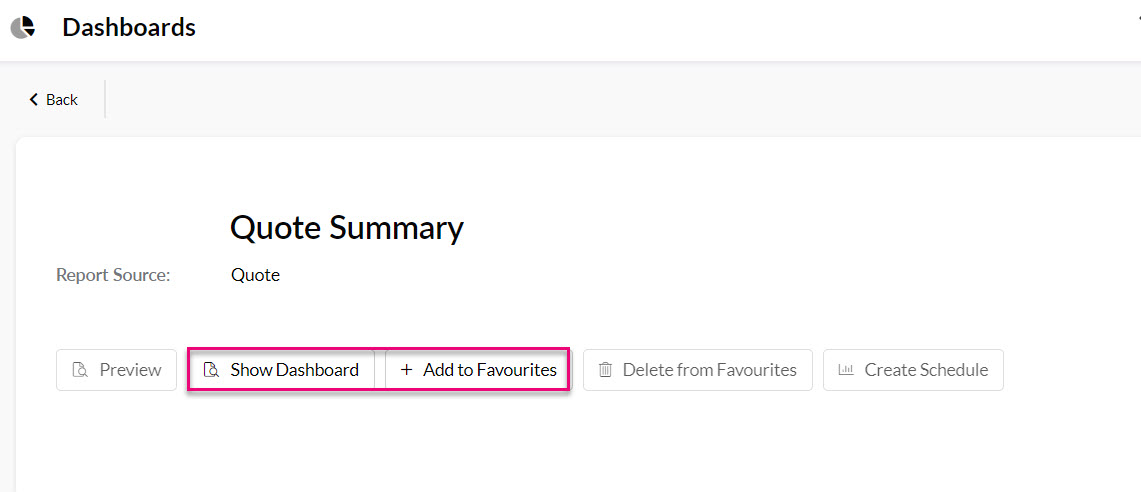
Dashboard options
See also:
Reports
- From Reporting > Reports you can access various reports – just run a quick filter on “quote” the in the Name box.

Filter in Reports for Quote
- Click on any record to open a screen that provides the option to view the Dashboard, add it to your Favourites list or send it out on a schedule.
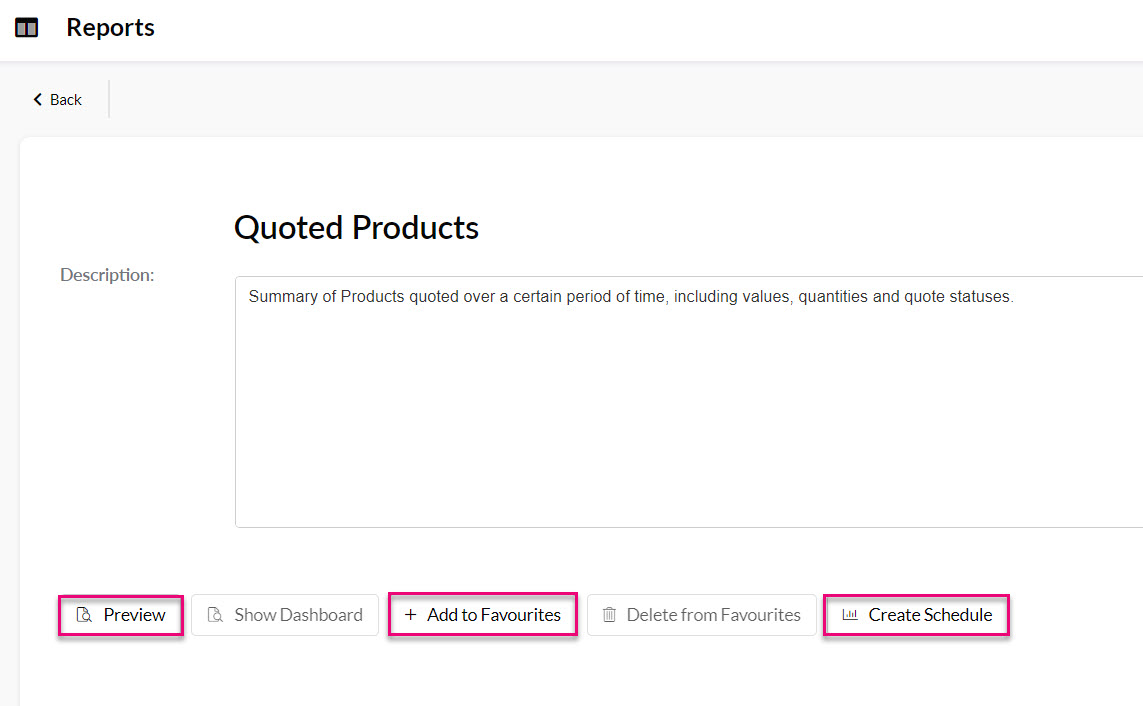
Quote Report options
- You can then save the report in various formats or print it.

Report save options

Report print options
See also:
From a Product record
- From the Prior Items Quoted tab on Product and customer (Contact or Company) records to see all previously quoted items.
If you can’t see this tab, it may be hidden, and you need to edit the record tabs to make it visible.

From a customer record
- From the Prior Items Quoted tab on customer (Contact or Company) records you can see all previously quoted items.

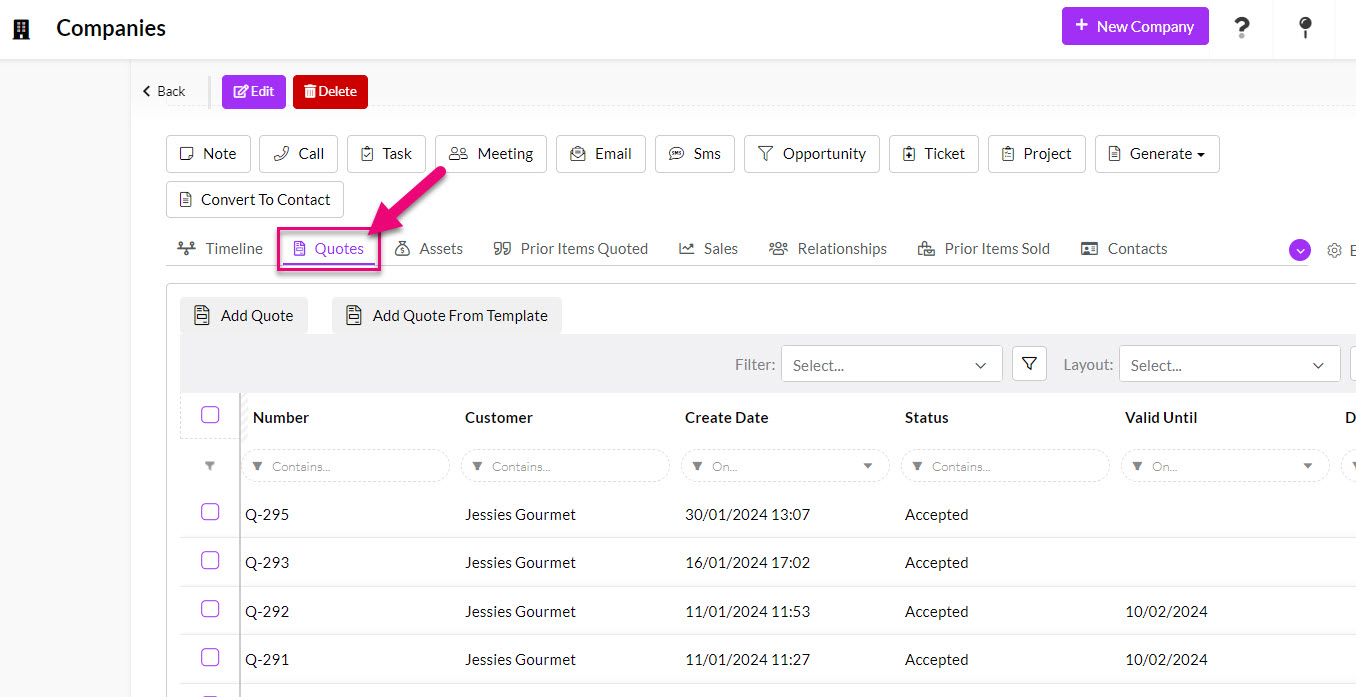
- From the Quotes tab you can see all current and previous Quotes for that customer (Contact or Company).
If you can’t see these tabs, they may be hidden, and you need to edit the record tabs to make them visible.