Projects
This module in CRM allows you to create overarching projects and assign smaller tasks, breaking down workloads and providing structure for your team members.
There are a number of ways to create a new Project:
From Projects
- From Operations > Projects by clicking on the New Project button.

From a customer record
- From a customer record (Company or Contact) by using the Project button on the activity toolbar.
If you cannot see this tab, it may be hidden, and you need to edit the record tabs to make it visible.
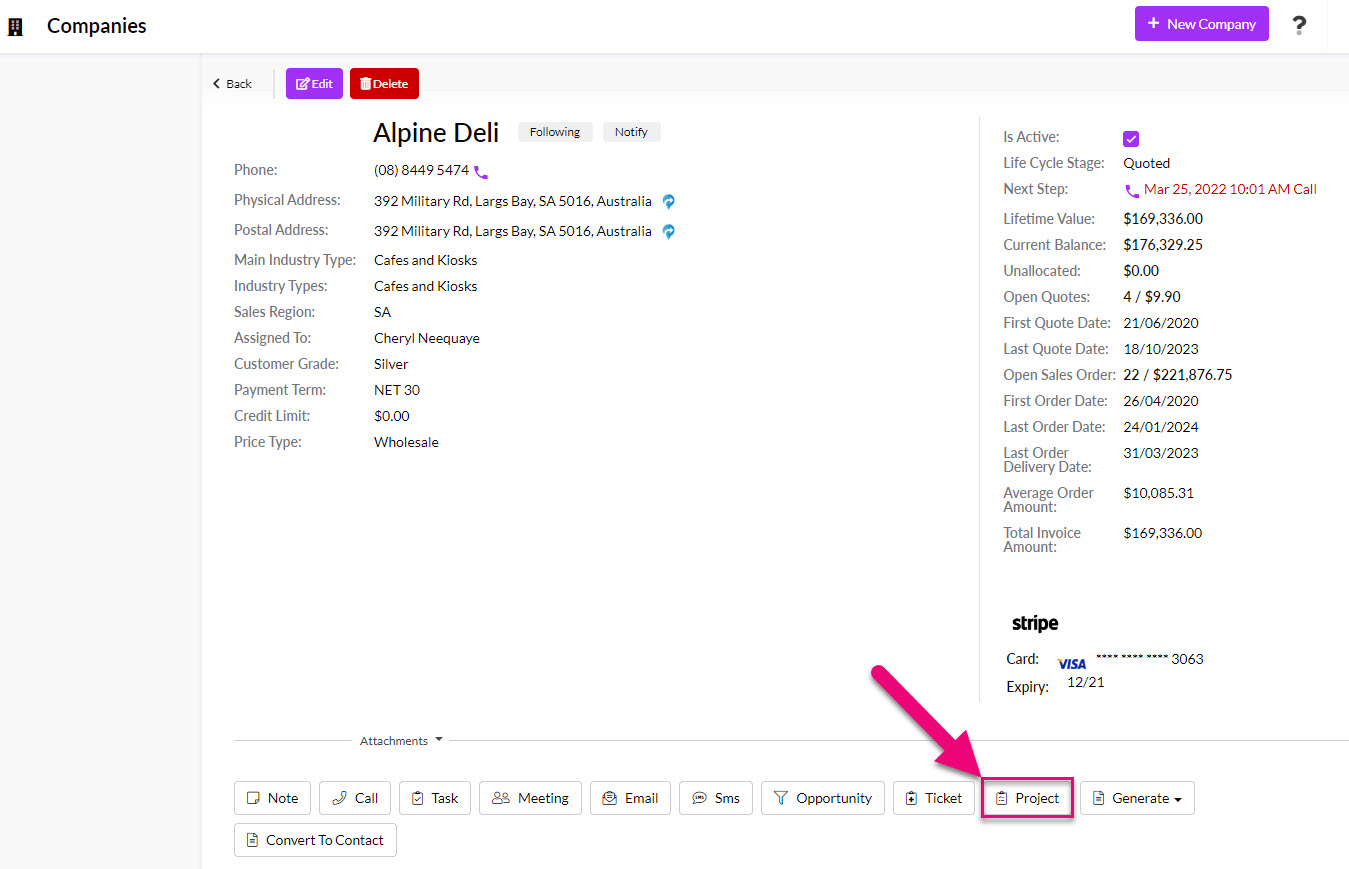
- You will also be able to see any linked records from the Projects tab on a Company or Contact.

Using a Web Form
- You can set up a Web Form to automatically create a new Project – a form is filled in online and a new Project and Company and/or Contact can be created in CRM.

This is an important step because it allows you to apply your specific terminology and internal process to Projects in CRM so that they are easy to track and segment.
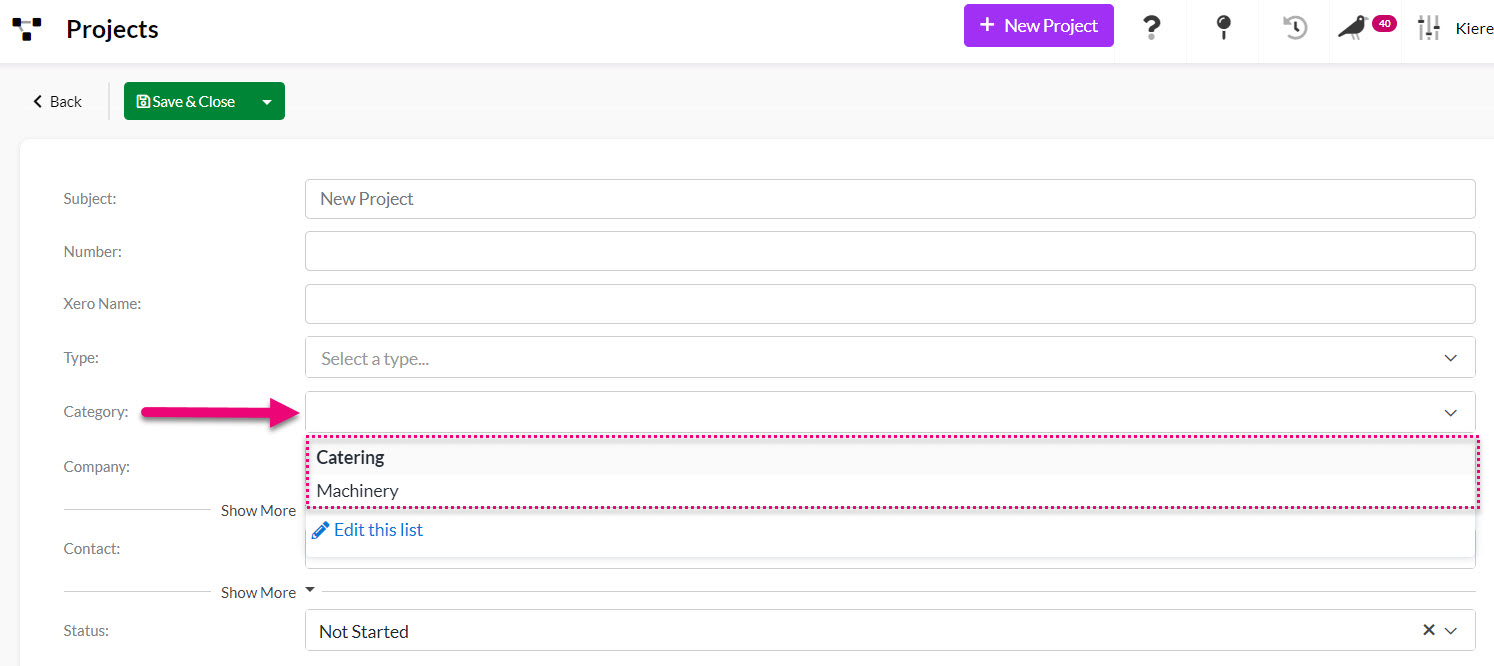
From Admin > Settings > Project Settings you can access and customise the lookup list values for the Type, Status and Category fields.

The Type and Status fields are related to one another – each Type can be linked to multiple Status options so that when you select a Type on a Project, the Status field will populate automatically with the chosen options.

The Category field allows you to segment and sort your records by a list of custom values.
Customise Types
- Click on Project Types & Statuses.

- A pop-up window will then display where you can edit your Types – just click the link.
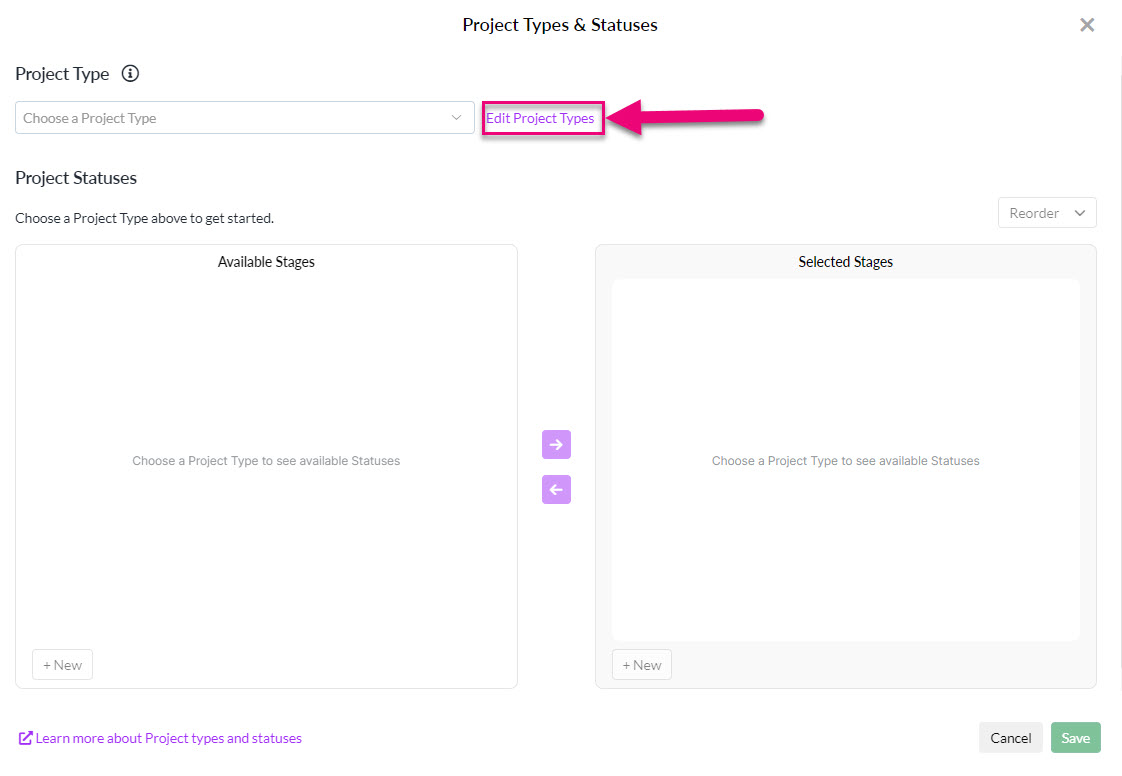
- You can then view existing Types or click +New to add a new Type.

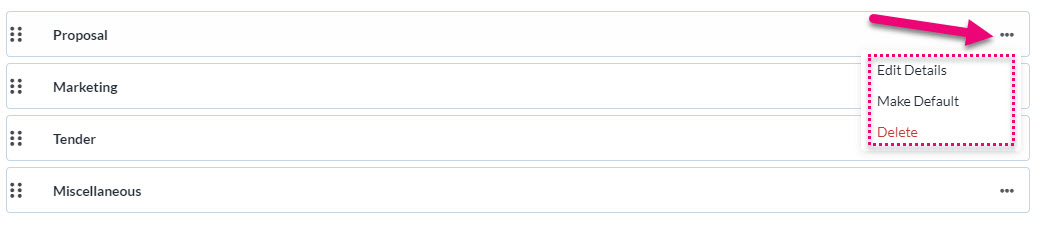
- Adding a new option brings up a box for you to enter the Name of the new Type, then click Save.
- Ensure the Active box is ticked so the Type is available for use. If you ever want to retire a Type in future, you can deselect the Active box.

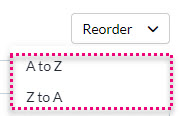
- You can also reorder the options on the list using the Reorder button, or by dragging & dropping an option into a new position on the list.
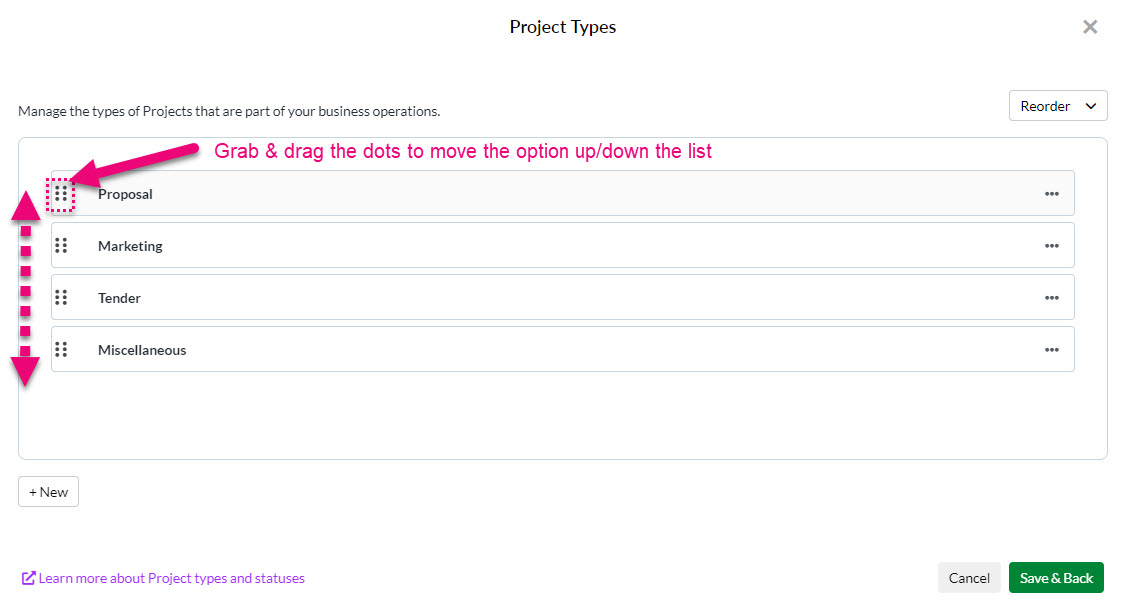
- If you need to edit an existing Type, just click on the 3 dots on the right-hand side to reveal options.
- Once you are done, click on Save & Back.
Customise Statuses
- From the customisation window, select a Project Type from the list that you want to edit the Statuses for.
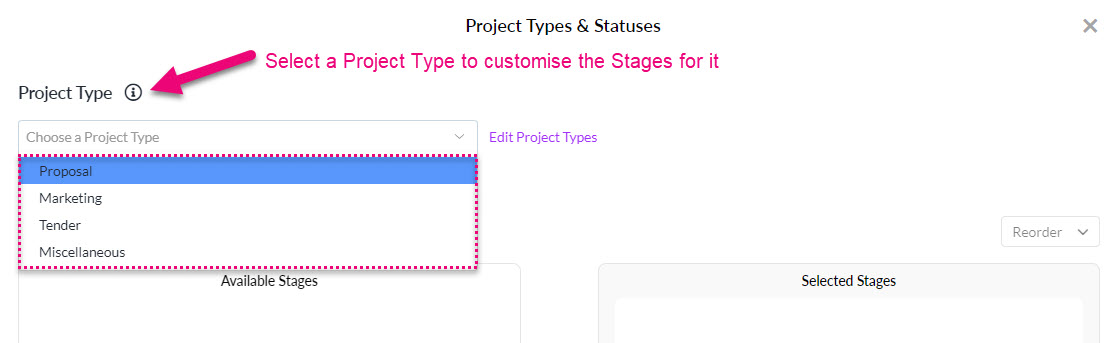
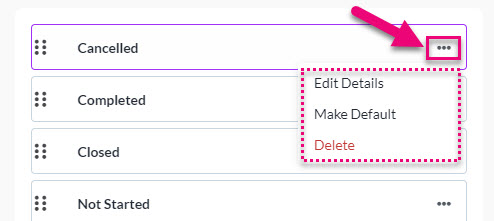
- You will then see options to create a new Status and change the available Statuses.

- You can also click on the 3 dots on the right-hand side of the options to edit them.
- The list order can be changed by either using the Reorder button, or by dragging & dropping options into a new position in the list.
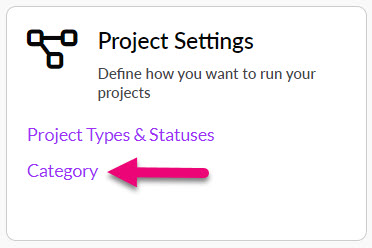
Customise Categories
- Click on Category.
- This opens a pop-up box with options to create or edit the Categories available in Projects.
- You can use the + New Option button to add more values to the list.
- You can reorder the values by clicking and dragging the dots on the left-hand side of each value or use the Reorder A-Z button.
- Clicking on the bin icon will delete an option from the list.
- The eye icon determines whether the option is visible on the Category field list or not.
- The Open option can be toggled to indicate whether each value leaves the Project with a Status of Open.
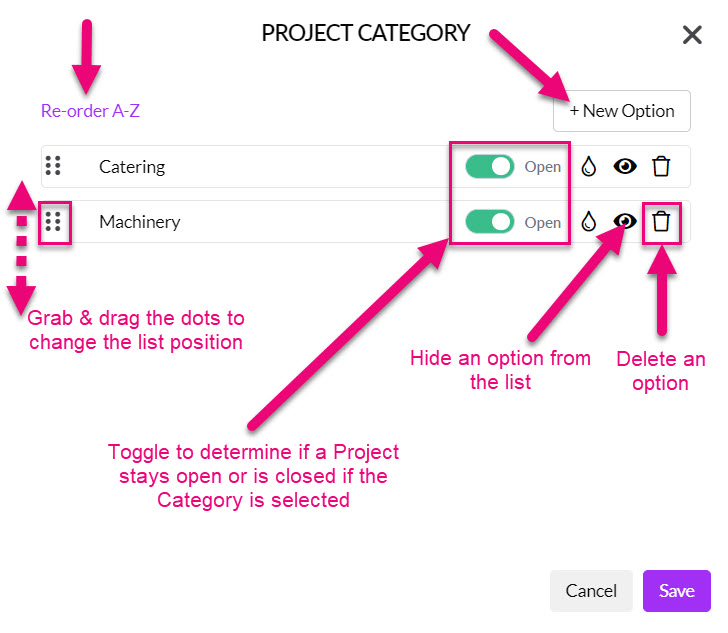
- Click on Save when you are done.
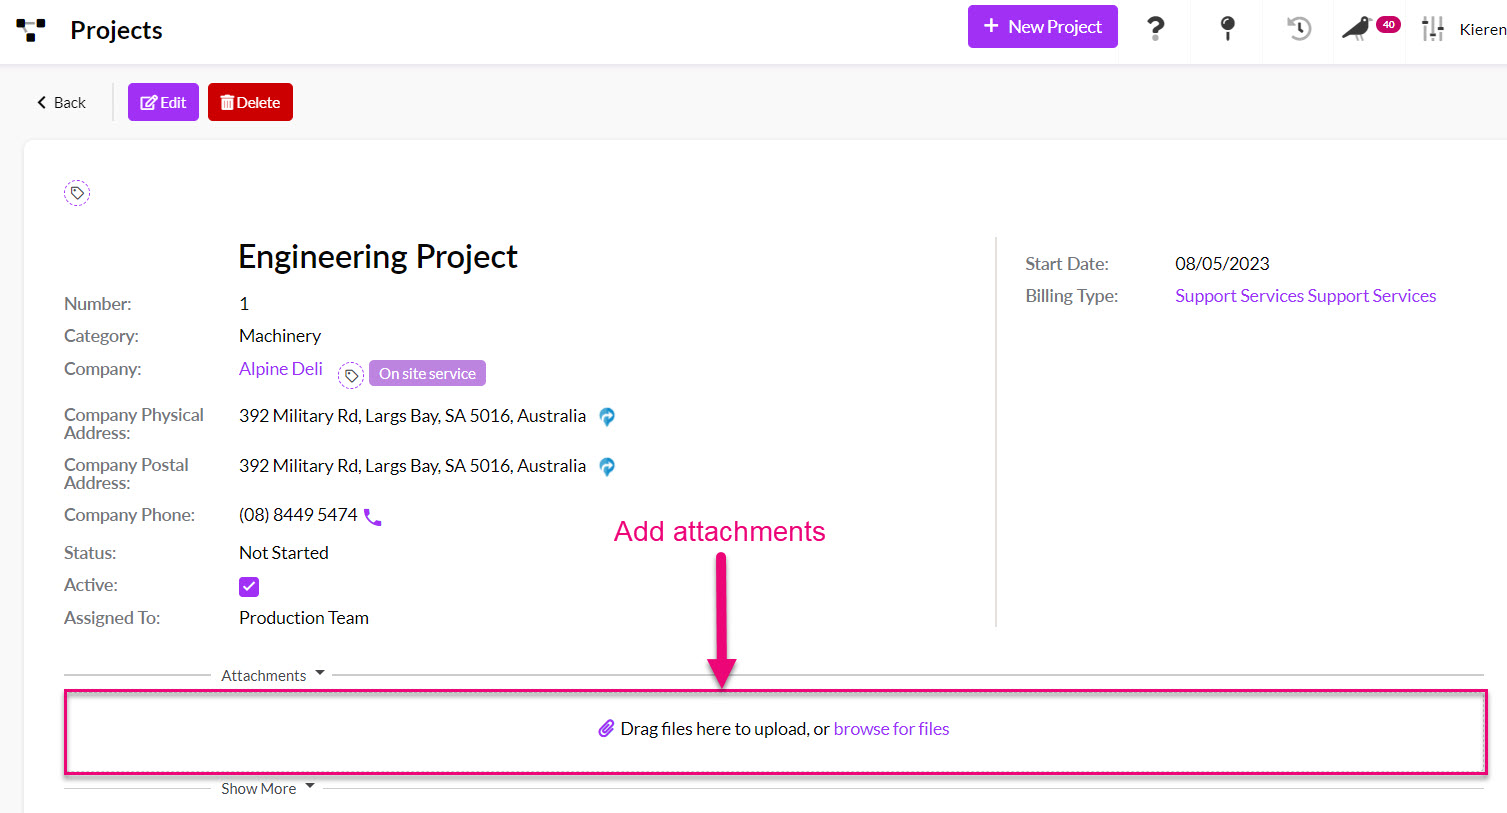
Just click on the paperclip icon to select the files you want to attach.
You can quickly create an Activity for a Note, Call, Task, Meeting, Email or SMS using the toolbar buttons. You can also bill for the time you spend on Activities associated with Project – see the section on Time Billing for Activities.

Activities you create will then display on the record in one of the following areas:
- Upcoming meetings, calls or tasks will show in the Planned Activity area to the right of the timeline.
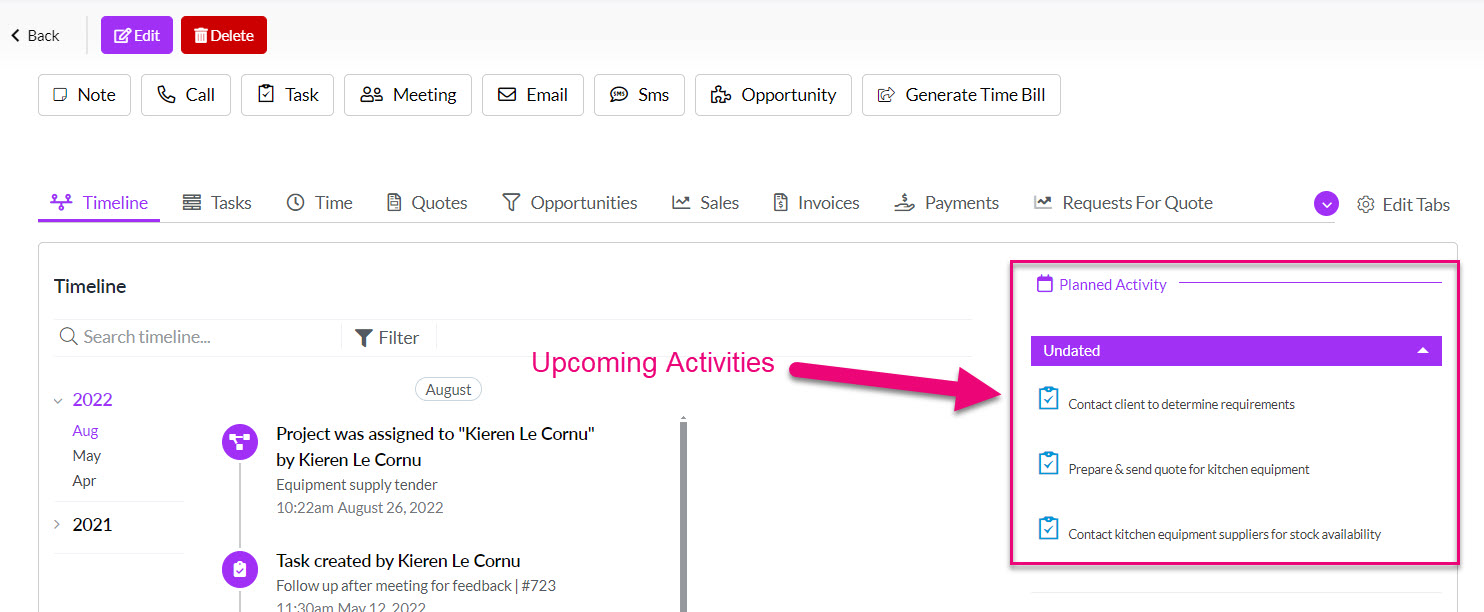
- The top right-hand corner of the record will also quickly show you what the next step for the Project is.

- Past or completed activities will show on the Timeline.
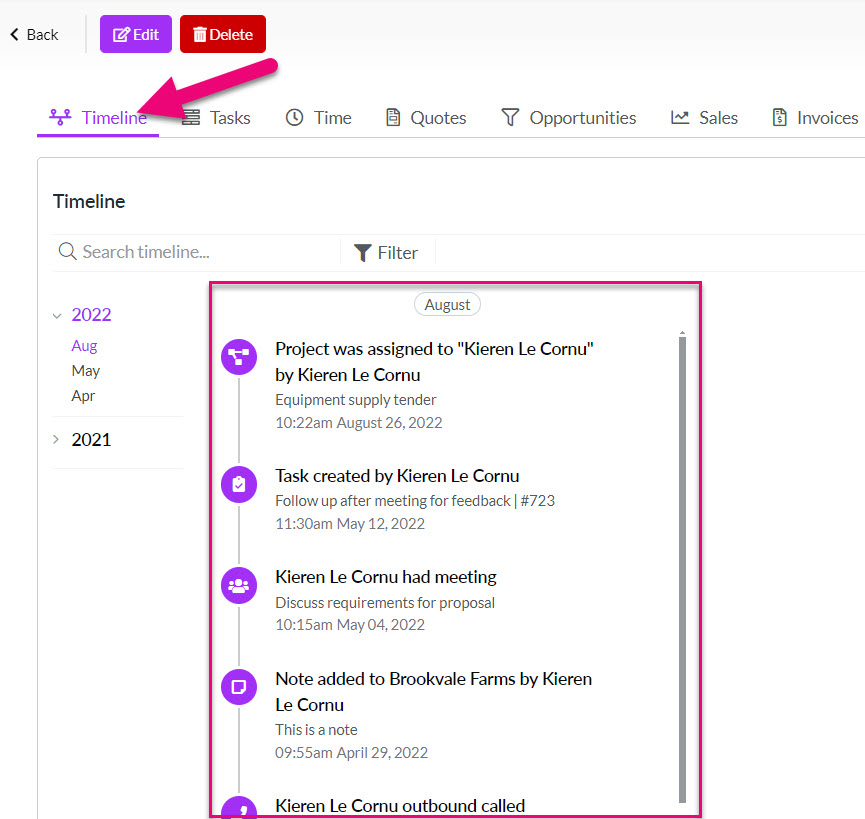
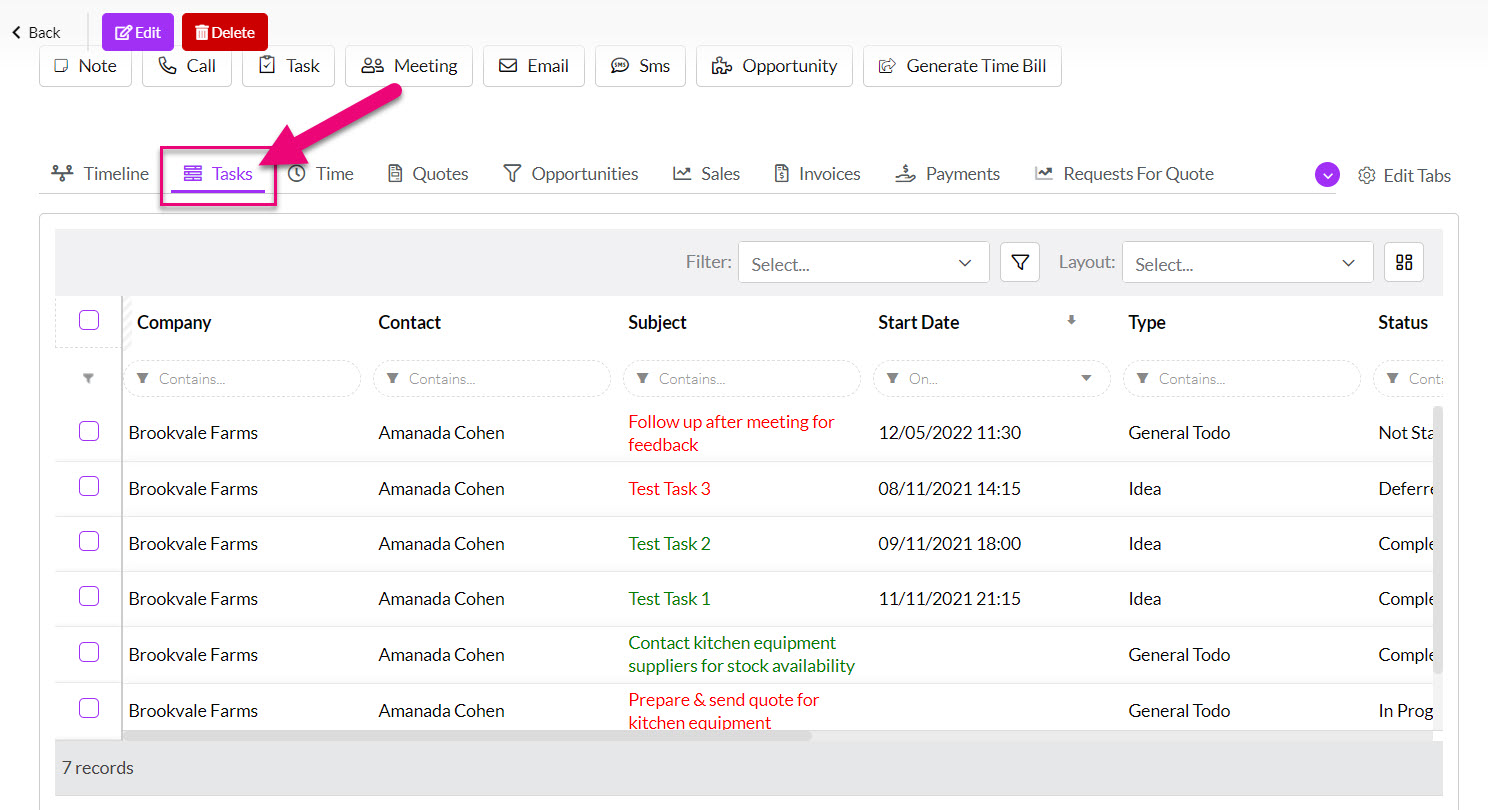
- You can also see all Tasks associated with the record by navigating to the Tasks tab where you can filter and search the records.
You can also set reminders for a range of Activities so that you and your team can receive notifications and alerts – see this guide to Notifications and Reminders for more information.
You can create an Opportunity using the toolbar button. Note that you can have multiple Opportunities attached to a Project record.

You can then quickly see all Opportunities associated with a Project from the Opportunities tab.
If you cannot see this tab, it may be hidden, and you need to edit the record tabs to make it visible.
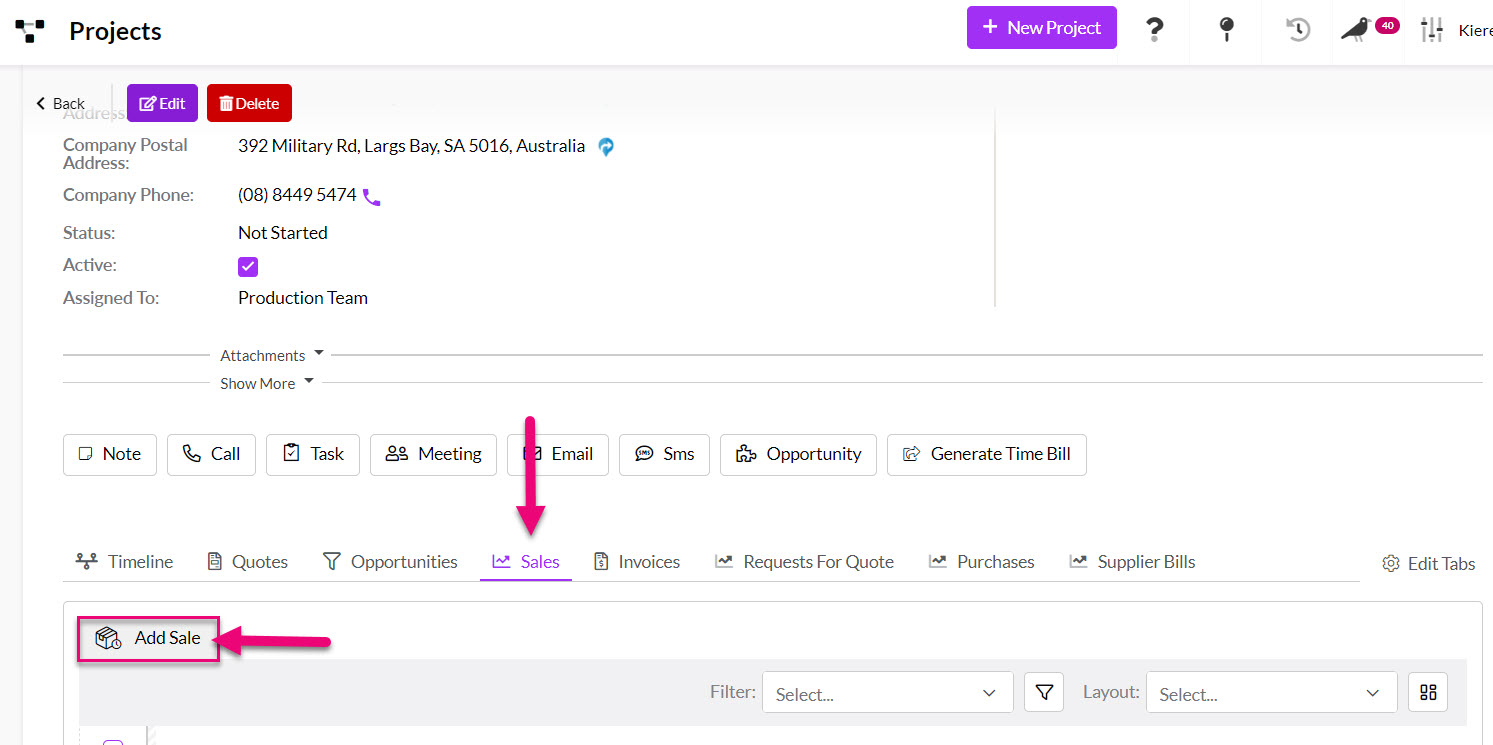
You can quickly add Quotes, Sales Orders and Invoices by navigating to the relevant tab and then clicking on the Add button.


Each linked record will contain a link back to the Project record – the following example shows a Project link on a Quote.

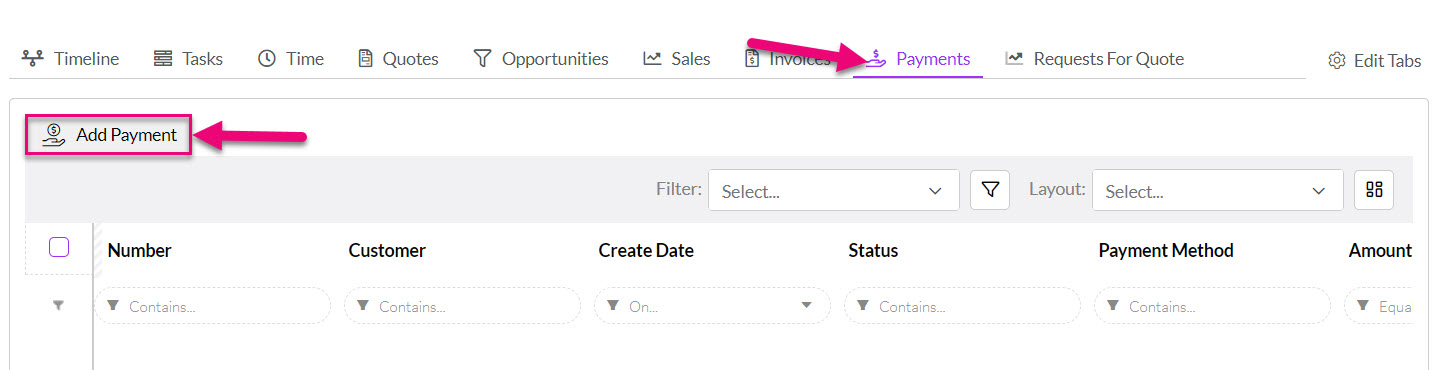
You can also add or view associated Payments from the named tab.
If you cannot see these tabs, they may be hidden, and you need to edit the record tabs to make them visible.
You can quickly add Requests For Quote, Purchase Orders and Supplier Bills by navigating to the relevant tab and then clicking on the Add button.

If you cannot see these tabs, they may be hidden, and you need to edit the record tabs to make them visible.
You can enable Time Billing in CRM with these instructions, which will allow you to quickly generate a time bill from the activity toolbar for the selected Billing Type.

The top right-hand corner of the record will also show you the amount of time spent for the Project and how much of that time is unbilled.

You can navigate to the Tickets tab to add and view Tickets associated with the Project.
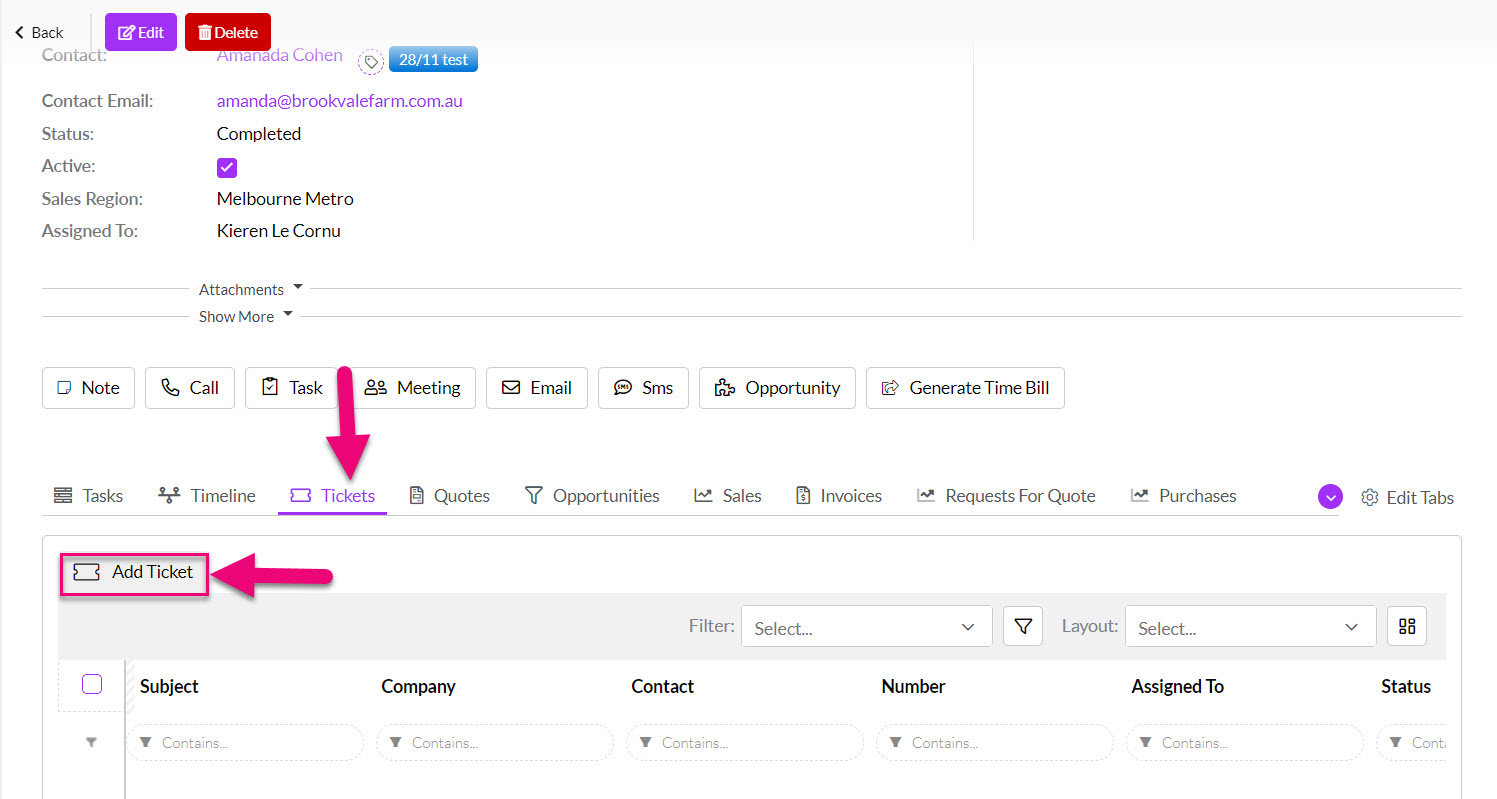
If you cannot see this tab, it may be hidden, and you need to edit the record tabs to make it visible.
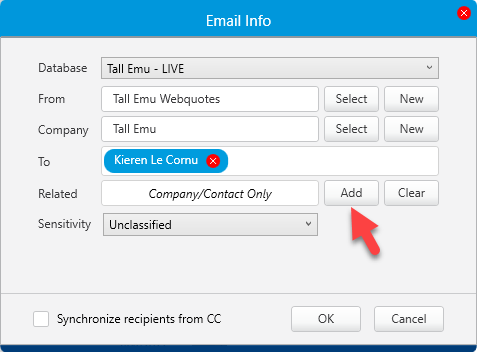
If you are using our Outlook add-in Inbox Insights, you will be able to track emails back to Project timelines so that they form part of the record history, which will help you to centralise your data.
When you sync the Outlook email to CRM:
- Click on the Add button next to the Related box.
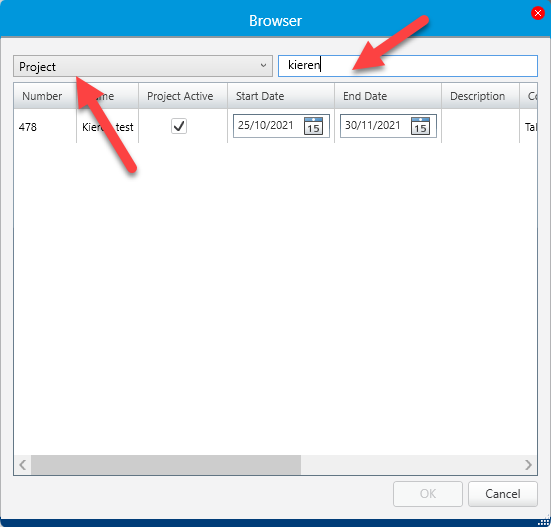
- Select Project from the dropdown list of options and then use the search box to find the Project you want to sync the email to, select and then press OK when you are done.
- The selected Project will then show in the Related box and you can click OK to complete the sync.
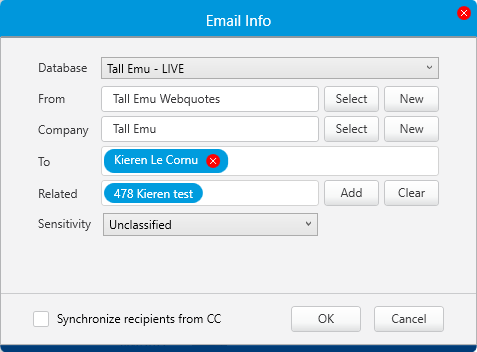
The synced email will then be visible on the Project timeline.
To the right of the Timeline is an area for Attendees where you can add other CRM Users or Teams to the Project.
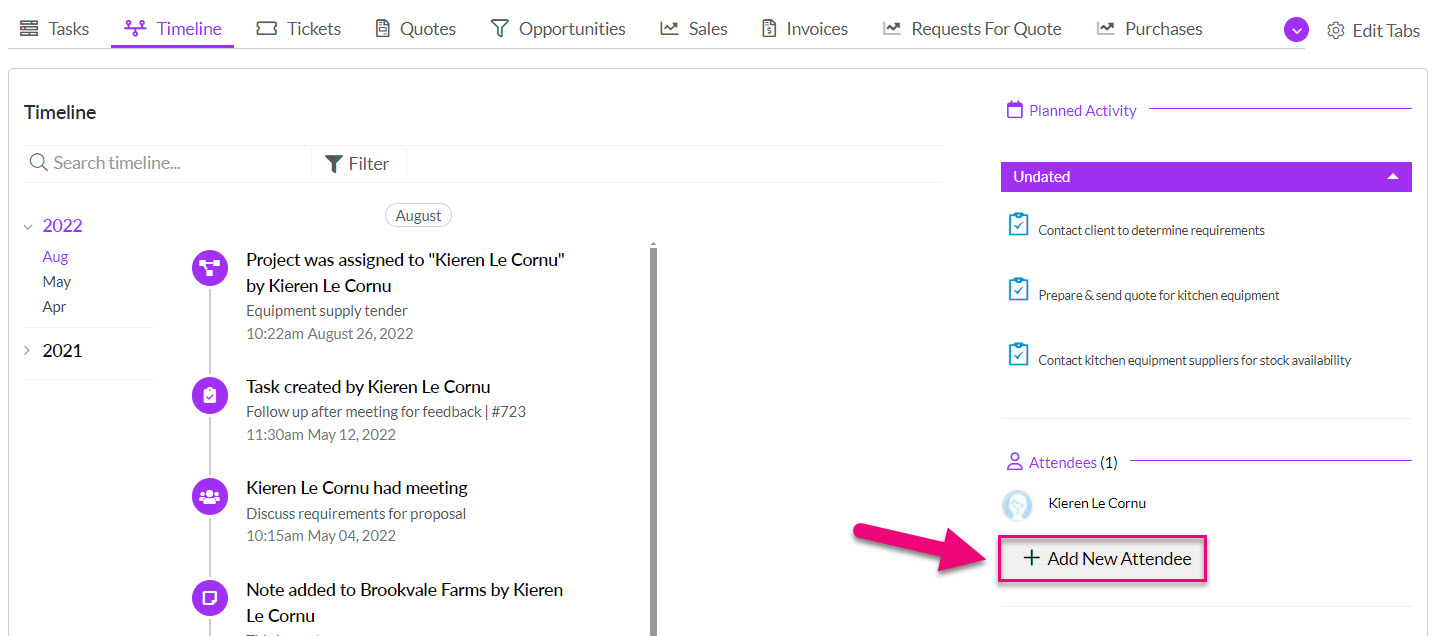
To the right of the Timeline is an area for Contacts where you can link multiple Contact records to the Project so that you can quickly identify stakeholders.

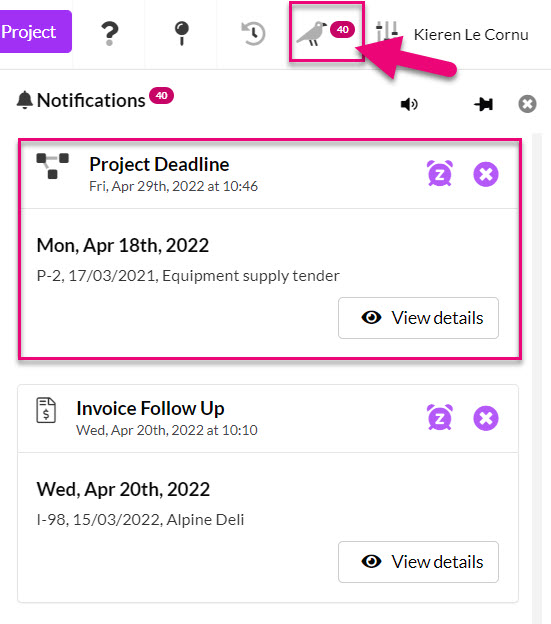
You can set up a Project deadline reminder in CRM for the person the record is Assigned To by using the Planned End Date field.
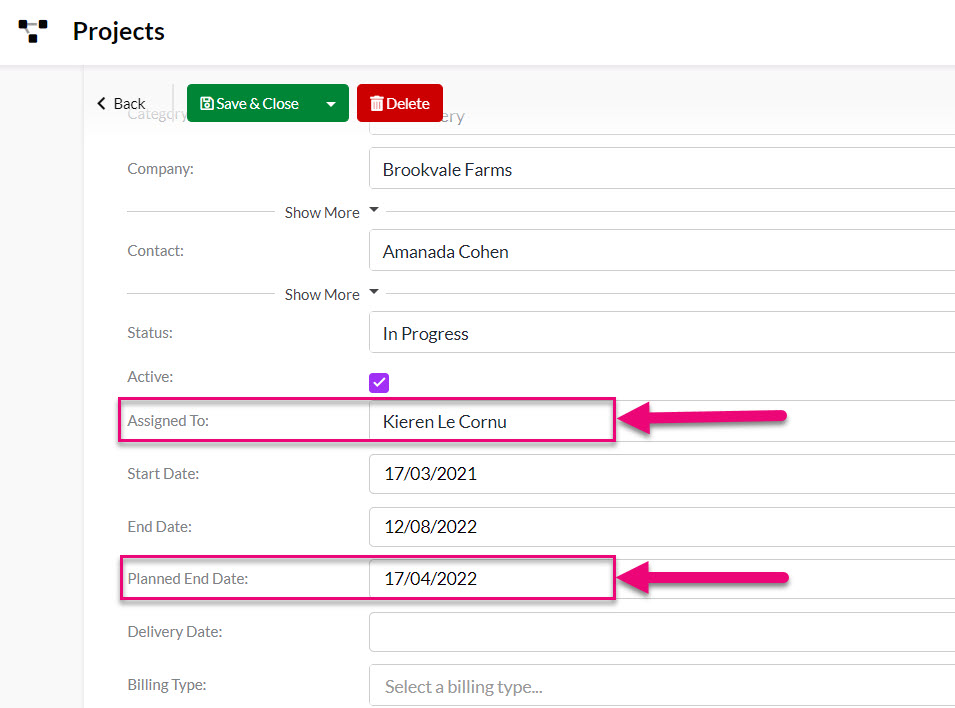
On the Planned End Date the user that the record is Assigned To will receive a notification in CRM.
You can also set reminders for a range of Activities so that you and your team can receive notifications and alerts – see this guide to Notifications and Reminders for more information.
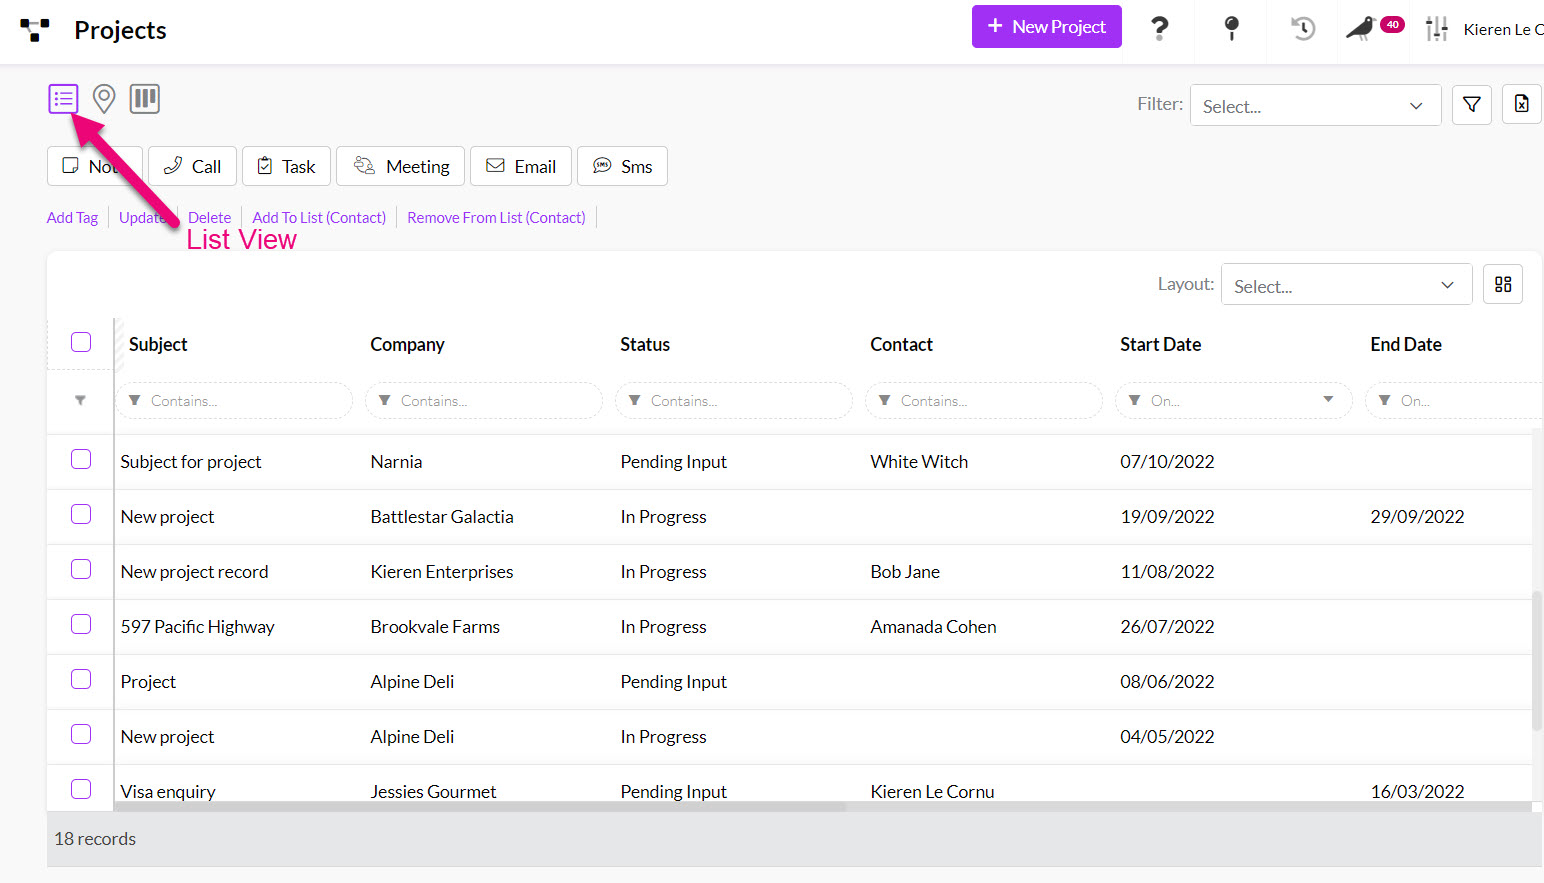
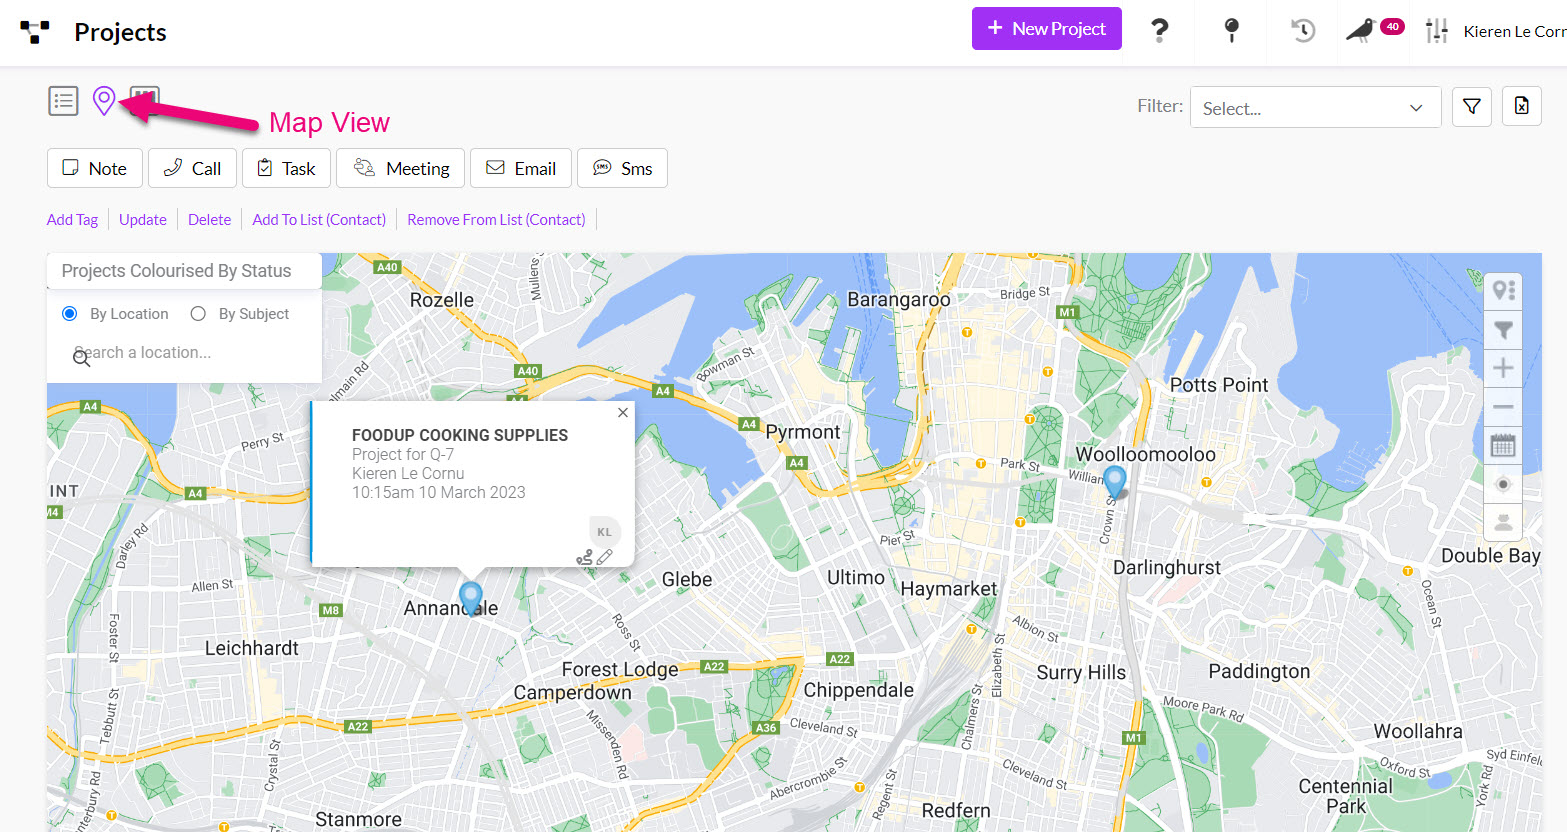
You have 4 different view options in Projects and you can switch between the views by using the selector icons above the activity toolbar, as per the following examples.
- List view – displays a list of records you can search and sort. Setting up Filters and Layouts here will make it easy to track and manage your workflow in future.
- Map view – if you have added address information to your records, each Project will display as a pin on the map.
- Kanban view – this will display your records according to their Status, or you can click on the gear icon to change the view so that it is sorted by who the records are Assigned To.


Adjusting Kanban view to sort by Status or Assigned To
- From Reporting > Dashboards you can open the Project Summary dashboard.

Learn more with our guide on how to search, sort and report in CRM.
There are 2 ways you can do this:
1. Use the bulk update tool – select the records you want to modify and then click on Update on the toolbar.

2. Export and reimport data: you can export your data to Excel, update it and then reimport it back in to update existing records. You can also use the import to add new Projects to CRM.

See our guides on bulk updating and export & reimport.