Creating Assets
An Asset is a product which your business has an interest in/relationship with. Whether it’s marketing collateral provided to franchises for point-of-sale displays, a hire car leased to a client, or machinery you sell that requires regular servicing, asset management in the CRM lets you track your assets to easily stay organised and in control.
To access CRM’s asset management module, head to Operations > Assets – here you’ll find a list of Assets related to your business.
See also:
- Asset settings
- Customising Assets
- Creating Assets for servicing
- Creating Jobs
- Creating a service Job
- Service Products
There are a few ways to create a new Asset:
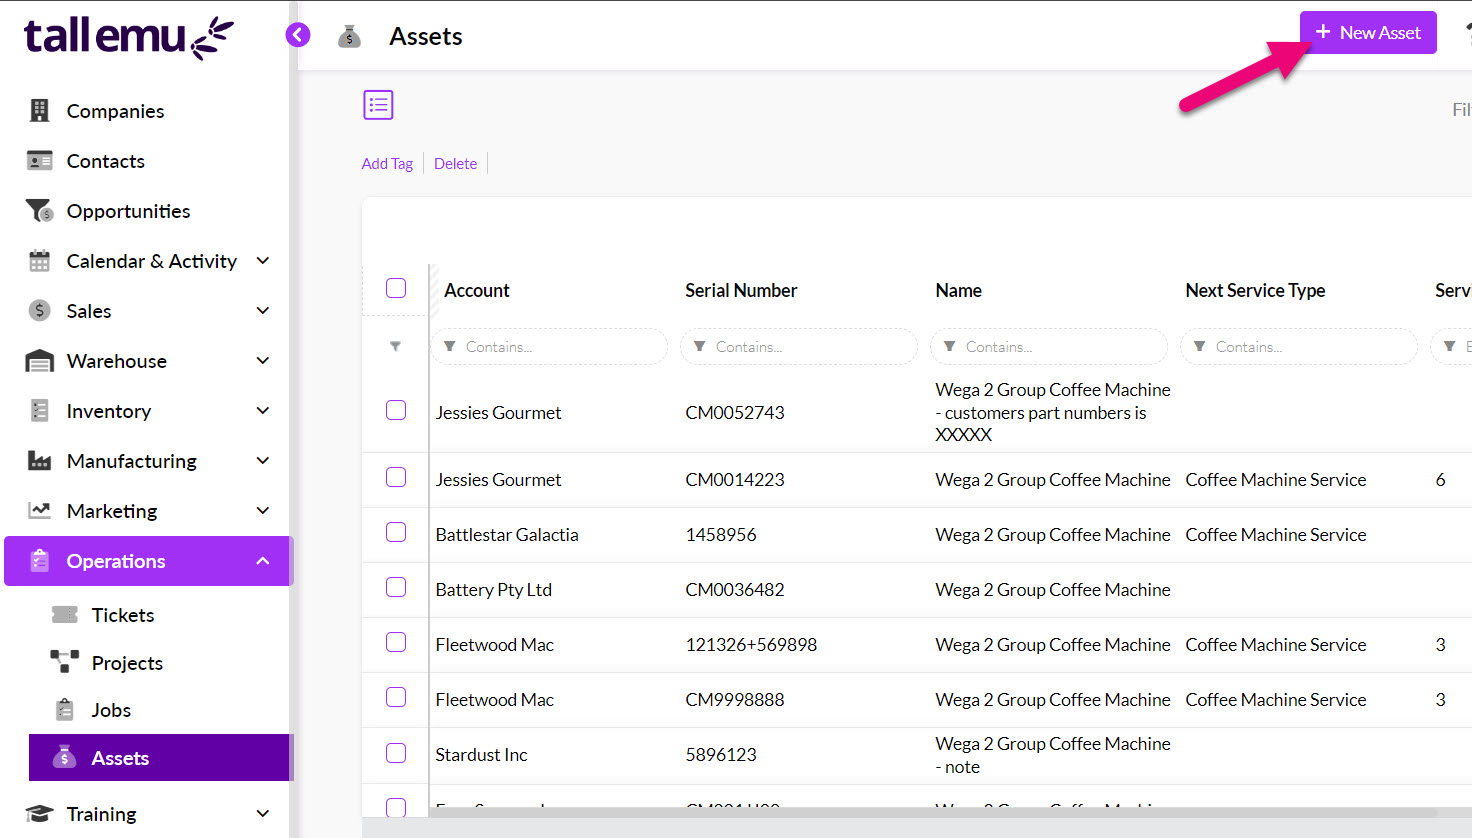
From Assets
- From Operations > Assets click the New Asset button in the top right.
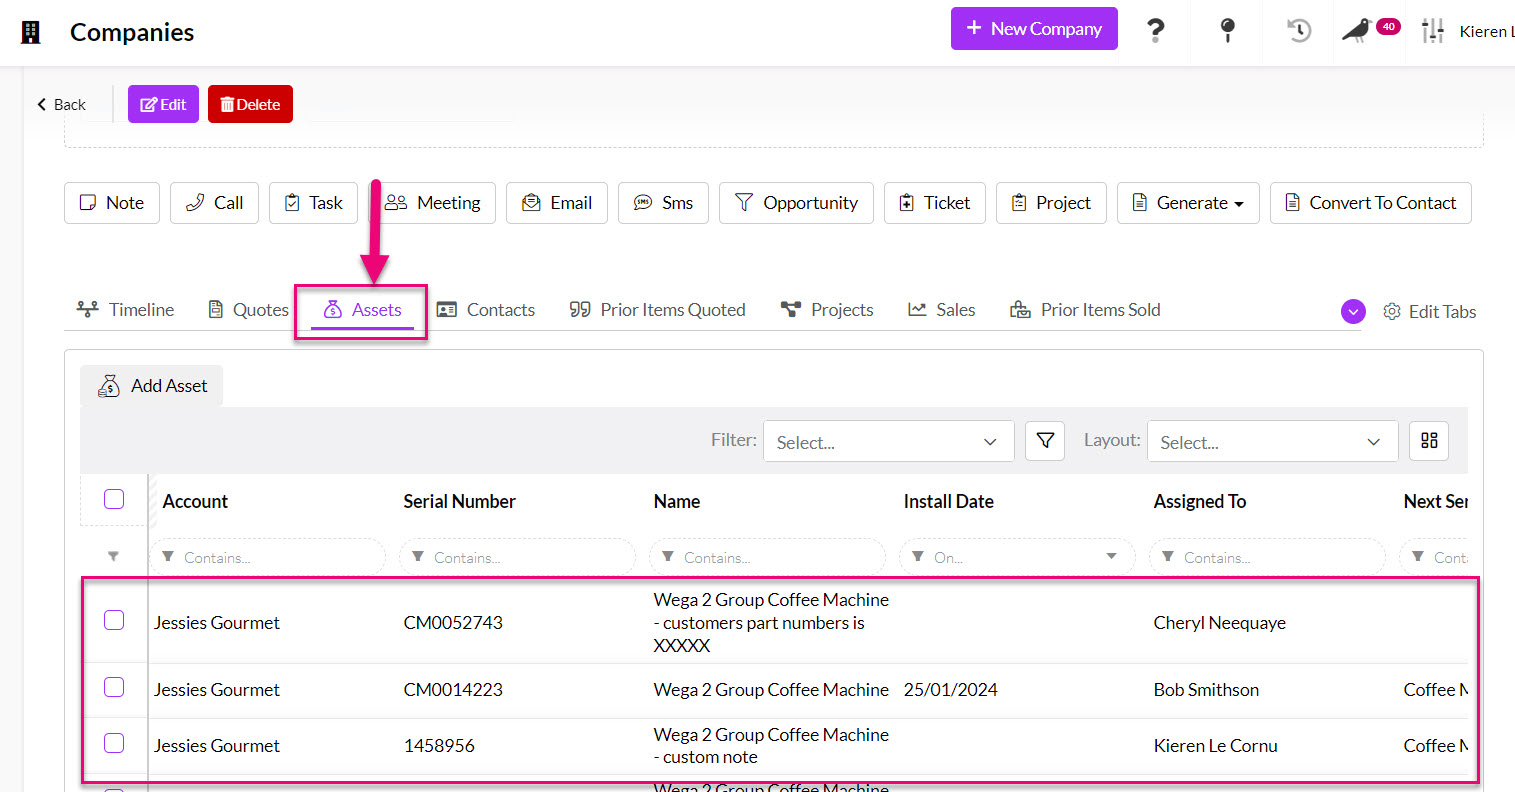
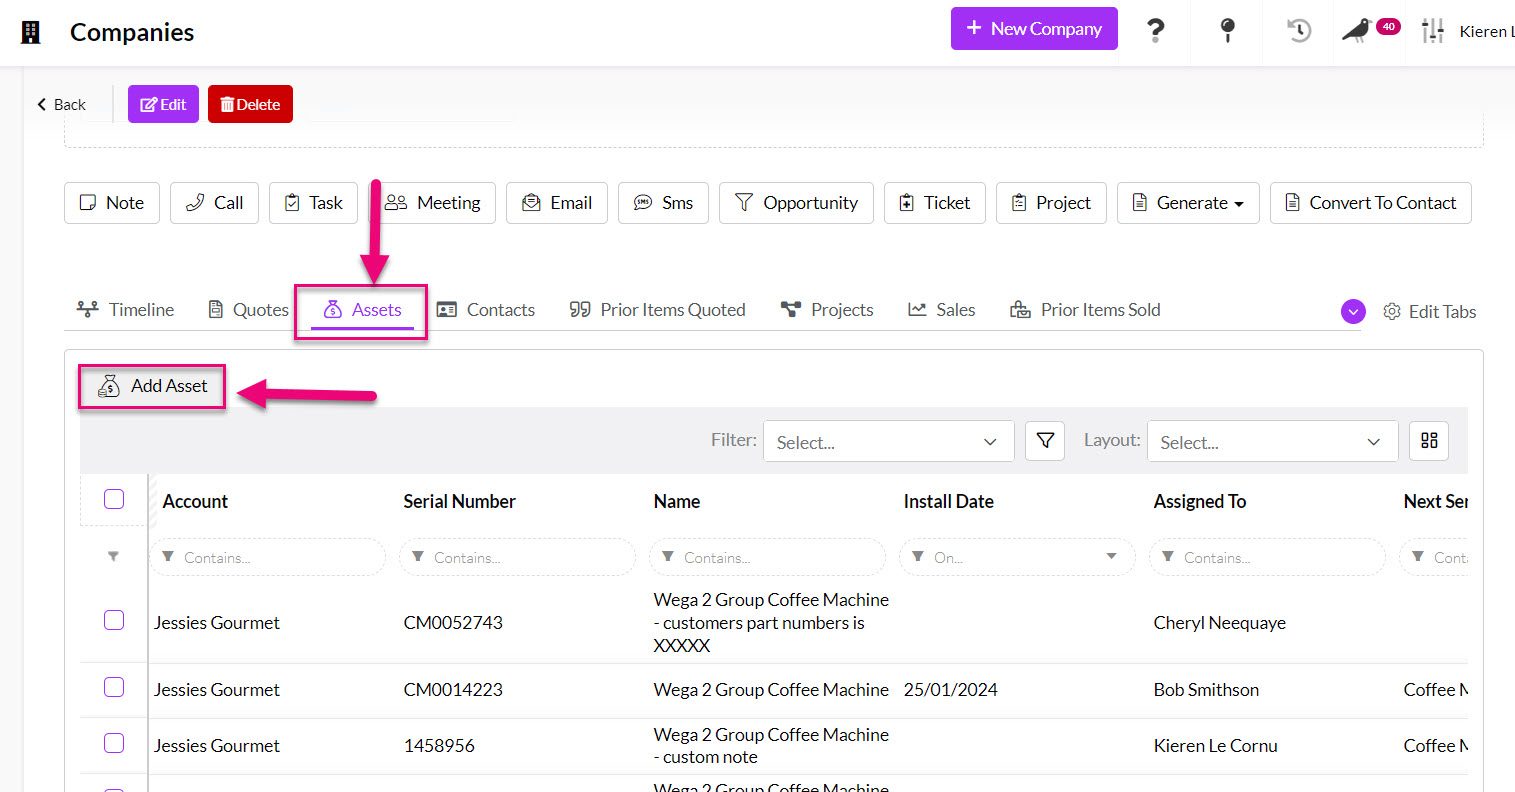
From a customer record
- From a customer record (Company or Contact) – go to the Assets tab and then click on Add Asset. From this tab you’ll also be able to see any existing Assets for the customer.
If you cannot see this tab, it may be hidden, and you need to edit the record tabs to make it visible.
Auto-created Assets
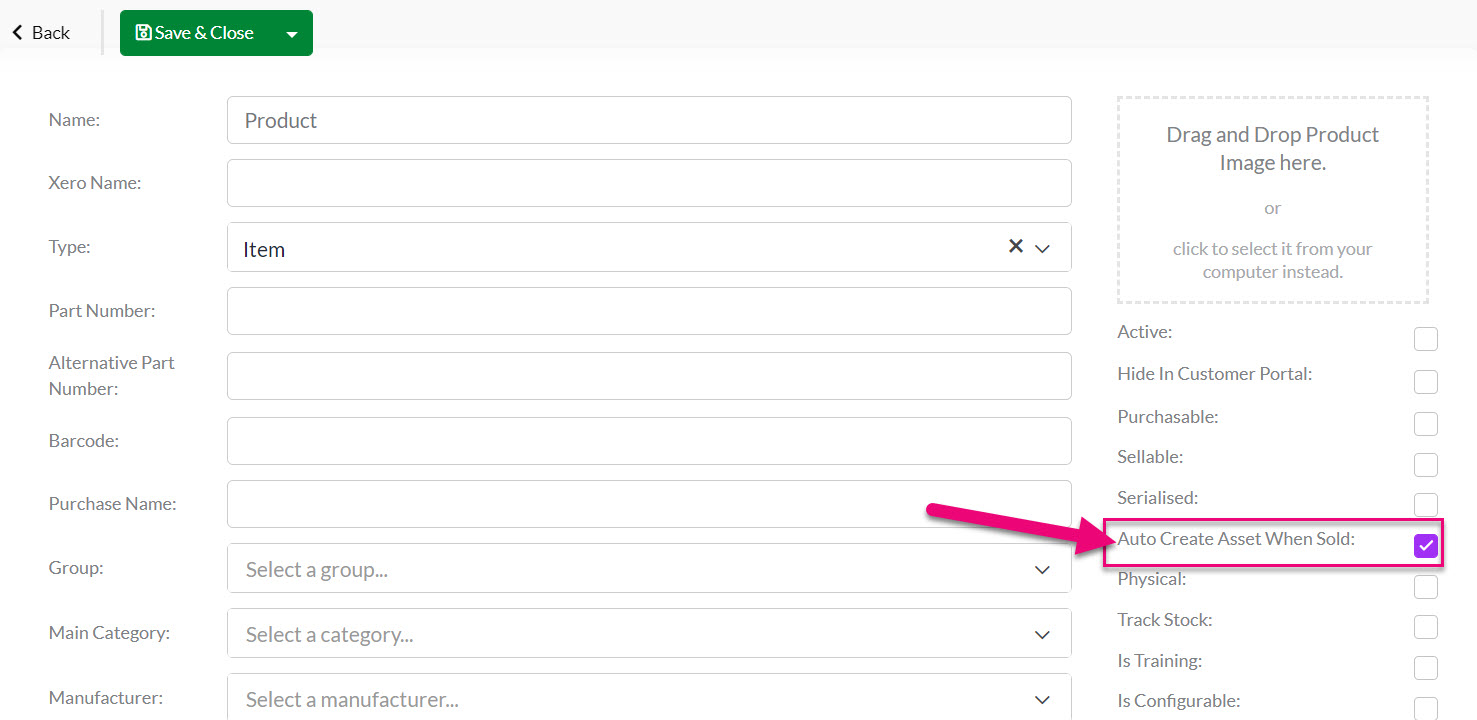
Per product
- To enable the auto-creation feature, you can open any Product record, put it into Edit mode and then ensure that the Auto Create Asset When Sold box is checked.
- Then click on Save & Close to apply the change.

- You can quickly check which of your Products are set to automatically create Assets by adding the column for Auto Create Asset When Sold to your Layout and then searching for a “True” value in the column search.

At a system level
At a system level you can also choose to have all of your Products or specific ones create Assets automatically – see the following section for further details.
- From Admin > General > Assets you can set your preferences for the system to automatically create Assets.

- Auto Create Asset – here you can choose which Products will auto-create Assets. You can Manually Choose Product, set it to happen on All Products or have it only apply to Serialised Products.
- Auto Create Asset On – here you can choose the trigger/s for creation from either Shipment, Invoice or Both.
From a Sales Order
- From a Sales Order if you have already set up a particular Product to automatically create an Asset when sold, you will be able to click on the Configure Asset button to enter in specific details.

You’ll notice here that there are a number of different fields on the new Asset form.
What data you choose to populate depends on your business requirements. You may or may not own the product, it may or may not be PPSR registered, and it may or may not require servicing and/or follow up.
In this example, let’s use a coffee machine, leased to a customer, as an example. It’s important to note that any Assets you wish to list must be set up first as Products you sell.
Start by filling in the basic details:
- Select the underlying Product.
- Add a Display Name (which can provide more detail than just the name of the Product).
- Enter in the serial number (if applicable).
- Select the Account (this is the customer who may be in possession of the asset itself/the customer that the Asset relates to).
- You can also add a picture of the Asset to the record.

The checkbox Owned By defines the ownership status of the underlying asset. If the customer has purchased the underlying product outright and your asset record is being used solely for managing after-sales support (for example, servicing an air conditioner) then you would leave this checkbox unchecked.
If the customer is leasing a product owned by you (e.g. a coffee machine or hire car) and the asset record is being used to track your own property, then you would leave this box checked.
- Since we’re leasing the coffee machine in this example, we’ll ensure the box beside Owned By is checked. This will help us track internally which assets are owned by us and which assets are owned by third parties/customers.
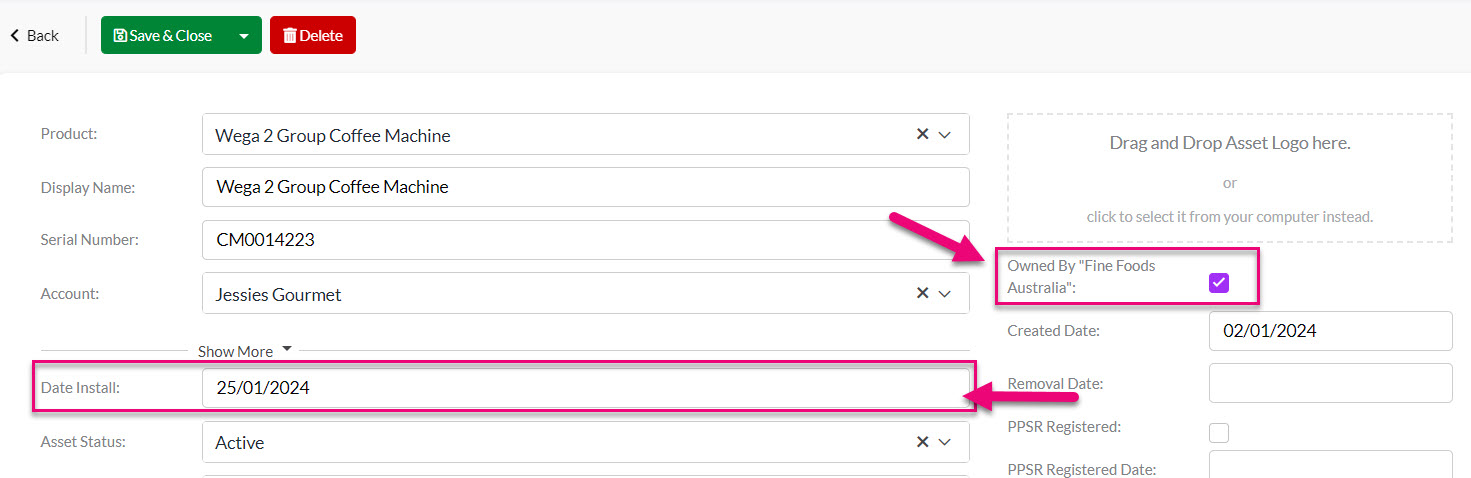
- We’ll also specify the date of install to indicate when the machine was first handed over.
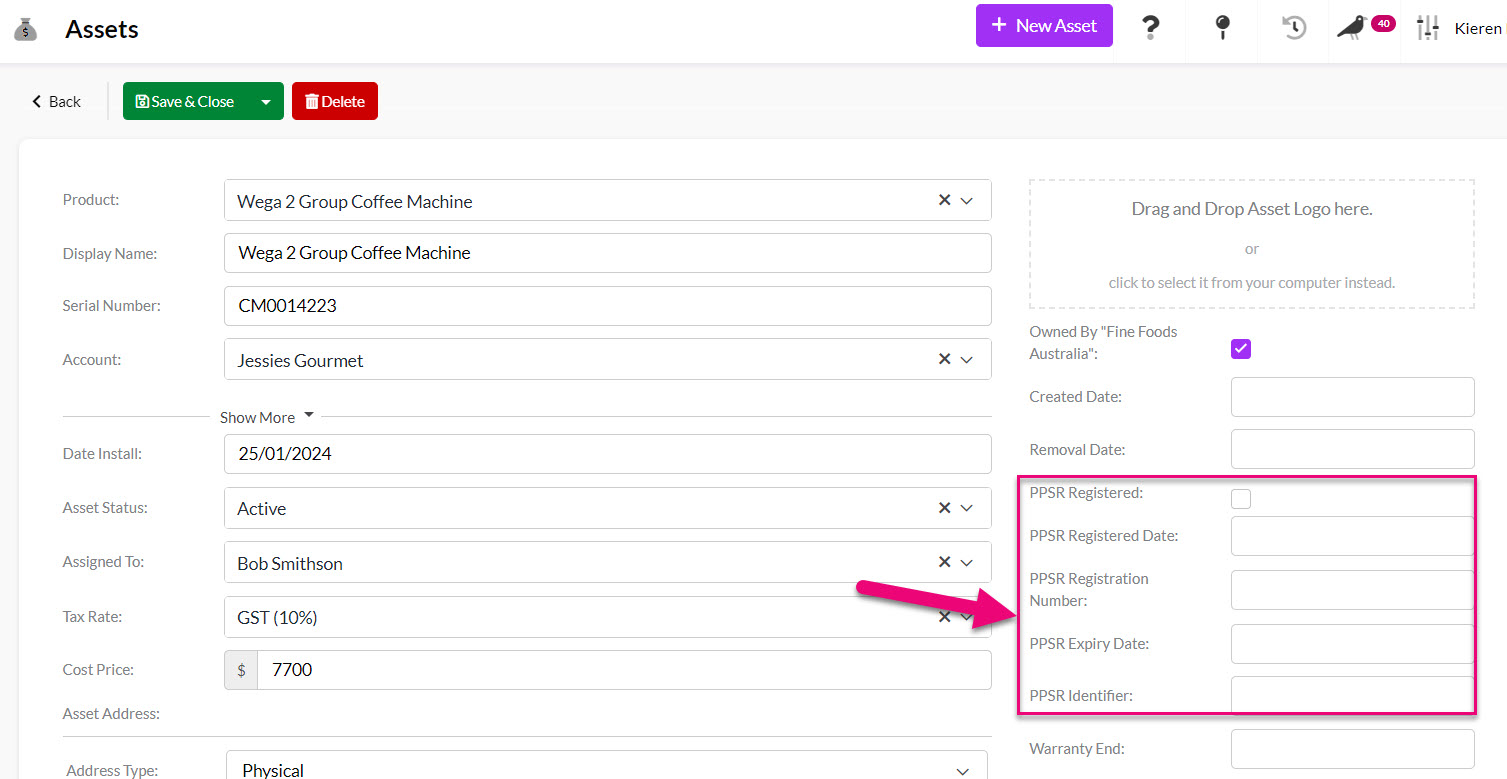
Next you’ll see some ‘PPSR’ related fields. The PPSR is the Australian Government’s Personal Property Securities Register. It’s an optional register allowing businesses to register their security interests, essentially reducing the legal and/or financial risks you may be exposed to during leasing agreements.
If your asset is registered on the PPSR, you’re able to enter the appropriate details in the fields outlined below for easy reference against the asset itself. First, you’ll need to check the box beside PPSR Registered. Then, proceed to populate the Registration Date, Registration Number, Expiry Date and Identifier.
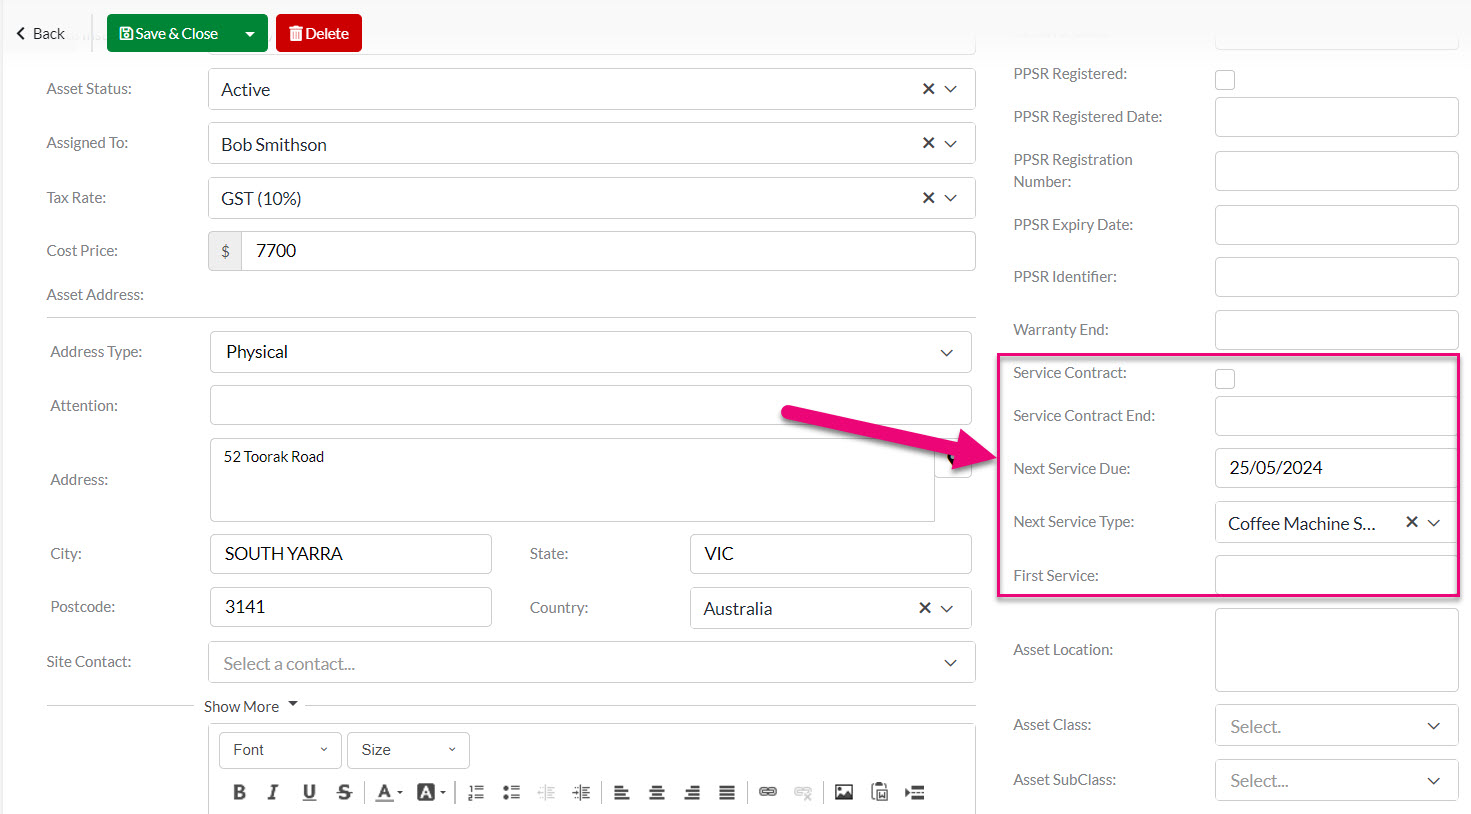
Following the PPSR fields you’ll notice additional service fields.
We’ve covered this in more detail in another help file, so click here to view more information. Essentially, you’re able to flag whether the underlying asset has an associated service contract or service schedule (carried out by you).
You can select the service type and the due date to keep track of servicing requirements for the asset. Then you’re able to view these requirements in the grid to easily manage and follow up on the service schedule for a particular asset/customer.
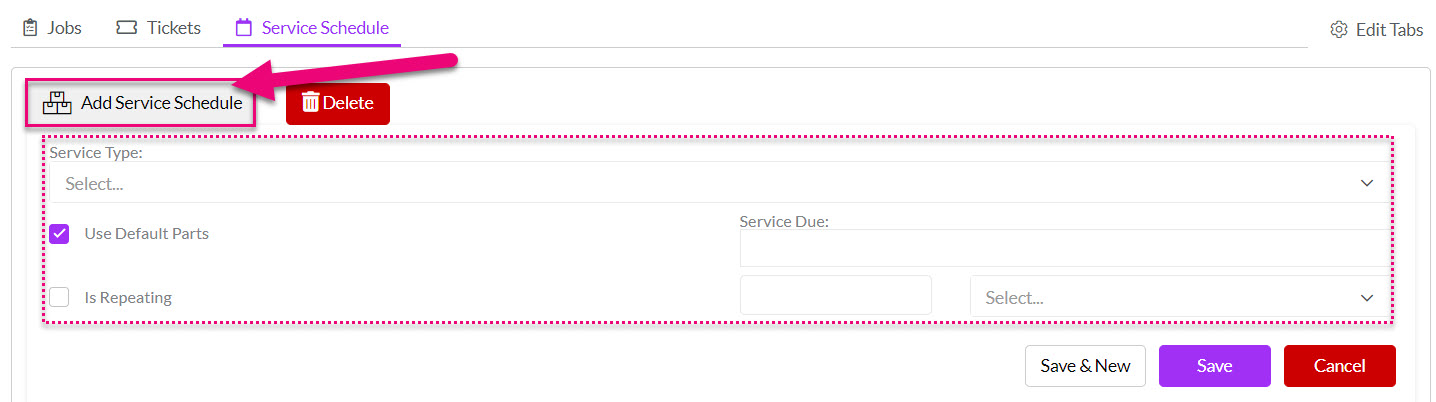
On a saved Asset record you can navigate to the Service Schedule tab to either view existing or create new schedules.

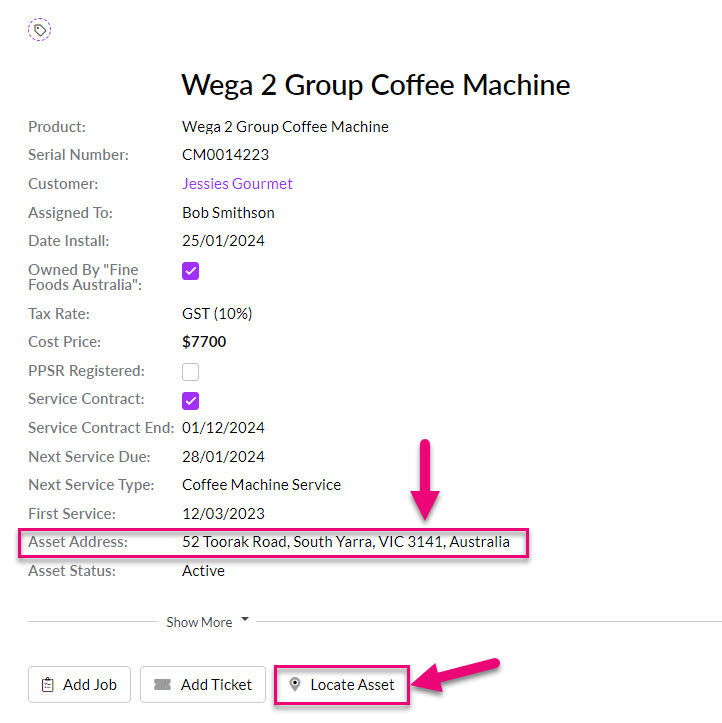
Below the service information fields you’ll see location details. Here you can specify the exact location of the asset (for servicing, maintenance or tracking purposes).
You’re also able to select a Site Contact, who you would typically liaise with regarding the asset in question (either in person when carrying out a service, or via phone/email).

- As long as you have an Asset Address populated, you can click on the Locate Asset button.
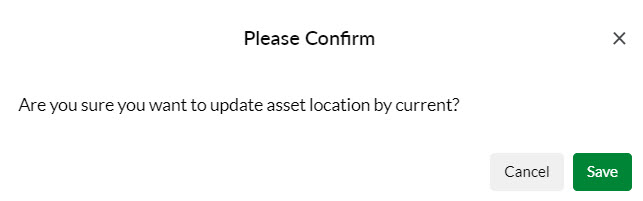
- You’ll then need to confirm you want to proceed.
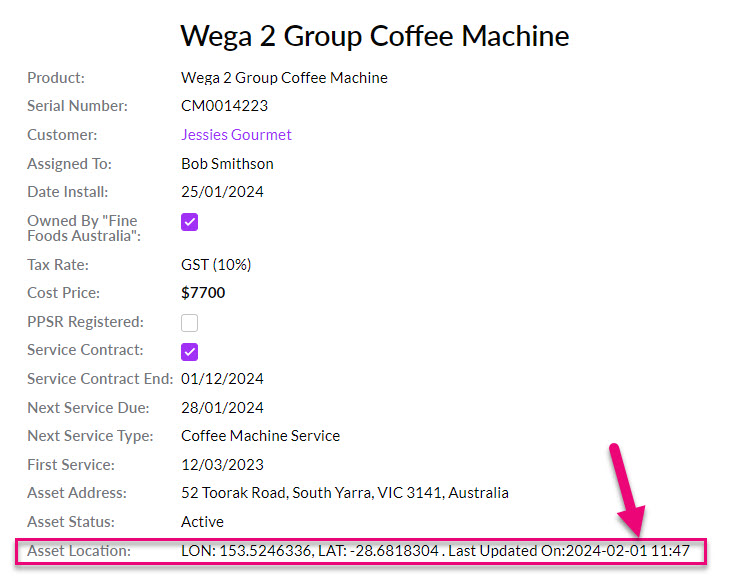
- CRM will then automatically populate the Asset Location field and show this on the record – this provides you with the precise longitude and latitude, based on the Asset Address.
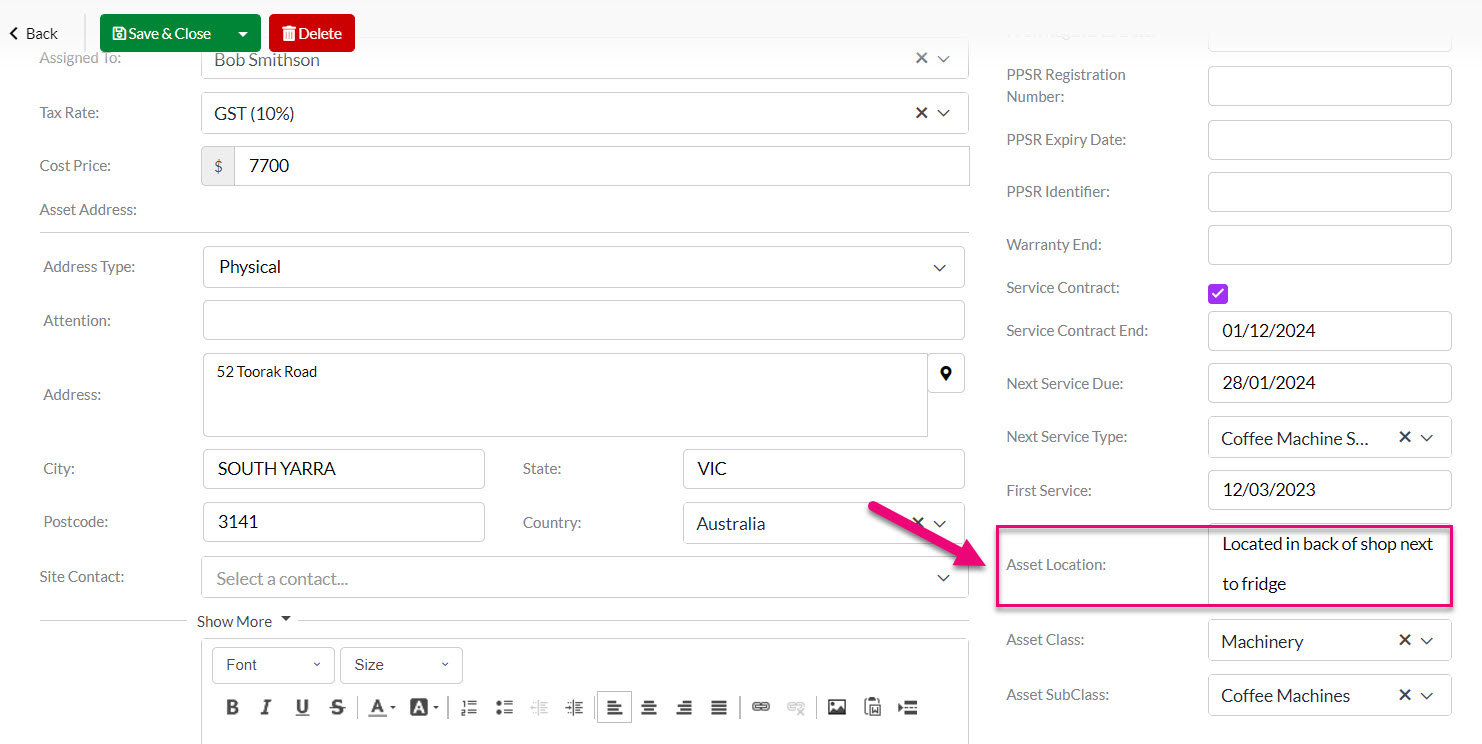
- You can also add manually add information into the Asset Location field which you can use for enhanced on-site location detail – i.e. you may want to include a room/workshop or factory floor location description.
- Just note that if you then use the Locate Asset button, this will overwrite the information you have manually added.
The final fields on asset creation are able to provide an enhanced level of detail to the asset record. They define:
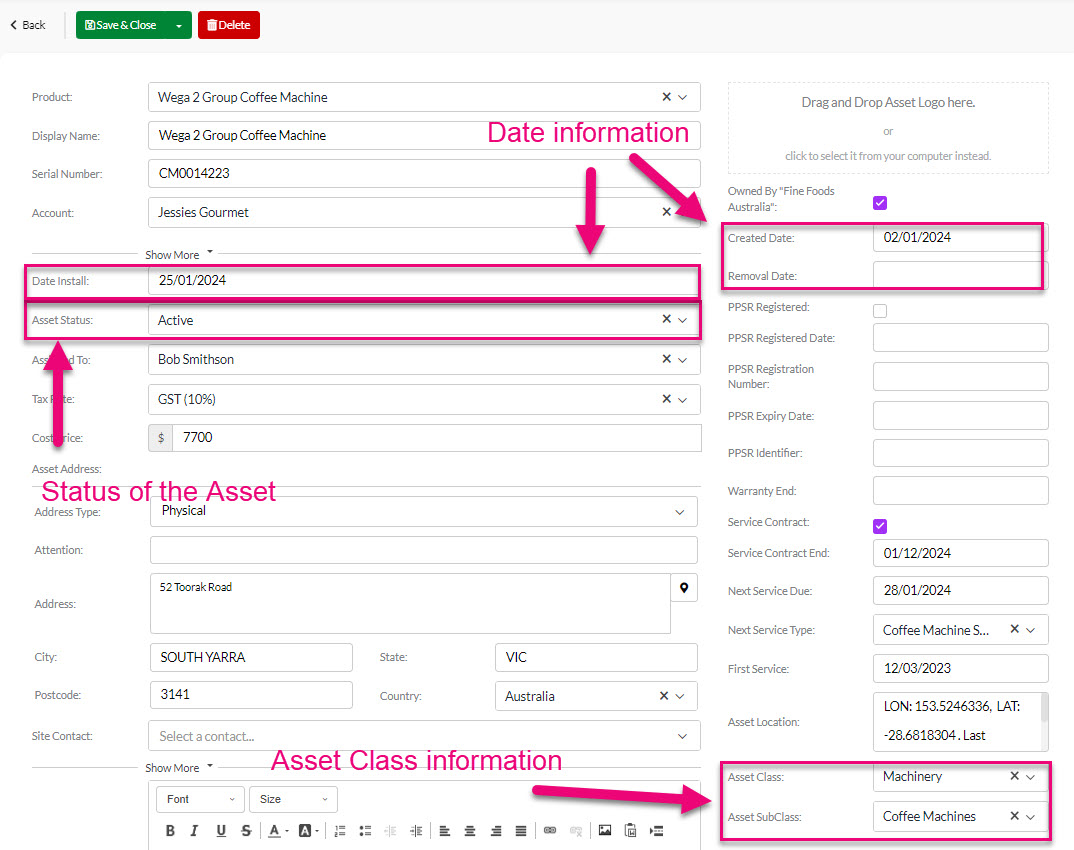
- Installation Date lets you record the date the Asset was placed in-situ.
- The Asset Status (active, broken or inactive).
- The Created Date and Removal Date (if applicable).
- The Asset Class and Asset Subclass (helpful for grouping and categorising your assets for internal organisation/management – i.e. Machinery, Tools, Marketing Equipment etc.).
Please note, the asset class and subclass options can be tailored to suit your requirements by heading to the Admin> Settings> Asset Settings and editing the appropriate lists.
- The Description box can be used to capture specific notes.
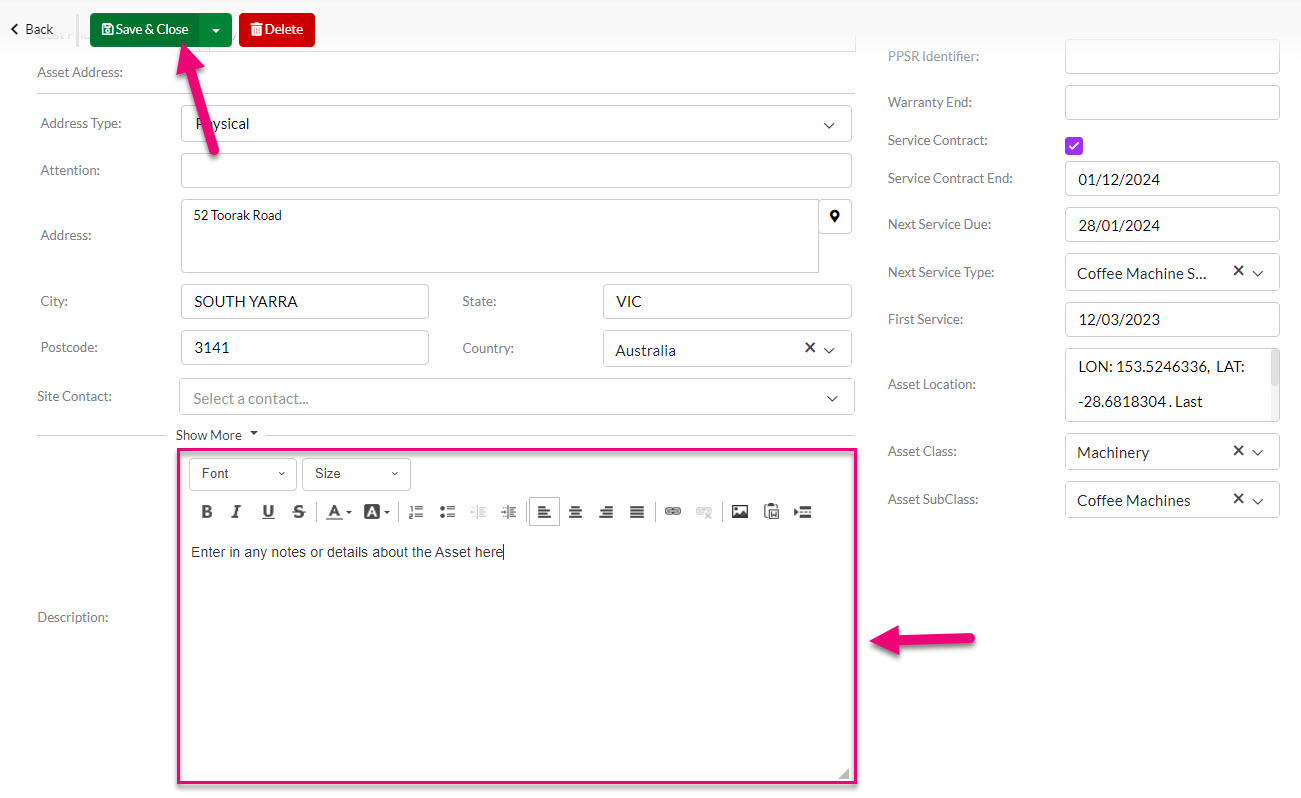
- Once you’ve finished populating the desired data, hit Save & Close at the top of the screen.
On a saved Asset record you will be able to quickly create or access associated Jobs and Tickets.

- Go to Admin > Settings > Assets.

- Click on either of the options to reveal a pop-up window that allows editing.
- Click on a value and use the Edit or Delete buttons or just click Add to put a new value on the list.
See our guide on customising Assets for more information.
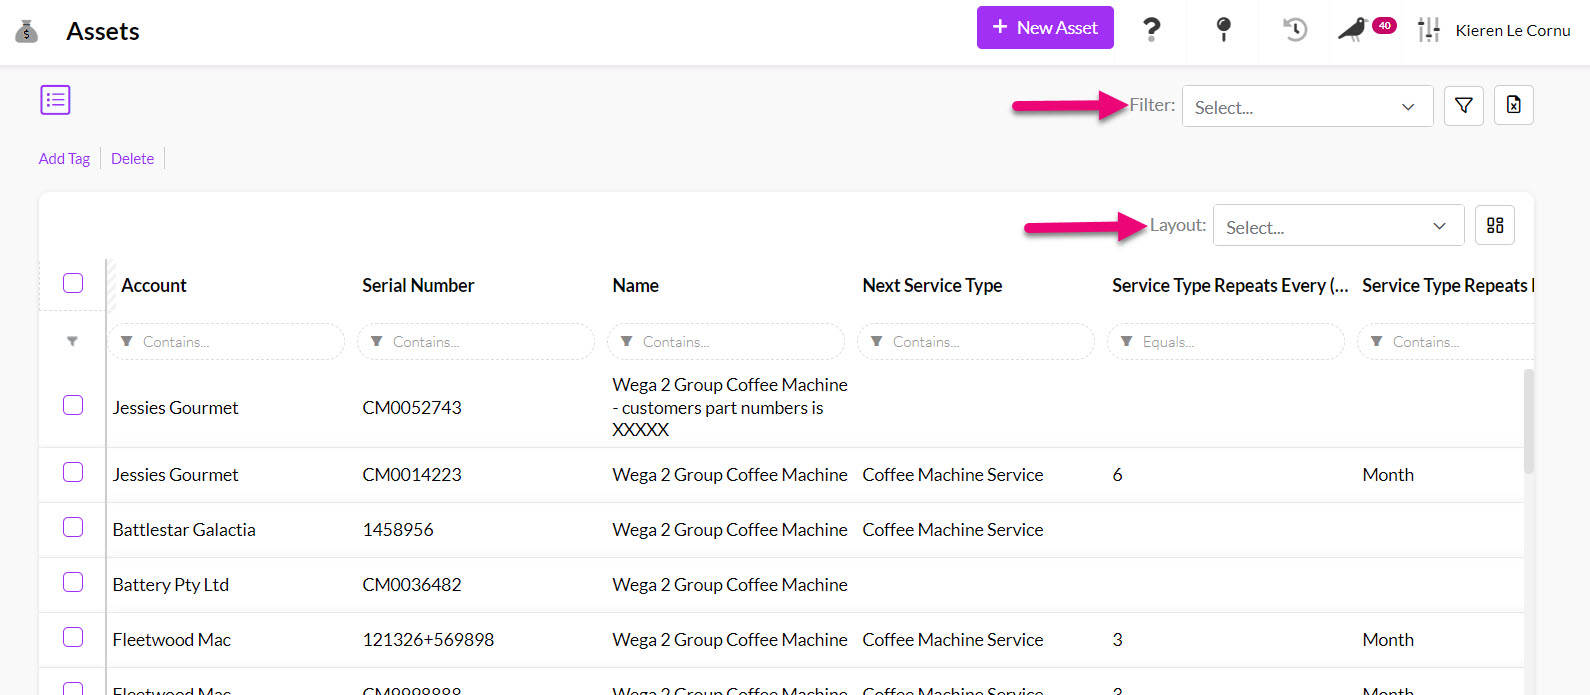
You can view and manage all your Assets from either:
- Operations > Assets will display a list of records, which you can segment and search using Filters and Layouts.
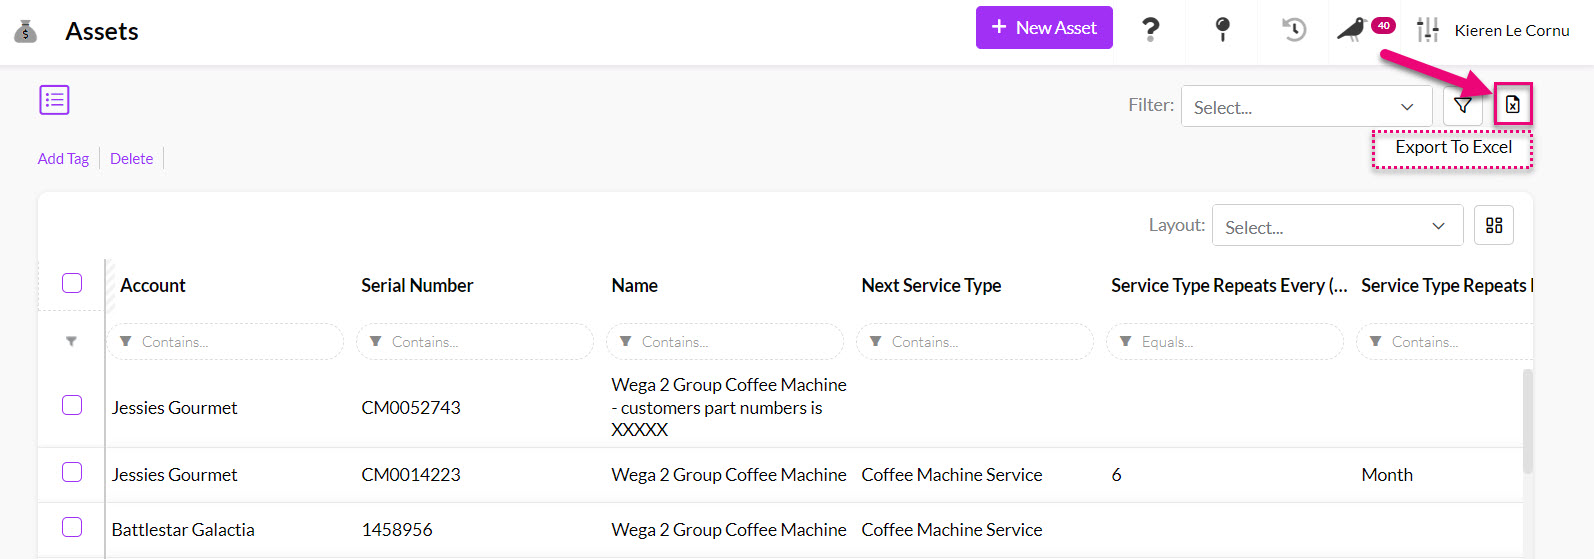
- You can also export your Asset data to Excel.
- Directly from a customer record (Company or Contact) by navigating to the Assets tab.