- Companies
-
- Inventory
- Multi-currency for Purchasing
- Backorders
- Bay Locations
- Features
- Stock Tracking
- System Products
- Accounting details for Products
- Deactivating Products
- Products in Portal
- Suppliers
- Supplier Pricing
- Suppliers & Products
- Products
- Stock Transfers
- Barcodes
- Product Inventory Details
- Importing & exporting Product data
- Virtual Products
- Stock Adjustments
- Purchase Orders
- Enable or disable Stock-Tracking
- Training Products
- Units of Measure (UoM)
- Freight Products
- Working with Landed Costs
- Configuring Product Settings
- Stock Locations
- Stocktakes
- Product Batches
- Serial Numbers
- Different Price Types
- Purchase Orders
- Managing Stock
- Configurable Products
- Variable Products
- Time Billing
- Manufacturers and Suppliers
- FROM Location-based pricing
- TO Location-based pricing
- Requests For Quote
- Time Products
- Quantity-Based Price Breaks
- RFQ Web Templates
- PO Web Templates
- Location-based Price Breaks
- Customer-Specific Pricing
- Deleting Special Prices
Supplier Bills
This page will take you through some common scenarios when you are working with Supplier Bills.
See also:
- Purchase Orders
- Suppliers
- Supplier Pricing
- Linking Suppliers & Products
- Inbound Shipments
- Landed Costs
- Requests For Quote
There are 2 ways to create a new Supplier Bill
1. Turn a Purchase Order into a Supplier Bill using the Convert To Supplier Bill button on the record toolbar – this will move all relevant information over to the new Supplier Bill.
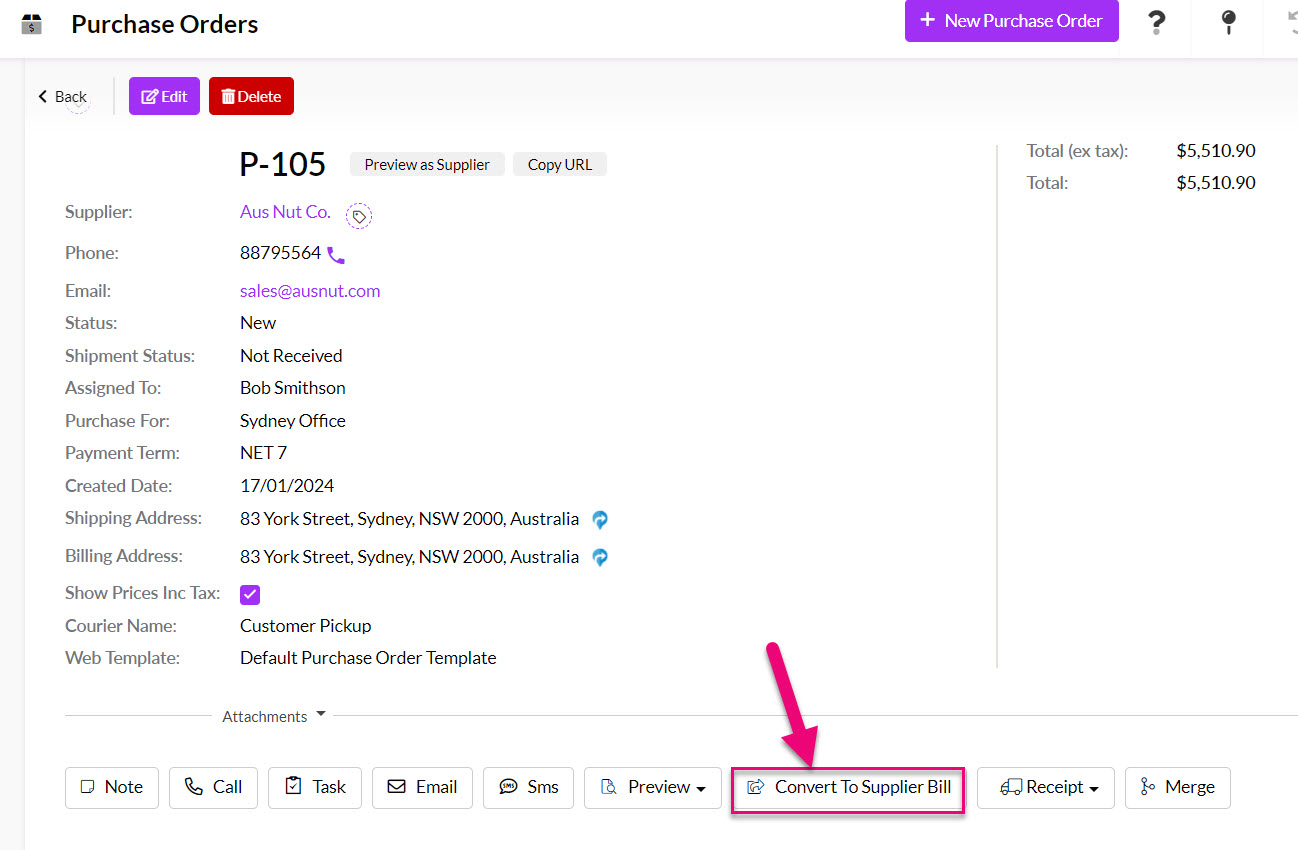
The resulting Supplier Bill will have some locked fields where values populated from the Purchase Order and cannot be changed e.g. item name, price, currency, exchange rate etc. You can also add new items to a bill, if required.
2. Create a new Supplier Bill for landed costs: you can create new bills when you add actual landed costs to a Purchase Order.
For more information, see our guide on landed costs.
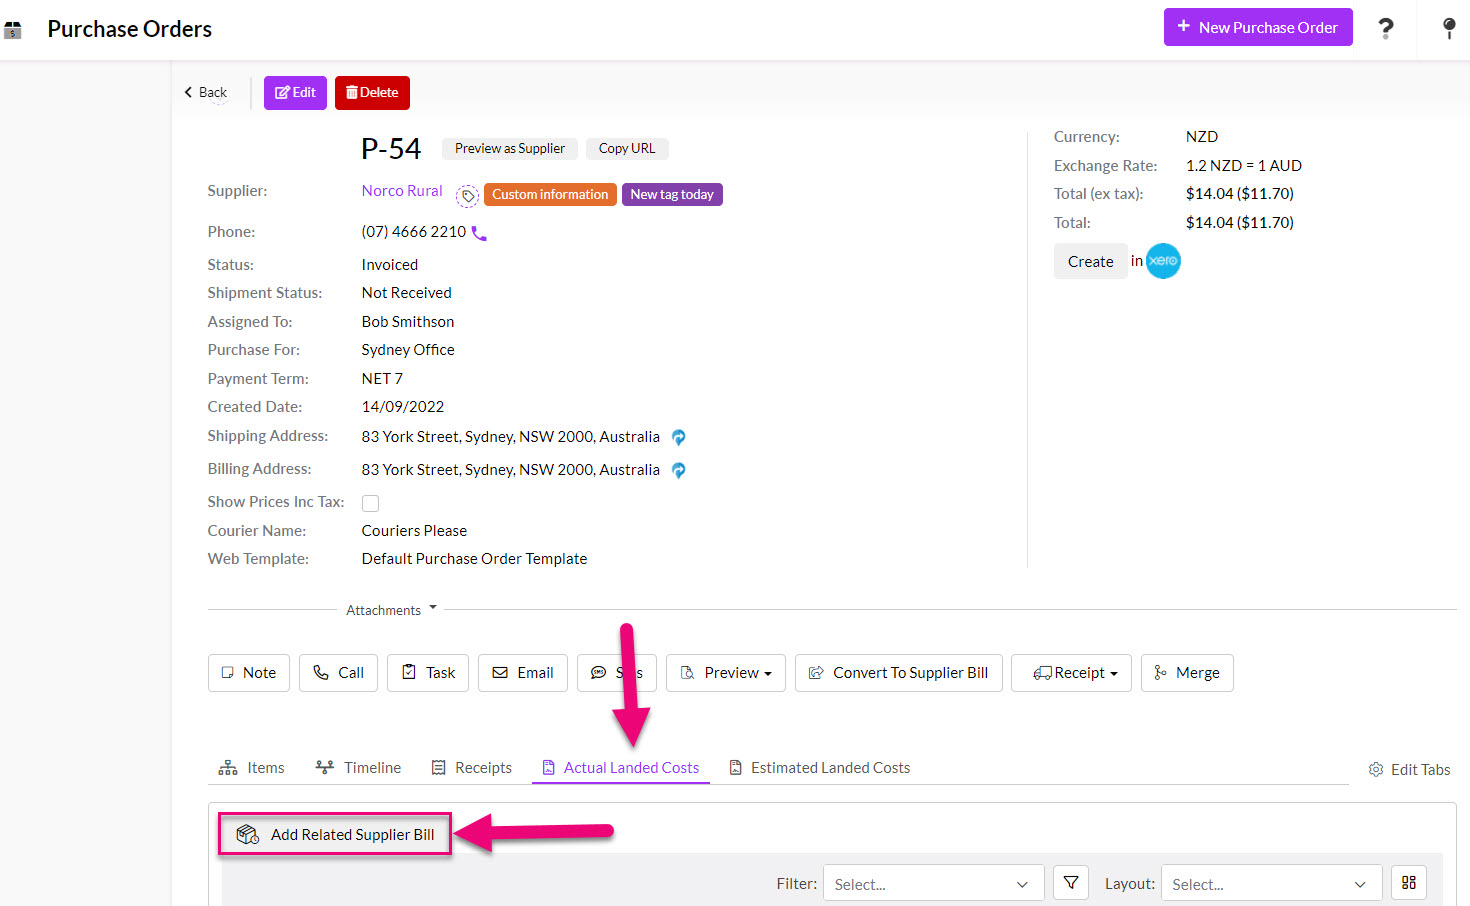
There are a few important things to note with Supplier Bills:
- To increase your stock level of purchased items in CRM, you need to receipt items into stock from a Purchase Order.
- You can then sync your Purchase Order out to your accounting system, just note that this does NOT increase your stock level there.
- You then need to convert the Purchase Order into a Supplier Bill.
- You then need to sync your Supplier Bills from CRM out to your accounting system; this action increases your stock of items there.
- You need to make sure that you have your data sync settings correctly configured for MYOB or Xero so that your accounting system stock levels are in line with CRM.
Notes for MYOB
If you are integrated with MYOB, you need to be aware that a Supplier Bill will replace a Purchase Order in your accounting system.
For example, if you sync a Purchase Order over to MYOB and then sync the Supplier Bill, the bill will automatically convert the existing PO – both records cannot exist at the same time and the bill will cannibalize the PO.
Notes for Xero
If you are integrated with Xero, you need to ensure that the Status of your bills is correct before they are synced out. The following Status of a Supplier Bill in CRM will equal the status of the bill record in Xero once the exported record has been received:
- ‘Entered’ in CRM = ‘Draft’ in Xero,
- ‘Generated’ in CRM = ‘Submitted’ in Xero,
- ‘Cancelled’ in CRM = ‘Deleted’ in Xero,
- All other statuses are exported as ‘Authorised’ in Xero.
These details are automatically populated from the originating Purchase Order. If you want to edit these details, continue reading.
Editing the Supplier details
The first part of the order screen describes to whom the order will be sent. Start typing a Supplier Contact or a Supplier Company name. The list of options on each dropdown list will filter automatically to display any relevant matches.
You’ll note that when looking up a Supplier Contact the name of the linked Supplier Company (if relevant) is also shown in brackets, and if the person you choose is related to a company that field will be filled in automatically.

If the Supplier Contact or Supplier Company you are looking for isn’t already in CRM, you can quickly add them inline – just type in the name and if a match isn’t found, click to create a new record.


When the Purchase Order is saved, CRM will create a new Company and/or Contact record for you and link the Sales Order.
Parent-child & third-party billing
If you have a third-party billing relationship or parent-child hierarchy in place for the Supplier on the order you will see an alert message beneath the Company field to remind you of the circumstances.
In the parent-child example below, a new field (On Behalf Of) shows beneath the Company field, allowing you to select from child accounts via the dropdown.

CRM will automatically generate order numbers sequentially, starting from 1 and using a “SB” prefix i.e. “SB-1”.
If required, you can manually edit the number and overwrite the system number e.g. if you want to add in the supplier’s invoice number.

If you want to change the starting number or prefix, please email us at [email protected] with your requirement (e.g. “B-746”) and we will be happy to assist.
Generated is automatically set as the default Status when you create a new record.
You can also manually change the Status to: Sent, Cancelled, Paid or Partially Paid. To do this:
- Open the applicable order and click Edit.
- Go to the Status field and select an option from the dropdown.
- Click on Save & Close.

If you are integrated with Xero, you need to ensure that the Status field in CRM matches the desired status in Xero, as follows:
- ‘Entered’ in CRM = ‘Draft’ in Xero,
- ‘Generated’ in CRM = ‘Submitted’ in Xero,
- ‘Cancelled’ in CRM = ‘Deleted’ in Xero,
- All other statuses are exported as ‘Authorised’ in Xero.
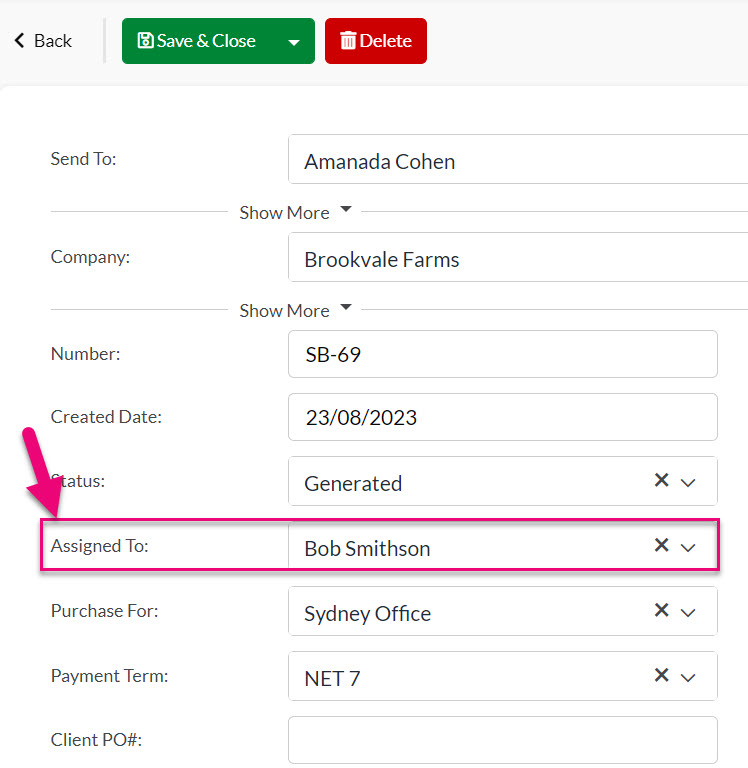
This field allows you to choose from Users in your system to select the person the record should be Assigned To.
This value will also automatically populate from the originating Purchase Order, and you can edit it here, if required.
This field refers to the date on the supplier invoice and is then used to calculate the Due Date i.e. Created Date + Payment Terms = Due Date.
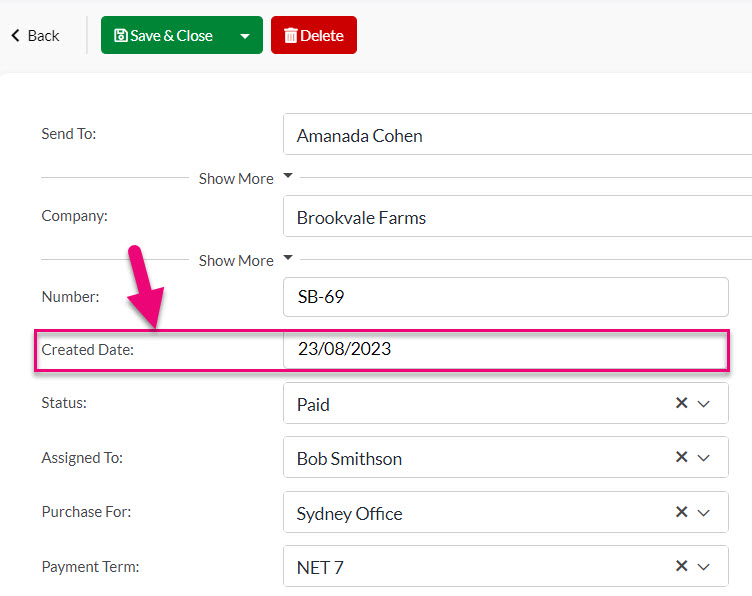
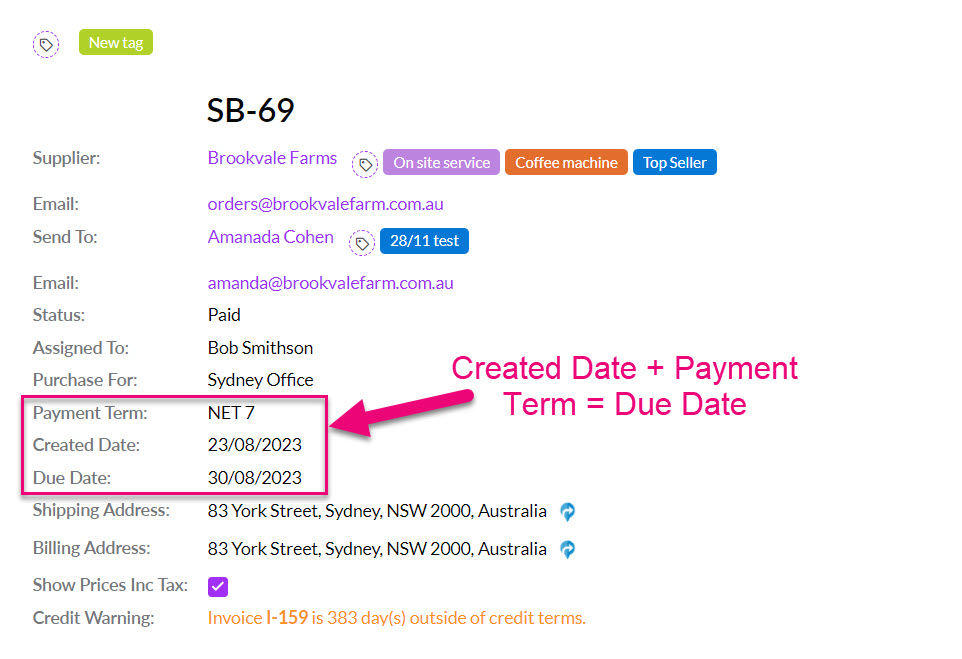
Note that the Due Date field will only be visible when the record is in save mode, so if you need to adjust it, it cannot be edited directly, and you will need to change the value in the Payment Term and/or Created Date fields.
This field refers to the date that the supplier invoice and is due. the system will automatically calculate this date for you based on the Created Date + Payment Terms = Due Date.
Note that the Due Date field will only be visible when the record is in save mode – it cannot be edited directly.

If you need to adjust the date, you will need to change the value in the Payment Term and/or Created Date fields.
This is only applicable if you have multiple Locations in your database.
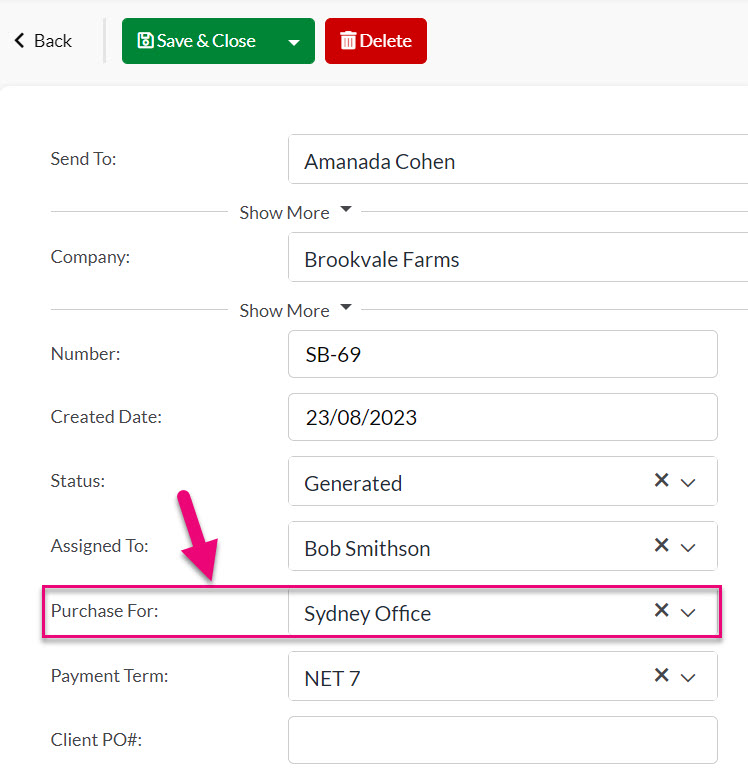
At a Purchase Order level, you can choose the Location you want to buy goods for via the Purchase For field, which will show a list of your active Locations.
This information will then flow through to your Supplier Bill.
Note that changing the Location here will NOT change the Location that goods are put into stock – this is managed via Purchase Orders when goods are receipted on Inbound Shipments.
When viewing an item on a bill, you can click on the “i” button to see what is currently in stock at each of your Locations.

Pricing
Prices will automatically flow through from the originating Purchase Order and the Price and Discount fields will be locked for all items on the bill.
If you need to edit these details, this needs to be done on the Purchase Order before it is converted to a bill.

Tax
You can determine at a system level via your pricing settings whether or not prices are shown inclusive or exclusive of GST.
That choice will flow through to all Supplier Bills and can then be amended, if required.

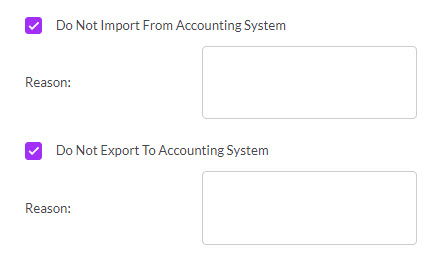
If you don’t want to sync a record with your accounting system, you can prevent it by using these boxes.

Once you select a checkbox, you get an additional box for text called Reason.
For more information about how data syncing with your accounting system works, see our guides for MYOB and Xero.
If this is set up on the Supplier record, it will automatically flow through to the Payment Term field. You can also manually add or adjust the value here.
The value in this field used in conjunction with the Created Date field to determine the Due Date for the bill.

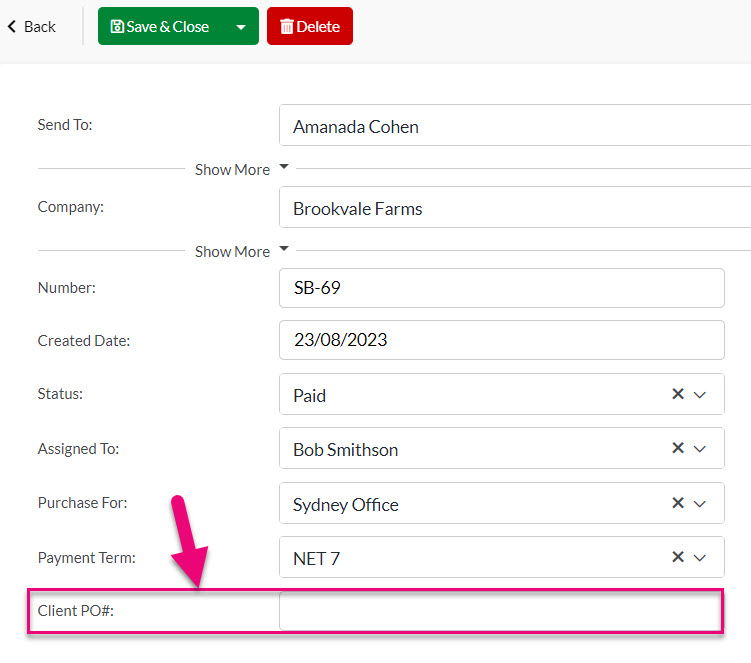
You can add your reference number for the purchase in the Client PO# field.
The Currency and Exchange Rate fields from the originating Purchase Order will automatically flow through to the Supplier Bill as locked fields i.e. you cannot edit them.
If you need to edit these details, this needs to be done on the Purchase Order before it is converted to a bill.
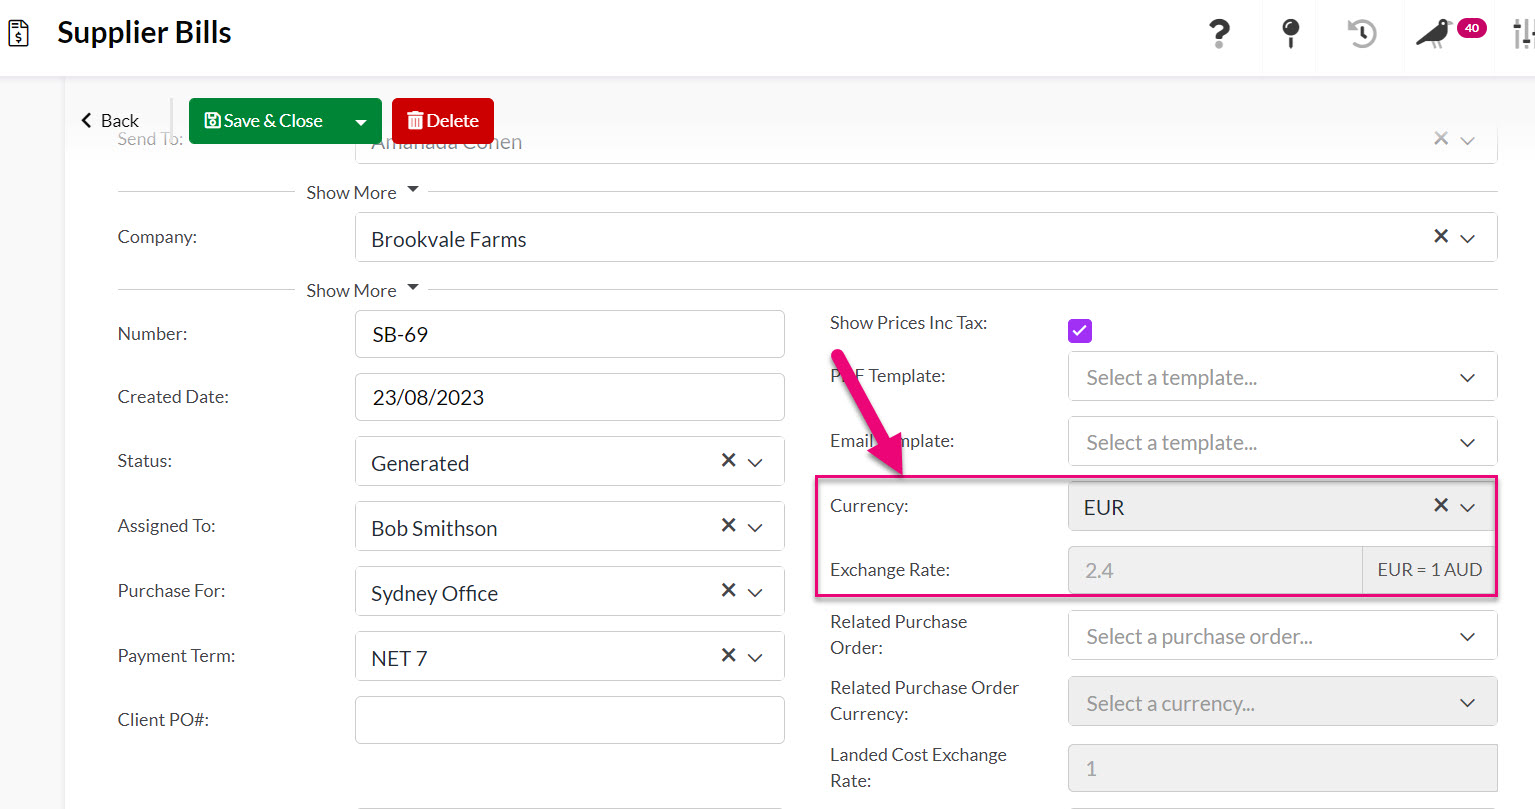
See our guides on multi-currency for purchasing and Landed Costs for further information.
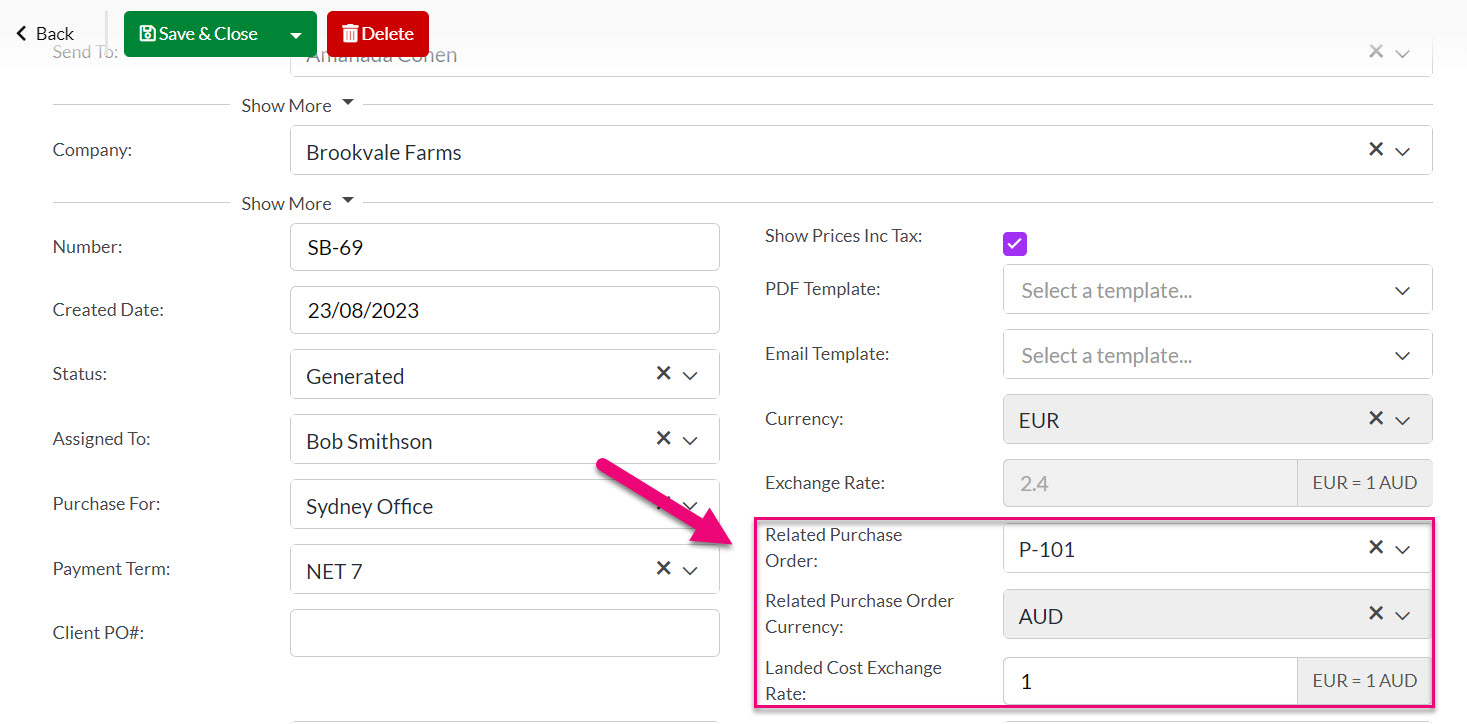
If applicable, you can select an additional Purchase Order that is related to the bill.
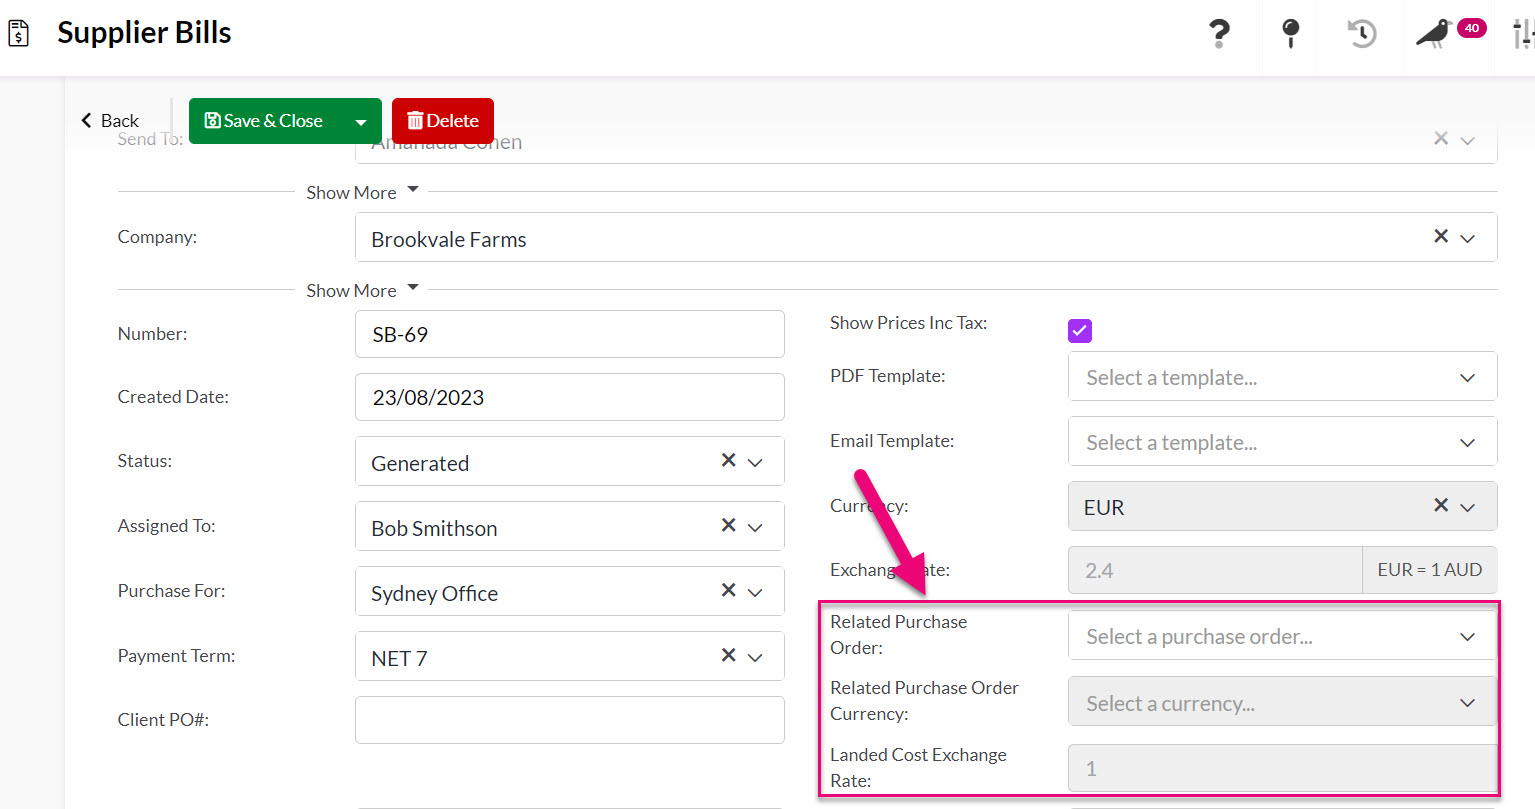
Once you select an order from the list, the currency field will be populated with the
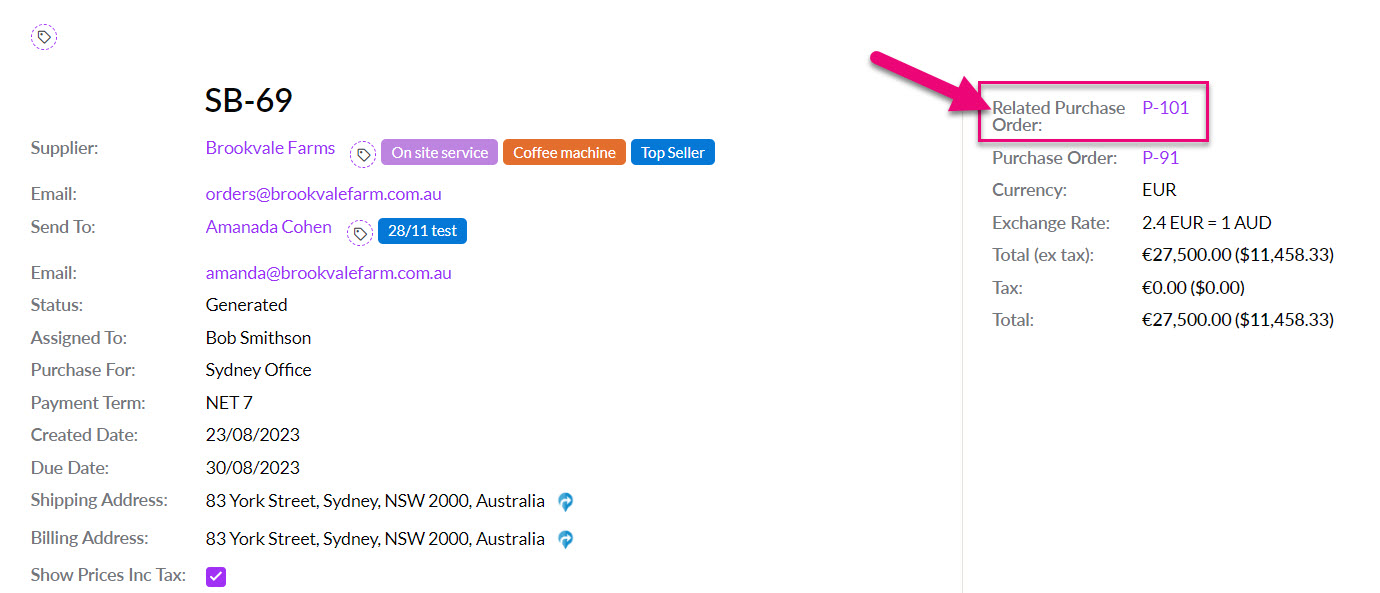
A link for the Related Purchase Order will then show in the top right-hand corner of the saved bill.
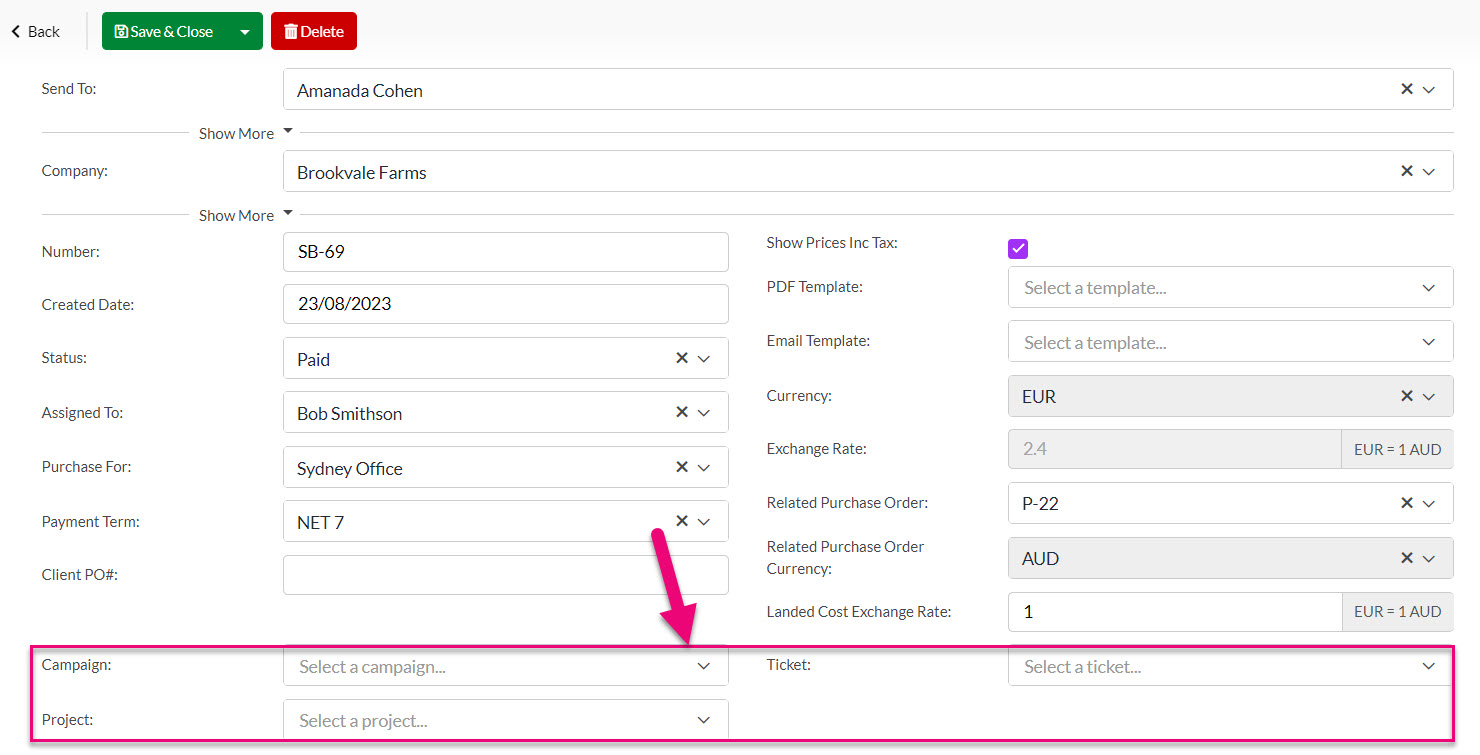
You can use the fields here to link a Purchase Order to a Project, Campaign or Ticket.
Address information will be automatically brought through to the Supplier Bill from the originating Purchase Order.
You can use the Shipping Address and Billing Address dropdown fields to select from existing addresses in the system.
If you want to copy an address from Shipping to Supplier you can do so quickly by pressing the double arrow button.

You can also manually enter in address information in either section, just note that this will not populate back to the Supplier Company/Contact record automatically – you will need to update the customer record separately.
Add single items
When you create a new Supplier Bill, the system will pre-load items from the associated Purchase Order for you.
You can also add additional items (if required), you just need to select the name of the item from the dropdown list.
For example, the originating Purchase Order may not have included a charge for freight, which needs to be added as a new item on the Supplier Bill.

Minimum Order and Pack Size information for each item.


You can use the Add Item button to add additional items.
Add multiple items at once
Click on the arrow next to Add item to reveal the option to Select Products.

This opens a box where you can search, filter and sort your products and then select multiple items to add to the Supplier Bill – just click on OK when you are done.

Item groups
Click on the arrow next to Add item to reveal the option to add a Group.

A group of items allow the use of several options:

- Adds a single line item to the group.
- Brings up a search box to add multiple items at once to the group.
- Adds a comment line to the group.
- Allows you to enter in a description, instruction or purchase text.
- Click on the box to open the text editing window for the description box.
- Min/Max Selection allows for a mandatory number of items to be selected within the group before the Supplier Bill can be saved.
- Show Subtotal determines whether or not the Group Subtotal figure will be shown.
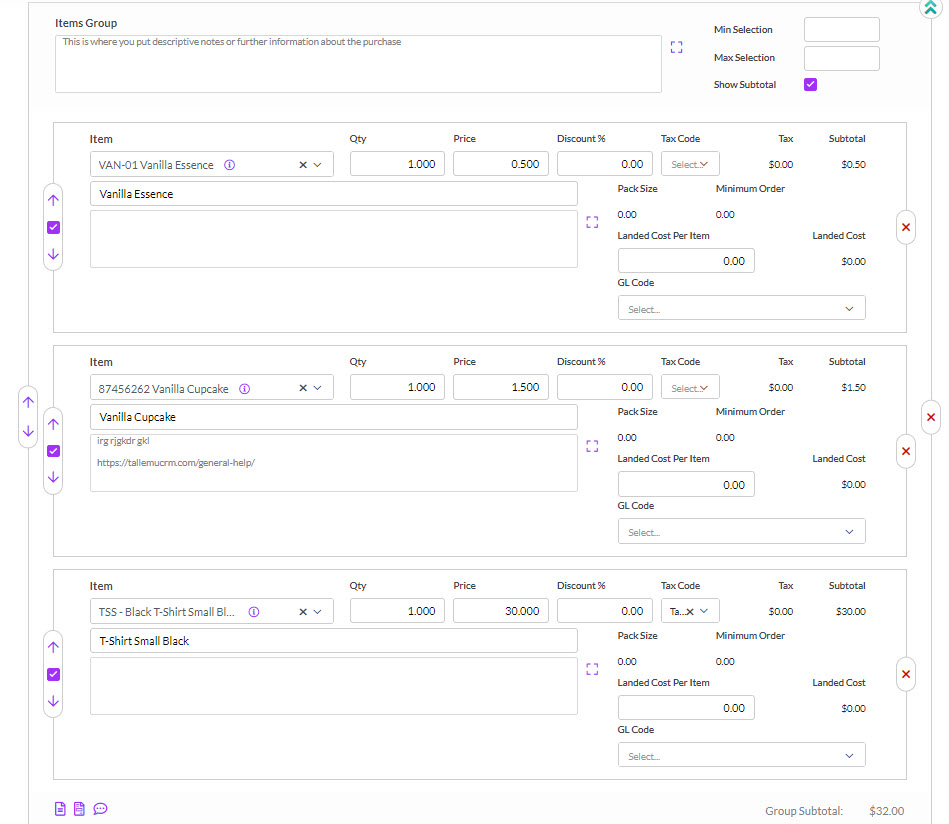
You can then contract or expand the group using the green arrows on the right-hand side.

Add Subtotals
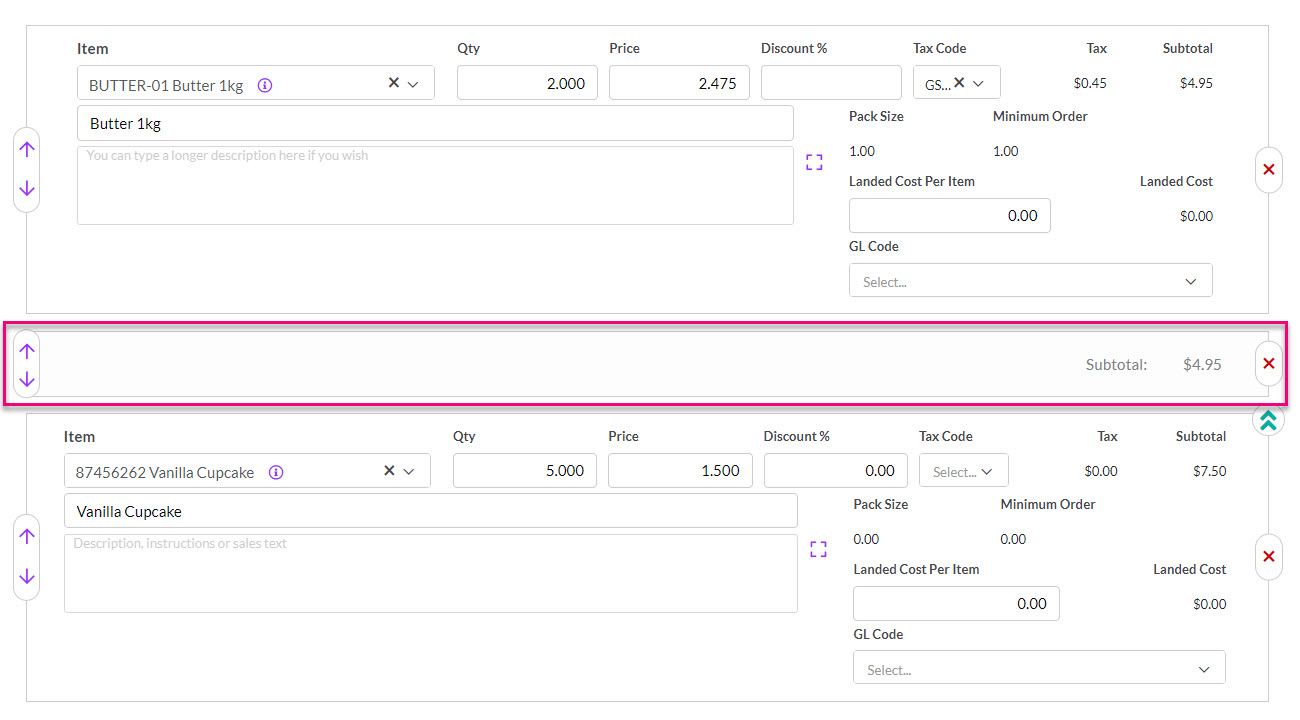
Click on the arrow next to Add item to reveal the option to add a Subtotal.

This will add a subtotal line and can be used as many times as required.
Add Comments
Click on the arrow next to Add item to reveal the option to add a Comment.

This will add a comment line and can be used as many times as required.

Note that if you have generated your bill from a Purchase Order, you will not be able to edit some of the item fields on the bill.

Once you have selected an item to edit, you can edit the text in the following boxes.
This information will pull from the chosen Product record, unless you have set up Supplier Pricing, in which case those details will automatically flow through to the order once a Supplier has been selected.


Purchase details on a Product

Supplier details for a Product
You can click on the purple square to the right of the description box to open up the text editing box. When you are done, click on the purple cross to close the box.

To remove an item, just click on the red “X” on the right-hand side of the item.

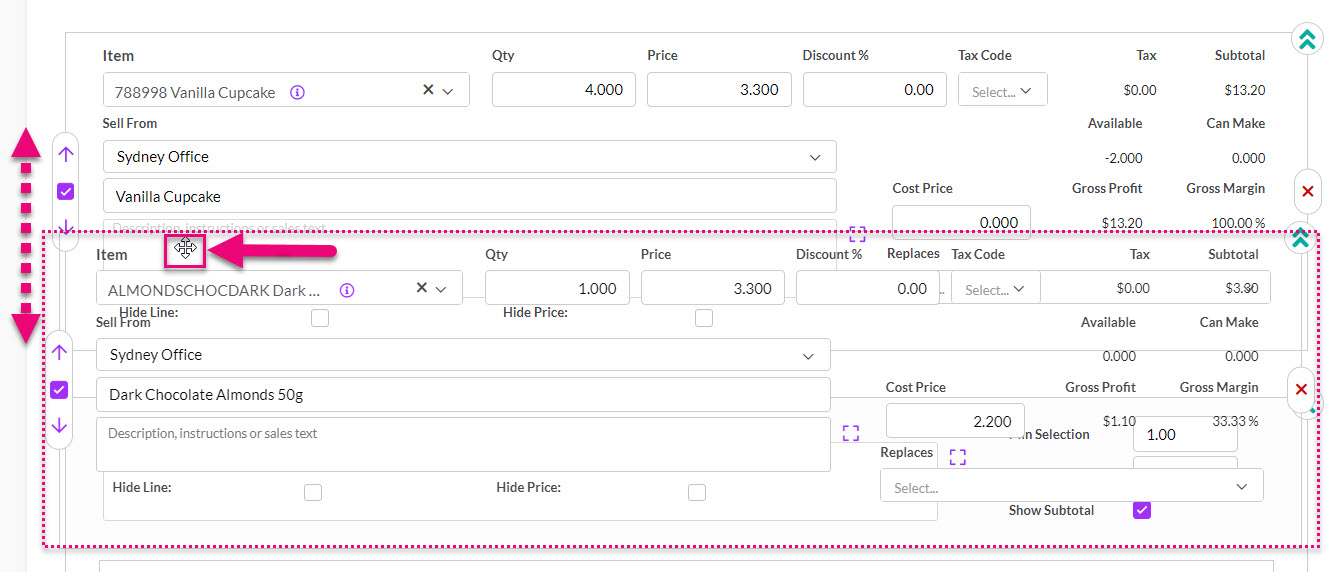
You can do this in one of two ways.
1. Use the arrows on the left-hand side of the item to move them up/down in the order.

2. Click & hold on the top of an item and then drag & drop it into a new position.
You can hide or show the description box by using the green arrows on the right-hand side of the item.


The Description box hidden
You can use this field to add notes or comments.

You can use this field to add notes or comments.

You must first have enabled Landed Costs in your database.
Once you have saved a Supplier Bill, you will have the option to calculate landed costs by using the toolbar buttons.
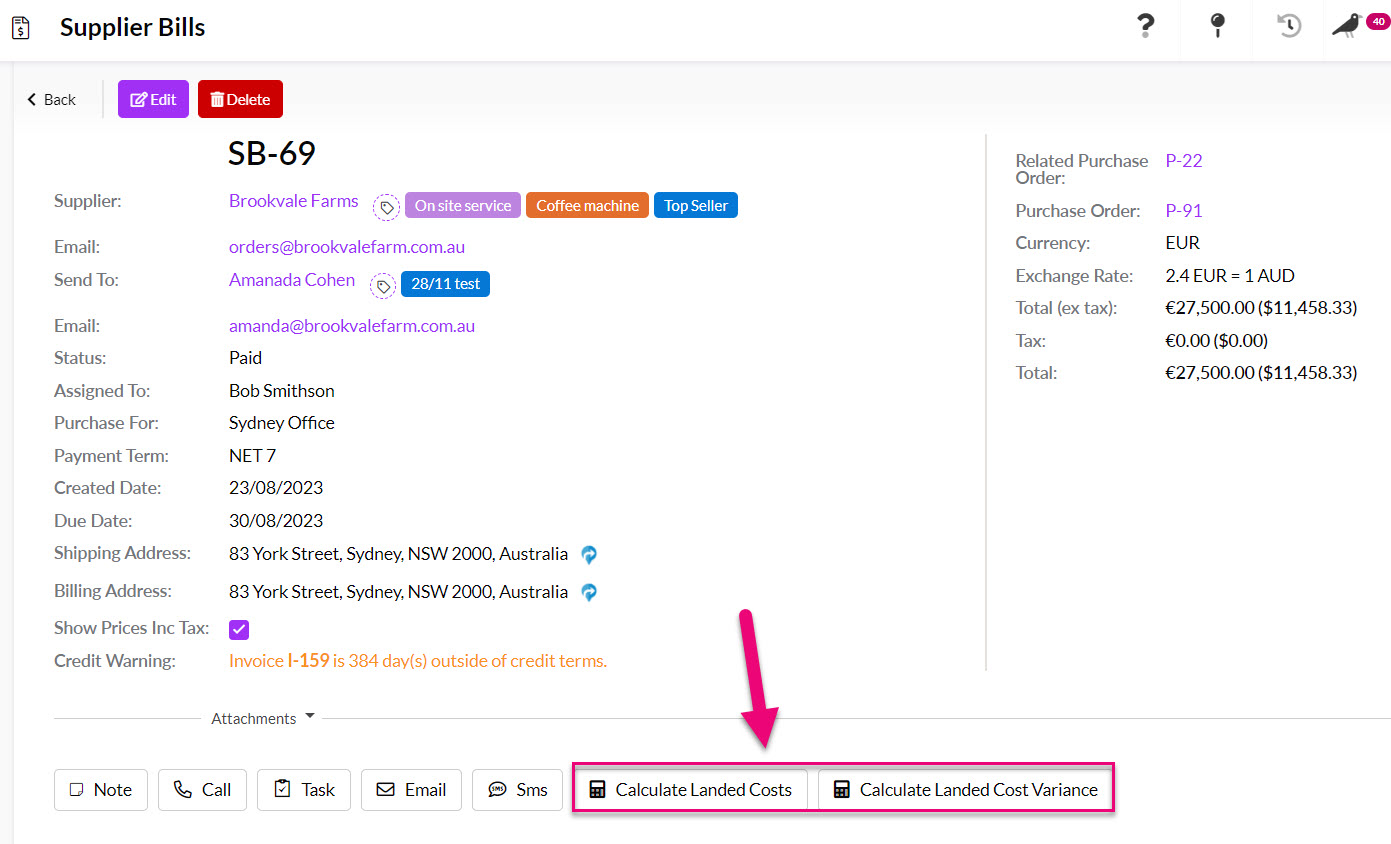
See our guide on calculating landed costs.
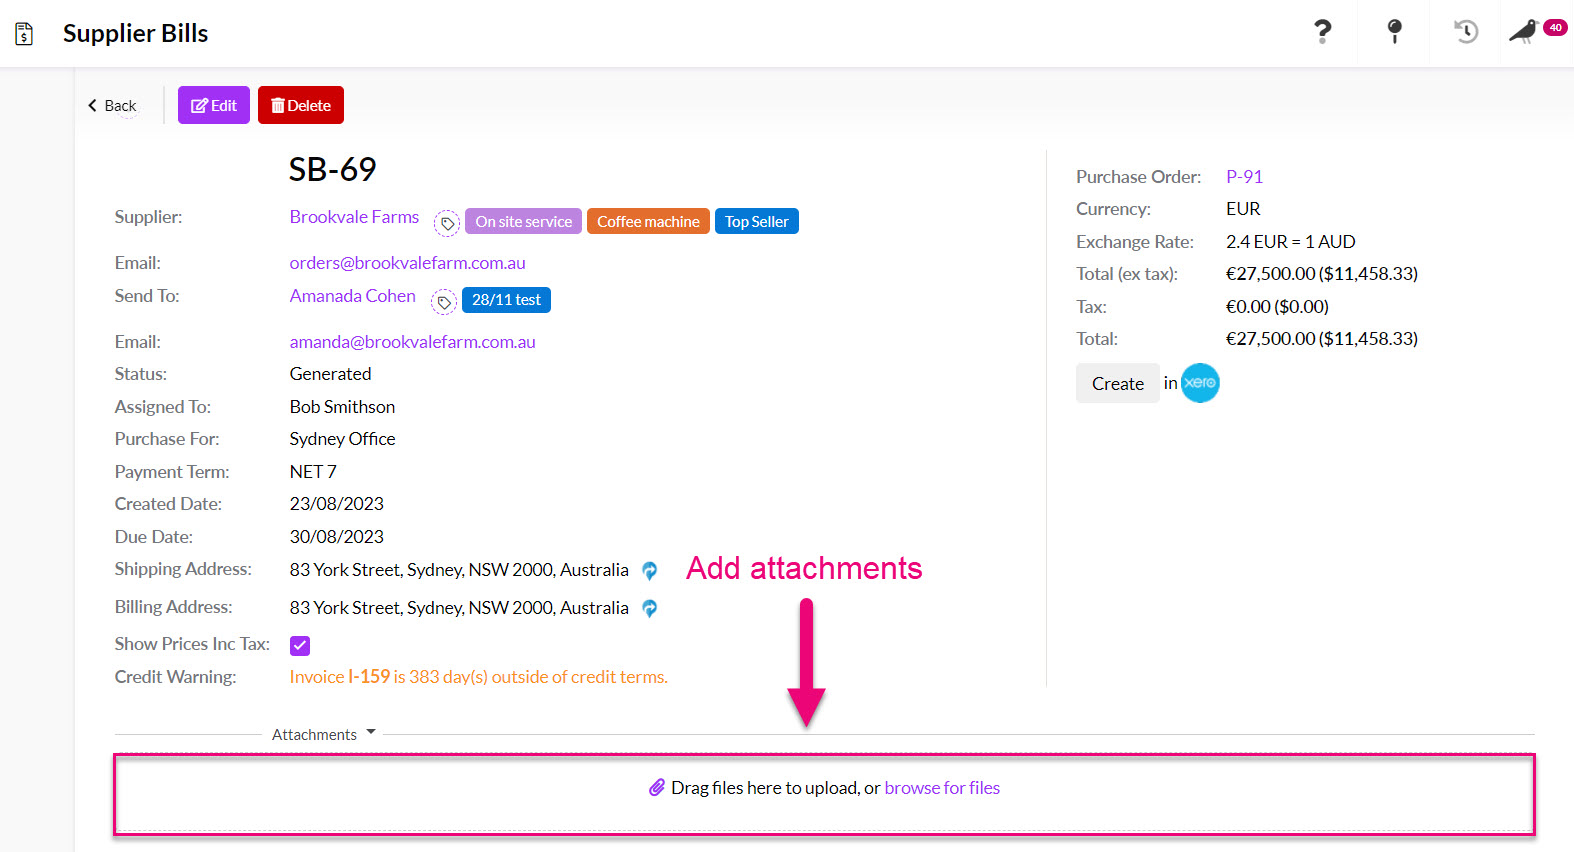
You can add multiple attachments to the record by dragging & dropping files into the Attachments section or clicking to add them from a selected folder.
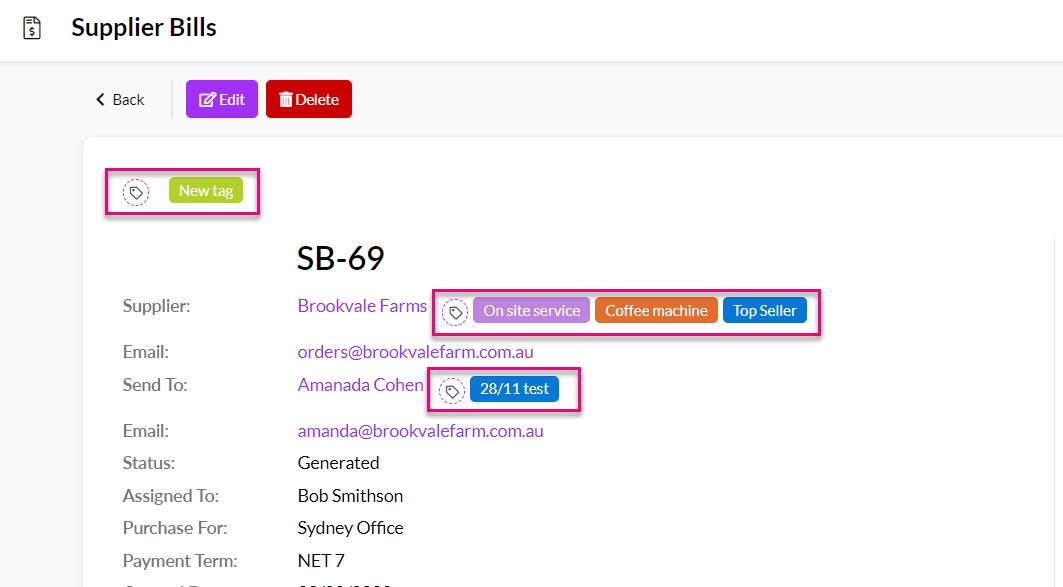
You can use Tags to segment and sort your Supplier Bills – see this guide for more information.
Tags added to Supplier records will cascade down to appear on Supplier Bills.
If you have given Suppliers access to your Customer Portal, they are able to view online all the Supplier Bills they have issued to you.

