- Companies
-
- Marketing
- Create Marketing Lists
- Send Email Campaigns
- Creating a simple Web Form
- Smart Lists
- reCAPTCHA for Web Forms
- Facebook Lead Ads
- About Web Forms
- Insta-Buy Web Forms
- Add or Remove Contacts/Companies from Lists
- Creating a Marketing List from Advanced Filters
- Editing existing List members
- Exporting Marketing Lists
- Filtering by Lists
Creating a Marketing List from Advanced Filters
One of the easiest ways to create a marketing list containing a highly segmented group of contacts or companies is to use the advanced filter feature and create the list directly from the filtered records. Follow the steps below to do this yourself.
In this example we’ll be creating a marketing list for contacts who have previously attended one of our courses, however, you’re able to set up the filter as required using a huge number of possible fields so your filter criteria can be entirely different.
The first step is to create the filter. Head to the Main Menu -> Contacts and locate the small funnel icon in the top right. Click the icon and then select New to create a new filter.

Locate the desired fields and matching criteria – in this case, we’ll select ‘Has Attended Course’, ‘Match’, and then our desired course. Then hit OK.

If the filter has been set up correctly, you should ow see a list of filtered contacts based on the criteria you’ve just set. To add them to a list, hit the select all button on the grid (note: the select all button will only select visible records, if there are many results in the grid, be sure to scroll to the bottom before hitting select all). If you’d like a little more control, you can also individually select the records by using the selectors next to each line. Once your desired records have been selected, click ‘Add to List’ in the smaller action bar above the grid.

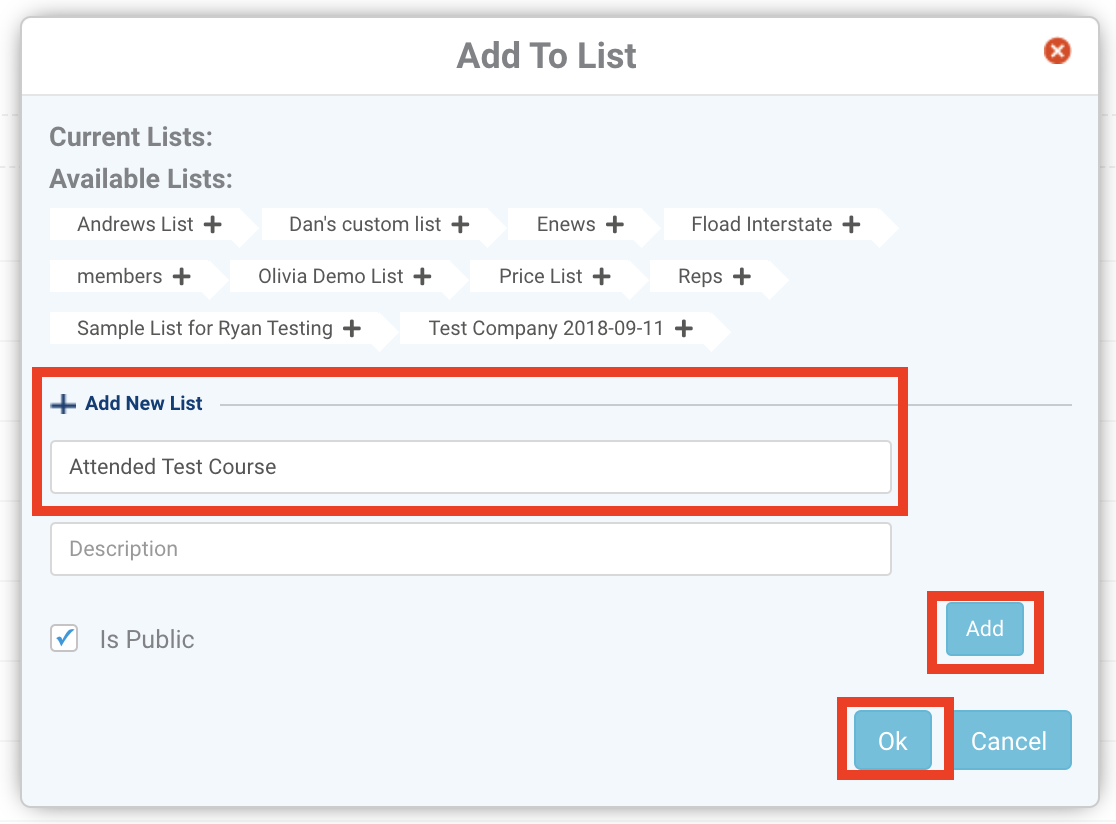
This will display a popup window that allows you to select an existing marketing list or create a brand new one. In this case, we’ll create a brand new one by clicking ‘Add New List’, giving it a name and clicking ‘Add’. Once the list has been added, click OK.
To see the results of this filtering/list creation process, navigate to the Main Menu -> Marketing -> Lists and open up your list. You’ll see all the selected users are now in your newly created list, ready for export to email or digital marketing platforms.
