- Companies
-
- Inventory
- Multi-currency for Purchasing
- Backorders
- Bay Locations
- Features
- Stock Tracking
- System Products
- Accounting details for Products
- Deactivating Products
- Products in Portal
- Suppliers
- Supplier Pricing
- Suppliers & Products
- Products
- Stock Transfers
- Barcodes
- Product Inventory Details
- Importing & exporting Product data
- Virtual Products
- Stock Adjustments
- Purchase Orders
- Enable or disable Stock-Tracking
- Training Products
- Units of Measure (UoM)
- Freight Products
- Working with Landed Costs
- Configuring Product Settings
- Stock Locations
- Stocktakes
- Product Batches
- Serial Numbers
- Different Price Types
- Purchase Orders
- Managing Stock
- Configurable Products
- Variable Products
- Time Billing
- Manufacturers and Suppliers
- FROM Location-based pricing
- TO Location-based pricing
- Requests For Quote
- Time Products
- Quantity-Based Price Breaks
- RFQ Web Templates
- PO Web Templates
- Location-based Price Breaks
- Customer-Specific Pricing
- Deleting Special Prices
Serial Numbers
When you create a new Product, you can specify whether serial numbers are required by ticking the Serialised box – this enforces the creation and ongoing management of serial numbers for the Product. You can also update the Serialised field on existing Products when you edit them.
Important points to note:
- If you enable serialisation on a Product, you cannot undo this action if the item is already synced to your accounting system. If you need to turn it off in this case, please contact [email protected] and we will be able to assist.
- Enabling serialisation will automatically turn on stock tracking for the Product.
- You need to ensure you have filled in the relevant GL codes and tax rates for the Product.
See also:
- Batch-tracked Products
- Outbound Shipments
- Purchase Orders
- Invoices
- Sales Orders
- Work Orders
- Stocktakes
Enable serialisation on a Product
- When a Product is in Edit mode, you can select the Serialised box and then Save & Close the record. You can only do this if the item is NOT already synced to your accounting system.

Setting a new Product up with serialised stock
- If the Product is already saved and NOT synced to your accounting system, you can use the Stocks > Mark As Serialised option.

- Serialisation will then be enabled.

Serialisation on a saved Product
- When a Product is serialised, an Add Product Serial Number button will show on the Stocks tab of the Product record, allowing you to add serial numbers.

- On the Stock Movements tab, you will have an Add Serial Number Adjustment button.

Disable serialisation on a Product
Note that these options are only available where the Product is NOT already synced to your accounting system. Contact [email protected] if your item is already synced.
On the Product toolbar, click on the Stock button to reveal the following options:

- Mark As Not Serialised: this will disable serialisation on the item – a warning message will display before this action will be completed. Note that if you want to turn off stock-tracking as well, you need to select the Mark As Not Stock Tracked option following this.

- Convert To Batch Tracked: this converts the item from being serialised to being batch-tracked – a warning message will display before this action will be completed.

See also:
When you have a Product record open, you can use the Add Product Serial Number button on the Stocks tab to enter new numbers into the system. You will also be able to specify stock Locations associated with the serial numbers (including a bay location).
If you cannot see this tab on your Product record:
- The Serialised box may not be ticked on the Product and you will need to edit the record, tick this box and then Save & Close the record so that the tab becomes visible.
- The tab it may be hidden, and you need to edit the record tabs to make it visible.
Then you can enter in the serial details and click on Save to apply.

If you have a handheld USB barcode scanner, you can click in the Add Serial Numbers box with your cursor and then scan a barcode to have it added to the system.
When you add serialised items to a Purchase Order, you need to add serial numbers to the items before you can receipt them into stock. To do so:
- From a saved record you will be able to see serial information by clicking on the serial link for an item.
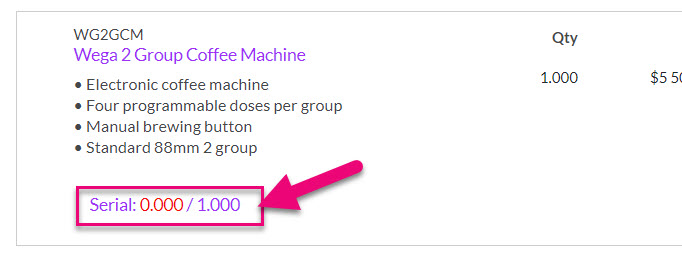

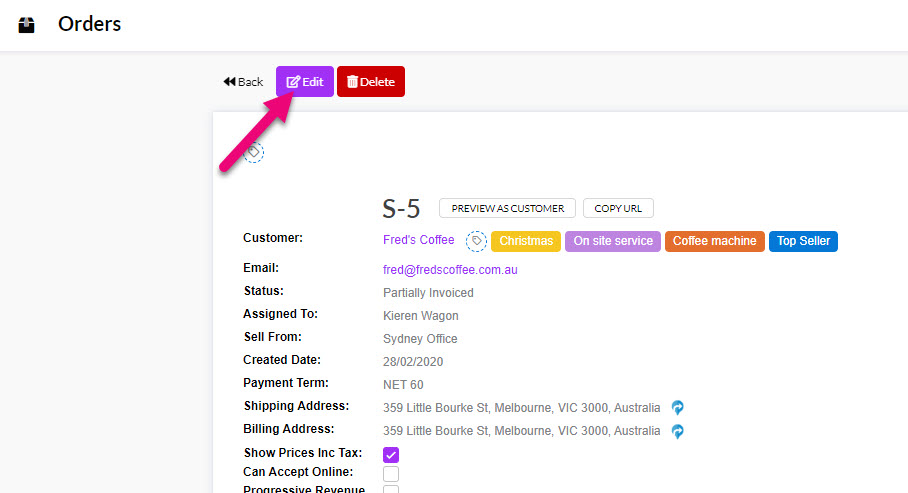
- To add serial information, the record needs to be in Edit mode – just click the Edit button at the top.

- You’ll then be able to click on the same serial links and click Add to input the required serial information, then click OK.

- You can then add serials either in bulk or manually, line by line.

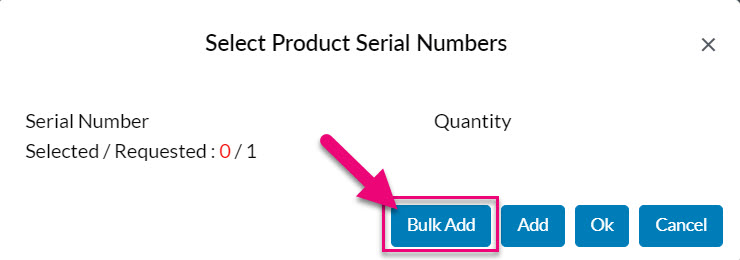
Add serials in bulk
- Once you’ve clicked on the Serial hyperlink add serials in bulk via the Bulk Add button.
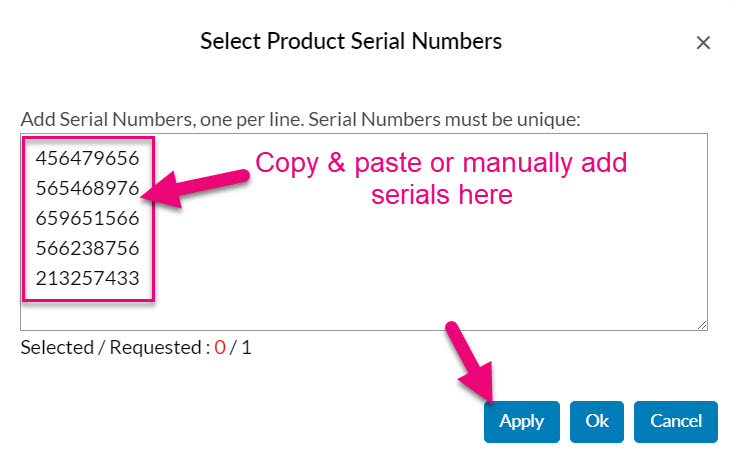
- You can then copy & paste in serials or manually type them in and click Apply.
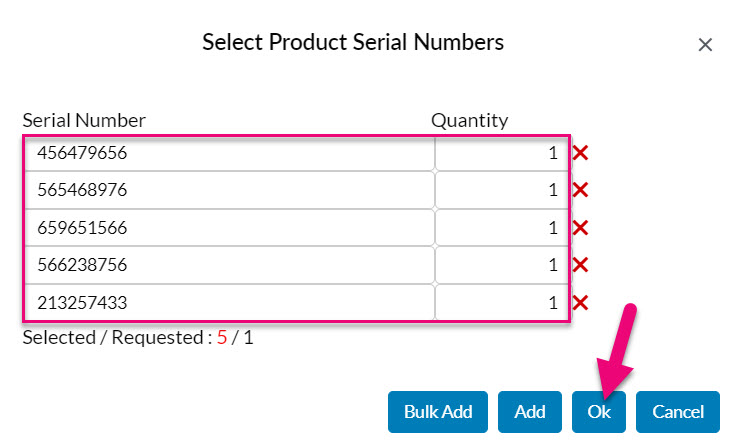
- The serials are then added to the Purchase Order, just click OK to have them allocated to the items on the order.
Add serials manually
- Once you’ve clicked on the Serial hyperlink, you can add serials line by line via the Add button.

- Enter a serial number and quantity and then click on Ok. If you want to add another serial number, click the Add button again.

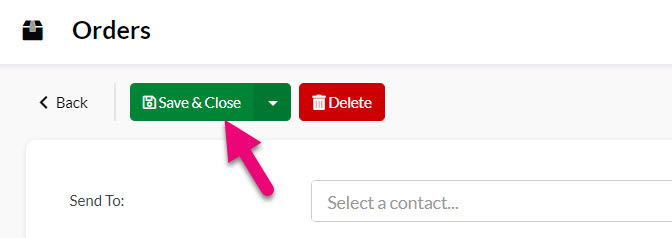
- You’ll then need to Save & Close the record.

When you enable the serialised option on a Product, the system will force you to manage serial numbers – this information then feeds through to Sales Orders, Outbound Shipments and Invoices.
When you add serialised Products to any of these forms, you will be able to select stock from the available serial numbers by clicking on Serial, as per the example below – this generates a pop-up where you can choose the serial numbers that apply to items.
Before you can ship or invoice an item, serial information must be entered.
- From a saved record you will be able to see serial information by clicking on the serial link for an item.

This will display further information.
- To edit the serial information, the record needs to be in Edit mode – just click the Edit button at the top.
- You’ll then be able to click on the same serial links and select the required serials, then click OK.


- You’ll then need to Save & Close the record.
When you enable the serialised option on a Product, the system will force you to manage serial numbers – this information then feeds through to Work Orders.
When you create a new Work Order and include Input Products that have serial numbers enabled, you will not be able to start the order until the serial numbers have been added – this is shown in the following example.

Adding serial numbers to input products on a Work Order

- Click on Save when you are done.
A Stock Movements tab will show in the Product record, allowing you track and add adjustments to the current serial numbers.
If you cannot see this tab, it may be hidden, and you need to edit the record tabs to make it visible.
From Reporting > Reports you can type “serial” into the Name column search box to show available reports – click on the desired report to open it.

You can then click on the Preview button which will open the report.

You can then select the parameters to run the report for.

See also:
From the Reporting area of CRM, you can select from either Prior Items Sold (anything on a Sales Order) or Prior Items Invoiced (anything on an Invoice).
You will then need to add the column for Serial Or Batch Numbers, which allows you to use the column search box to input a serial number to search for.

See also:
From this tab you can also Add Serial Number Adjustment and manually adjust the Quantity at various Locations.
Adding a serial number movement to a Product in the Serial Numbers Movements tab
Note that if you are connected to MYOB or Xero, you’ll need to make sure you’re pushing your stock adjustments out to your accounting system.
You can adjust the quantity of and also create new batches (manually or via import) from the Stocktakes area.
See our guide on Stocktakes for further information.

Creating a new serial from a Stocktake

Importing serials from a Stocktake