- Companies
-
- Admin
- Account Options
- Pricing settings
- PDF and Email Template system preferences
- Locations
- Brand Customisation
- Product Categories
- Product Groups
- Enable Time Billing
- Customising Assets
- Custom Fields
- Delivery Resources
- Delivery Options
- Reporting Preferences
- Sales & purchase settings
- Calendar Settings
- Messaging settings
- Repeated Invoice frequency
- Company Settings
- Credit Settings
- Sales Regions
- Asset Settings
- Ticket settings
- Relationships
- Proposal-based Quotes
- Customising Training
- Prefix/Sequences settings (Record Numbering)
- Creating SMS Templates
- Invoice Settings
- Creating Email Templates
- Creating Letter Templates
- Using Letter Templates
- Using SMS Templates
- Using Email Templates
- Setting up Teams
- System security
- Users
- Activate a new User account
- Log into a User account
- Managing Connections
- Calculating Landed Costs
- Resources
- Payment Methods
- Payment Terms
- Couriers
- PDF Templates
- Service Reports
- Quote Form Templates
- System Quote Preferences
- Credit Control
- Setting up Teams
- Regional Settings
Setting up Teams
Teams in the CRM serve two purposes:
- They are a point of assignment (E.g. “Assign this lead to NSW Sales”).
- They also are used to set team-based security permissions for Users.
Navigate to your user name in the top right hand corner of CRM and click on it to the reveal the menu, then choose Teams.

- From this page, you can view existing Teams and add new ones by using the New Team button in the top right corner.


The fields available when creating a new Team have the following purpose:
- Team Name e.g. Sales team
- Email – if the group of users has a central email address e.g. [email protected]
- Phone – if the group of users has a central contact number e.g. 1800-72537
- CTI Extension Binding Mode – this is only required if a phone system is connected to your CRM, so you do not need to complete this field.
- Active – for your purposes, this needs to be ticked and you can untick this in future if you want to deactivate a team.
- Assignable – this means that the Team can be assigned to users and users can be assigned to the Team. This box should be ticked.
- Description e.g. this Team is for members of the sales team based in Sydney.
- Ensure that you click Save & Close when you are finished.
- Once you have saved a new Team, you will be able to see a new area near the top of form where you can set the Team permissions for each module within the CRM.
- You can add a permission to the Team by ticking the appropriate permission box that corresponds with a module.
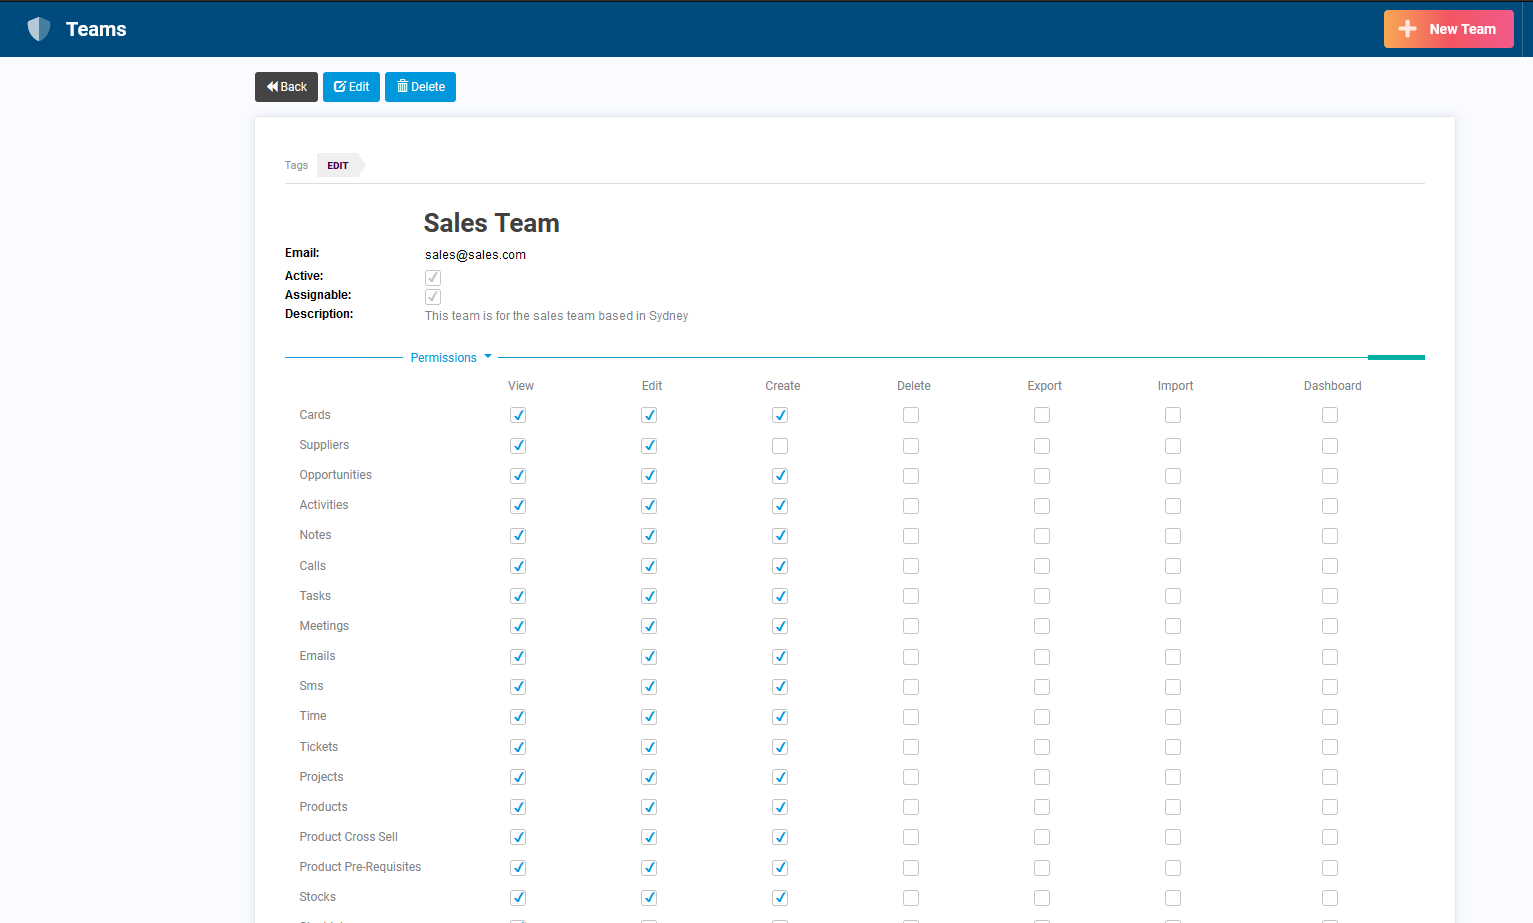
Worked example to demonstrate how permissions are applied
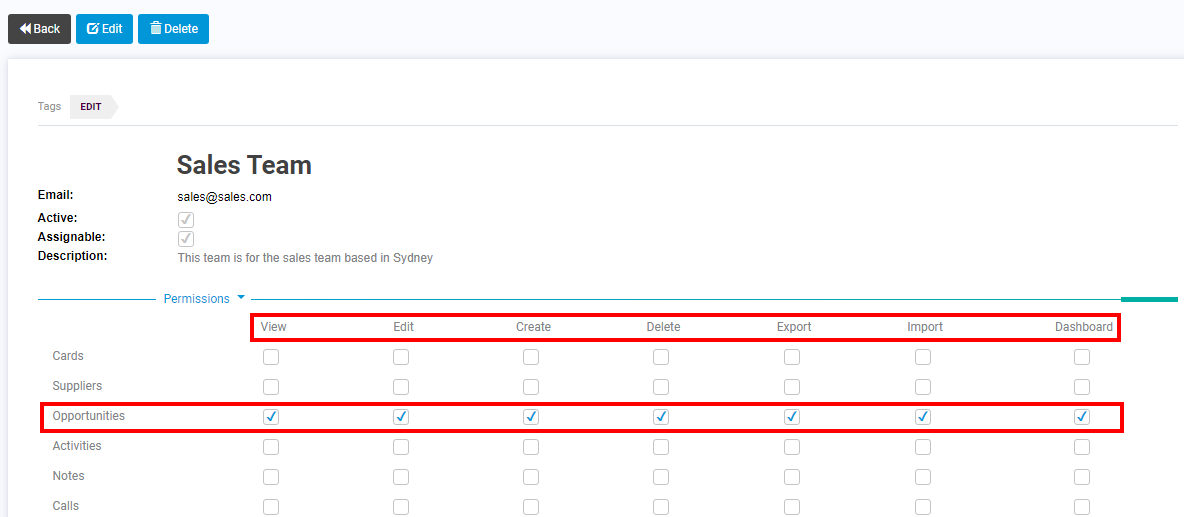
Following is a summary of what each of the available permissions means, using the Sales Team example above, which shows the Team being given permission to perform all actions within in the Opportunities module.
- View – members are able to see the named module e.g. members of the Sales Team example here would all be able to see Opportunities if the View box corresponding with the Opportunities row is ticked. If this box remains unticked, they will not be able to see the module.
- Edit – members are able to edit records within the named module e.g. members of the Sales Team example here would all be able to edit Opportunities if the Edit box corresponding with the Opportunities row is ticked. If this box remains unticked, they will be able to view the records but will not be able to edit them.
- Create – members are able to create new records within the named module e.g. members of the Sales Team example here would all be able to create new Opportunities if the Create box corresponding with the Opportunities row is ticked. If this box remains unticked, they will be able to view and edit existing records, but won’t be able to create new records.
- Delete – members are able to create new records within the named module e.g. members of the Sales Team example here would all be able to delete Opportunities records if the Delete box corresponding with the Opportunities row is ticked. If this box remains unticked, they will be able to view, create new and edit existing records, but won’t be able to delete records.
- Export – members are able to export records within the named module to an Excel spreadsheet if the Export box corresponding with the Opportunities row is ticked. If this box remains unticked, they will be able to view, create new, edit and delete existing records, but won’t be able to export them.
- Import – members are able to import new records within the named module by uploading a CSV file if the Import box corresponding with the Opportunities row is ticked. If this box remains unticked, they will be able to view, create new, edit, delete and export existing records, but won’t be able to import them.
- Dashboard – members are able to view Dashboards associated with records within the named module if the Dashboards box corresponding with the Opportunities row is ticked. If this box remains unticked, they will be able to view, create new, edit, delete and import & export existing records, but won’t be able to view the records in Dashboard format.
- Ensure that you click on Update at the bottom of the permissions section to save your changes.

Make sure you scroll down and click ‘Update’ to save your changes
Once you have saved a new Team, you will be able to see a new area at the bottom of the form where you can add users as Team members.

Adding users to the Team at the bottom of the form
This Team is set up in your system by default. If you add a user to this team they will be able to do anything in the system.