Training Courses
If you run training sessions or courses, you can set these up as Products in your inventory and then use Training Courses to:
- Take online course bookings from leads or customers.
- Track bookings and actual attendance.
- If required, take payment for course attendance online or generate an Invoice.
- Assign particular skills or quantifications to attendees.
Before you can use the Training Courses area of CRM, you need to have already set up some Training Products.
See also:
Create a new Course
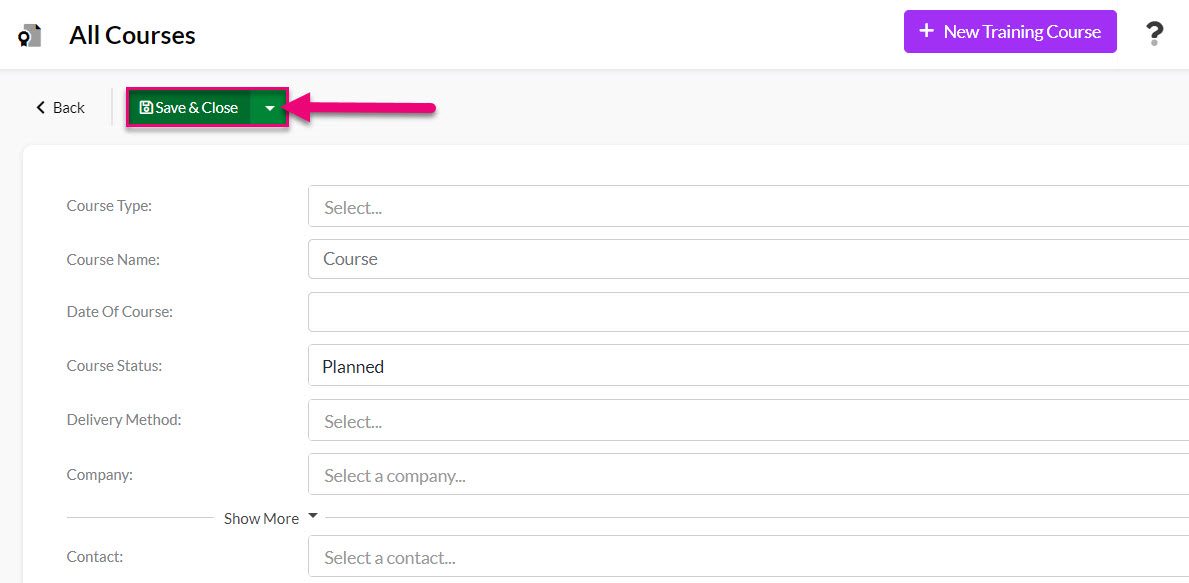
From Training > All Courses, click on the New Training Course button.

Basic Course details
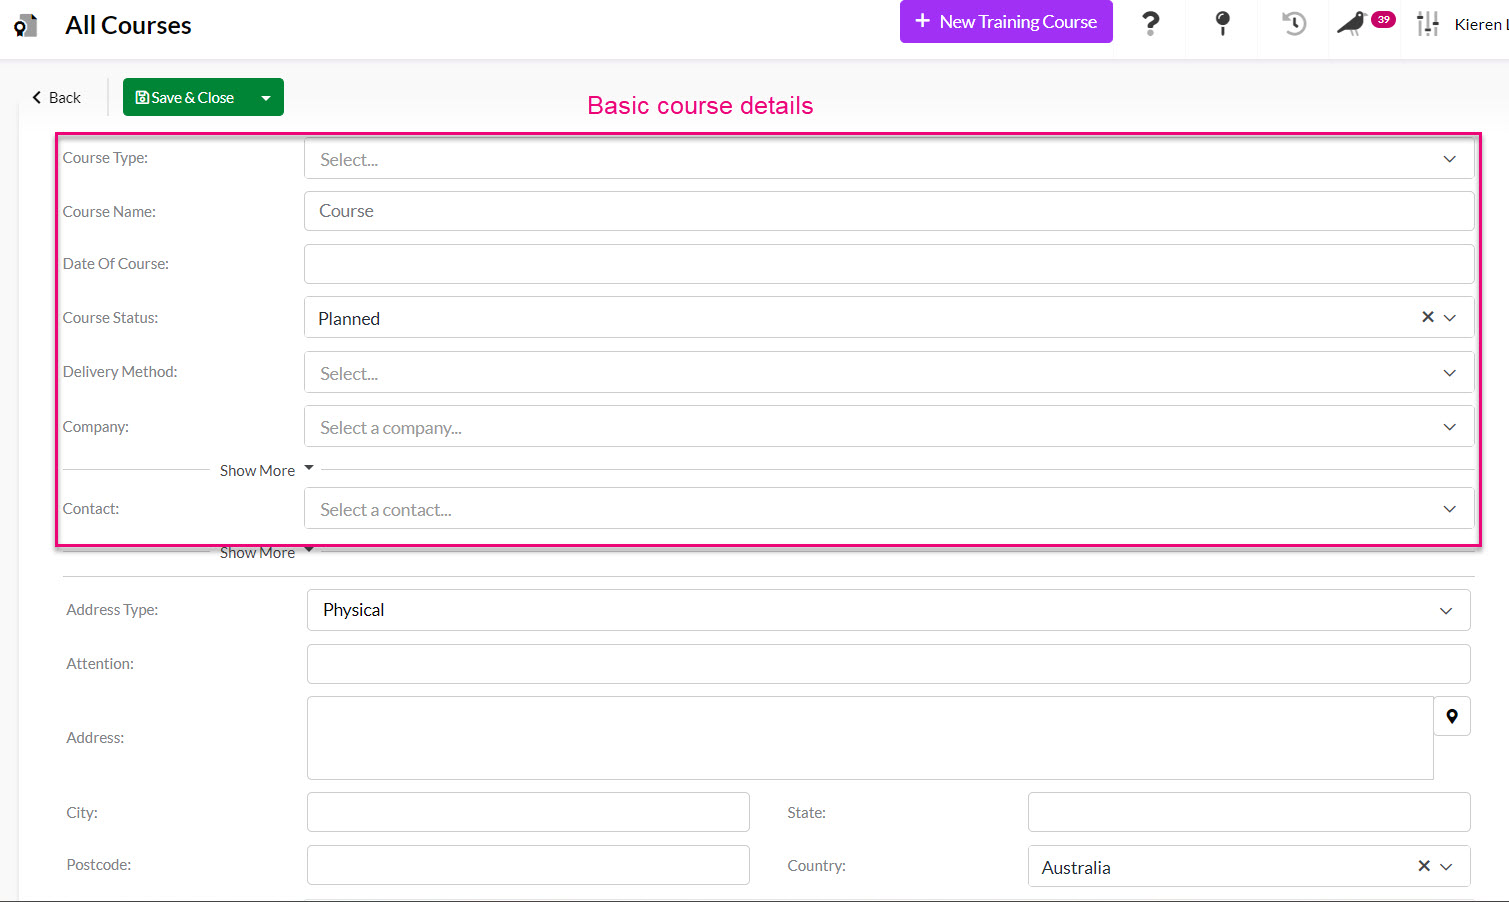
A new form will display which will allow you to enter in the basic details for the Course:
- Course Type: here you need to select a Training Product from your inventory. If you haven’t already set any up, you will need to do so in order to proceed.
- Course Name: here you can enter in the specific name of the course so it’s easy to identify and manage booking for e.g. “Barista training course 28/03/24”.
- Date Of Course: when the course will be held.
- Course Status: here you can select from options like Planned, Confirmed, Completed or Cancelled. You can also customise the options on this list to suit your requirements.
- Delivery Method: this means how the course will be presented e.g. in-person or online. You can also customise the options on this list to suit your requirements.
- Company: this field is optional, and you can use it to link the course to a particular Company.
- Contact: this field is optional, and you can use it to link the course to a particular Contact.
Advanced Course details
Scrolling down further on the form reveals specific options you can set.
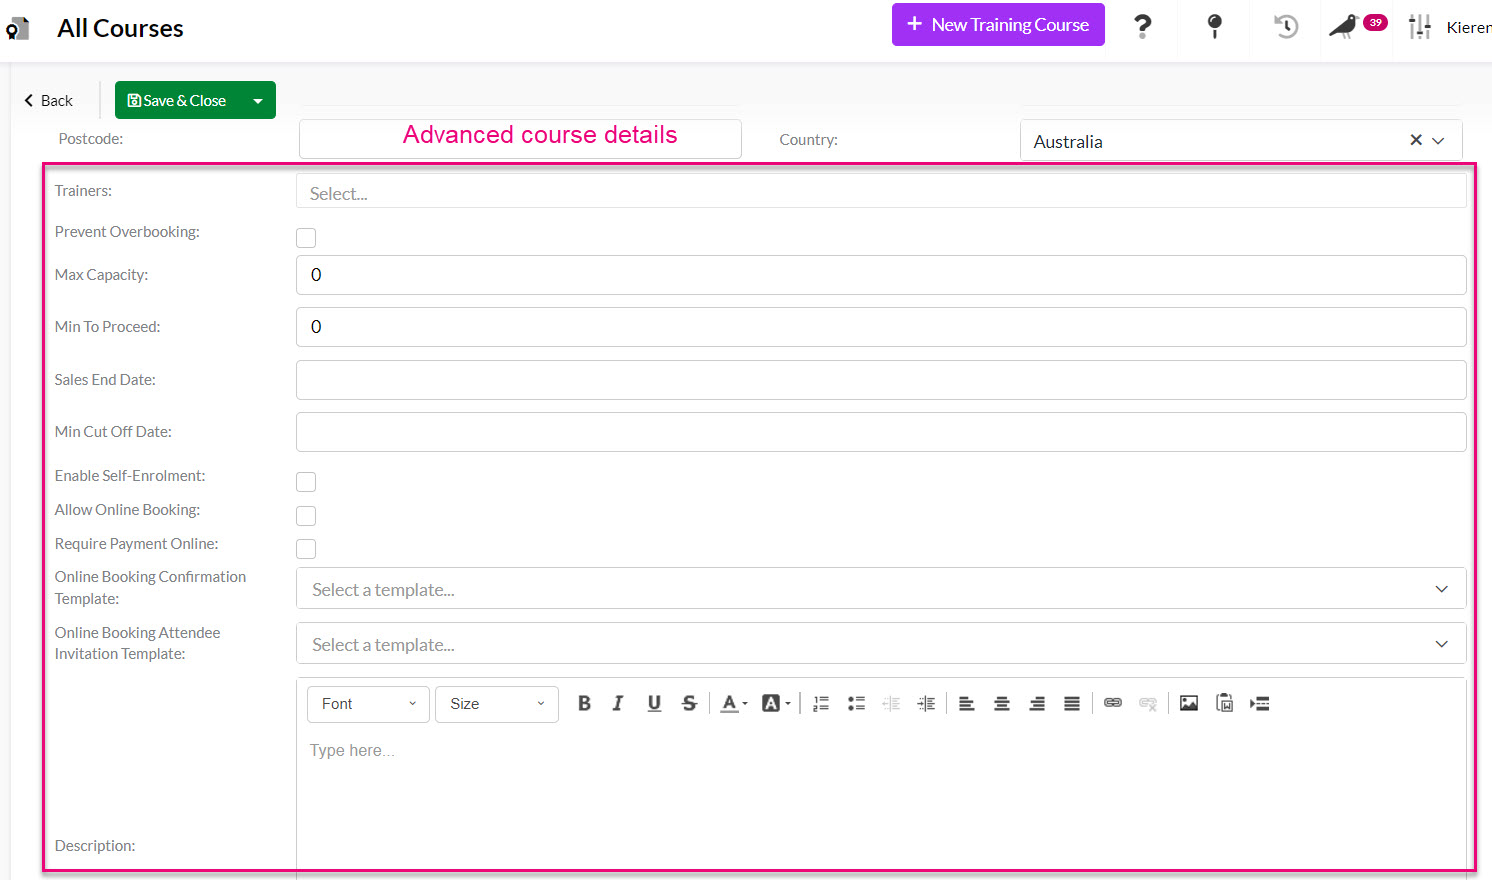
- Trainers: here you can select from Users and Contacts in your system to identify who will be running or presenting the course. You can choose multiple people in this field.
- Prevent Overbooking: enabling this option means that once the course has reached its attendee capacity, no further bookings will be allowed. If this option is NOT enabled, it means that bookings will still be accepted after the maximum number of attendees has been reached.
- Max Capacity: this is the maximum number of attendees for the course.
- Min To Proceed: this is the minimum number of people required for the course to run.
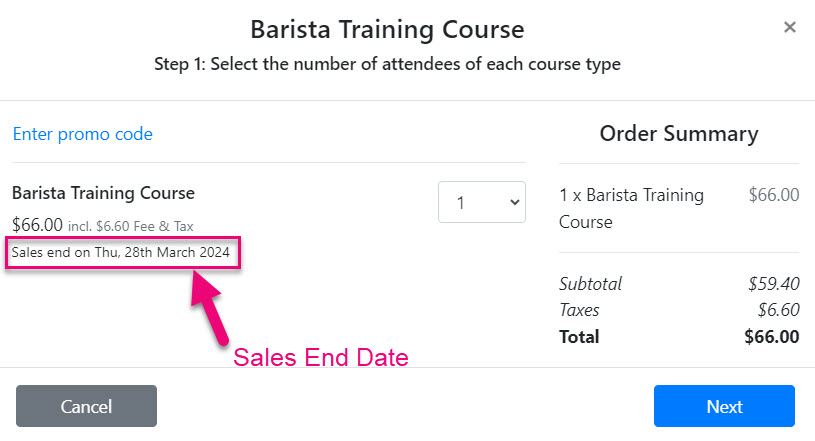
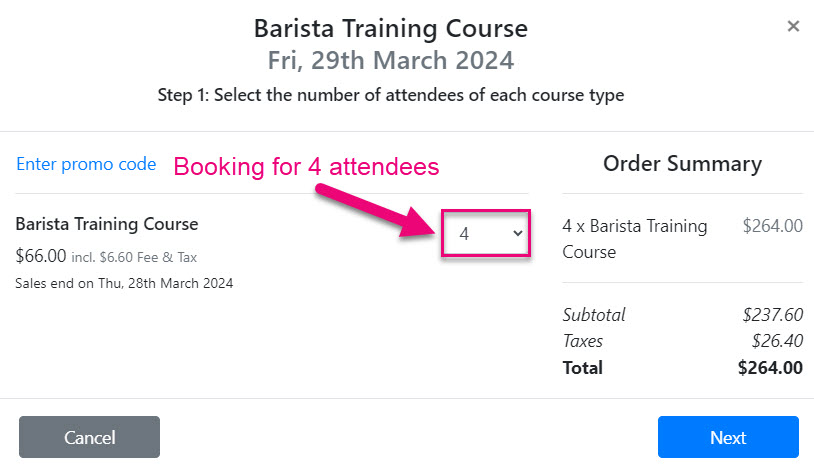
- Sales End Date: the date after which bookings from attendees can no longer be taken, which will appear in the online booking form.
- Min Cut Off Date: the date after which bookings from attendees can no longer be taken.
- Enable Self-Enrolment: means people can register to attend online via a Web Form.
- Allow Online Booking: means that attendees can register online via a Web Form.
- Require Payment Online: if there is a cost for people to attend the course, you can take payment online via a Web Form before people can register to attend.
- Online Booking Confirmation Template: here you can select an existing Email Template for the automated email that will be sent to the person who submits the online booking request (via a Training Course Booking Web Form). An online booker can register multiple Attendees for a course.
- Online Booking Attendee Invitation Template: here you can select an existing Email Template for the automated email that will be sent to each person that is registered as an Attendee for the course i.e. if the booker registers several people, each will get this email as an Attendee.
- When you are finished, click on Save & Close.
See also:
Add Skills
The options that will show in the Skill dropdown field on Training Courses are determined (and can be customised from) Admin > Settings > Training.
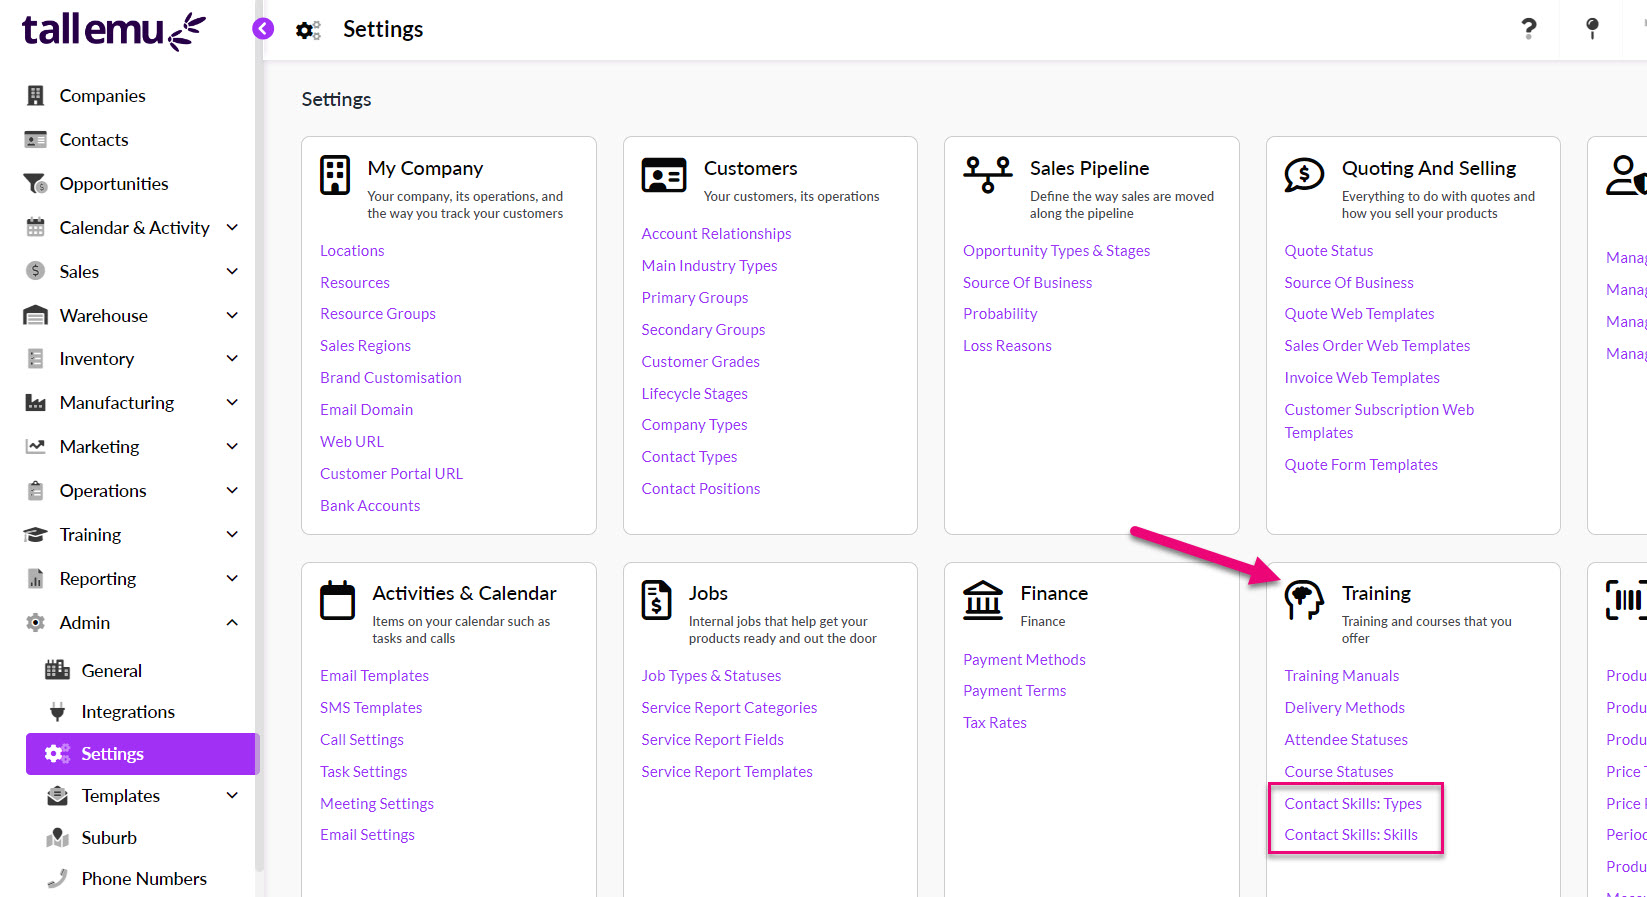
Click on either:
- Contact Skills: Types – these are the types of skills e.g. qualifications, certification. licence etc. Under each Type, you can then have multiple Skills. Use the buttons at the bottom of the box to edit the list options.
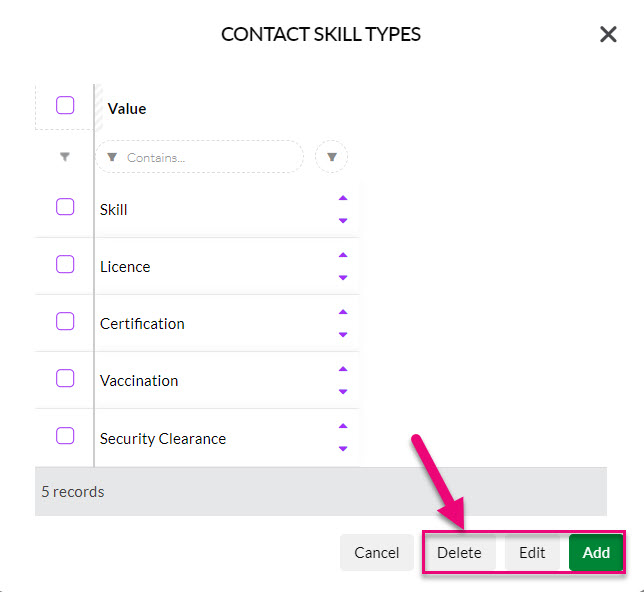
- Contact Skills: Skills – these are actual Skills that are gained by completing a course. Each Skill can be linked to a Type. Use the buttons at the bottom of the box to edit the list options.

- When adding a new Skill to the list, you are able to add additional relevant information like the validity period, renewal alert period and whether or not documentation is required to substantiate the Skill.

Also see:
Link Skills to a Course
- Once you have saved a Training Course, you will see a tab called Skills.
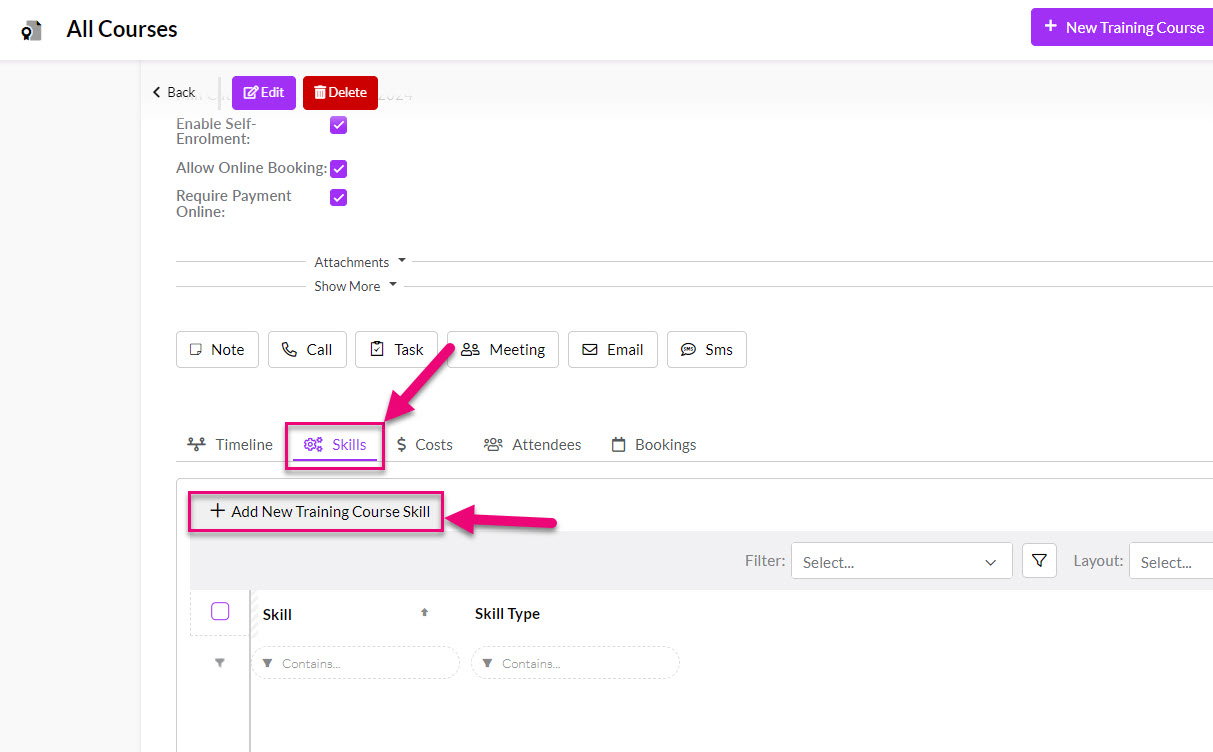
- Here, you can use the Add New Training Course Skill button to link a particular Skill to the course.

- Linking the Course with a Skill means that once an attendee has been marked as having completed a course, the particular skill/s will be attributed to their Contact record e.g. if it’s a First Aid course, the Skill attained may be a “Certificate in First Aid”.
Add Costs
- Once you have saved a Training Course, you will see a tab called Costs. Here you can add multiple costs or components to the course that attendees will need to pay.
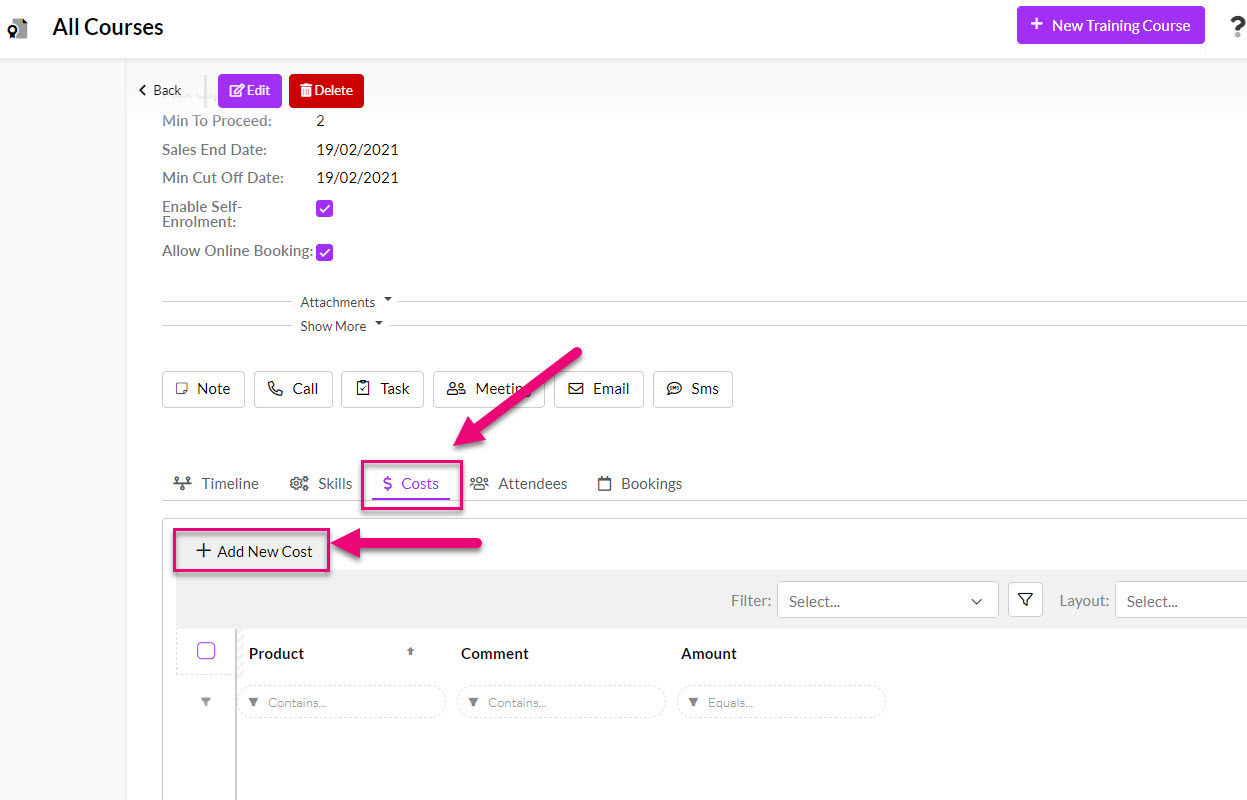
- Here, you can use the Add New Cost button to add a charge for the course. Here you will need to select the Training Product from your inventory that the cost relates to, enter in an amount and then add any relevant comments.

- When people book in online to attend a course, you have the option to allow them to pay for any associated costs before they are able to complete a booking request.

Attendees
- From this tab you are able to see and manage all the individuals who have registered to attend the course.
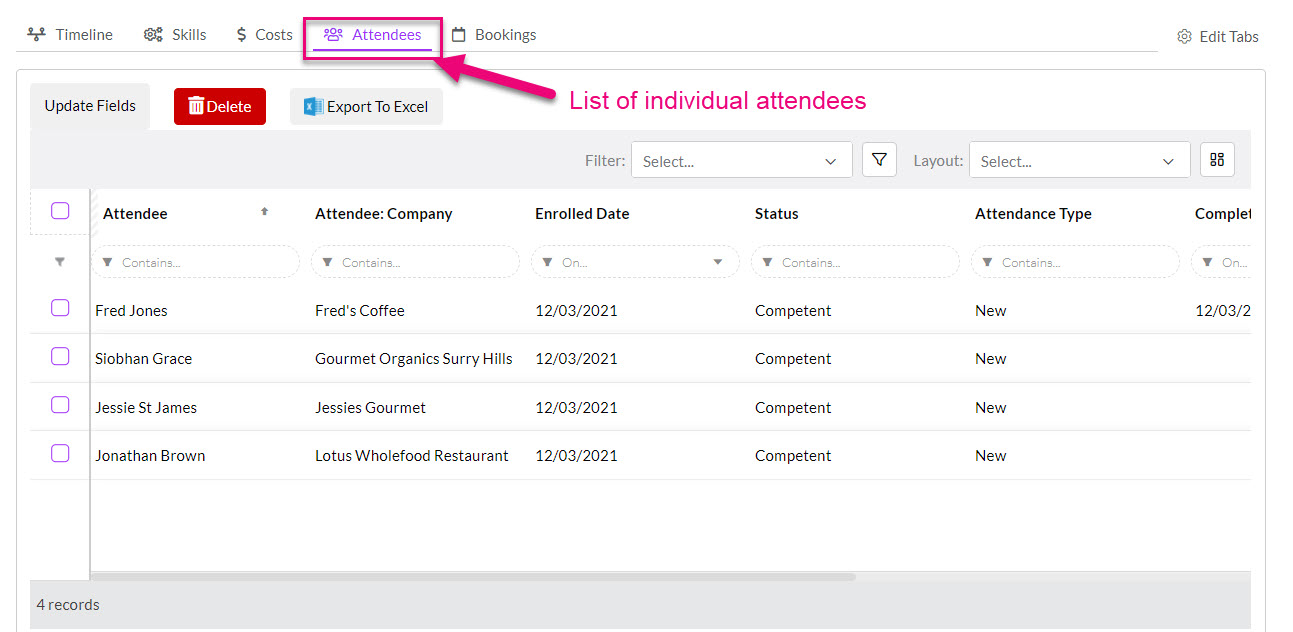
- Click on any name on the list to open up the particular details for that attendee.
- Here you can

- If you want to update the details for several attendees at once, you can click on the Update Fields button which will allow you to bulk update selected values.
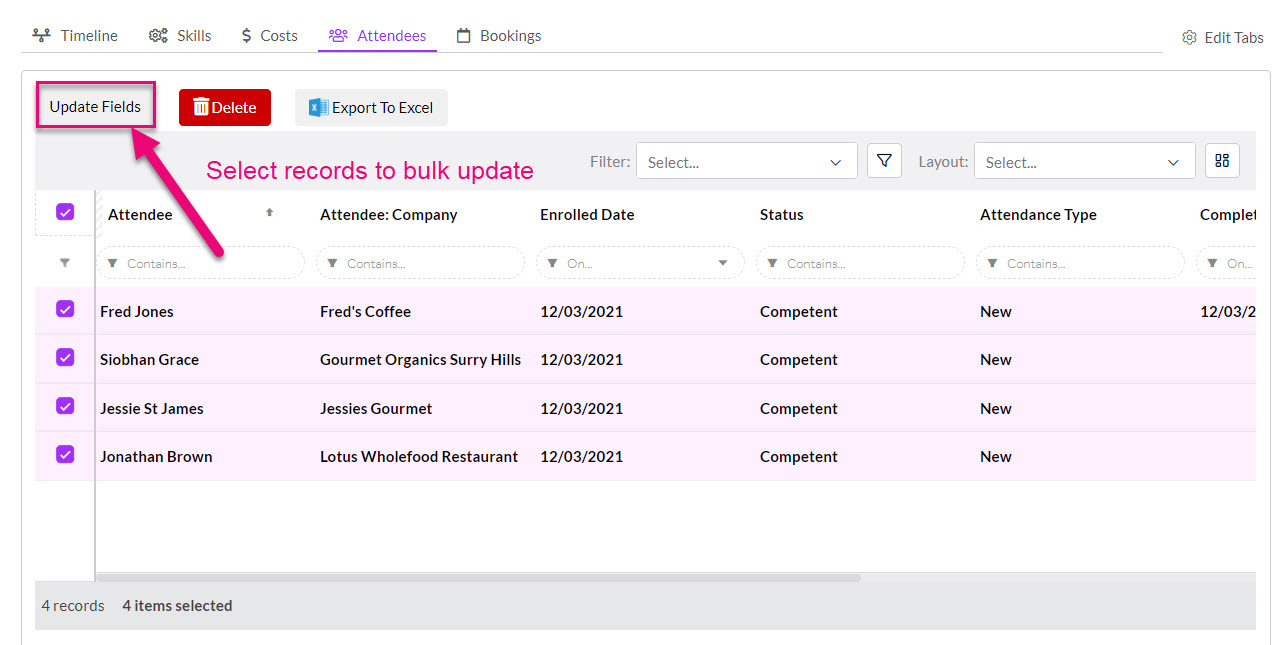
- You can then select the relevant field/s you want to update and choose the new value – click on Update when you are done.

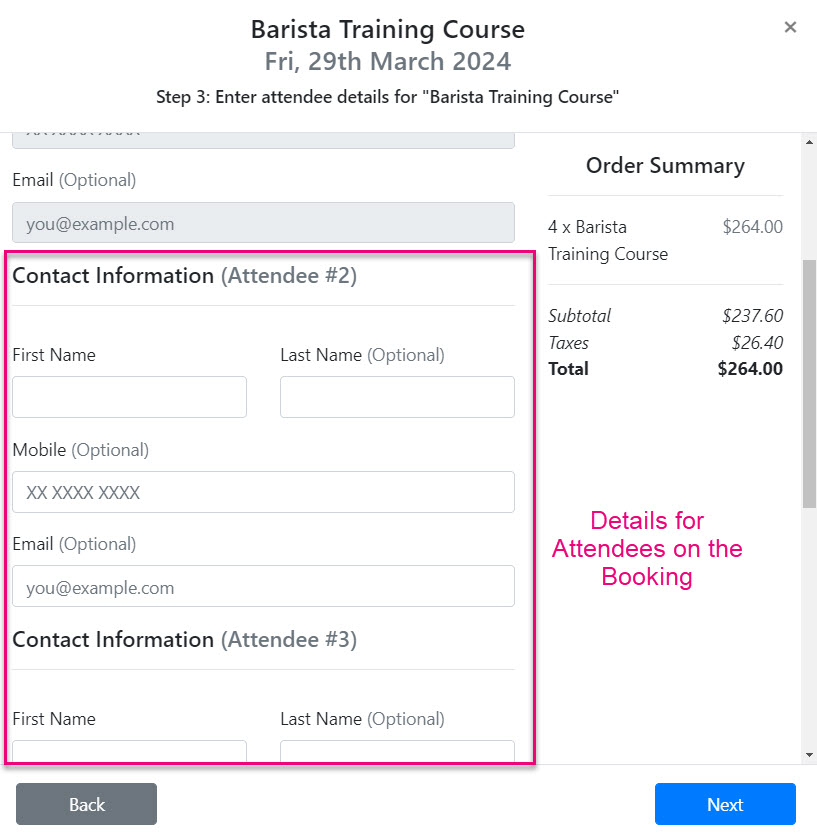
Bookings
From the Bookings tab you can see and manage all the course bookings. You can have one person create a Booking for multiple Attendees, so this tab will show you everyone that has created a Booking.
This is different to the Attendees tab that shows each individual that is registered to attend, regardless of who created the Booking.
- From this tab you can add or delete a Booking.
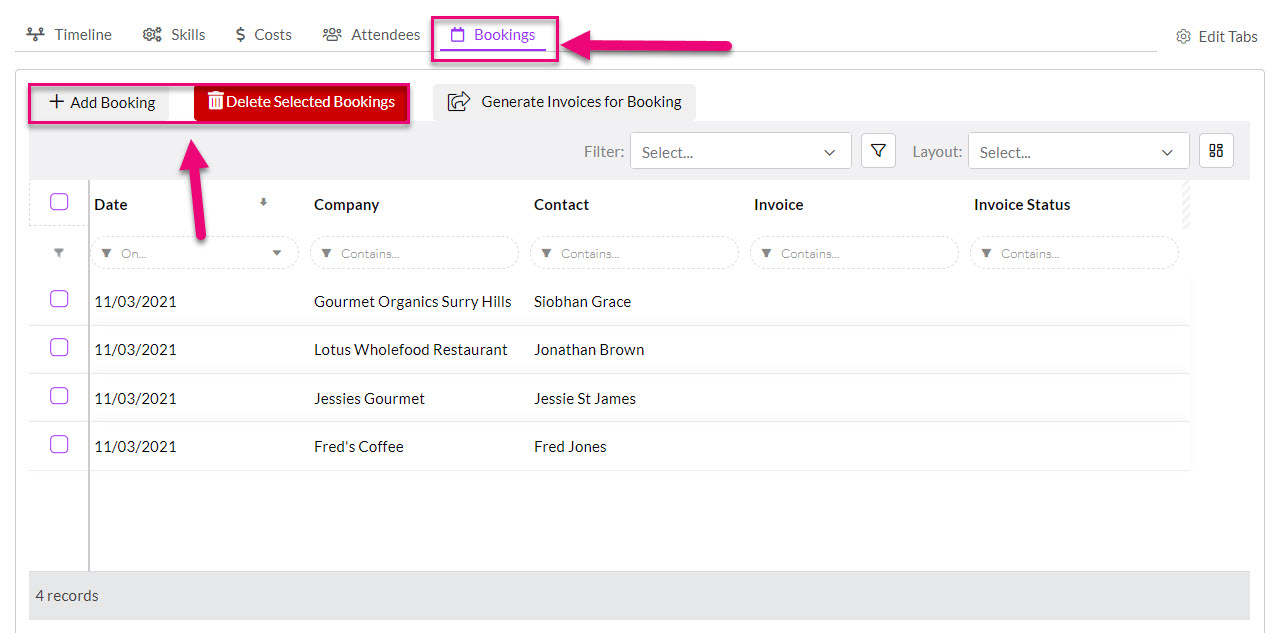
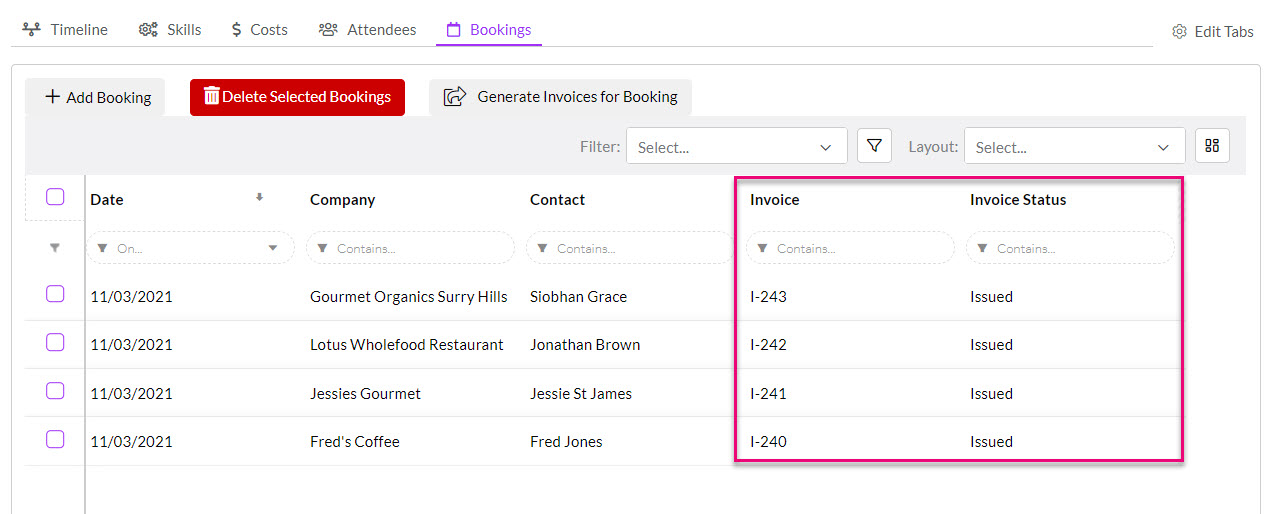
- In the event that payment for a Booking has not been made online, you can select the relevant Bookings and then use the Generate Invoice for Booking button.

- This will create an Invoice for each booking, which will be visible from the tab. All these Invoices will also display normally in the Sales > Invoices area of CRM.
See also: