Training Course Booking Web Forms
The easiest way to gather registrations for your Training Courses is to use a Web Form.
You can the place the form on your website for people to fill in, email a link to fill in the form online or have a QR code scanned to access the form online. You can even deploy all three methods at once if you want!
You can also manually register people for courses in CRM.
See also:
Create a booking Web Form
Basic form details
- To create a Web Form for online registration, go to Marketing > Web Forms and click on New Web Form.

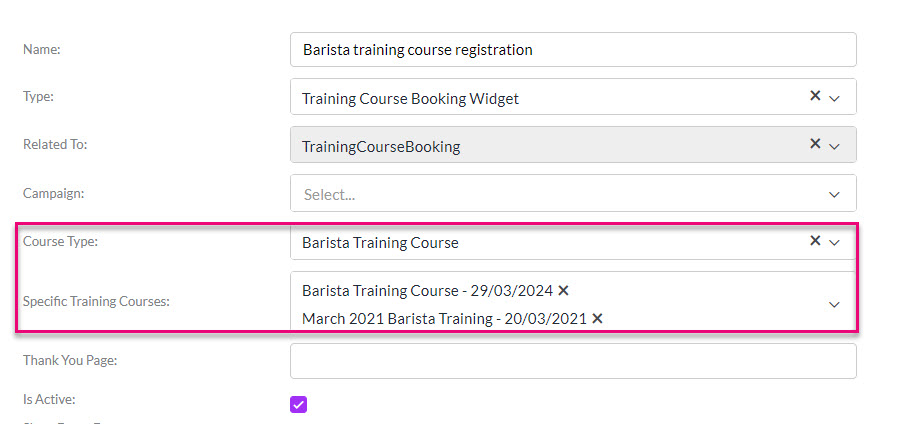
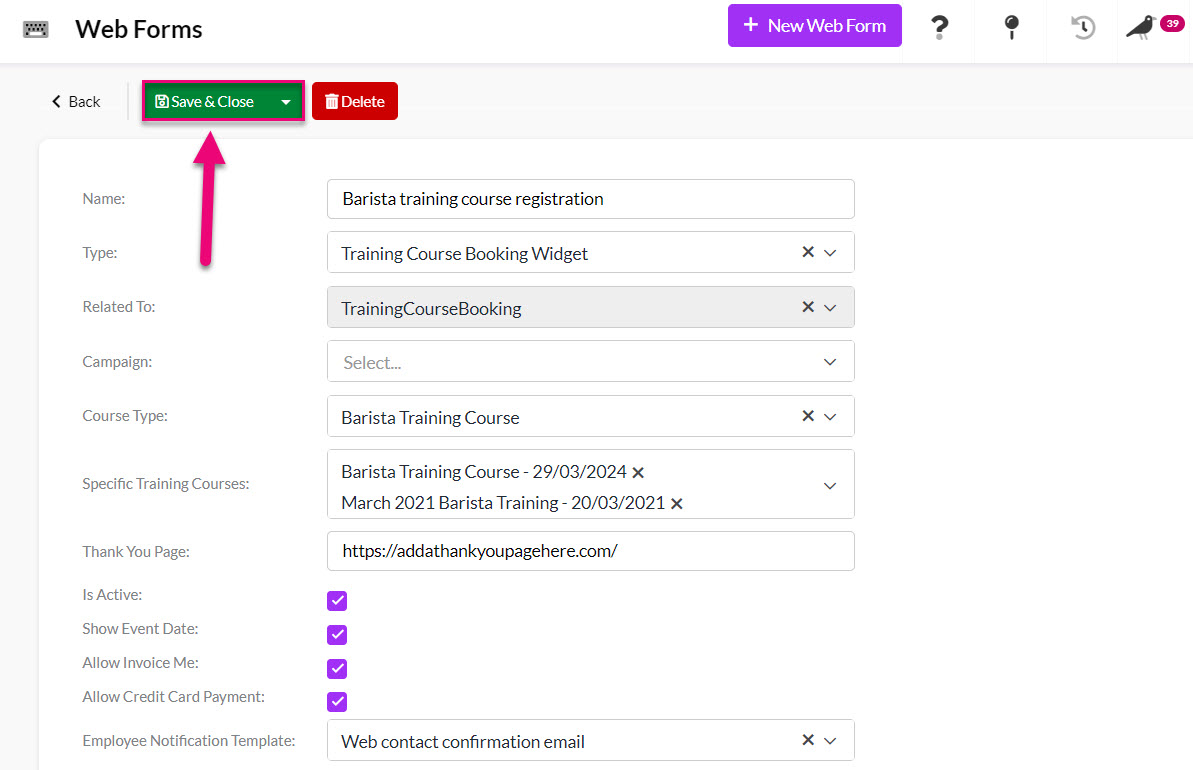
- Give the form a Name that describes what its purpose is.
- Ensure that in the Type field you have selected Training Course Booking Widget. Once you have filled in this field, the Related To field will automatically be populated with “TrainingCourseBooking”.

You will then need to use the following fields to link the form to the Training Course:
- Course Type looks up the list of Training Products in your inventory – just select the appropriate Product.
- Specific Training Courses looks up a list of Training Courses that are related to the Training Product that you selected. You can select multiple courses here.
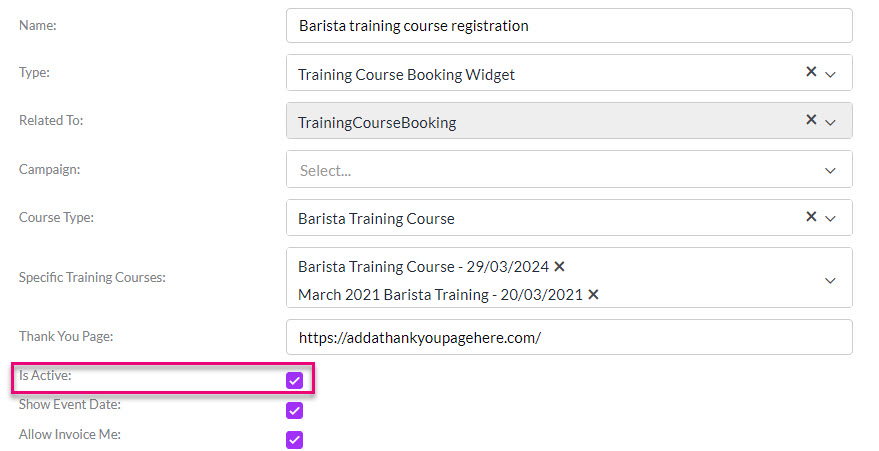
- The next field to fill in is the Thank You Page – here you can enter any URL and this is where people will be redirected to once they have submitted the form.

- You then need to make sure that the form Is Active. If you want to retire the form in future, you can deselect this option.
You then have a few options to configure that affect how the form will behave:
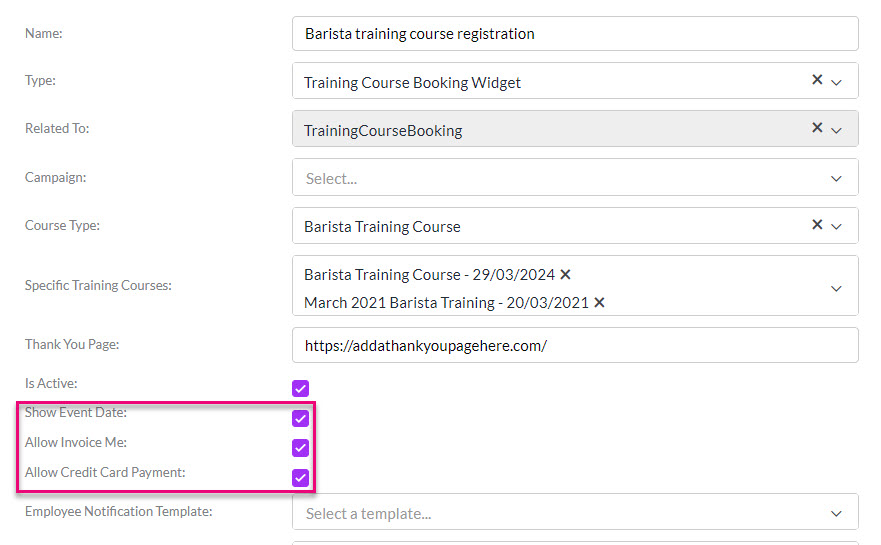
- Show Event Date means that the Date Of Course field from the Training Course will be visible when the booking list options are displayed.


If there is a cost associated with your courses, these fields determine how people can pay you:
- Allow Invoice Me means that an option to “Send me an invoice, please” will appear on the booking form. This means that payment doesn’t need to be taken at the time of booking and the Invoice can be issued and followed up later.

- Allow Credit Card Payment means that if you have a payment gateway integrated with CRM, people can pay for the course with a credit card online at the time of booking.

See also:
Notification Emails
There are 2 fields where you can select an existing Email Template to be used for an automated email to be sent: Employee Notification Email and Contact Notification Email.

- Employee Notification Email: an email is sent to the User in CRM being notified that a form has been submitted (see the following section on “Notify people when a form is submitted” for more information).
- Contact Notification Email: normally, this field is used to specify an email that is sent to the person filling in the form. It might seem counterintuitive, but you actually want to ignore this field when you’re creating a training web form; when you link the form to a Training Course, automated emails are sent from the Training Course, rather than from the Web Form.
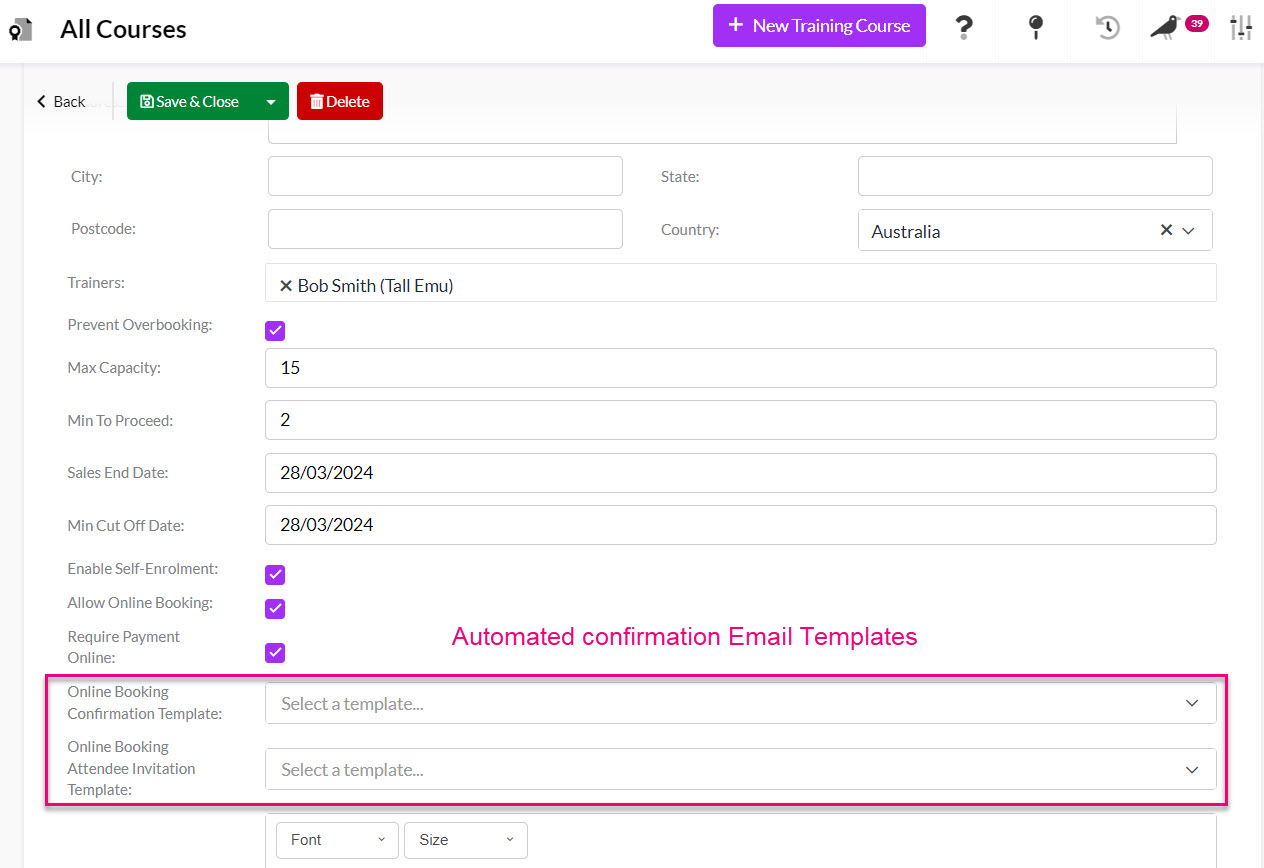
There are 2 email fields on a Training Course:
-
- Online Booking Confirmation Template: here you can select an existing Email Template for the automated email that will be sent to the person who submits the online booking request (via a Training Course Booking Web Form). An online booker can register multiple Attendees for a course.
-
- Online Booking Attendee Invitation Template: here you can select an existing Email Template for the automated email that will be sent to each person that is registered as an Attendee for the course i.e. if the booker registers several people, each will get this email as an Attendee.
See also:
Add fields to your form
Down below, in the field selector, you’ll be able to define the fields that are displayed on the form. If you don’t see the options you want, you may need to revisit the data type that your form is linked to – see the previous step for more details.
Click to expand each section and drag and drop the desired fields into the form. You can also double-click on a field to add it to the form.
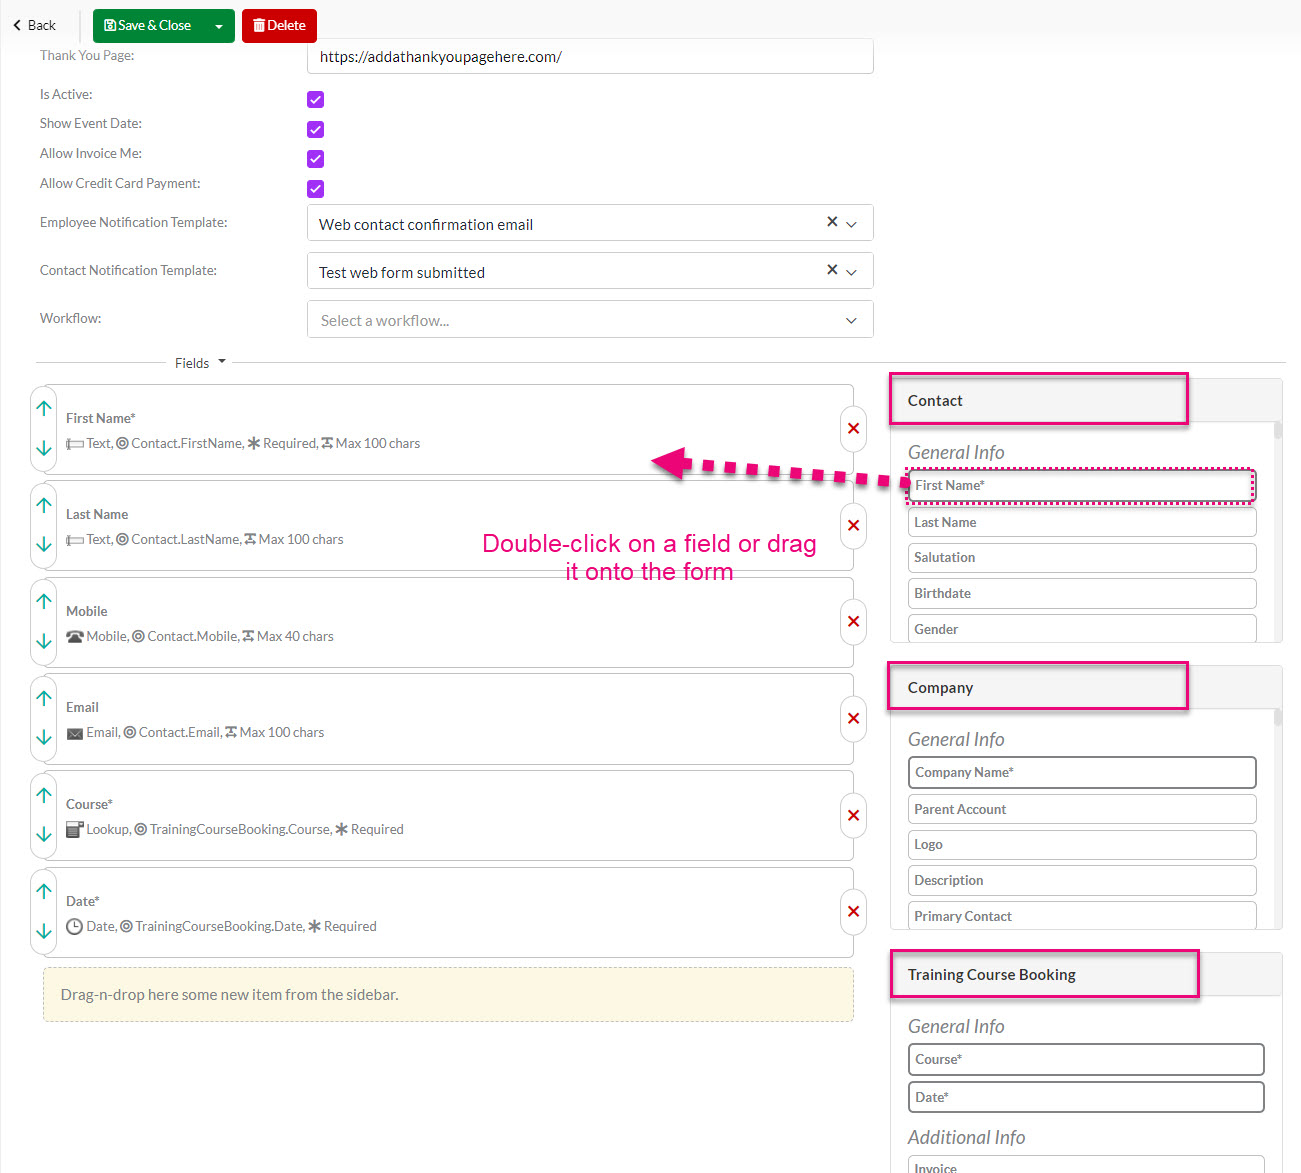
There are mandatory fields that must be added to a training web form for it to function correctly:
- Contact: First Name – this is the minimum information required to create a Contact record.
- Contact: Email Address – you will need an address so that CRM can look for a match for an existing Contact record, it is also required so that automated booking confirmation emails can be sent.
- Training Course Booking: Course – this must be present so that a course to register for can be selected.
Following are optional fields that are commonly added to this type of form:
- Contact: Last Name
- Contact: Mobile (e.g. in case you need to get in touch with them about the booking).
- Company: Company Name (e.g. in the event that you need to know where the Contact works).
You are free to add as many fields to the form as you require. If you’ve added Custom Fields to the Contact or Company form, you can add these here as well.
If you want to know more about how to hide, rename or configure fields on your form, please see our guide on Creating a simple Web Form.
Once you’ve set the fields as required, click Save and Close at the top of the screen. You’ll be taken to the saved Web Form record.
See also:
Automatically add people to a Marketing List
The When Filled In tab lets you define basic workflows that occur after the form has been completed.
You will only see this area once you have Saved & Closed the record.
If you’d like the respondent to be added to a specific Marketing List after form completion, click Add beside the correct list in the sectioned outlined below and then click Update.
If you have integrated CRM with either Mailchimp or Campaign Monitor, your Marketing Lists will be automatically synced between systems.
In the example below, I will have people who submitted the form automatically added to my newsletter list.

See also:
Notify people when a form is submitted
Further down you’ll see a notification section. If you’d like to notify a member of staff when a form is filled in, select their user from the left-hand list, then click Add, then click Update. They’ll then receive an email every time the form is completed.
You will only see this area once you have Saved & Closed the record.

Test your form
Before you deploy your form, you should run a test submission on to check that the form is working correctly.
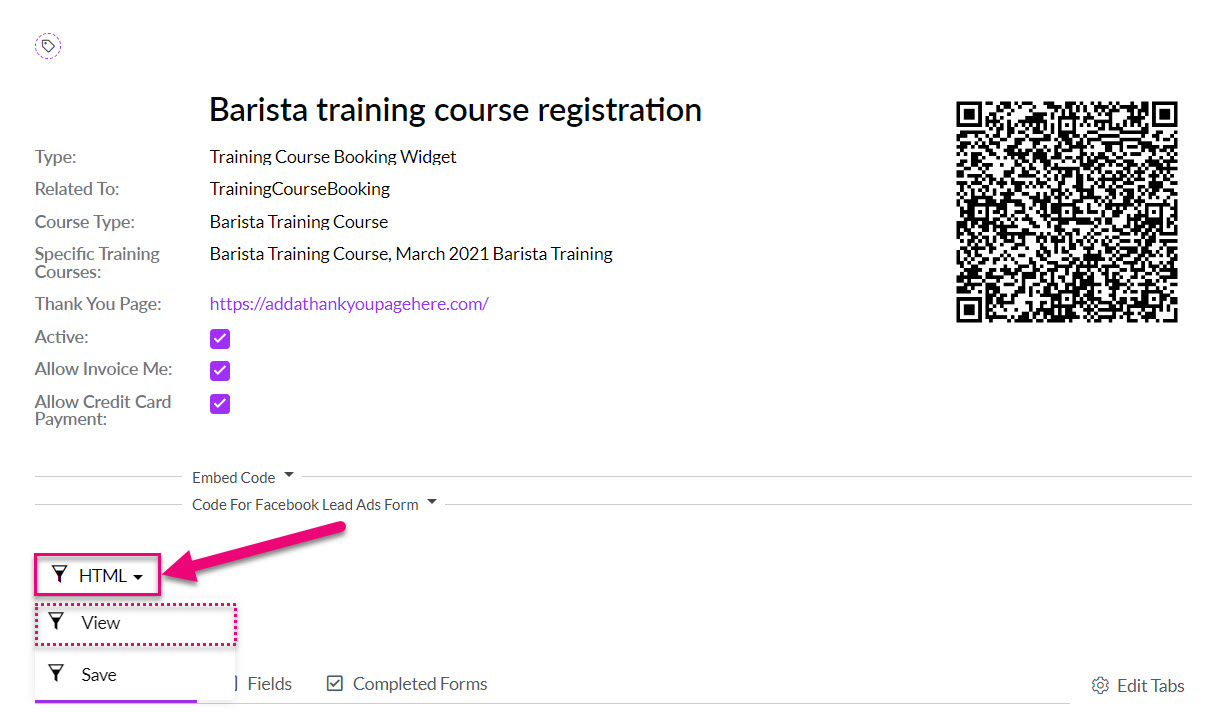
To do this, click on HTML > View which opens the form in a new tab.
You can check the form to see that the layout matches your expectations and then enter test data into the form and submit it.
Following are screenshots of the example form used in this help page.

Page 1: select the Course
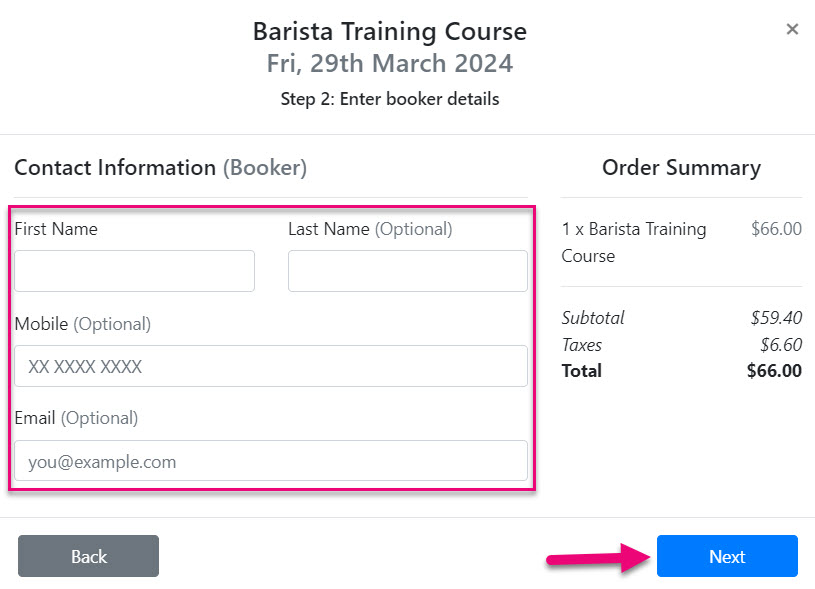
Page 2: the booker enters their details

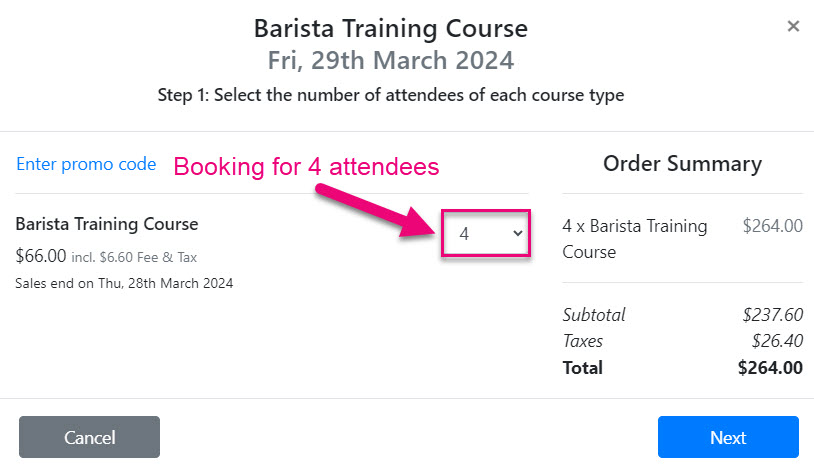
Page 3: select the number of Attendees
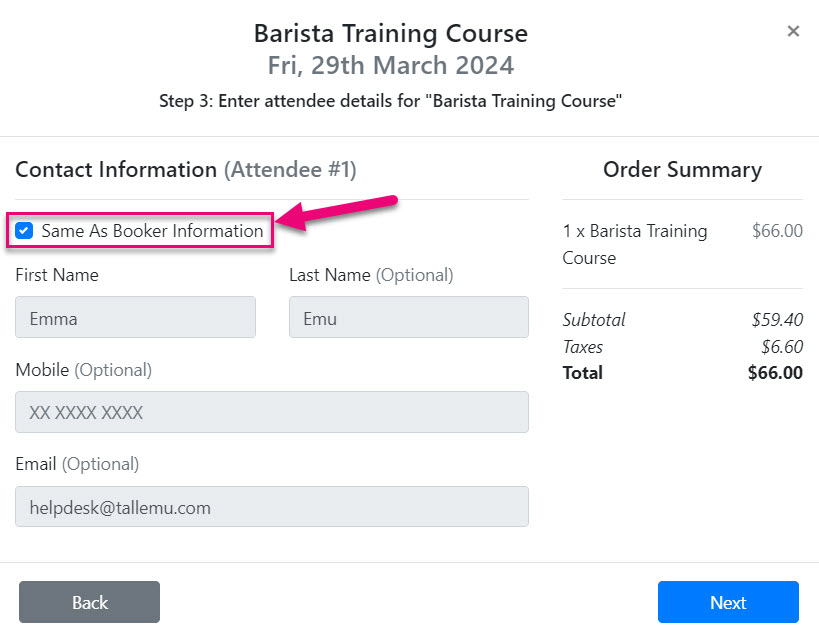
Page 4 (option 1): the Attendees is the same as the booker
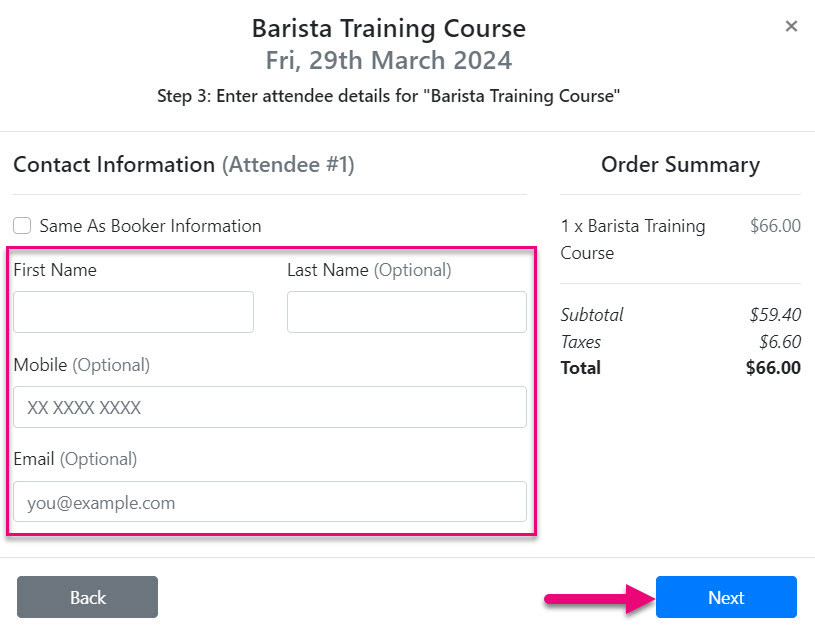
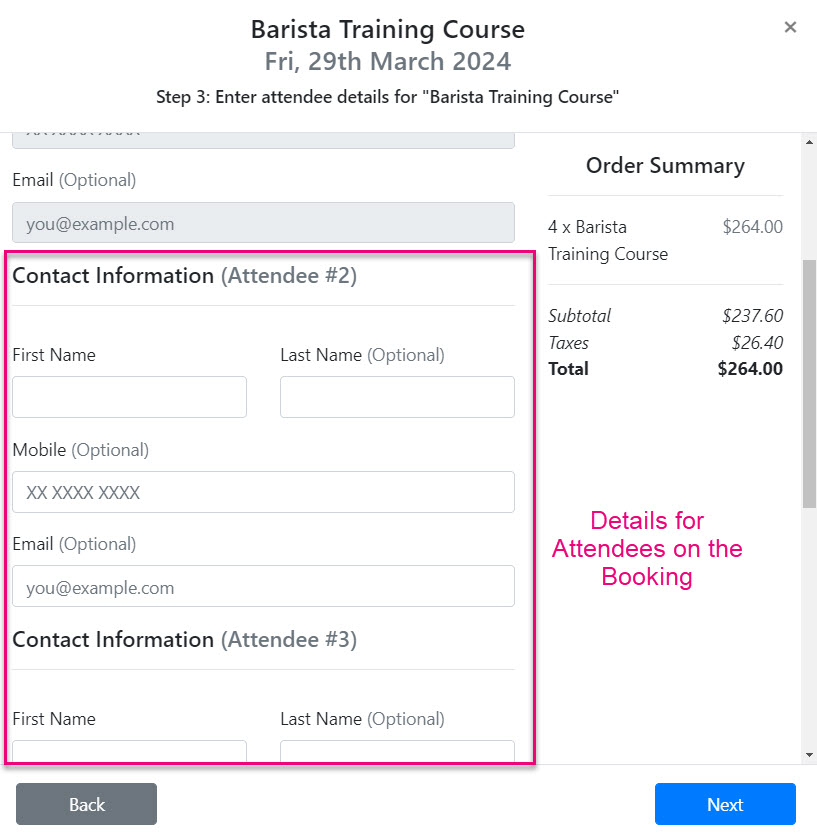
Page 4 (option 2): the Attendees are different to the booker
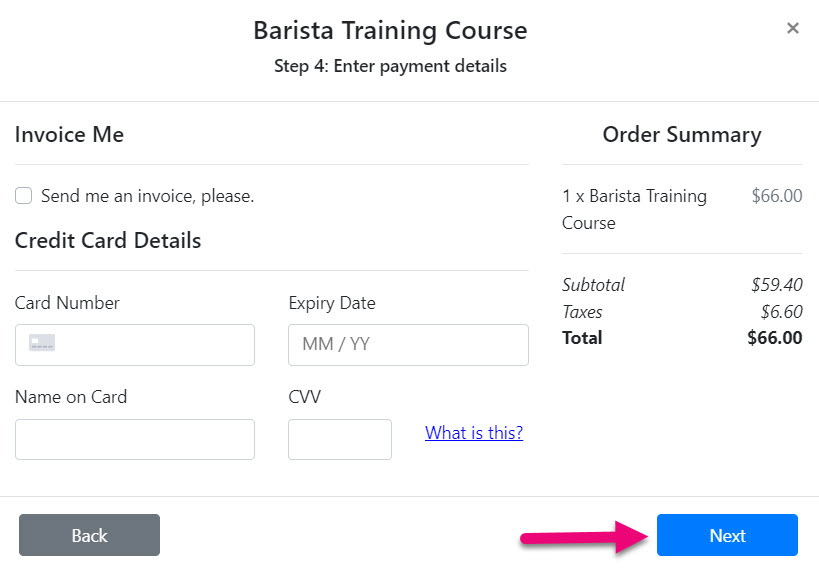
Page 5: payment options
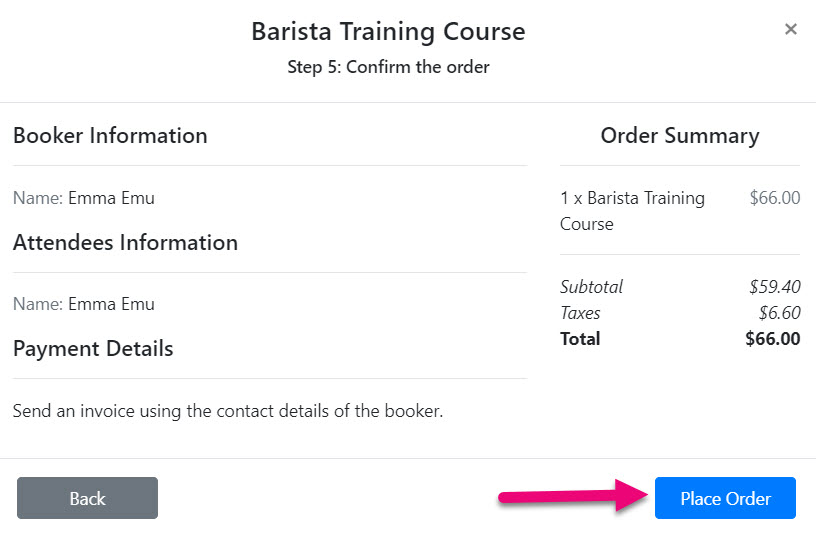
Page 6: confirmation & submission
Form submissions
If the form submits without issue, you can go to the Completed Forms tab on the Web Form and see the submission details.
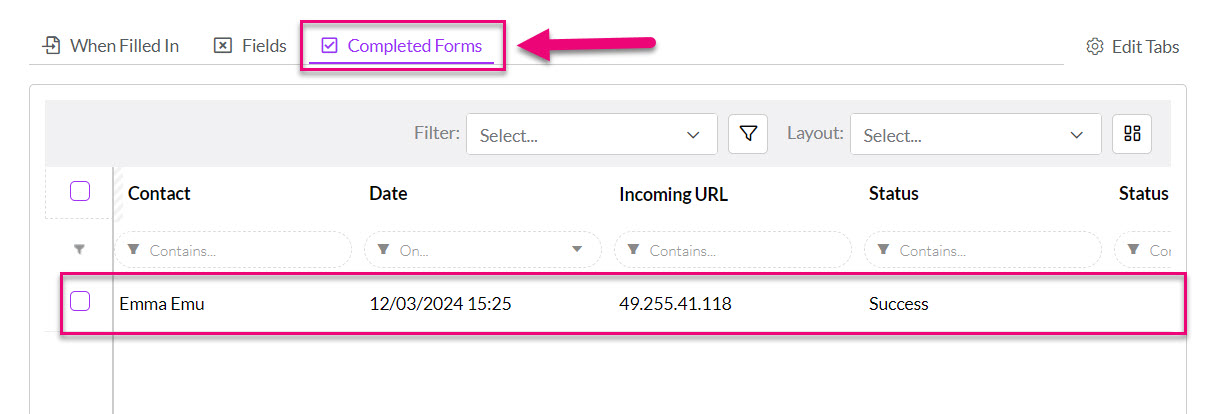
An example of a successfully submitted form
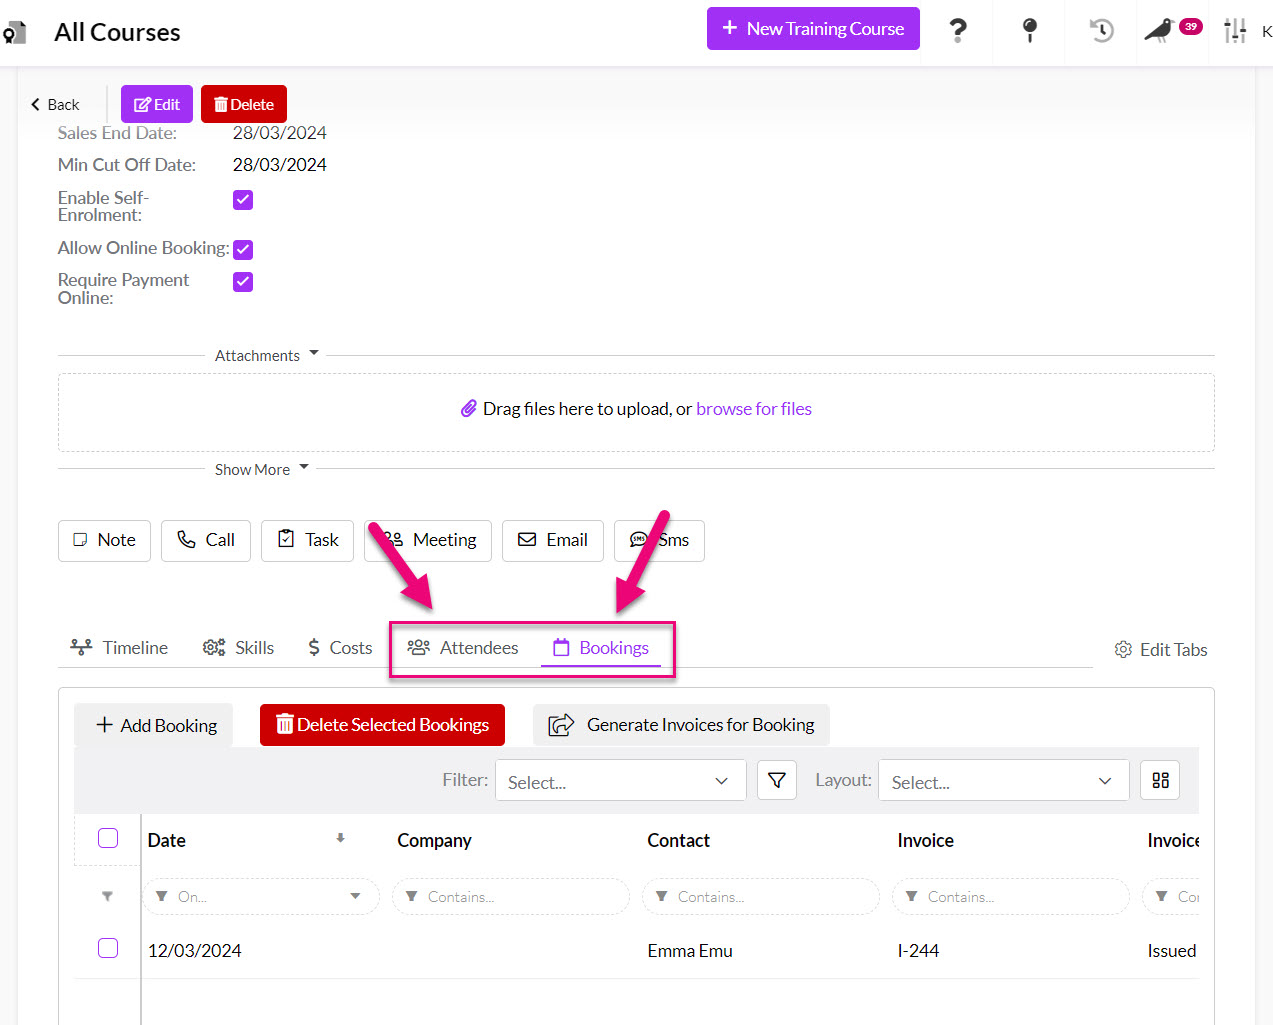
You can also go into the relevant Training Course in CRM and refer to the Attendees and Bookings tabs to see the submissions from your Web Form.
Form failures
If your form fails to submit, you should return to the Web Form in CRM and go to the Completed Forms tab which will show you a history of form submissions and in the event of failure, a reason why. You can then go back into the form configuration to resolve the issue.

An example of a form failure
Ways to deploy your form
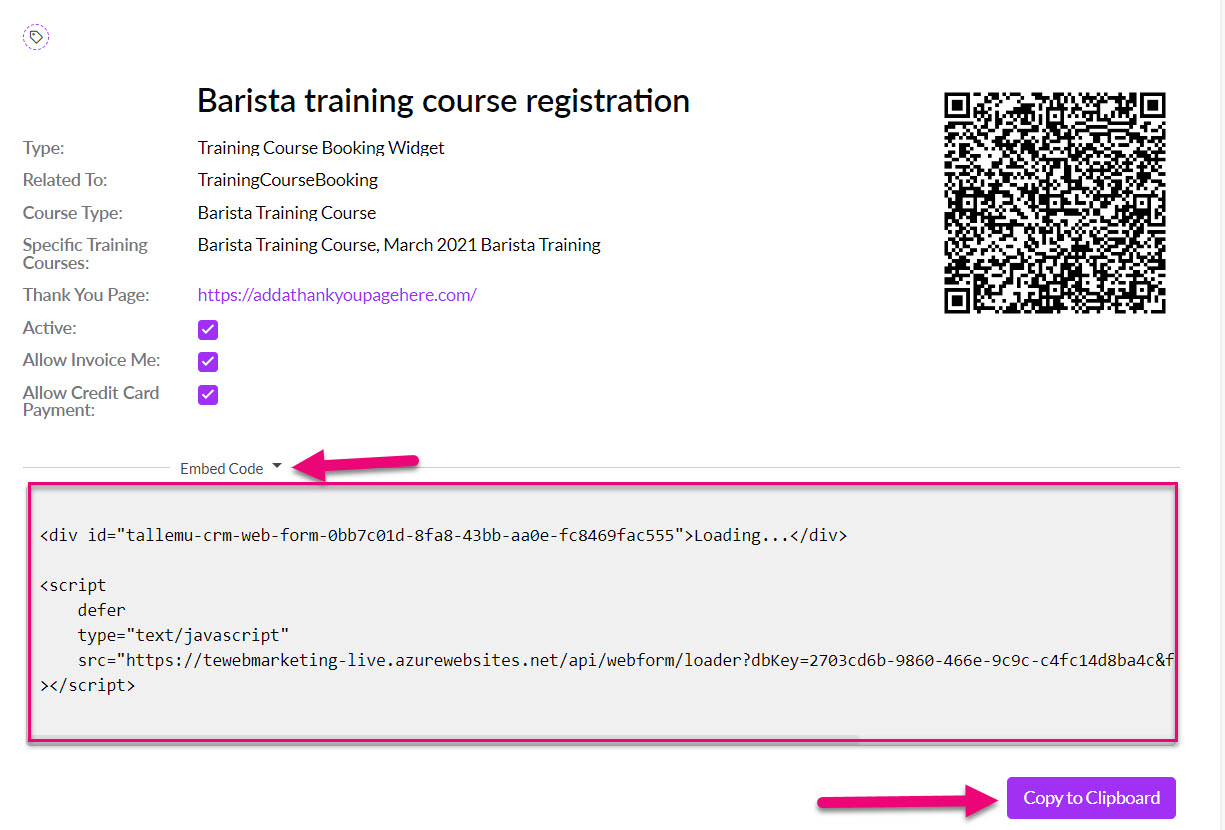
Get code to embed the form on your website
By clicking the Embed Code heading you’ll be able to view the required code for adding the webform to your site. Simply click the Copy to Clipboard button and paste the code into your website – the form will be available to use right away.
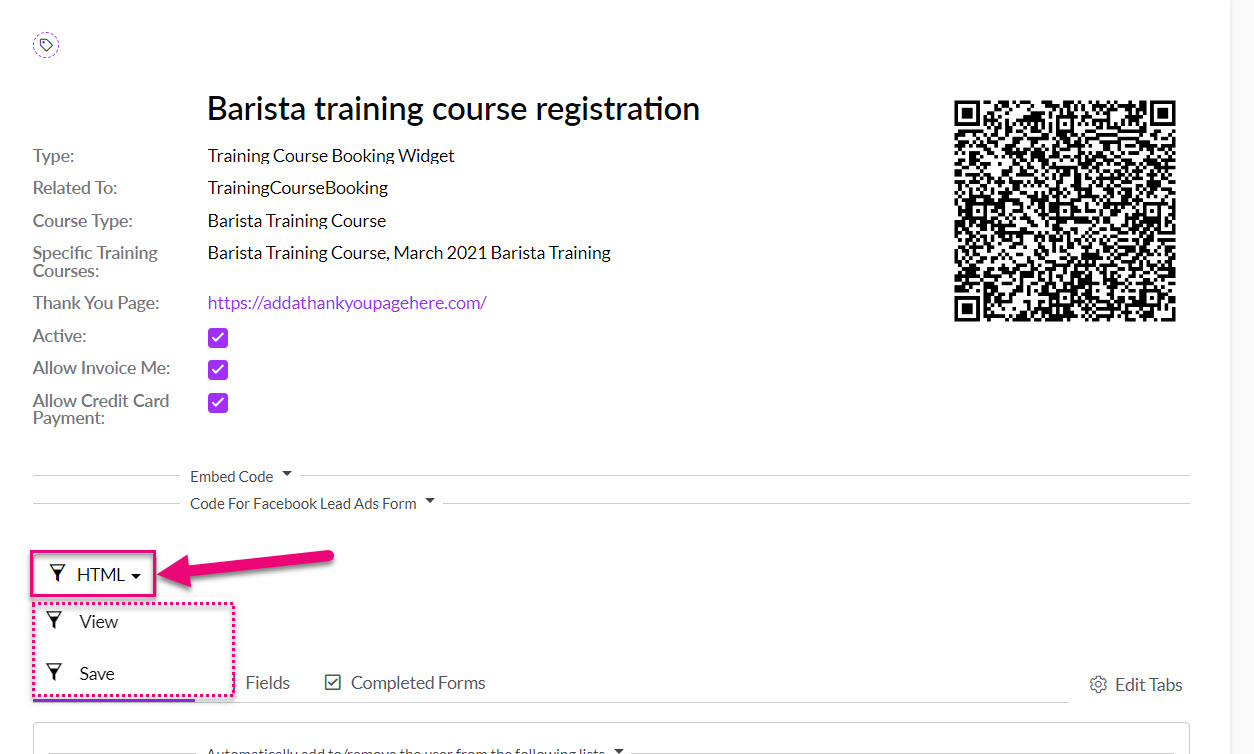
Generate a HTML file or get the form URL
If you’d like to view or save the form as a HTML file, click the HTML button and then either:
- View: this opens the form in a new tab so you can grab the URL and also preview and test your form.
- Save: saves the form as a HTML file – the download will automatically start in your browser; if it doesn’t it may be being blocked.
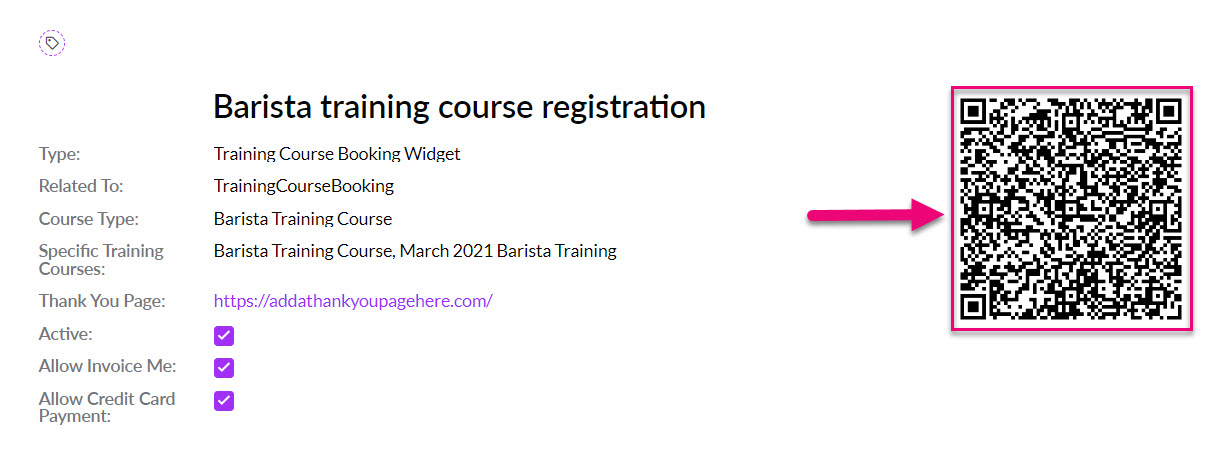
Get a QR code
CRM will automatically generate a code for you when you save the form – just copy it.
You can also use a Web Form to bring in Facebook Lead Ads.
See also: