Set up training in CRM
This guide will take you through how to set up CRM to book and manage training courses or sessions you run.
1 – Set up Training Products
WHY?
If you run training sessions or courses, you can set these up as Products in your inventory so you can:
- Take online course bookings from leads or customers.
- Track bookings and actual attendance.
- If required, take payment for course attendance.
HOW?
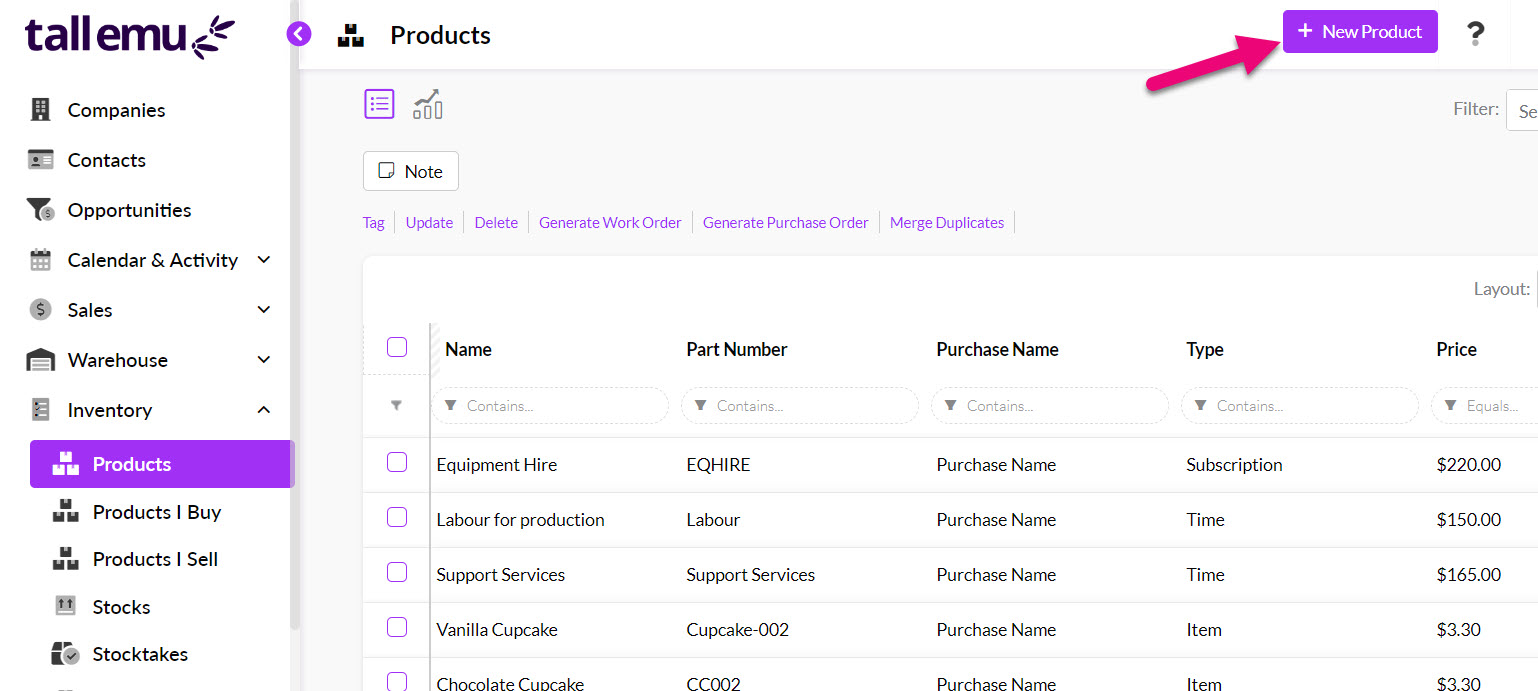
- From Inventory > Products click on the New Product button.
- The new Product form will display – you need to select the Is Training box – this tells the system that you are making a Training Product.
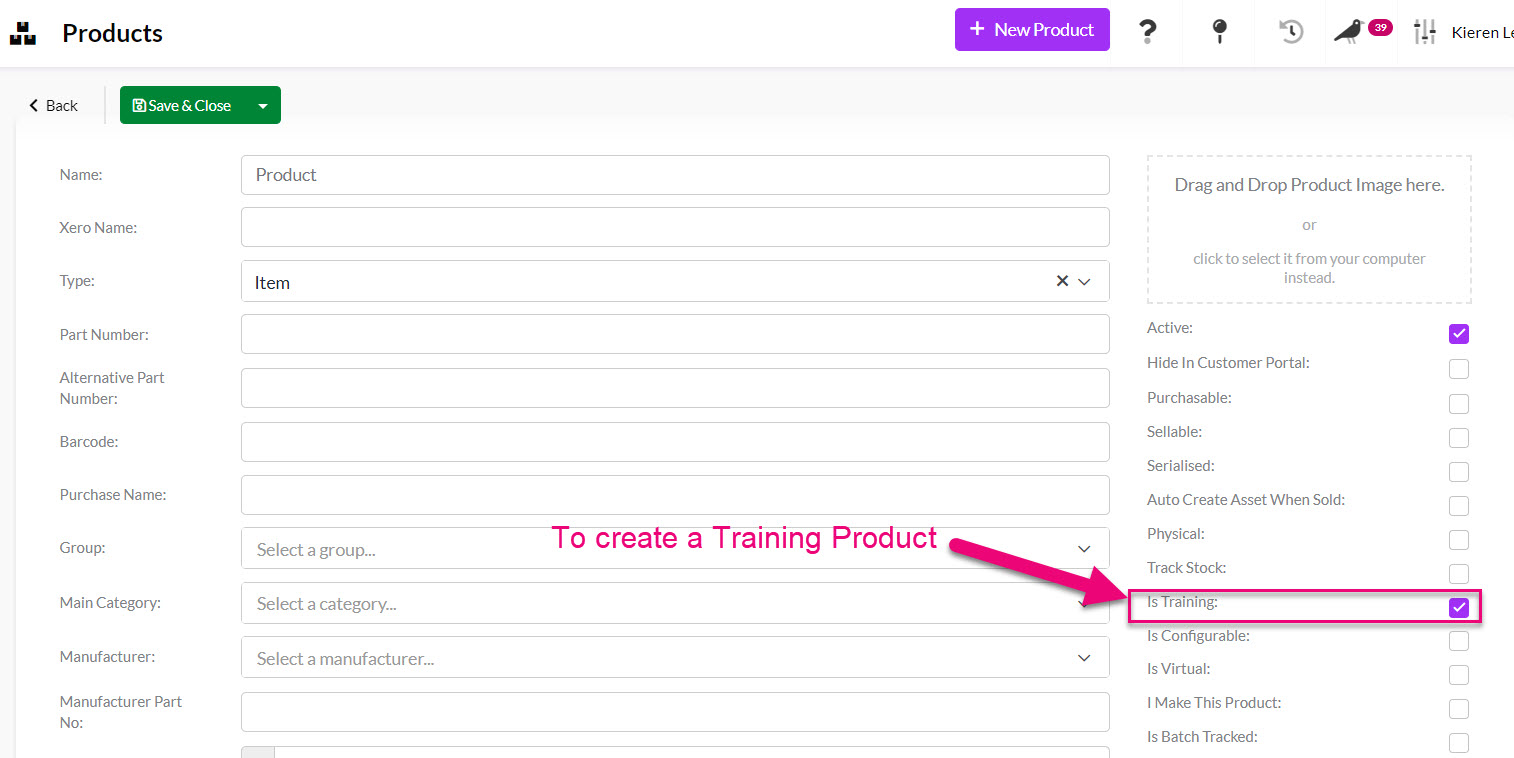
- Make sure the Active box is ticked. If you retire the course in future, you can de-select this box.
- Enter in a Product Name and Part Number as you would normally.
- If the course is ‘sold’, you’ll need to add in a Unit Sell Price and ensure that the Sellable box is ticked.
- Click on Save & Close at the top of the record when you are done.
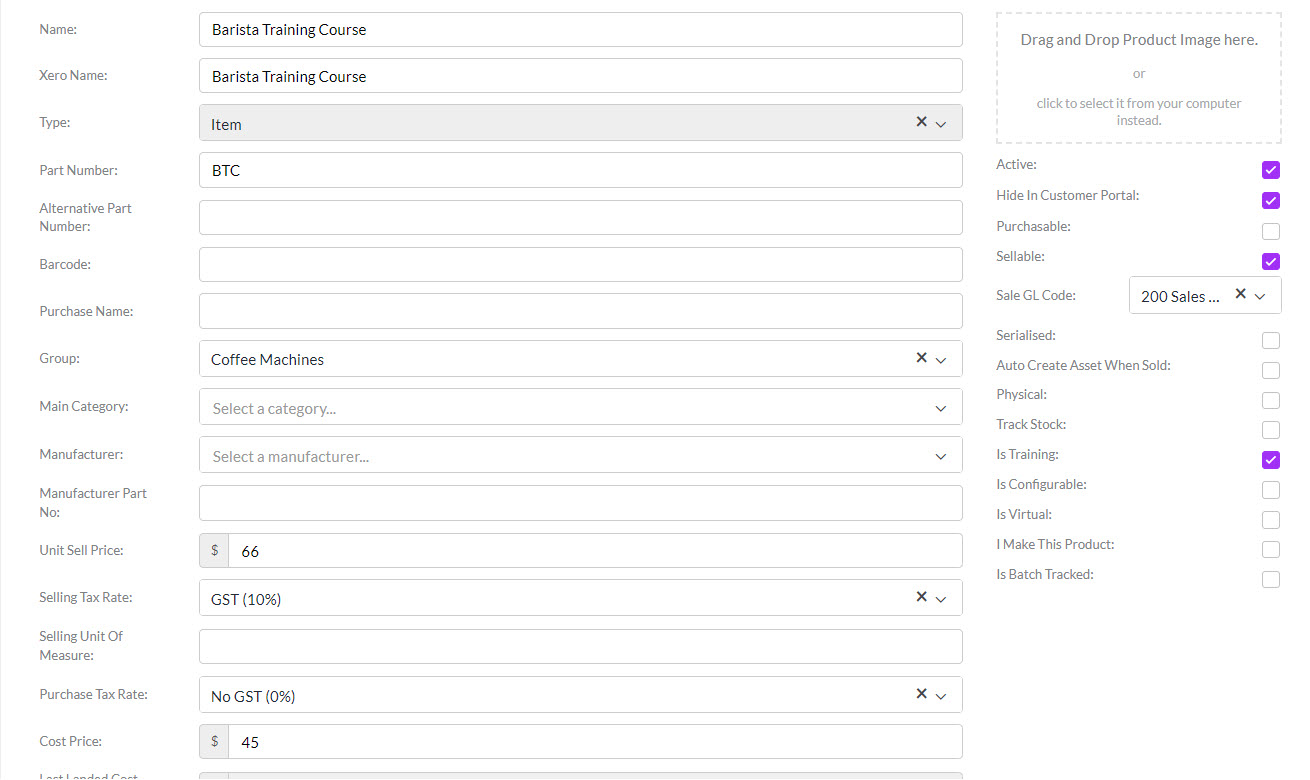
Following is an example of a Training Product in edit mode.
See also:
2 – Customise your Training fields
WHY?
On the Training Course form there are several fields that you can customise to display your own options.
Populating these fields with your own options mean that you can quickly segment and sort your Training records in a meaningful way.
HOW?
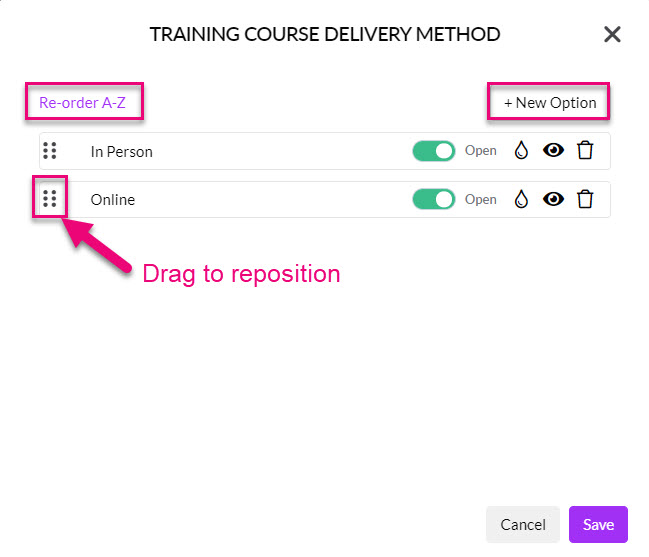
- From Admin > Settings > Training you can click on any field to customise it.
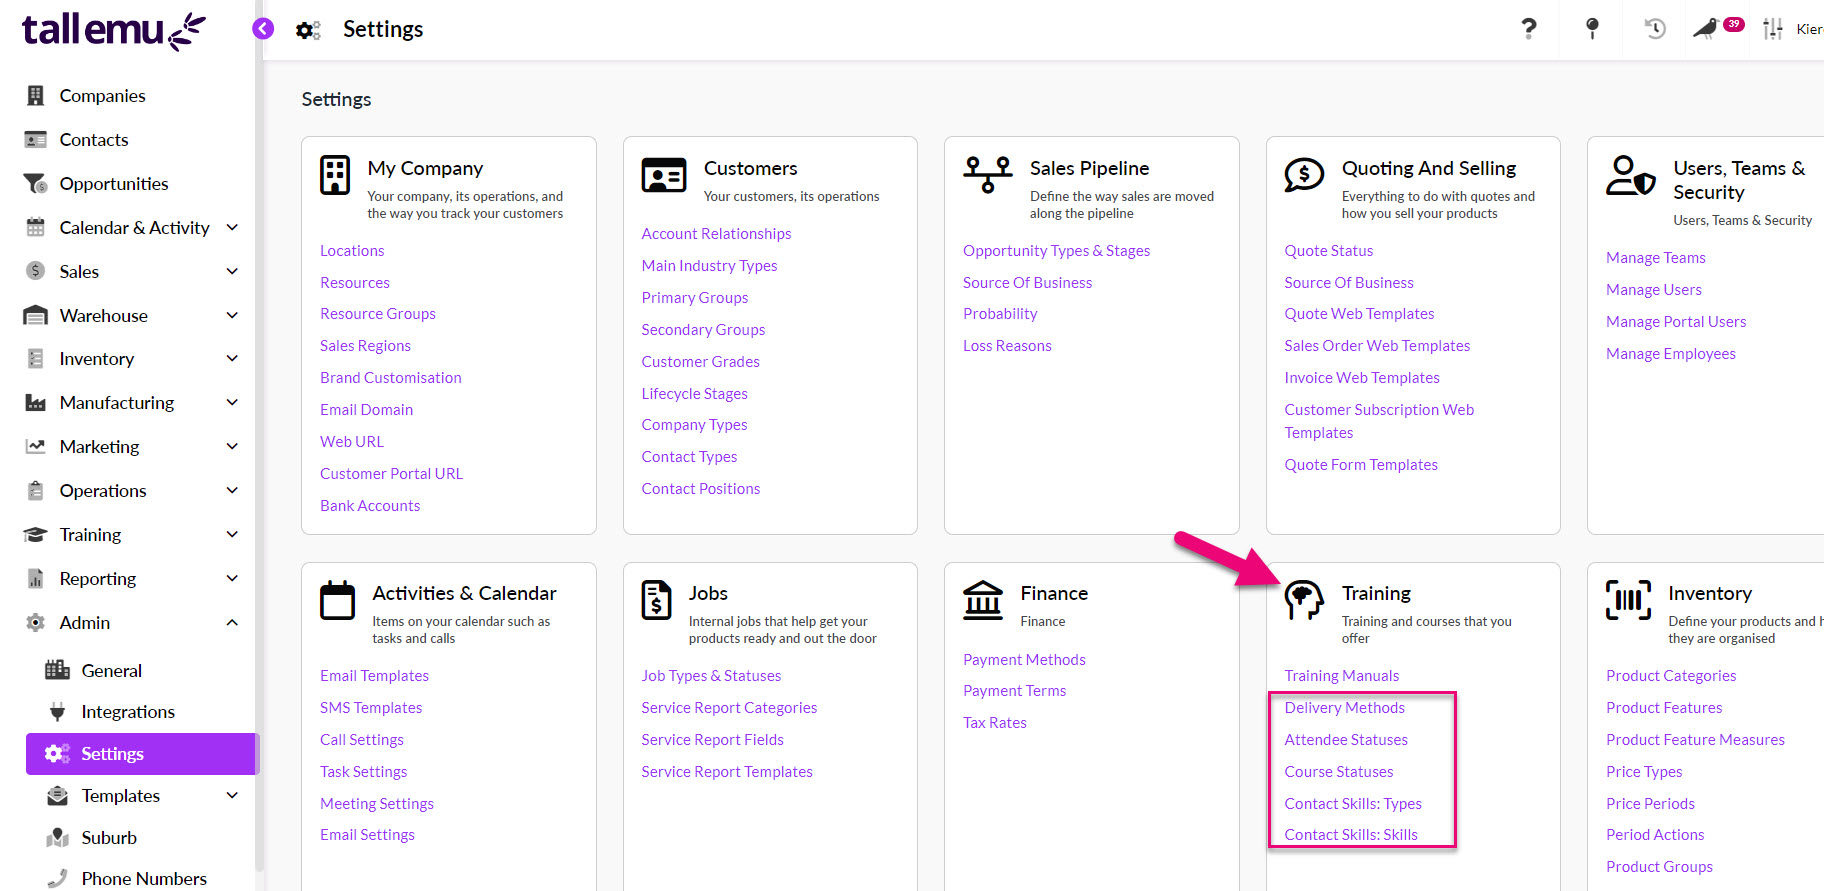
- A box will be displayed where you can add and re-order options that appear on the field’s dropdown list.
See also:
3 – Set up Training Courses
WHY?
A Training Course in CRM allows you to track the times, dates and the delivery methods of your courses.
You can also track bookings and attendance from the Course record.

See also:
HOW?
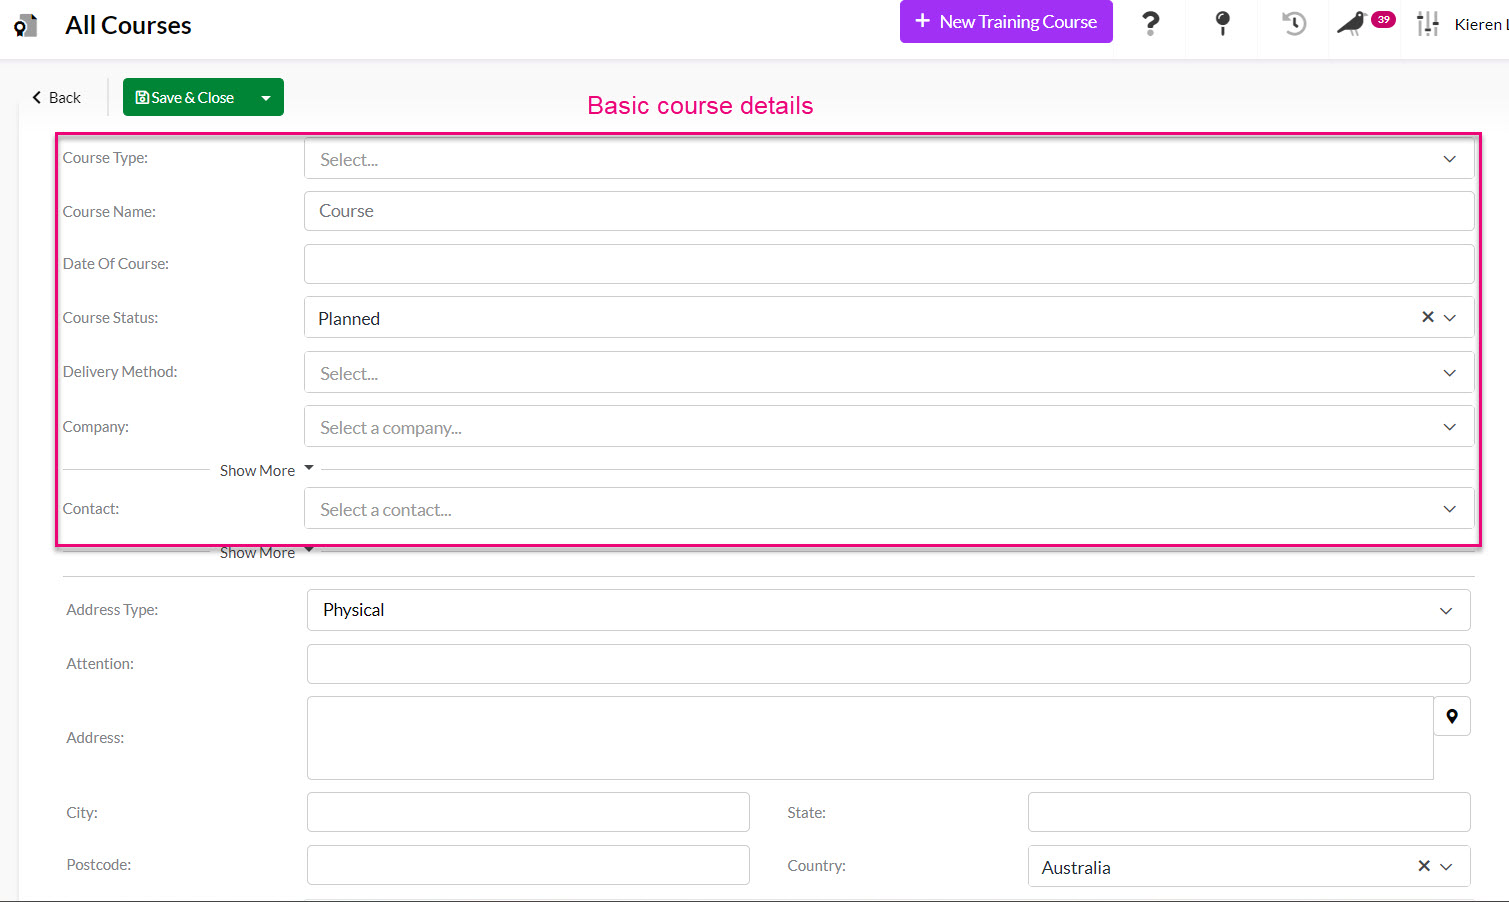
- From Training > All Courses, click on the New Training Course button.

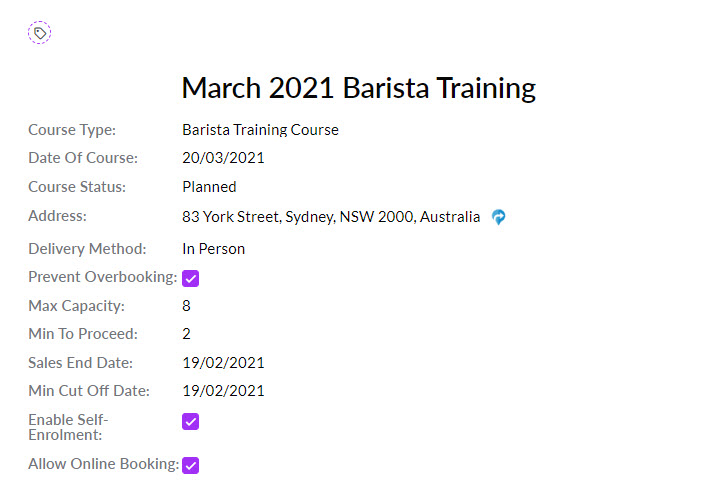
- A new form will display which will allow you to enter in the basic details for the Course.
- Scrolling down further on the form reveals specific options you can set.
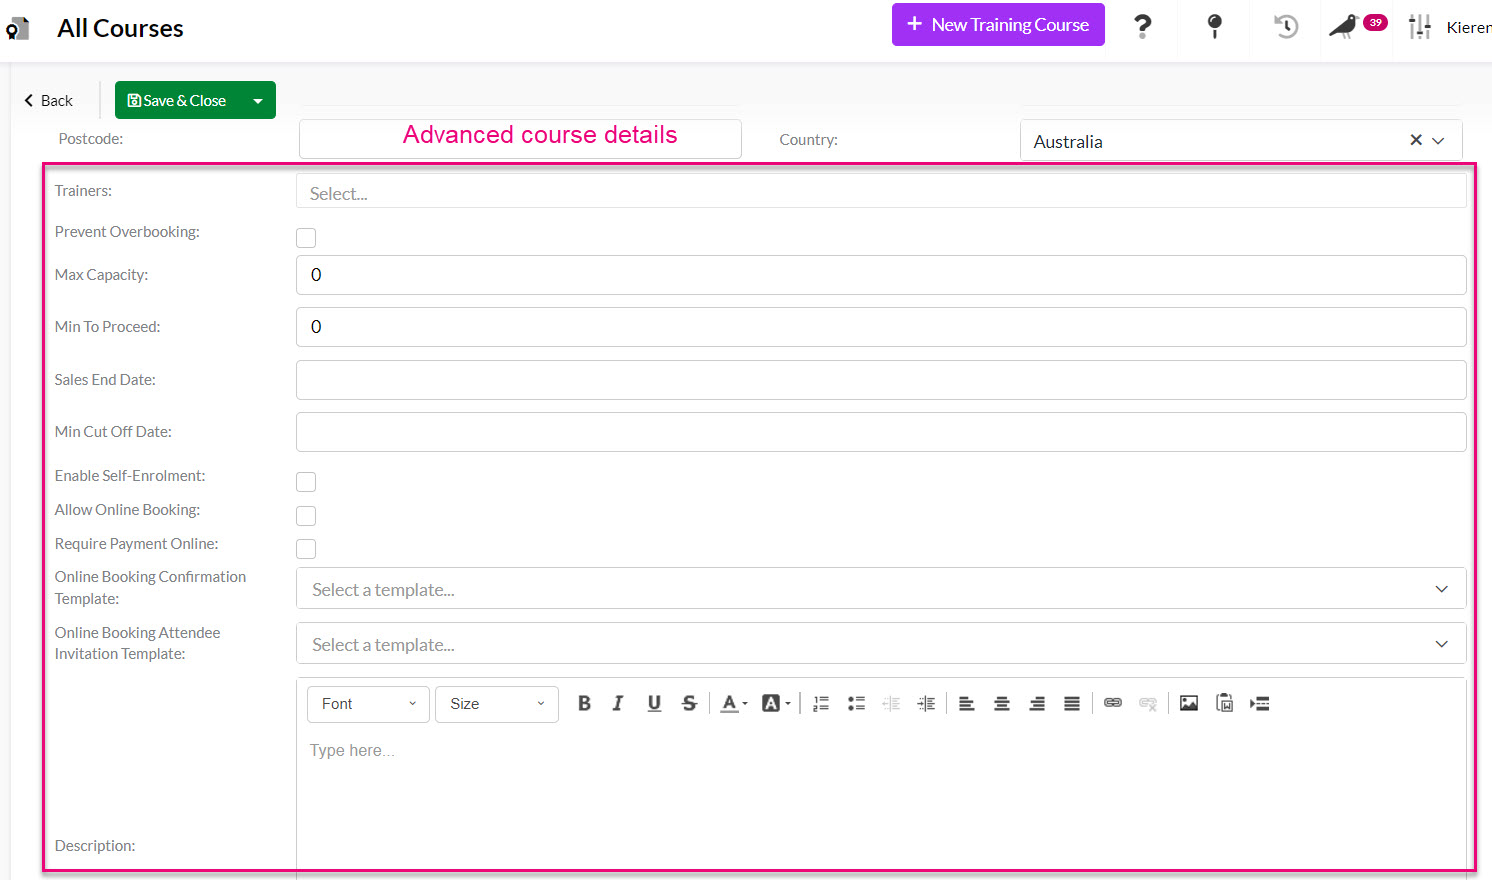
- When you are finished, click on Save & Close.
See also:
4 – Gather course registrations
WHY?
Once you have created your Training Courses, you’ll want to gather registrations or bookings from attendees.
HOW?
With a Web Form
The easiest way to gather registrations is to use a Web Form; you can the place the form somewhere on your website for people to fill in, email a link to fill in the form, or both. You can also manually register people for courses in CRM.
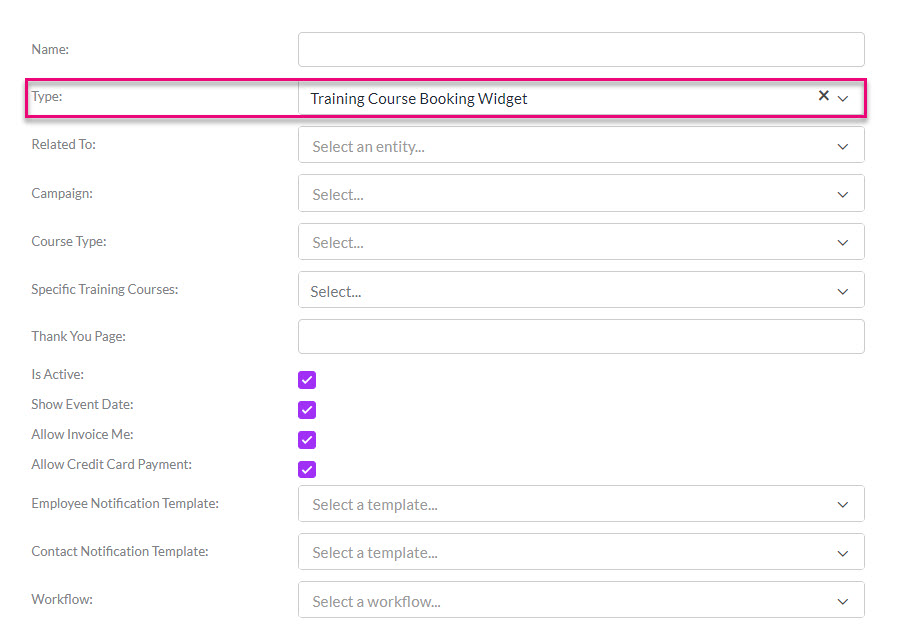
- To create a Web Form for online registration, go to Marketing > Web Forms and click on New Web Form.

- When the new form displays, ensure that in the Type field you have selected Training Course Booking Widget.
See also:
Manually
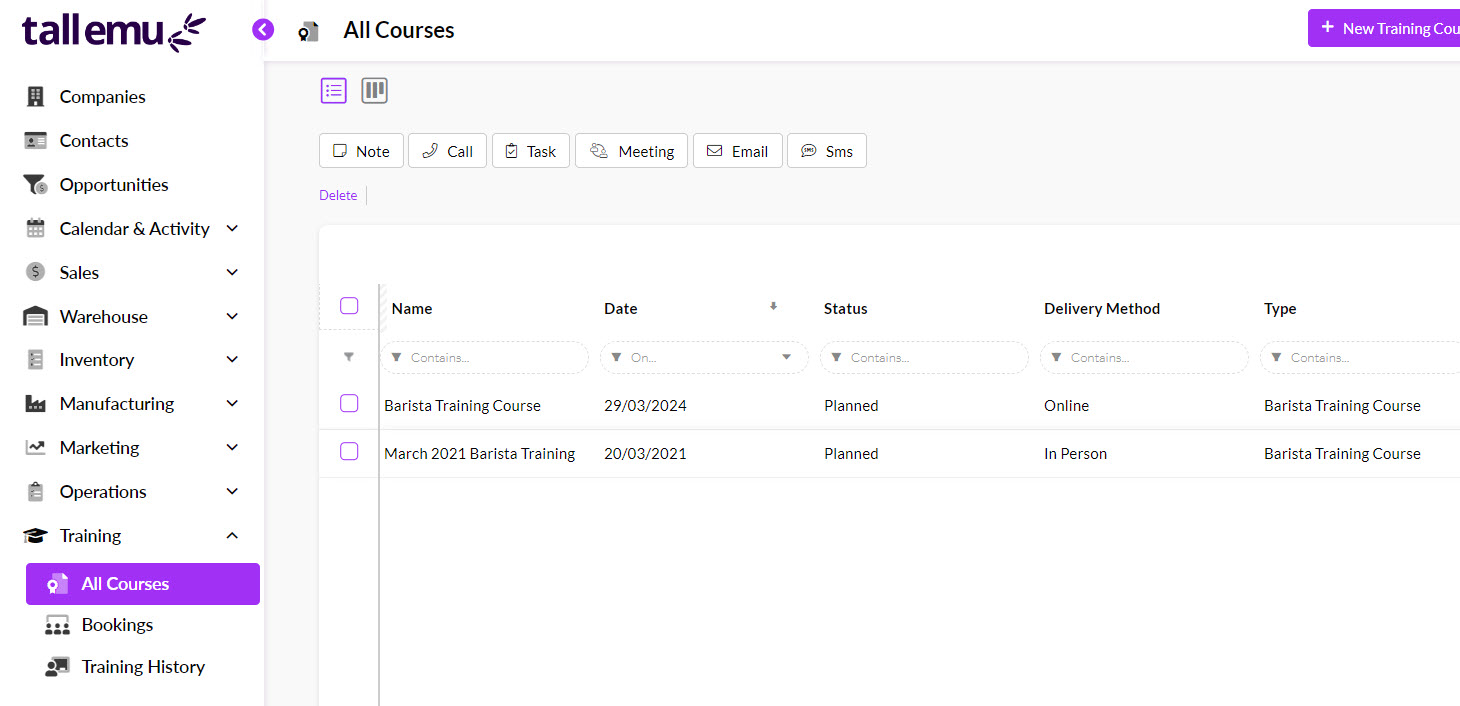
From Bookings
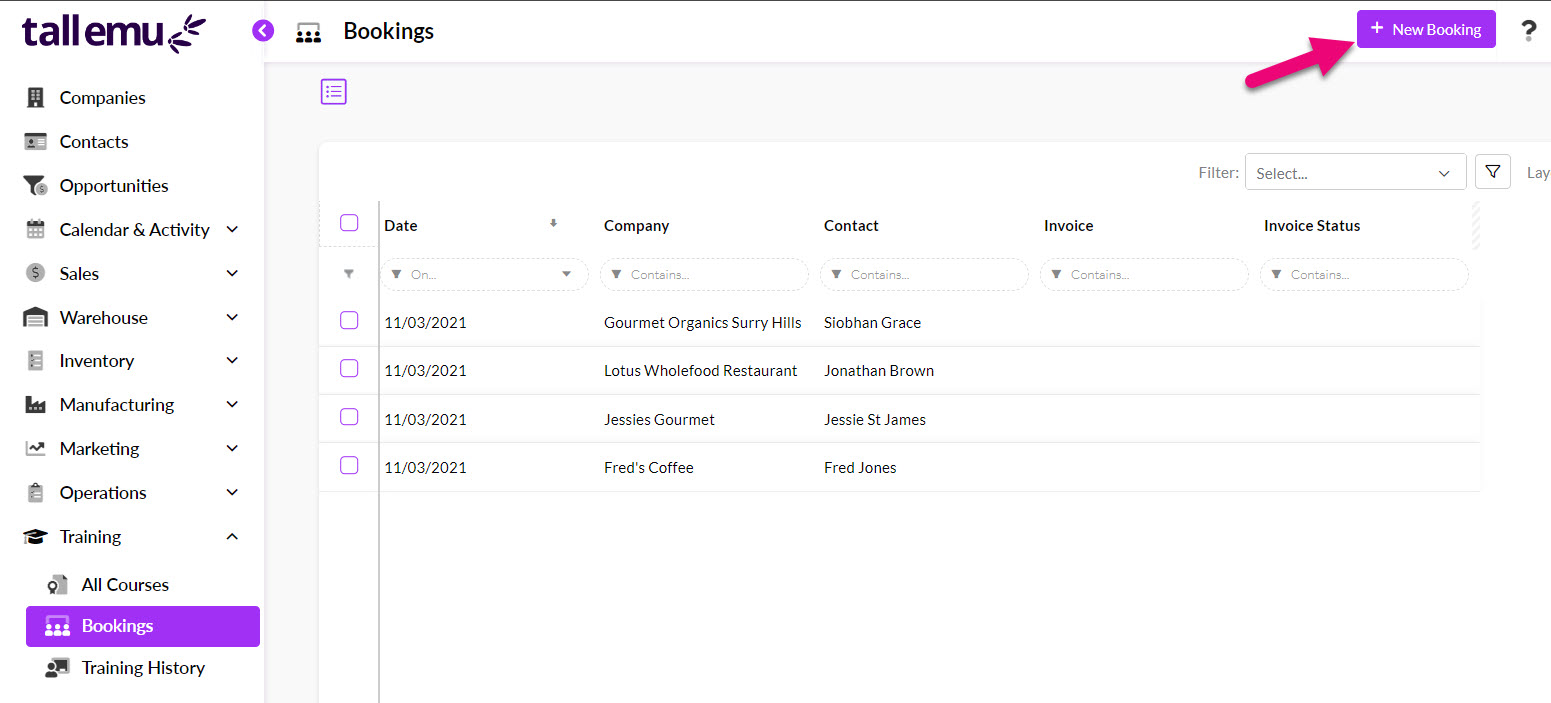
- From Training > Bookings you can click on the New Booking button.
- A new form will open where you can enter in the details for the booking by selecting an applicable Training Course and the Contact that will be the attendee, the Company they work for (if applicable) and the Booking Date.

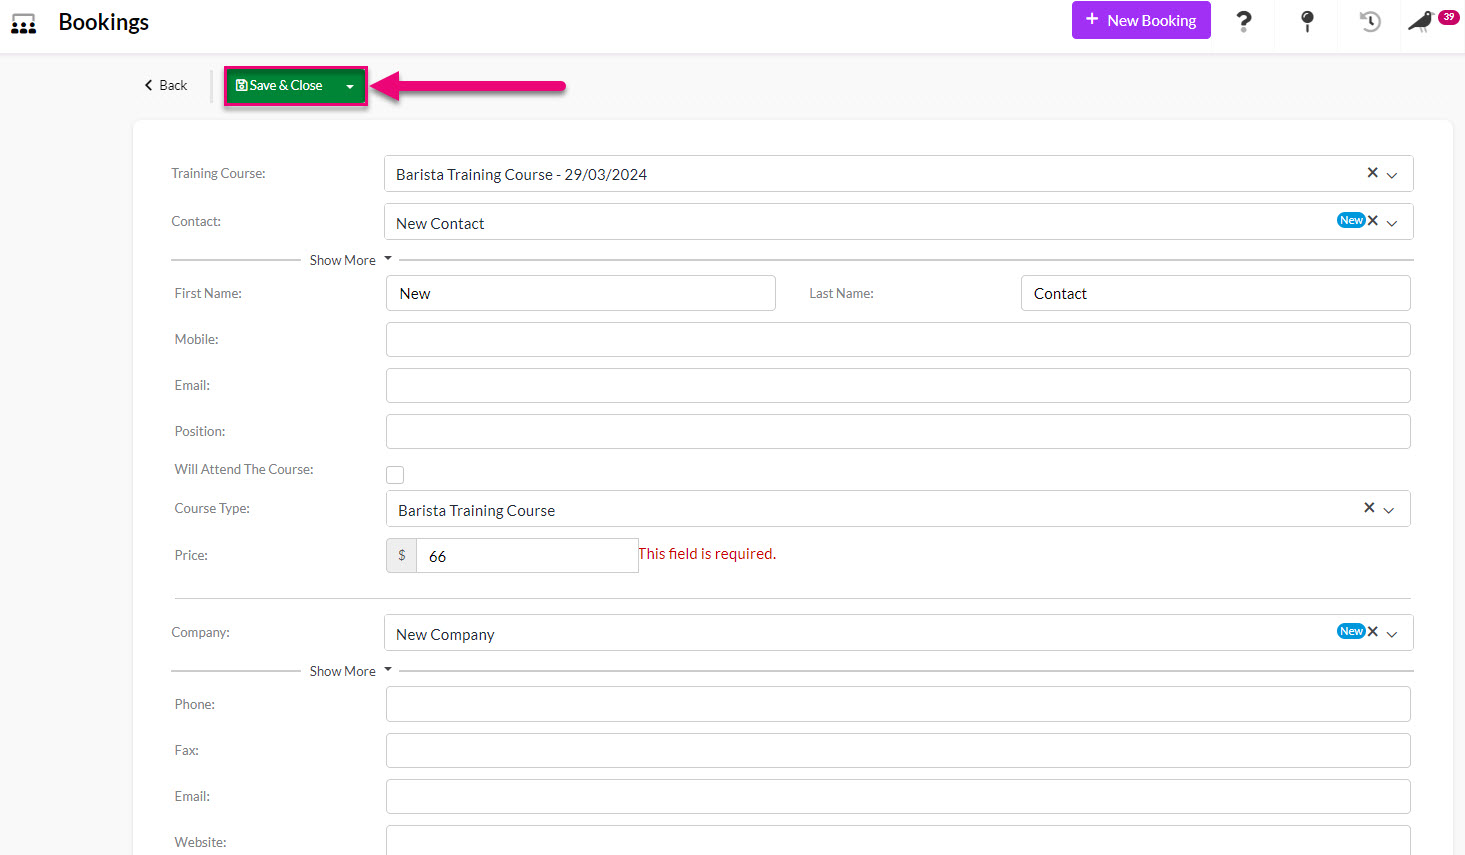
- If the Contact and/or Company doesn’t already exist in CRM, you can create them inline – just type in the name and CRM will perform a lookup to see if there is a match for an existing record; if there isn’t a match, CRM will offer to create the record for you – just click on the dropdown option that is displayed.
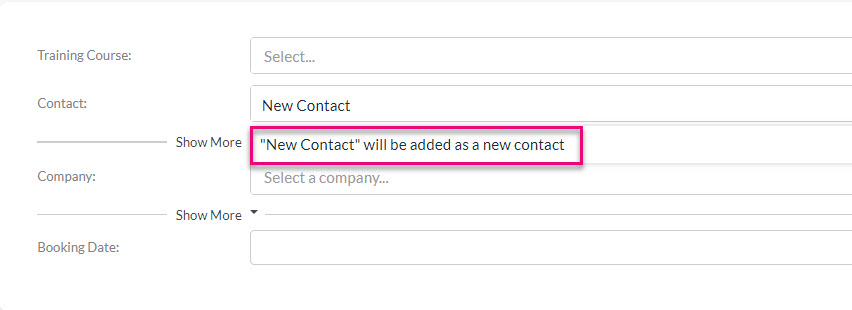
Creating a new Contact inline
Creating a new Company inline
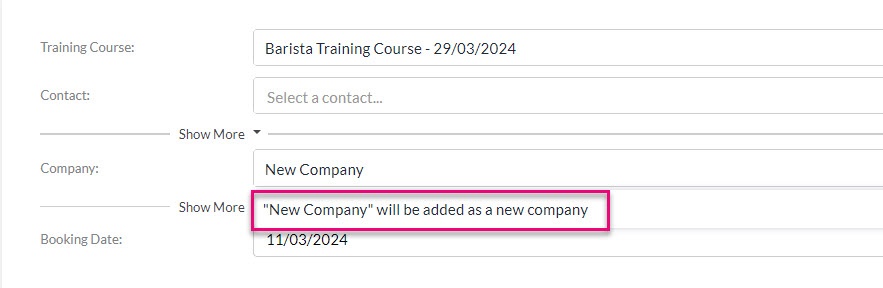
- A blue “New” indicator will confirm that CRM will create a new record for you. Fields for the new record will also be displayed so that you can fill in additional information.

Adding Contact details

Adding Company details
- Once you have clicked on Save & Close at the top of the form, a new Booking will be created and if applicable, a new Contact and/or Company record.
See also:
From a Training Course
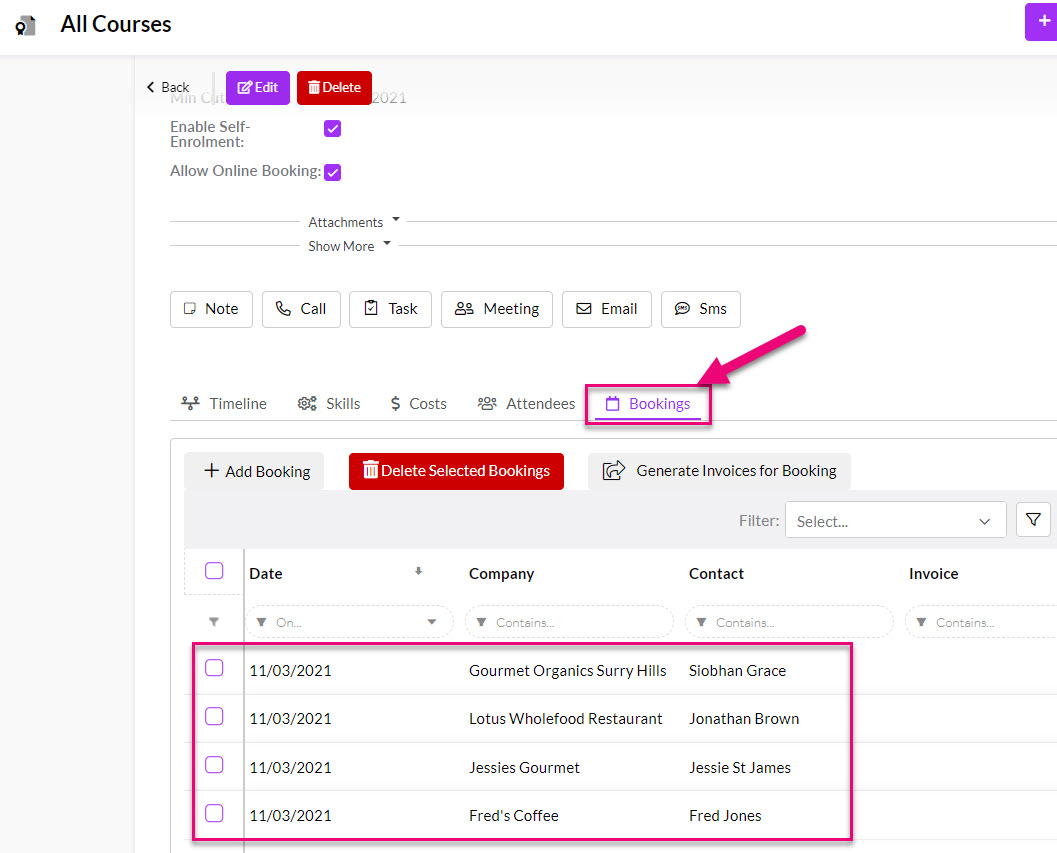
- From the Training > Training Course area you can open the relevant course by double-clicking it.
- Navigate to the Bookings tab and click on Add Booking.
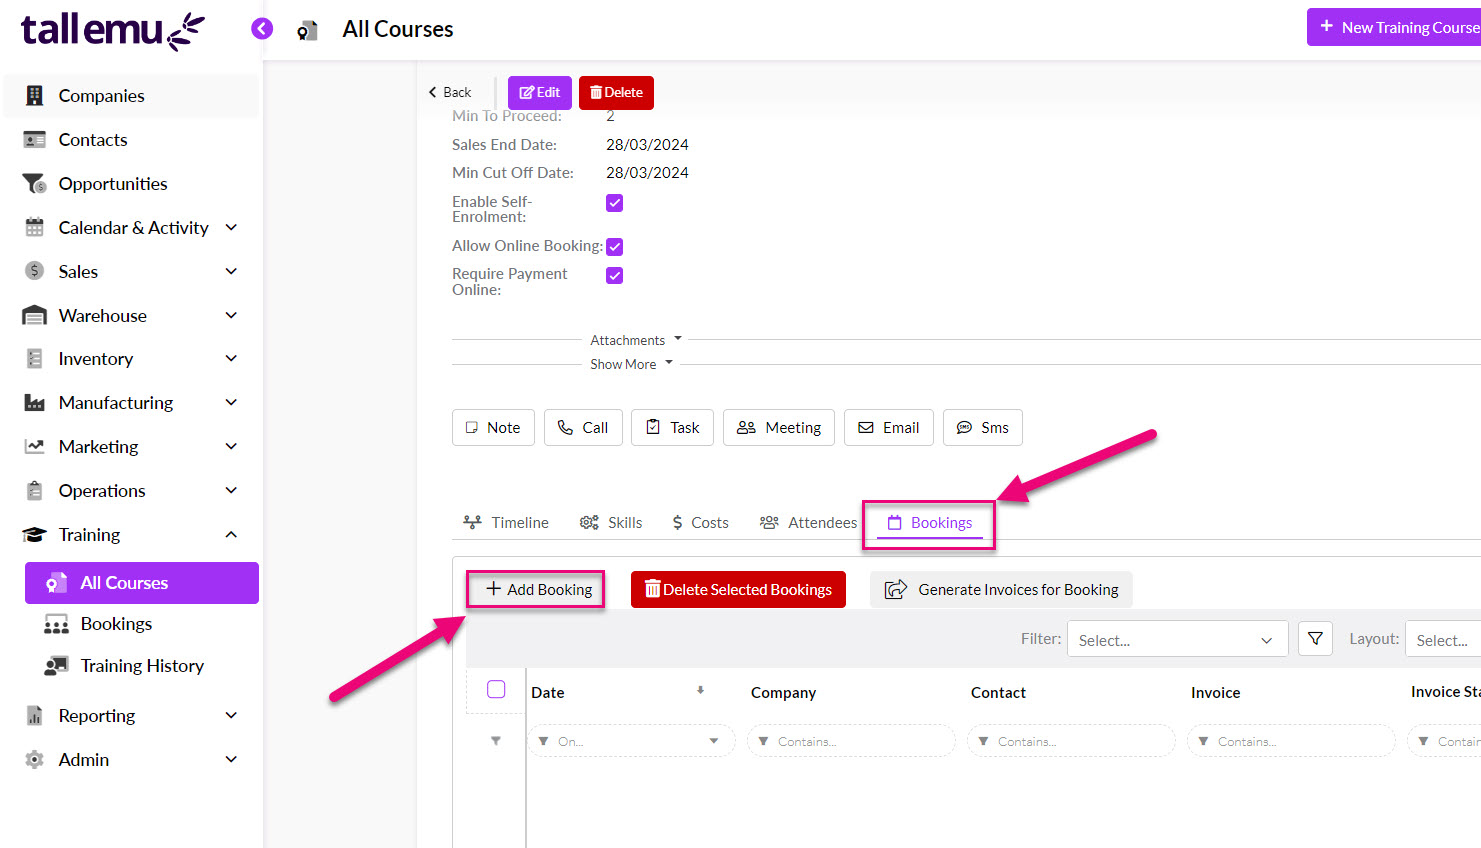
- You will then be taking to the new Booking form where you can select the relevant Contact and/or Company.

See also:
5 – Set up workflow lists
WHY?
Working with your Training data day-to-day can be streamlined for all your users by setting up some basic workflow lists to quickly display key information in the Training Courses, Bookings and Training History areas.
Instead of performing a lookup from scratch every time you want to view this information, you can save workflow lists that can be made visible to all Users (or only visible privately) so that everyone is literally on the same page.
HOW?
First, you need to decide what questions you frequently ask about your service pipeline, both as a business and a User.
In this example, I’m going to create a list of Training Courses that are scheduled to be held this month.
Advanced Filters
Each of these questions you want to answer about your pipeline can be turned into an Advanced Filter.
You can have as many of these as you want, and you can choose which ones are publicly available to all your Users (shared) and which ones are for your use only (private).
- Click on the Filter icon and select New – this opens the form to create a new filter.

- Enter in a short name for the filter that will make it easy to identify in your list of filters e.g. “Courses this month” will be the name of my Training Course filter.
- If you want to share this with others, click the Shared box, otherwise the filter will remain private and only the creator can see it.
- You can then start building criteria to answer your question by adding a field in CRM and then choosing the value it must meet – the following screenshot provides an overview.
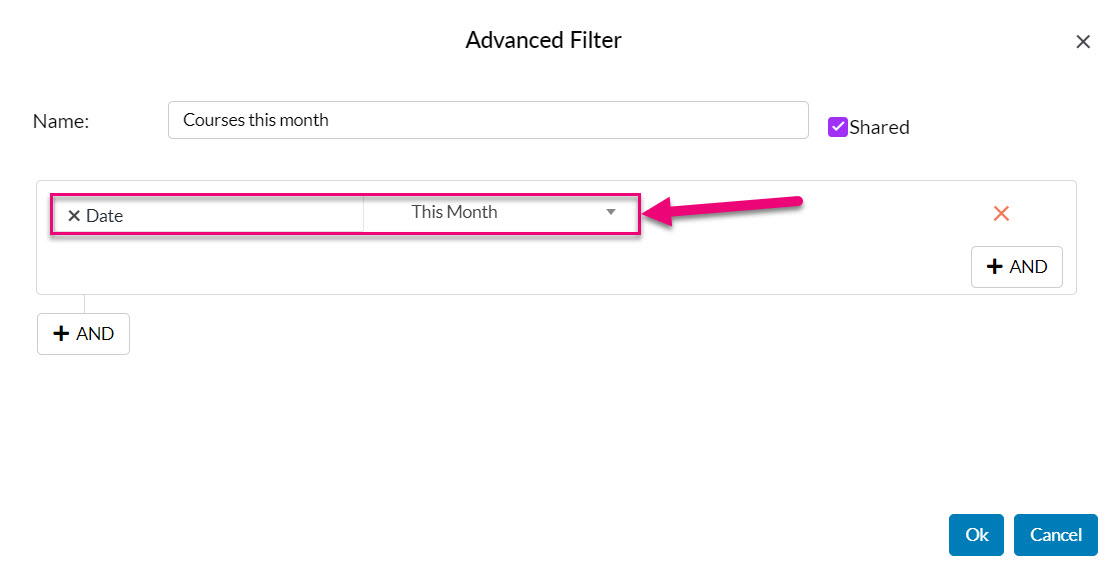
- Once saved, you can now see and select the Filter from the list to apply it.

See also:
Layouts
Once you’ve decided on the records you want to see in your Advanced Filters, you’ll likely come across the problem that once you’ve applied your Filter, the columns that you’re looking at don’t display the data you want to see.
In the following example, I have applied my Advanced Filter “Courses this month”, but I can’t see any of the columns that relate to dates. I’ll want to see this same information whenever I deploy my “Courses this month” filter.
Rather than manually adjusting the columns to display the required data each time, I can do this once and save it as a Layout; I can then select this from a list, exactly the same way I can choose an Advanced Filter to apply.

- To prepare my Layout, I’ll want to add, remove and re-position columns so that what’s displayed matches my requirements.
- I can then click on the button to create a new Layout.
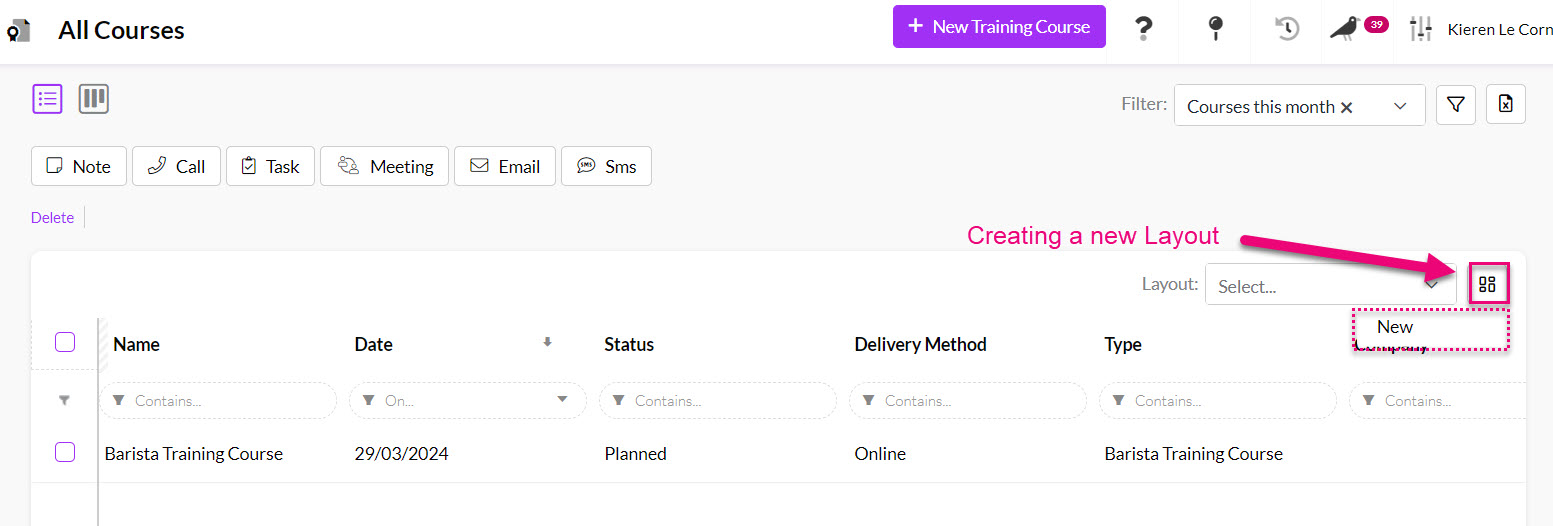
- A box will open, and you’ll need to add an easily identifiable name for the Layout and decide whether or not it’s shared.
- In this case, I’m just going to give the Layout the same name as the Advanced Filter as I’ll be using these together.
- Press OK to save the changes.

- You’ve just created a Layout that can now be chosen from the list and applied anytime.

See also: