- Companies
-
- Inventory
- Multi-currency for Purchasing
- Backorders
- Bay Locations
- Features
- Stock Tracking
- System Products
- Accounting details for Products
- Deactivating Products
- Products in Portal
- Suppliers
- Supplier Pricing
- Suppliers & Products
- Products
- Stock Transfers
- Barcodes
- Product Inventory Details
- Importing & exporting Product data
- Virtual Products
- Stock Adjustments
- Purchase Orders
- Enable or disable Stock-Tracking
- Training Products
- Units of Measure (UoM)
- Freight Products
- Working with Landed Costs
- Configuring Product Settings
- Stock Locations
- Stocktakes
- Product Batches
- Serial Numbers
- Different Price Types
- Purchase Orders
- Managing Stock
- Configurable Products
- Variable Products
- Time Billing
- Manufacturers and Suppliers
- FROM Location-based pricing
- TO Location-based pricing
- Requests For Quote
- Time Products
- Quantity-Based Price Breaks
- RFQ Web Templates
- PO Web Templates
- Location-based Price Breaks
- Customer-Specific Pricing
- Deleting Special Prices
Barcodes
CRM supports barcode scanning, and this feature should work with most barcode scanners. However, please note that:
- Your barcode scanner needs to be configured to send enter (CRLF) after each barcode scan.
- Some barcode scanners do this by default. Other barcode scanners need to be configured to do this.
If it is NOT sending the enter line, it will look like this:
123456789012345678901234567890
- You can edit or create a new Product and use the Barcode field on the form.
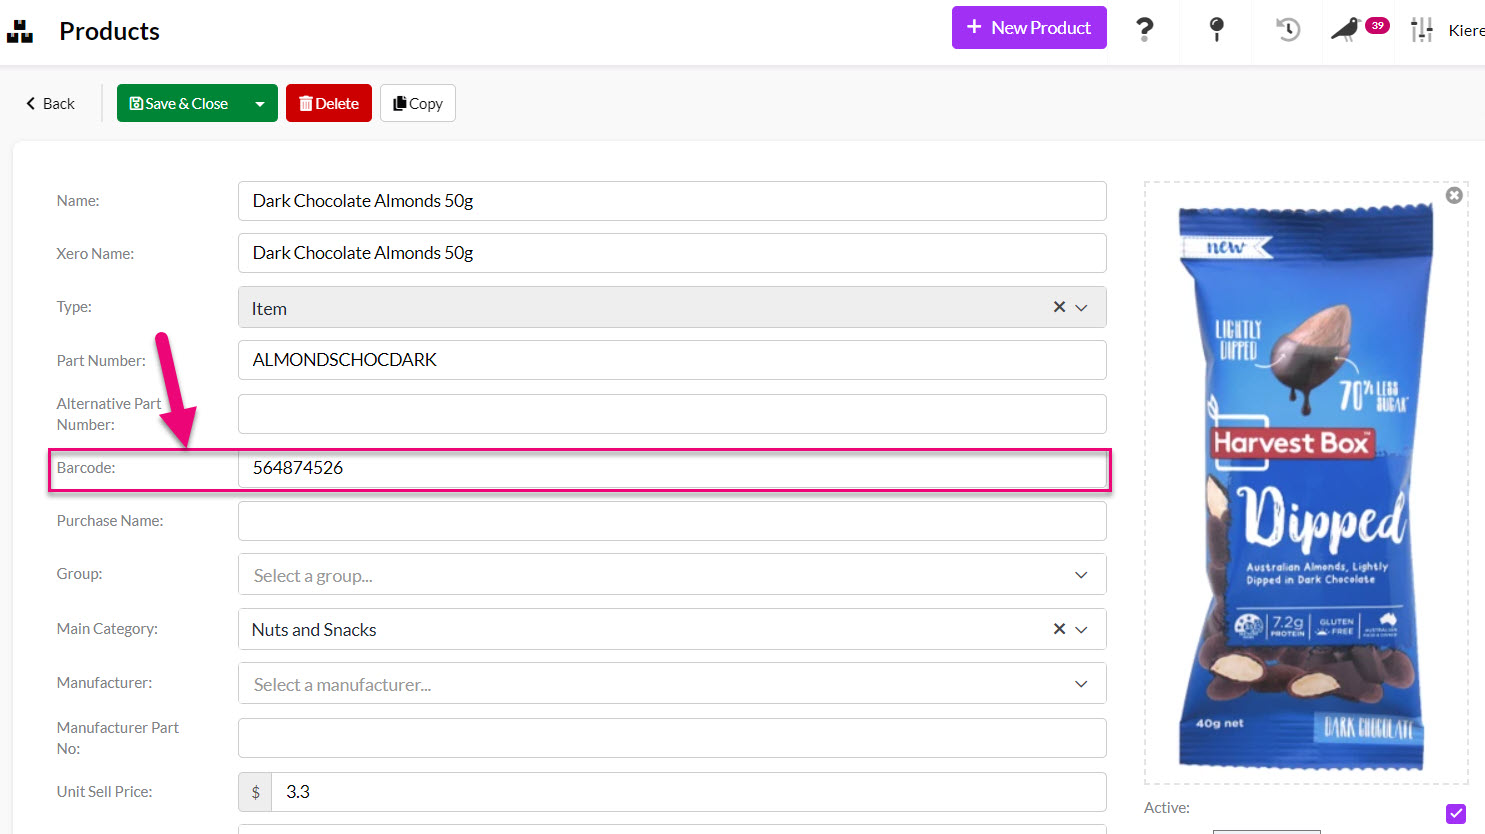
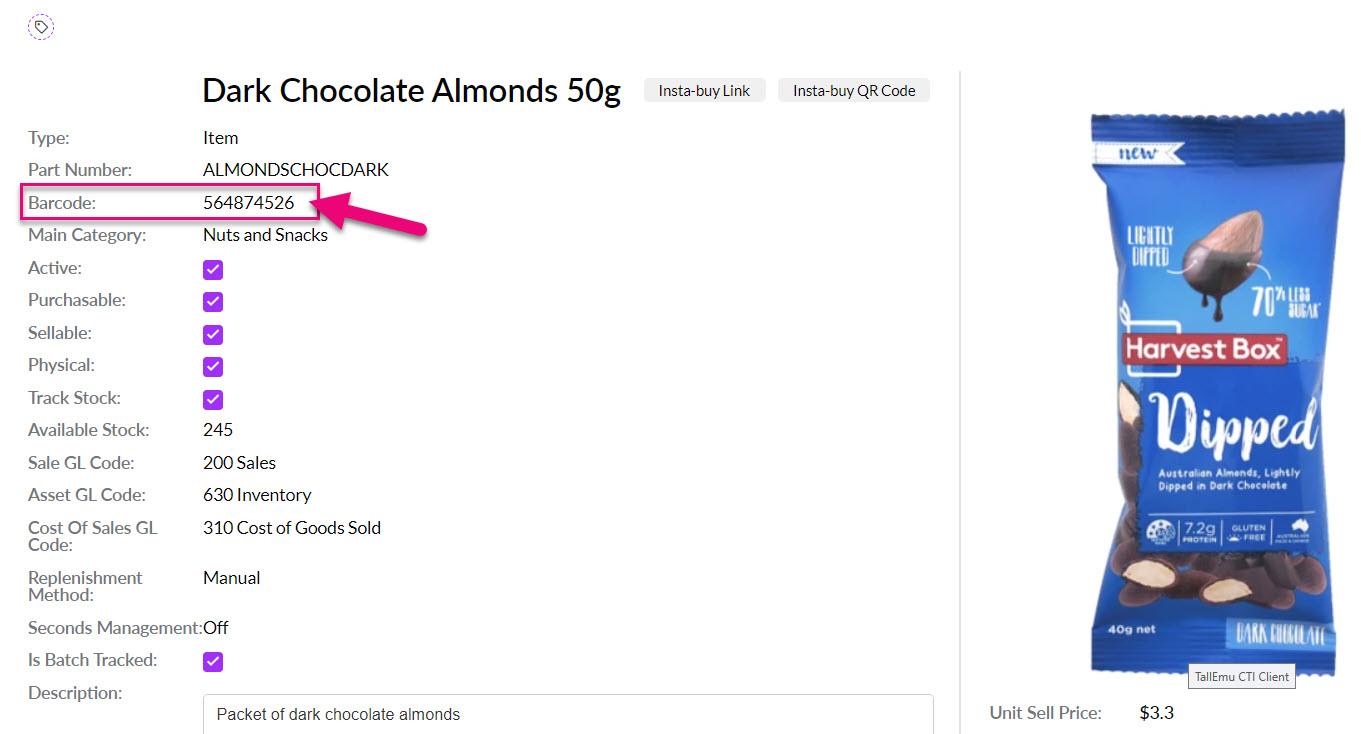
- Once the Product form has been saved, the Barcode field will be displayed.
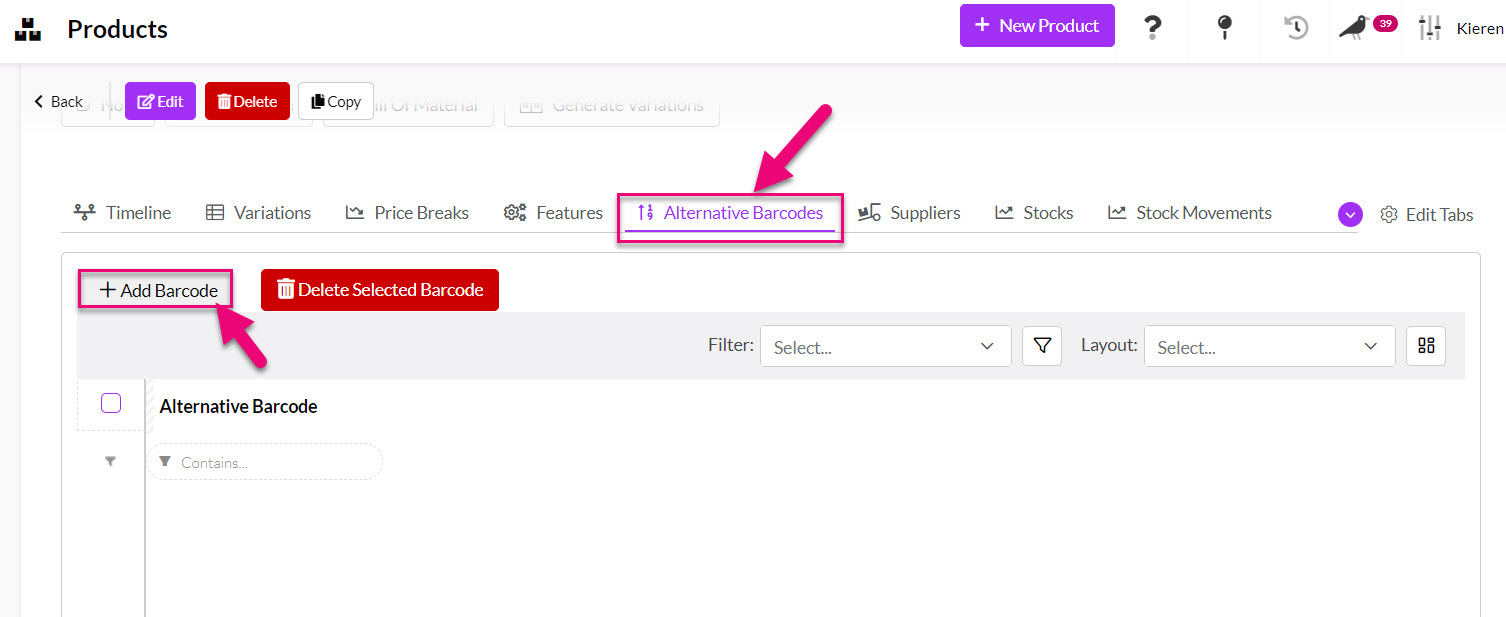
- You can also add additional barcodes via the Alternative Barcodes tab, which is visible on the saved Product form.
- Click on the Add Barcode button to add a new barcode to the system.
- Then use your scanner to add the barcode and press on Save or Save & New when you are done.

- You can also delete an existing barcode by selecting it on the Alternative Barcodes tab and then pressing the Delete Selected Barcode button.


Open any Outbound Shipment and click on the Scan Items button.

A pop-up will display and you can use your scanner to start scanning in barcodes for items on the shipment.

Items will be shown in green as they are scanned and the default quantity will be 1, which can be adjusted as required.
If an item that has already been scanned is scanned a 2nd time, it will be added as a new item at the top of the list with a quantity of 1.

If you scan an item that is not on the shipment, a warning message will be displayed.

If a scanned barcode cannot be recognised, a warning will display.

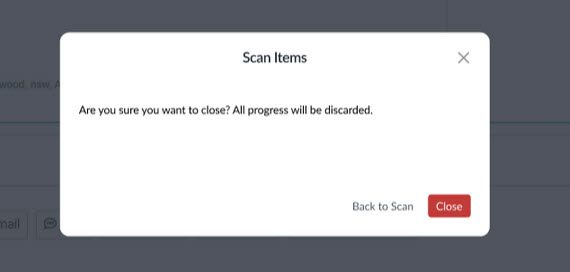
If you choose to close the scan window at any point, you will receive a warning message that your progress will be lost.
Once you are finished scanning, click on the Finish button at the bottom of the box.

if there are any items on the shipment that have not been scanned, they will be displayed at this point and you can either proceed or go back to the scanning screen.

Once you are finished, a message will show at the top of the shipment record to confirm that your scanned items have been added.
