- Companies
-
- Admin
- Account Options
- Pricing settings
- PDF and Email Template system preferences
- Locations
- Brand Customisation
- Product Categories
- Product Groups
- Enable Time Billing
- Customising Assets
- Custom Fields
- Delivery Resources
- Delivery Options
- Reporting Preferences
- Sales & purchase settings
- Calendar Settings
- Messaging settings
- Repeated Invoice frequency
- Company Settings
- Credit Settings
- Sales Regions
- Asset Settings
- Ticket settings
- Relationships
- Proposal-based Quotes
- Customising Training
- Prefix/Sequences settings (Record Numbering)
- Creating SMS Templates
- Invoice Settings
- Creating Email Templates
- Creating Letter Templates
- Using Letter Templates
- Using SMS Templates
- Using Email Templates
- Setting up Teams
- System security
- Users
- Activate a new User account
- Log into a User account
- Managing Connections
- Calculating Landed Costs
- Resources
- Payment Methods
- Payment Terms
- Couriers
- PDF Templates
- Service Reports
- Quote Form Templates
- System Quote Preferences
- Credit Control
- Setting up Teams
- Regional Settings
Custom Fields
For certain modules in CRM, you can create custom fields to store your data.
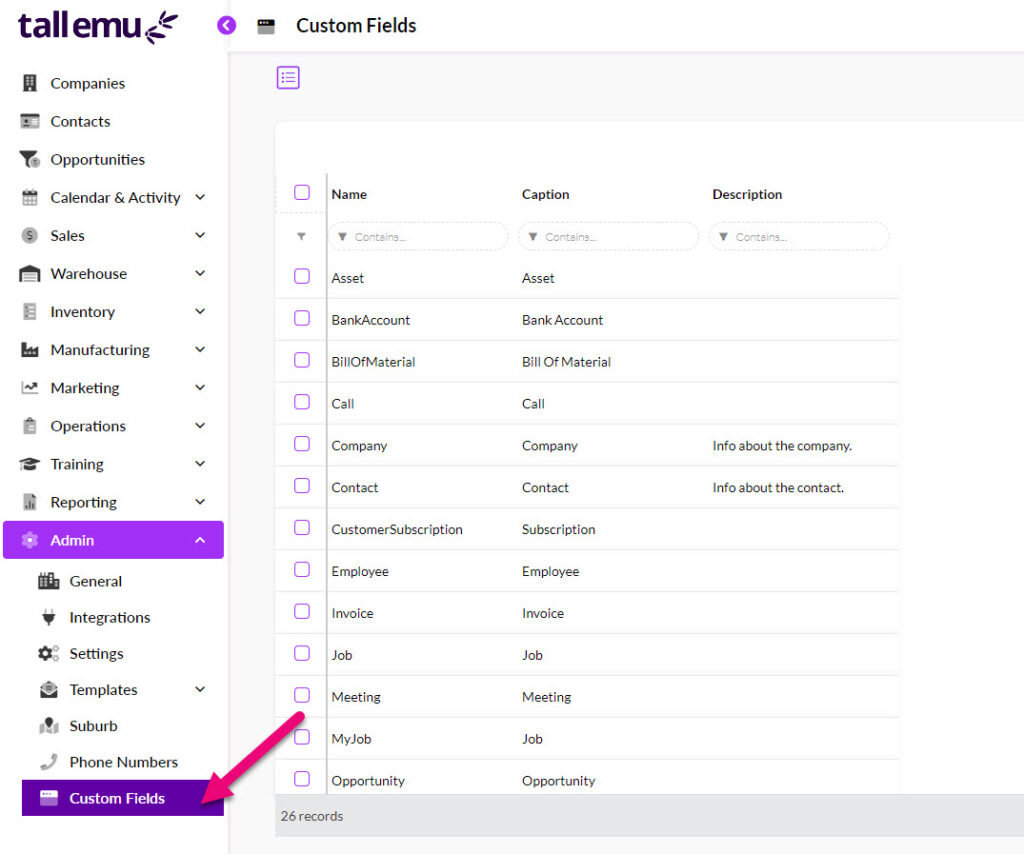
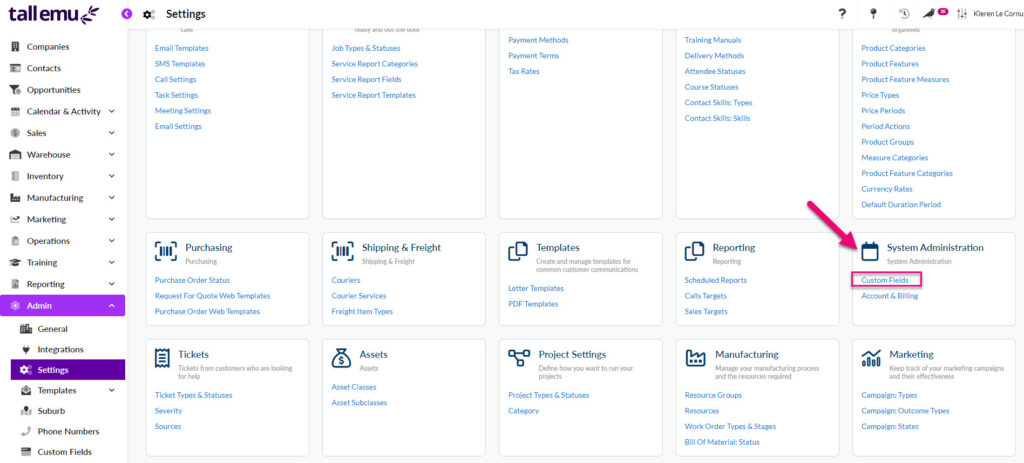
You can get to Custom Fields from Admin > Custom Fields or Admin > Settings > System Administration > Custom Fields.
Note that there are some modules that you can’t currently make custom fields in.
Create custom fields for a module
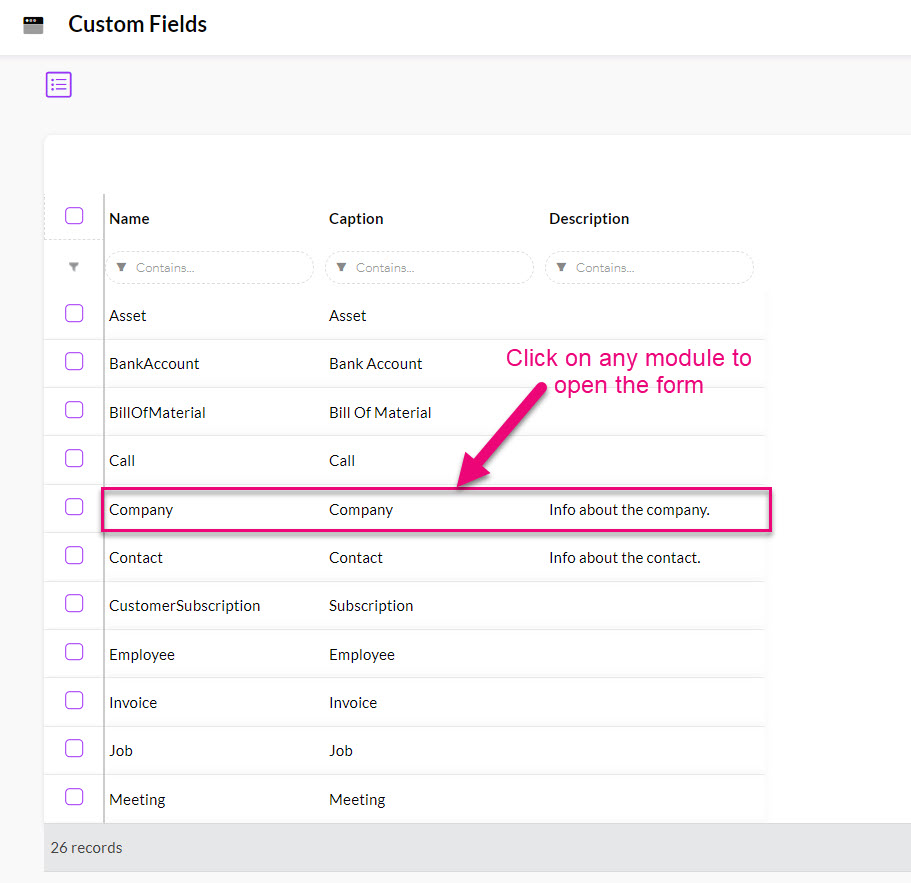
1. Select a module and open the form – just click on any module on the list to open it.
In this example, we’ll make a custom field on the Company form.
2. Select a field type from the bar on the left and drag the field onto the form on the right.
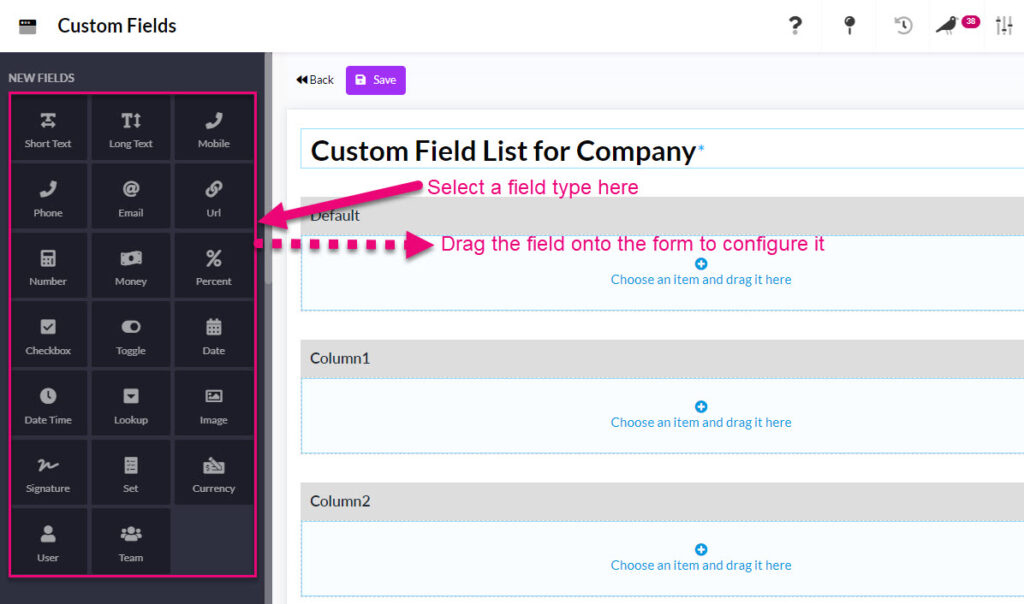
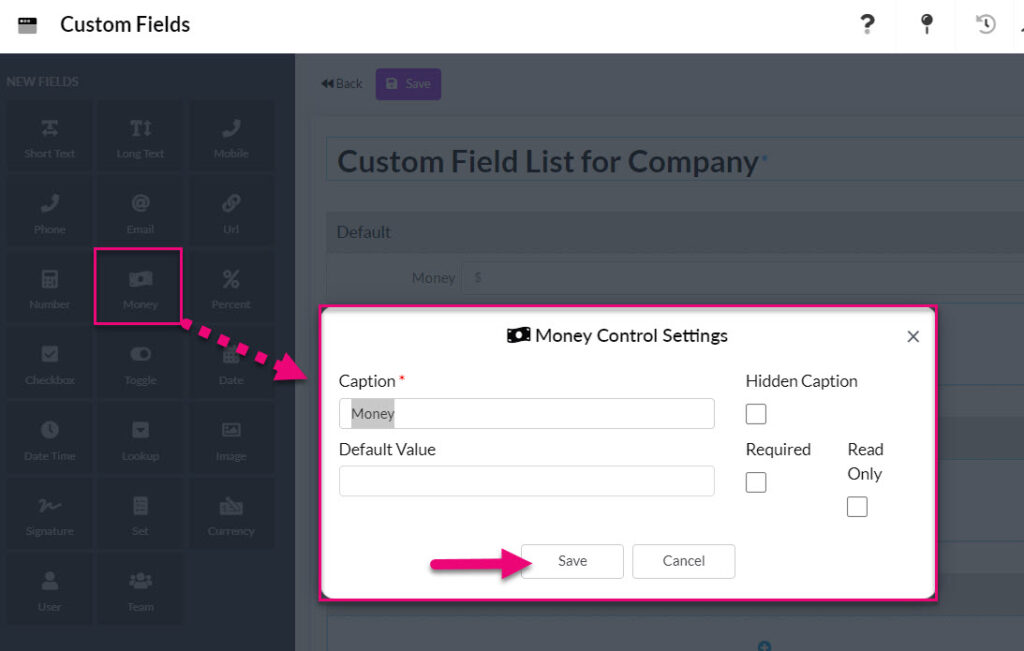
3. Once the field has been dragged onto the form, you will be able to configure the details and then click Save to add the field. The following example shows a Money field being added to the form.
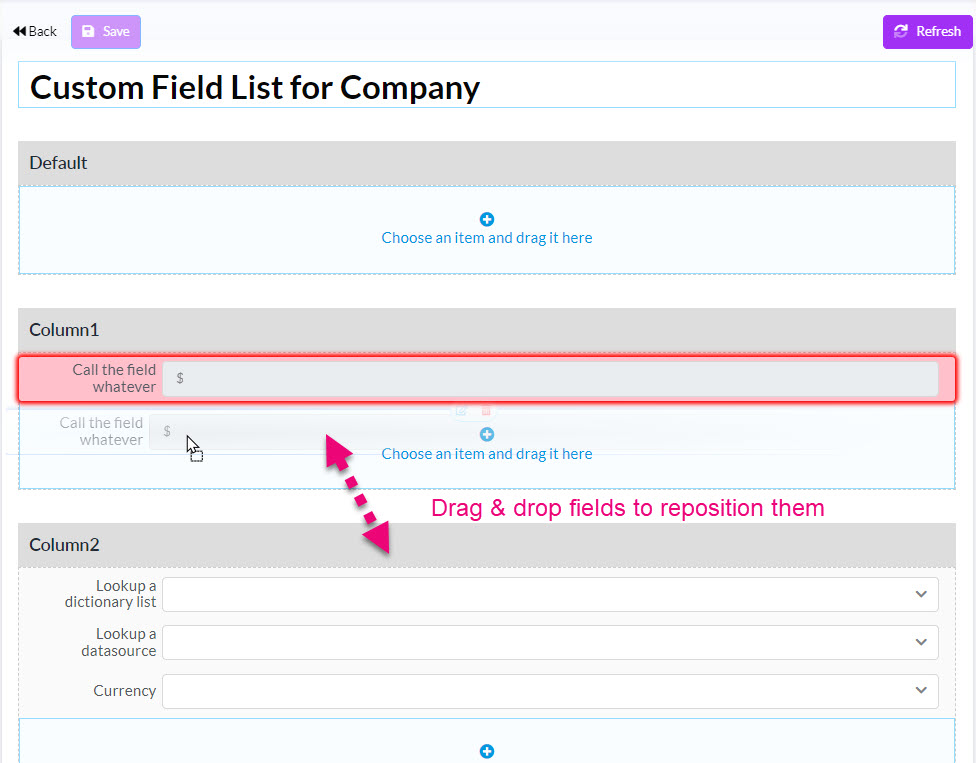
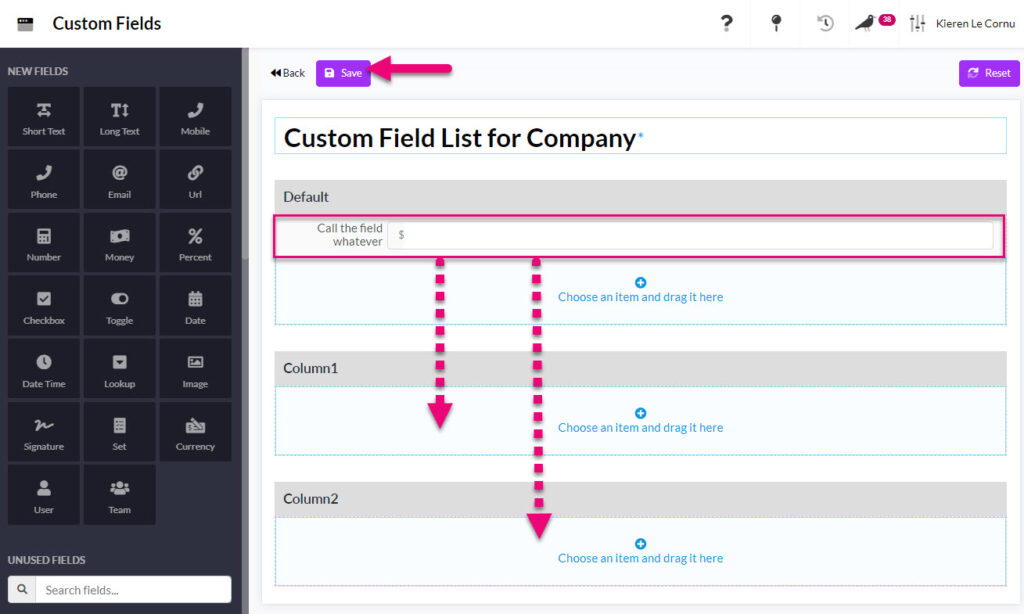
4. The field has now been added to the form. You can drag & drop the field into another area, which will change the position of the field on the form or leave it where it is.
Click on Save at the top of the screen when you are done.
5. I can then go and open a new Company record to see my new field on the form.

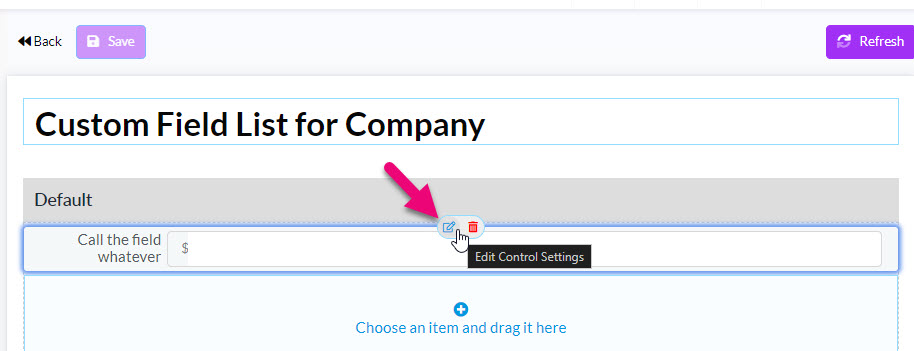
Edit an existing field
- Open any form and then hover over the field to reveal an edit button. You can also just double click on a field to edit it.
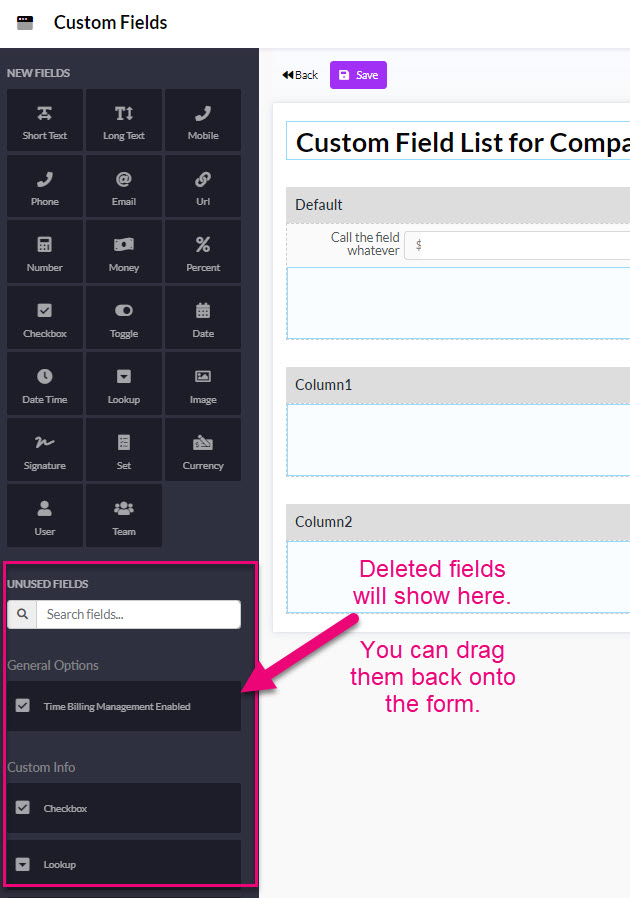
Delete a field
- Open any form and then hover over the field to reveal a delete button.
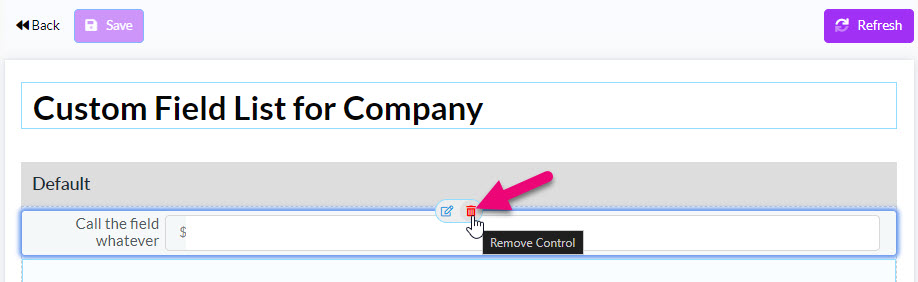
- Deleted fields will show in the Unused Fields section of the screen and you can drag & drop them back onto the form, if desired.
The following explains the basic properties of a new field and their purpose.
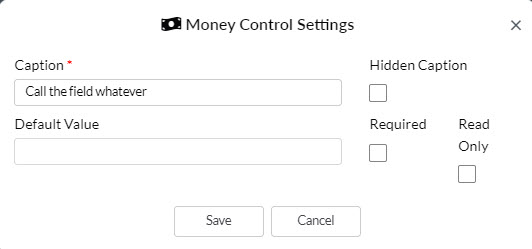
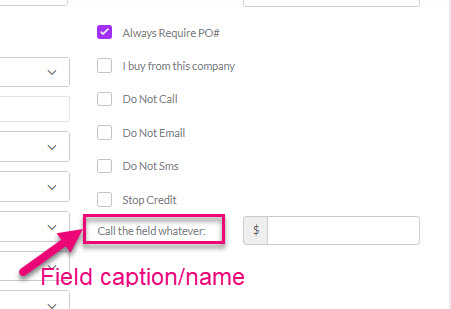
- Caption – this is the name of the field that will show on the form.
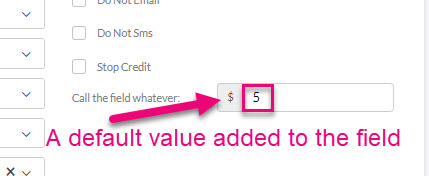
- Default Value – if I wanted the field to always be filled with a certain value, I would add it here. For example, if I wanted my money field to be filled with a value of $5, I would add this to the Default Value field.
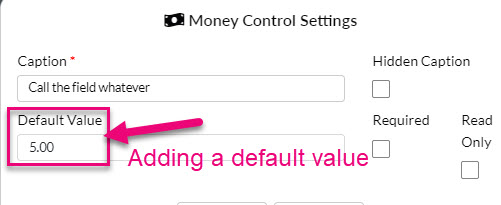
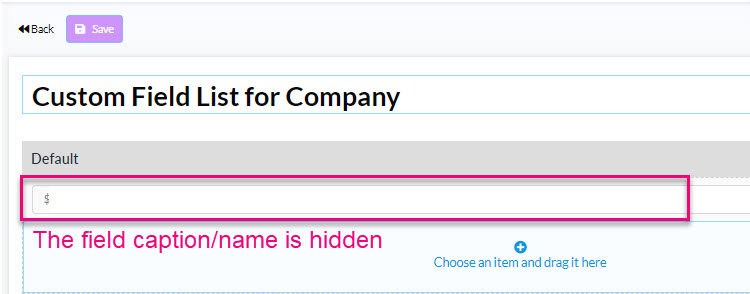
- Hidden Caption – this means that the field caption/name will not be shown when working with the field in Custom Fields.
- Required – this means that you will not be able to save the form unless the field is given a value – a warning will display in the field.

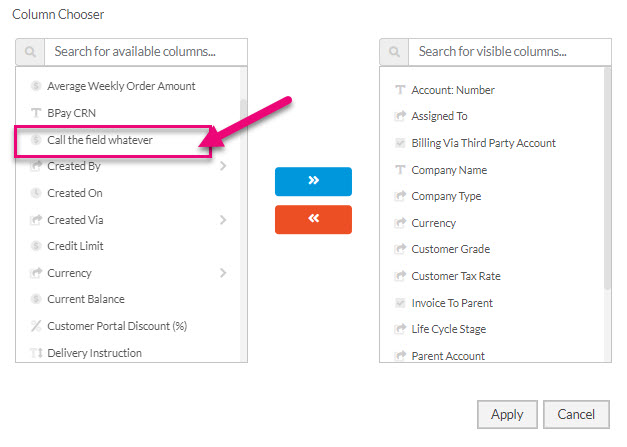
- Read Only – this means that the field will NOT appear on the form. You will, however, be able to add the column for the field to List View and use the field in Filters and Layouts.
Default values for Lookup fields
When you have a Lookup type field, you have a few more options to choose from.

- None – this means no default value will be applied to the field.
- Default – in the example above, it’s Default Currency, but depending on the Lookup Target, you may have different options here, such as the First or Last values on the list.


- Custom – this will allow you to select a value from the list.
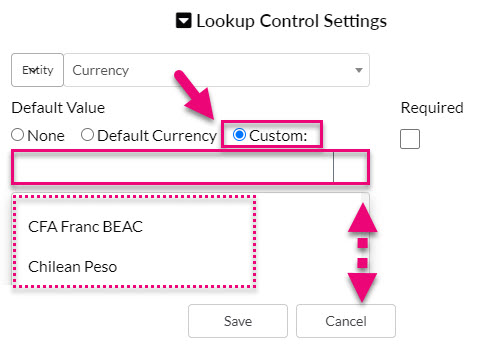
If I select the Chilean Peso as the Default Currency in this field, this is what the field will look like on a new record – CLP will be populated as the default value.

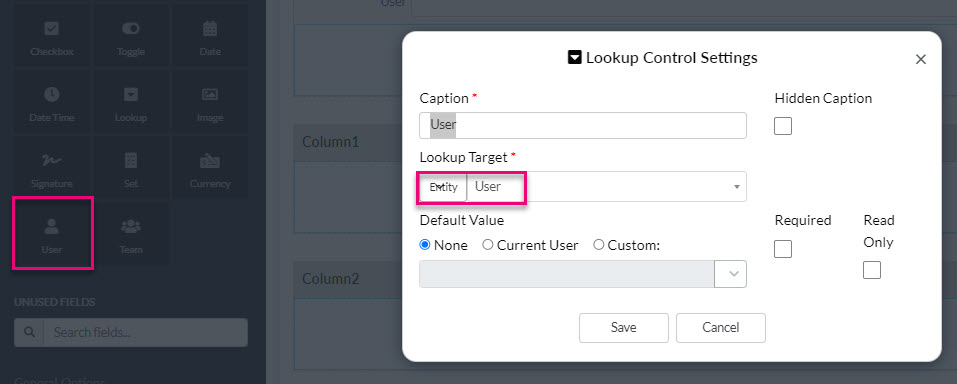
You can use a lookup field to cross-reference different types of records in CRM. There are 4 types of lookup field you can create:
- User – this field looks up your list of Users in CRM.
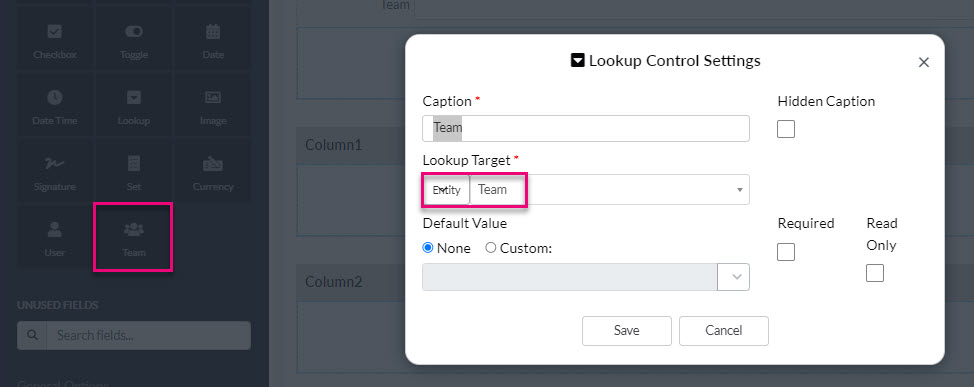
- Team – this field looks up your Teams in CRM.
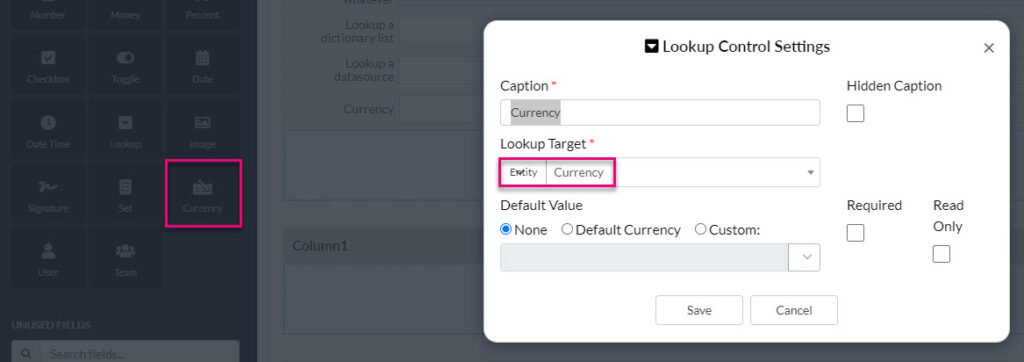
- Currency – this field looks at a list of currencies i.e. AUD, USD, NZD, EUR etc.
- Lookup – this field allows you to select which area of CRM should be the target for the lookup.
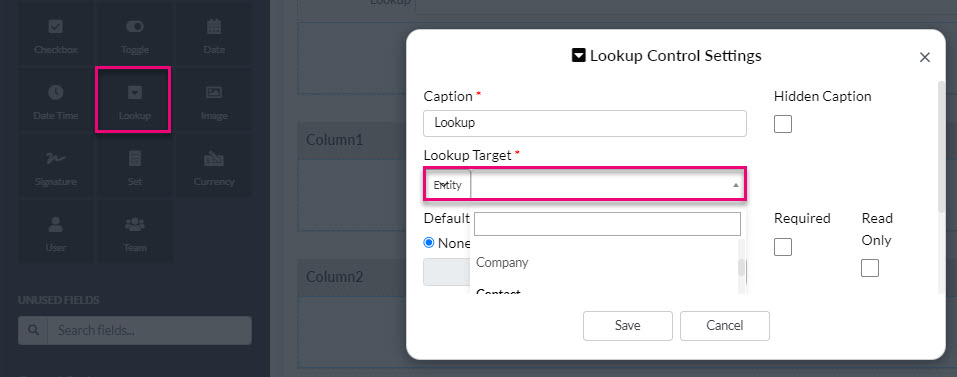
A lookup field will show on a form and allow you to select records from the lookup target.
Following is an example of a lookup field with a target of Product on a Company – I can use this field to select any item from my inventory and link it to that Company record.

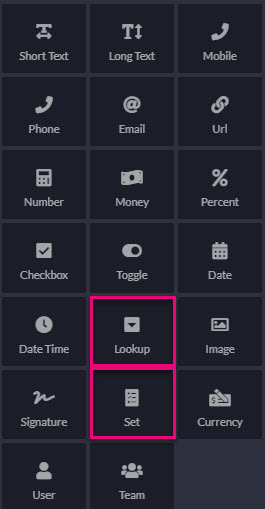
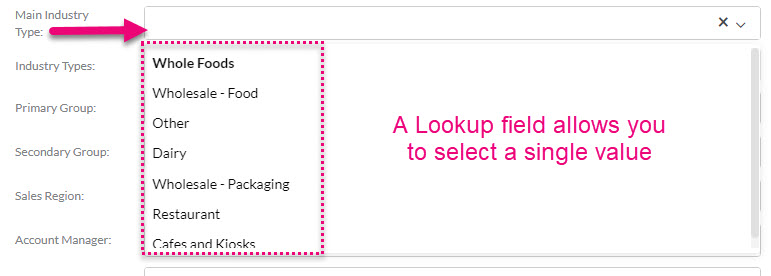
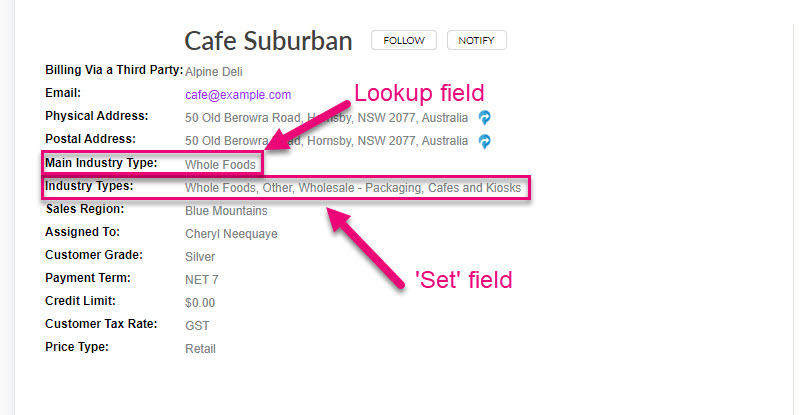
- If you want to be able to select a single value in the field, use a Lookup field.
- If you want to be able to select multiple values in the field, use a Set field.

When it comes to creating the values that show for selection in the field, you have 2 options:
- Lookup a list of existing system values (Datasource)
- Lookup a list of custom values you create (Dictionary)
Lookup a Datasource
In the lookup target field, select Datasource.
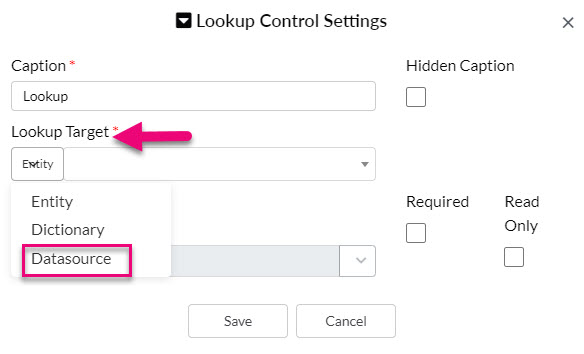
You can then scroll the list to see available options and make a selection.

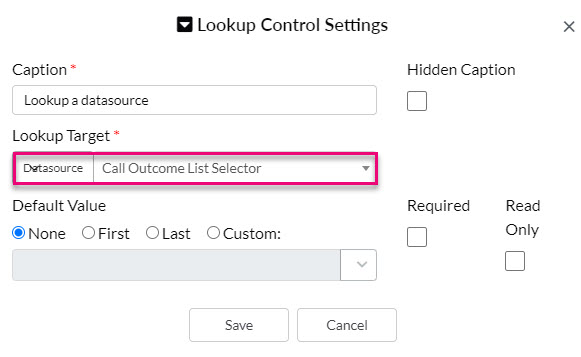
Once a selection is made, we can see that the lookup target is now set.
I have chosen Call Outcome List Selector, which will pull existing system values from Admin > Settings > Activities & Calendar > Call Settings > Outcome List.
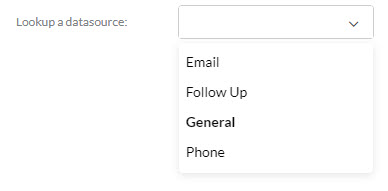
If I save the field and deploy it to the form, this is how it will display.
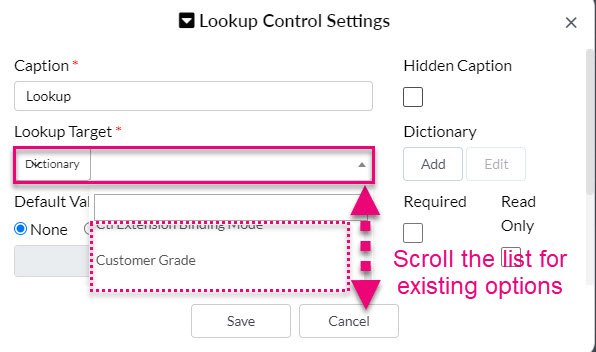
Lookup a Dictionary List
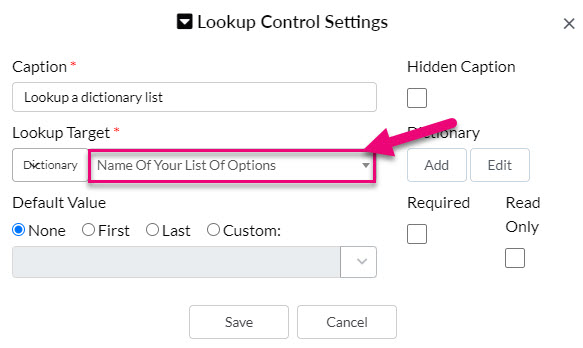
To create a new list of custom values, choose Dictionary as the lookup target.

Then click the Add button to create a new list.

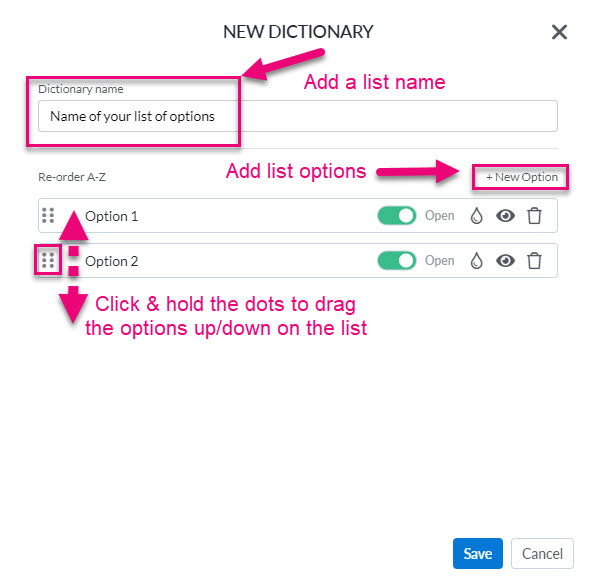
A new box will open where you can configure your list – start by giving it a name that will make it easy to find later on (in case you need to edit it).
Click +New Option to start adding options to the list and then drag & drop them into your preferred order. Click on Save when you are done.
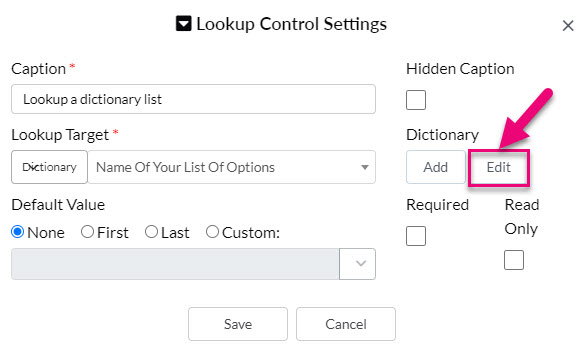
We can then see that the field is now set to lookup the custom list of options that’s just been created.
If you need to make changes to the list, just click on the Edit button.
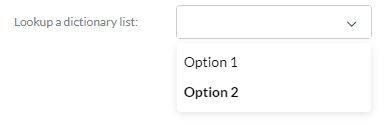
Following is what the end field looks like on a form.
If I want to re-use the same Dictionary List in future for another field, I can search for it and then select it.
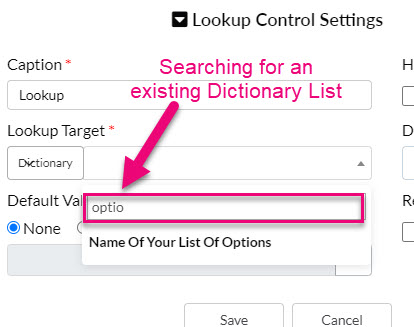
You can also opt to use one of the existing dictionary lists available – just scroll through the list to view the options.
Where your custom field will show on the finished form depends on the location you choose when you drag a field onto the edit form i.e. Default, Column 1 or Column 2.
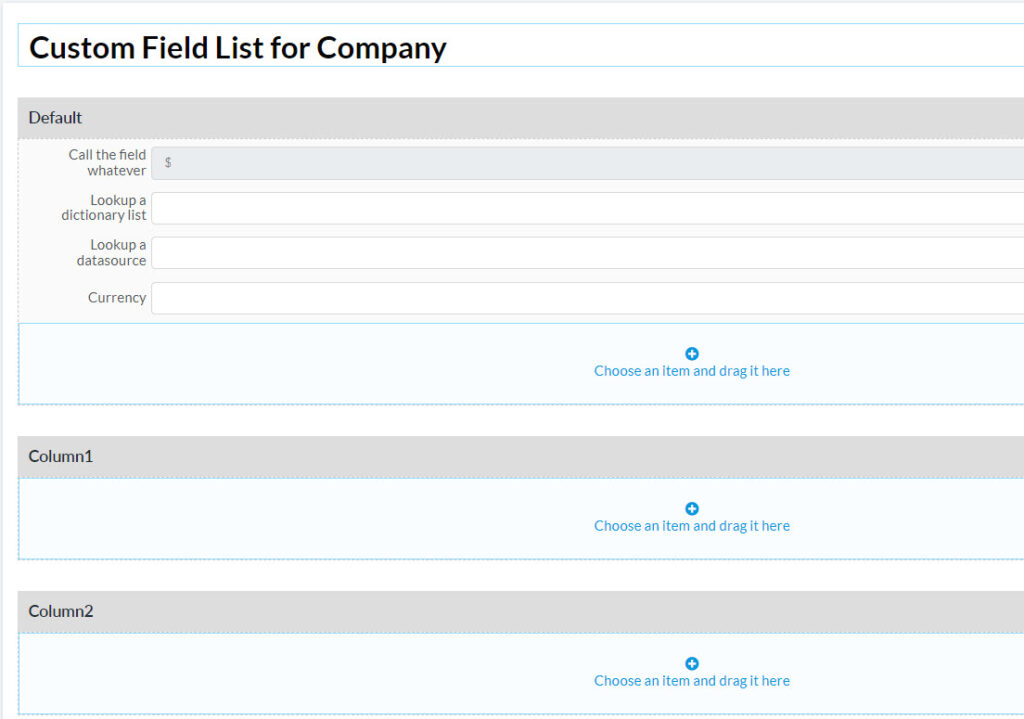
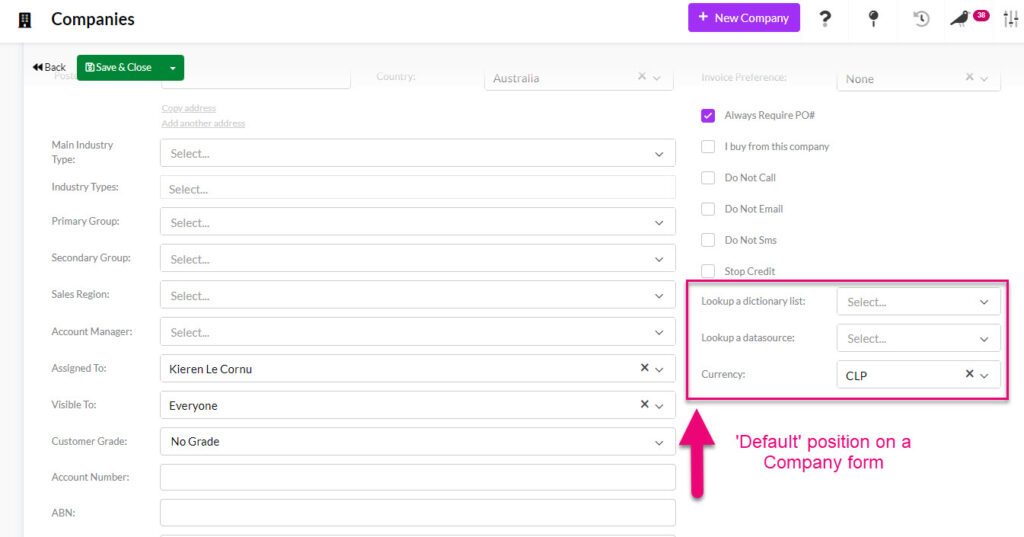
Different modules in CRM have different layouts with varying numbers of columns. In the following example, the fields I have made are all in the ‘Default’ position on a Company form – the bottom of the right-hand column.
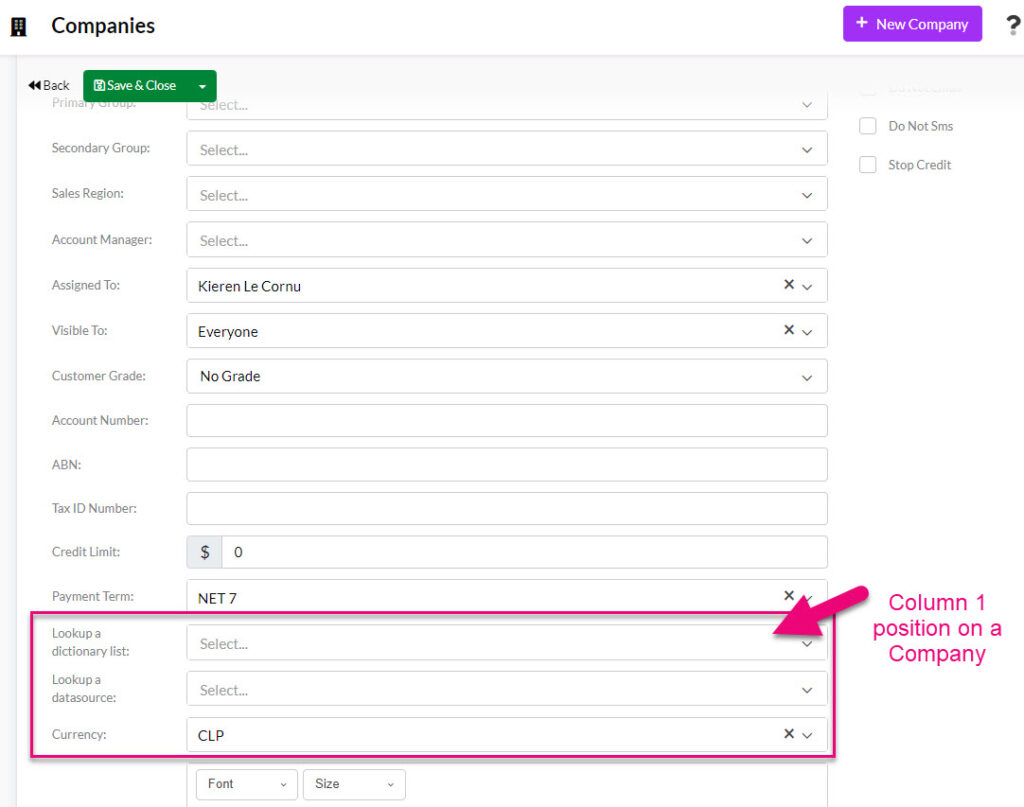
If I then move all these fields to ‘Column 1’, the location changes to the bottom of the central column on the form.
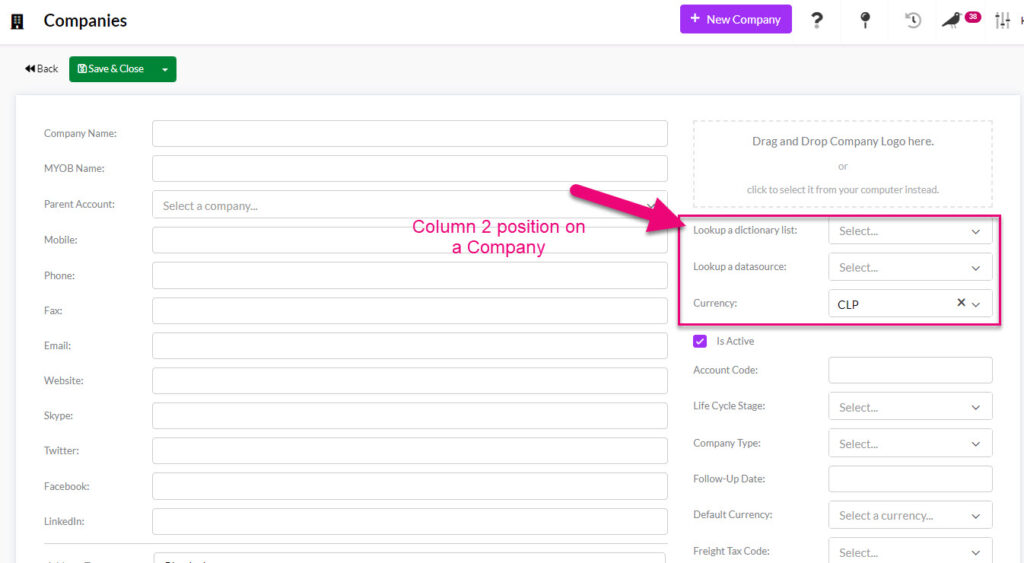
If I move the fields into the Column 2 position, they will show at the top of the right-hand column on the Company form.
You can move fields between areas or change the order that fields appear in by dragging & dropping them.