Outbound Shipments
Outbound Shipments are used to send goods to your customers. They live in Warehouse > Outbound Shipments.
You can learn more about the following related topics by clicking on the links:
Create a Shipment
To create an Outbound Shipment:
- Open a Sales Order.
- Go to the activity bar and click on Shipment.
- Select either Generate Shipment or Mark As Shipped.

Both choices will create a new shipment record that will appear in Warehouse > Outbound Shipments.
- If you choose Generate Shipment, the shipment record will have To Be Picked automatically applied as the shipment record Status.
- If you choose Mark As Shipped, the shipment record will have Shipped automatically applied as the shipment record Status.
- If the Courier field on the order is set to Customer Pickup, the Mark As Shipped button will appear instead as Mark as Picked Up and the shipment record will have Shipped automatically applied as the shipment record Status.
Pro Tip: you can have CRM automatically create Invoices for orders as you ship them.
Multiple shipments of a Sales Order
You can send items from a Sales Order in as many shipments as necessary.
When you select Generate Shipment, the default action is to pull all available items that are in stock and are not yet sent, into a new shipment record. You can then edit the shipment record.
If you don’t want everything on the order to be sent at once, just delete any items you don’t want to send.
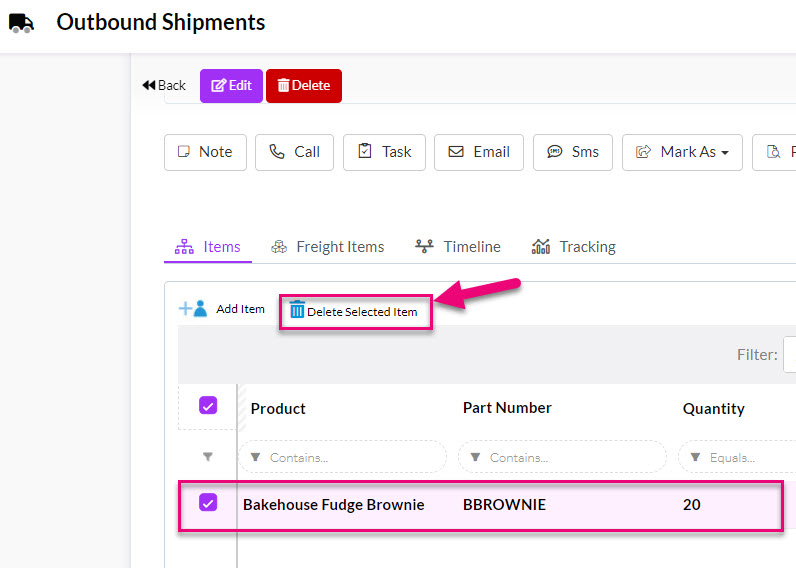
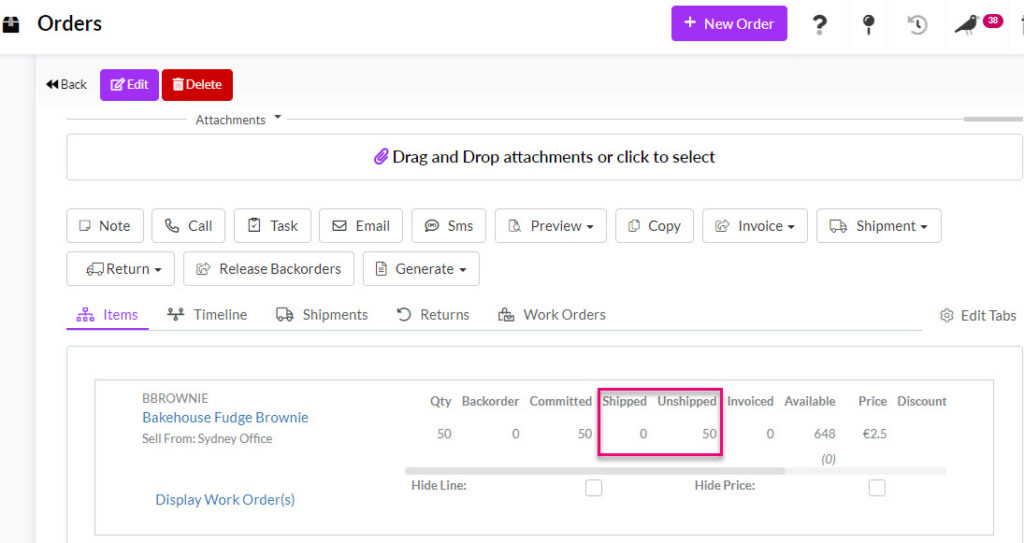
You can also amend the quantity sent by clicking on an item and amending the Quantity field, then click Save.

If you remove items from the shipment record, this will be reflected in the Sales Order, where they will show as unsent.
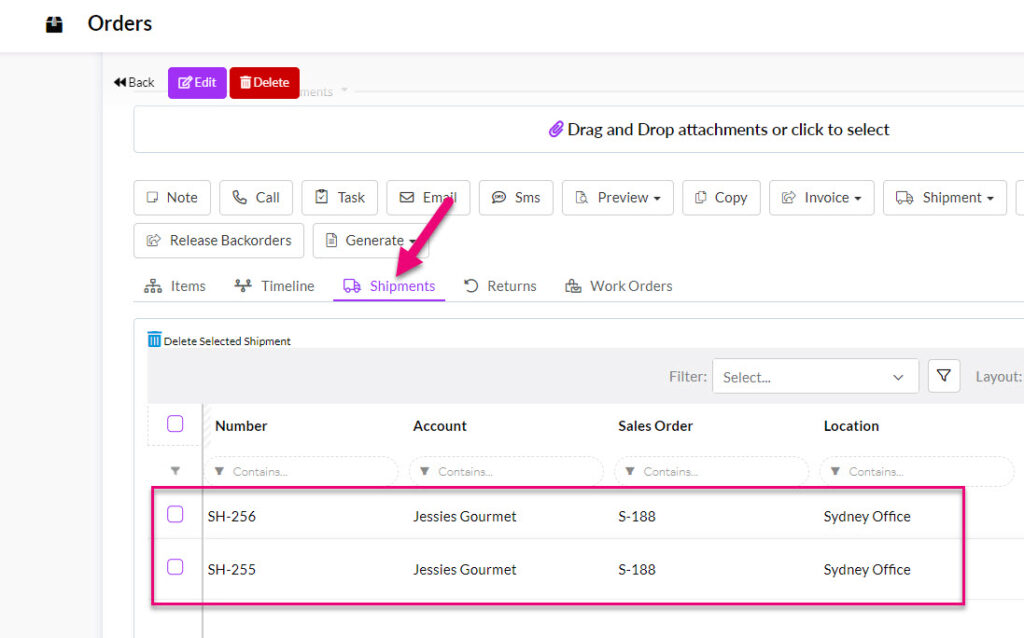
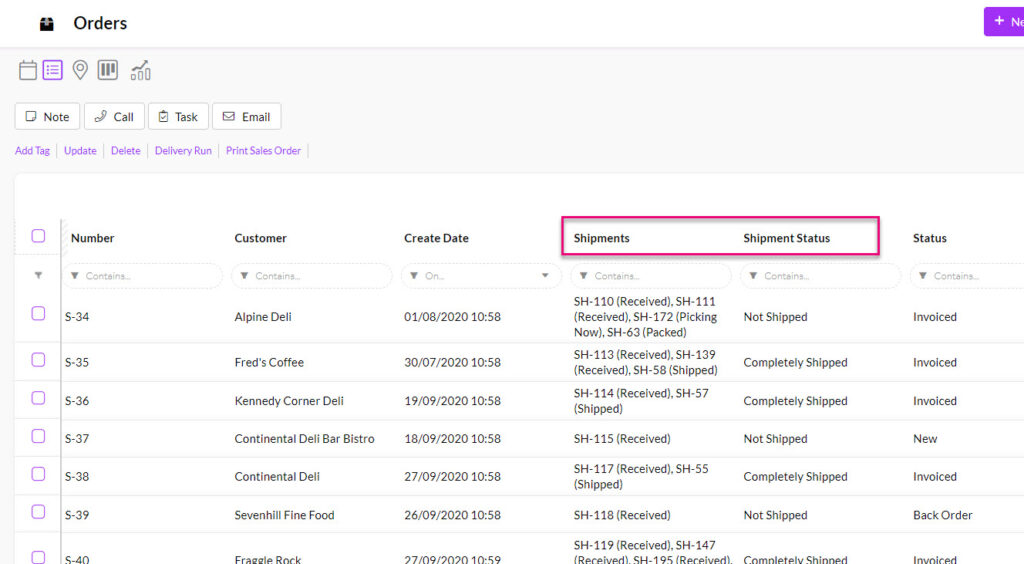
From the Shipments tab on a Sales Order you will be able to see all related Outbound Shipments.
The Shipment Status field on the Sales Order will also be updated automatically to reflect the overall status of the goods.

Shipment Status on a Sales Order
Picking Lists
There are a few ways that you can generate picking lists for your orders.
1. From an Outbound Shipment (record)
- Open an Outbound Shipment record.
- Go to the activity bar and click on Preview.
- Select Picking List from the options.
- The PDF picking list will open in a new tab.

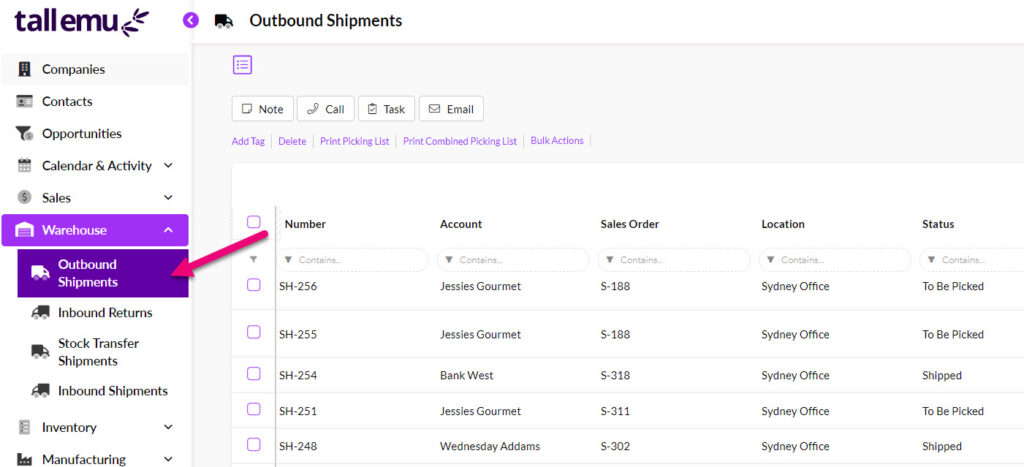
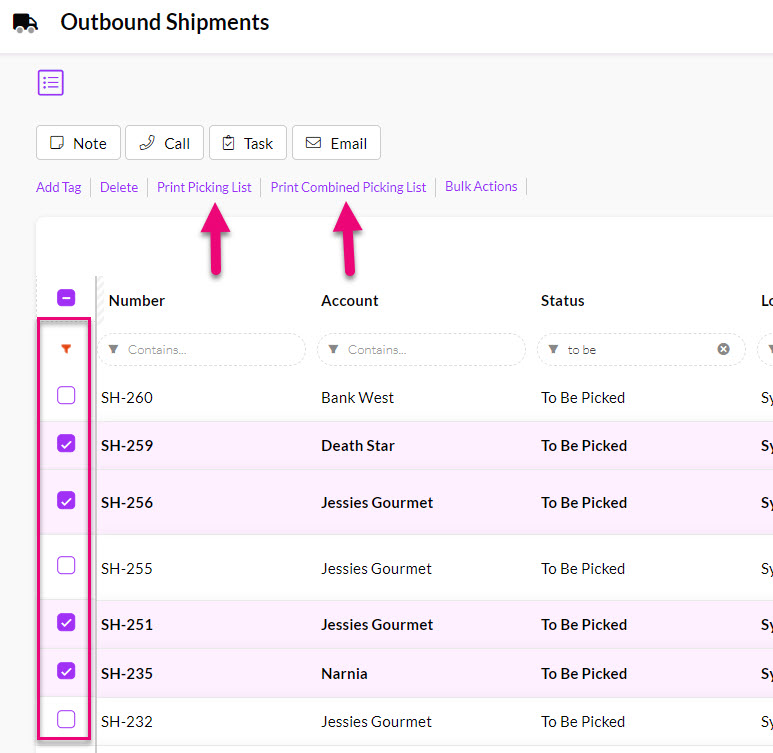
2. From Outbound Shipments (List View)
From Warehouse > Outbound Shipments you can generate Pick Lists by selecting the orders you want to pick from the list.
All new shipments generated from a Sales Order will have To Be Picked automatically applied at the Status, so you can isolate the orders you want to generate a picking list for by using a Filter in the Status column.

Search Outbound Shipment by Status
Just select the applicable shipments and click on either of the following options below the main activity toolbar:
1. Print Picking List – this will generate the picking list for each shipment selected and open it in a new tab as a single PDF document. This gives me a single picking list per shipment.
2. Print Combined Picking List – this will generate a single picking list for all shipments selected and open it in a new tab as a single PDF document. This is useful if you have a lot of orders that you are going to pick at once i.e. you can see the required quantities of all items, across all orders, at once in a single list.
Picking list generation options
3. From a Sales Order
- Open a Sales Order.
- Go to the activity bar and click on Preview.
- Select Picking List from the options.
- The PDF picking list will open in a new tab.

Delivery Dockets
There are a few ways that you can generate delivery dockets for your orders.
1. From an Outbound Shipment (record)
- Open an Outbound Shipment record.
- Go to the activity bar and click on Preview.
- Select Delivery Docket from the options.
- The PDF docket will open in a new tab.

2. From a Sales Order
- Open a Sales Order.
- Go to the activity bar and click on Preview.
- Select Delivery Docket from the options.
- The PDF docket will open in a new tab.

Pro Tip: you can have CRM automatically email Delivery Dockets to your customers when you mark a shipment as shipped.
Pick, pack & ship orders
There are a few ways you mark off shipments in CRM.
If you want to pick items on your order with a barcode scanner, please see this guide.

1. From an Outbound Shipment (record)
- Open an Outbound Shipment record.
- Go to the activity bar and click on Mark As.
- Select applicable option from the list: Picked, Packed, Shipped.
- The PDF docket will open in a new tab.

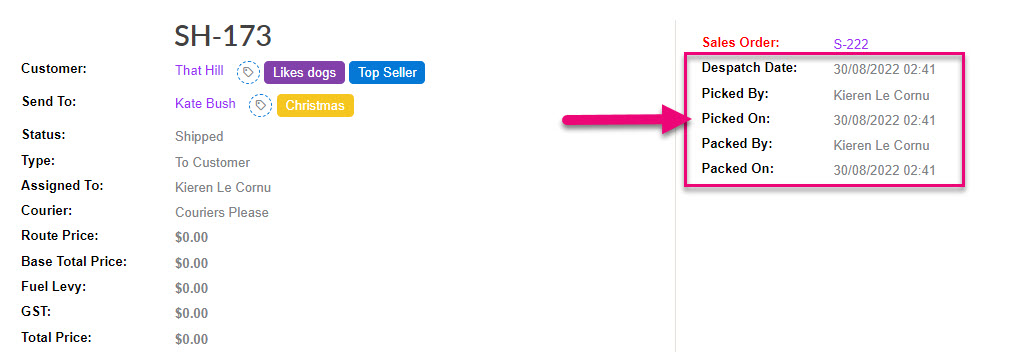
Each time a selection is made here, the top right-hand corner of the shipment record will be updated with time and date information for each action.
2. From Outbound Shipments (List View)
From Warehouse > Outbound Shipments you can bulk update the status of multiple shipment records.
Just select the desired records and then hover over the Bulk Actions button on the toolbar, which will reveal options to perform the following actions in bulk for the selected records:
- Mark As Picked
- Mark As Packed
- Mark As Shipped
- Undo Marked

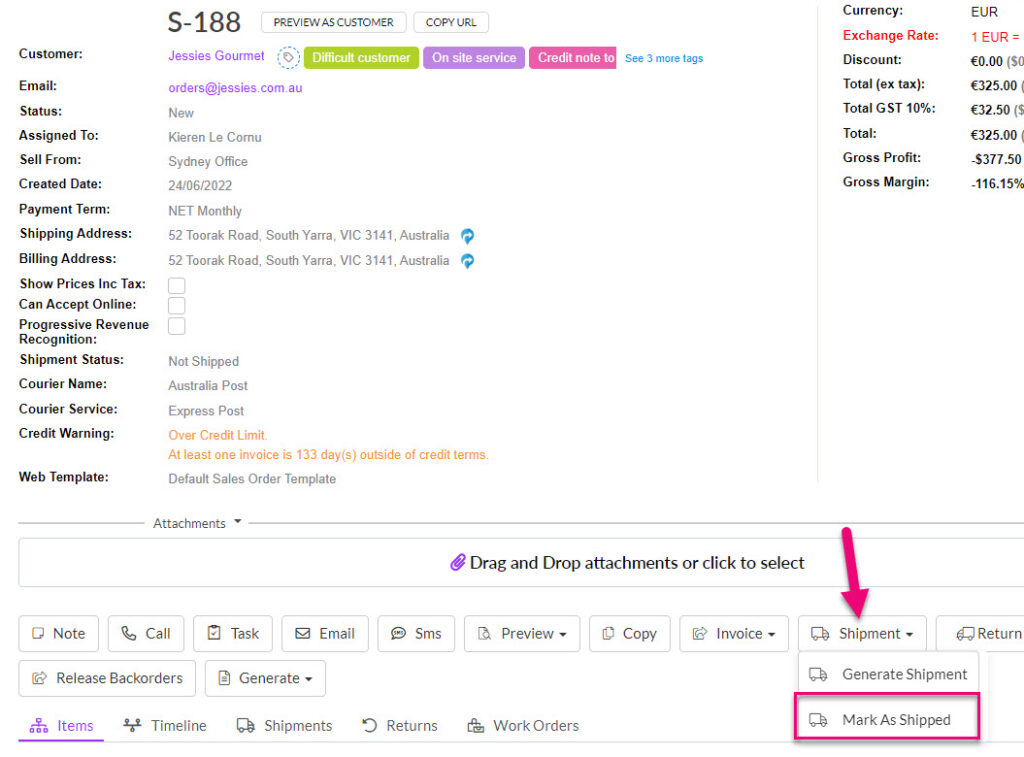
3. From a Sales Order
Customer Pickup
If the Courier field on the order is set to Customer Pickup, you can go to the activity toolbar and click on Shipment > Mark as Picked Up.
- This creates an Outbound Shipment and marks the Status as Shipped.

Mark as Shipped
If the Courier field does NOT equal Customer Pickup, you can go to the activity toolbar and click on Shipment > Mark as Shipped.
- This creates an Outbound Shipment and marks the Status as Shipped.
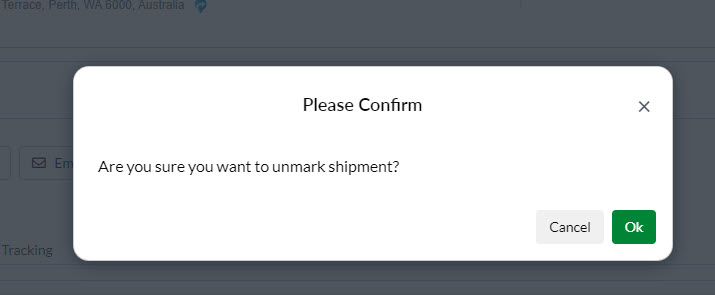
Undo the Status of a Shipment
If required, you can undo the Status of a shipment using the option underneath the Mark As button.
- For example, the record below is showing as Shipped, so if I click the Undo Mark button, it will be regressed back to a Status of Packed.
- From Shipped, if I clicked on Undo Mark again, the Status would be regressed back to Picked.

- You will then be prompted to confirm the action.
Tracking shipments
There are numerous ways you can keep track of the status of customer shipments.
From Outbound Shipments
- At any time, you will be able to see the Status of the shipment, either from a record, or from List View.
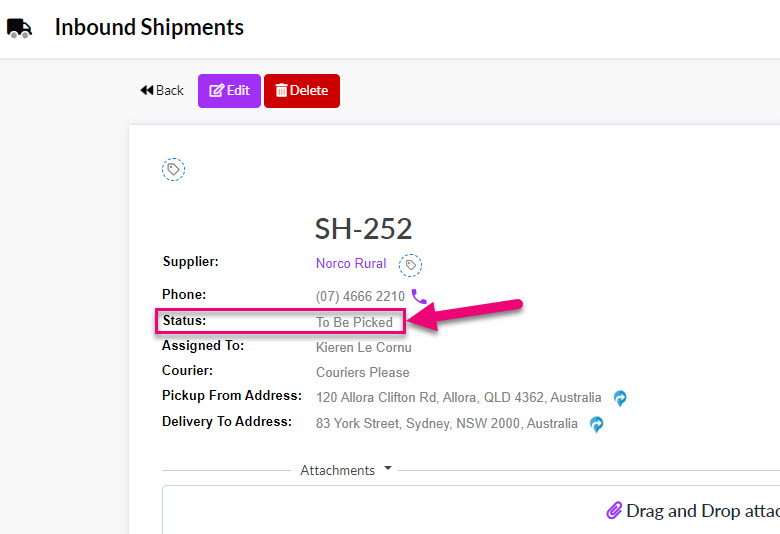
Status field on an Outbound Shipment
Status column in Outbound Shipments List View
- From the Tracking tab you will be able to see the progression of the shipment.
Tracking tab on an Outbound Shipment
- You will also be able to see some of this information in the top right-hand corner of the record.
From Sales Orders
- The Shipment Status field will show the overall status of the goods to be sent.
- The Shipments tab will show all associated Outbound Shipments.
- You will also be able to see shipment information per item on the order.
- From Sales Orders in List View you’ll be able to add the columns for both Shipments and Shipment Status.
Pro Tip: use Advanced Filters and Layouts to quickly segment and sort your shipments for easy workflow and tracking.