Bills of Materials (BoM)
Our system allows you to create a singular Bill Of Materials (BoMs) to take raw materials and produce an output product that is ready for sale.
The manufacturing process is in CRM ultimately determined by your preferences. You can have:
- Many input products and 1 output product e.g. baking a cake or building a car.
- 1 input product and many output products e.g. a cow ‘manufactured’ into multiple cuts of meat.
- You can use batch-tracked and/or serialised products in production.
- Resources allocated to your production process.
- Multiple BoMs for each of your Products.
For the sake of this example, we’re going to be setting up a BOM to make chocolate brownies.
Also see:
- Work Orders
- Production Steps
- Production
- Time Tracker for Production
- Resources for Manufacturing
- Manufacturing settings
- Creating Manufactured Products
There are several ways you can create a new BoM in CRM.
From Bills Of Material
In Manufacturing > Bills of Material click the New BOM button in the top right.

Copy an existing BoM
You can also create a new BoM by copying an existing one – either from List View on the main screen or from a record toolbar.
You can make multiple copies if you want – just input the required number when prompted.
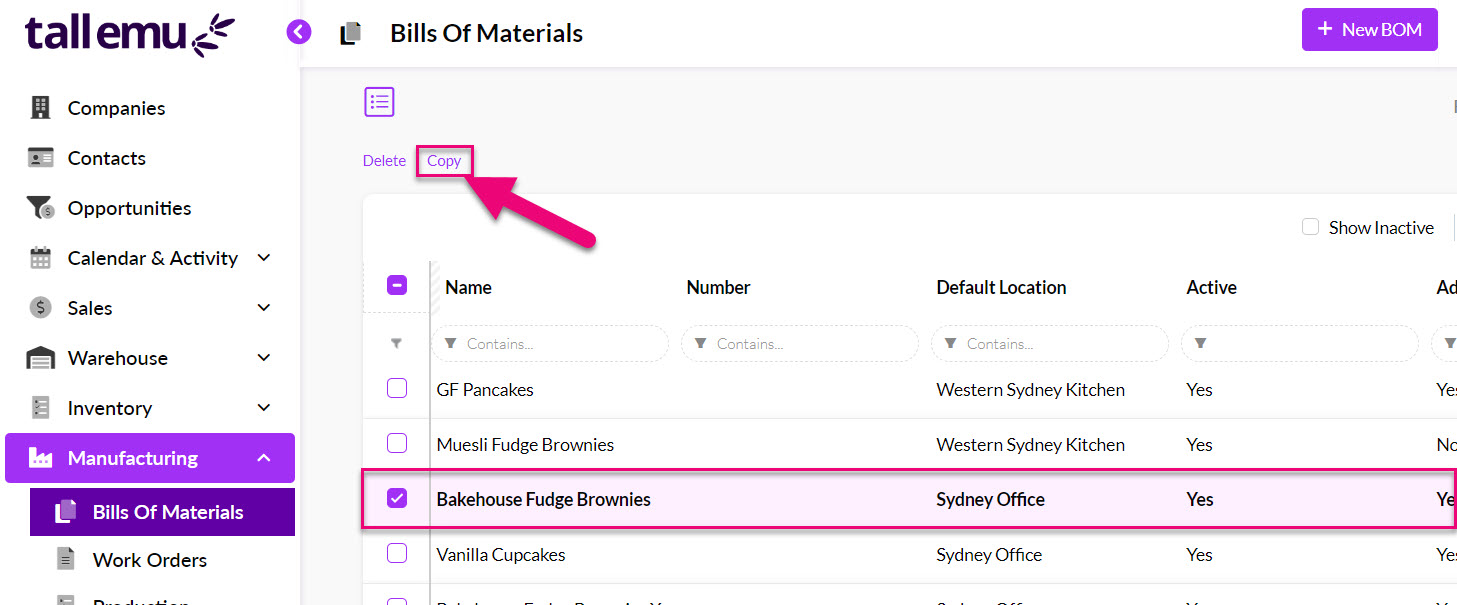
Copy a BoM from List View
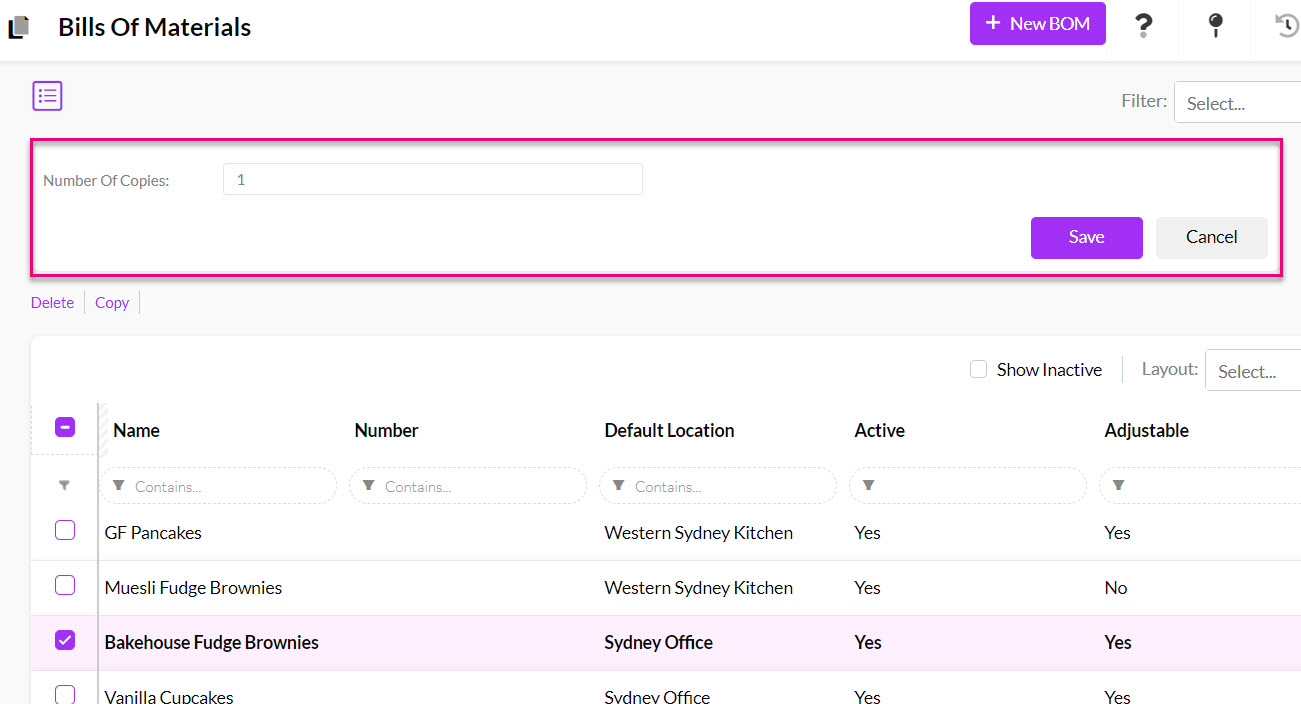
Select the number of BoM copies to create
You can also make a copy directly from a BoM record.
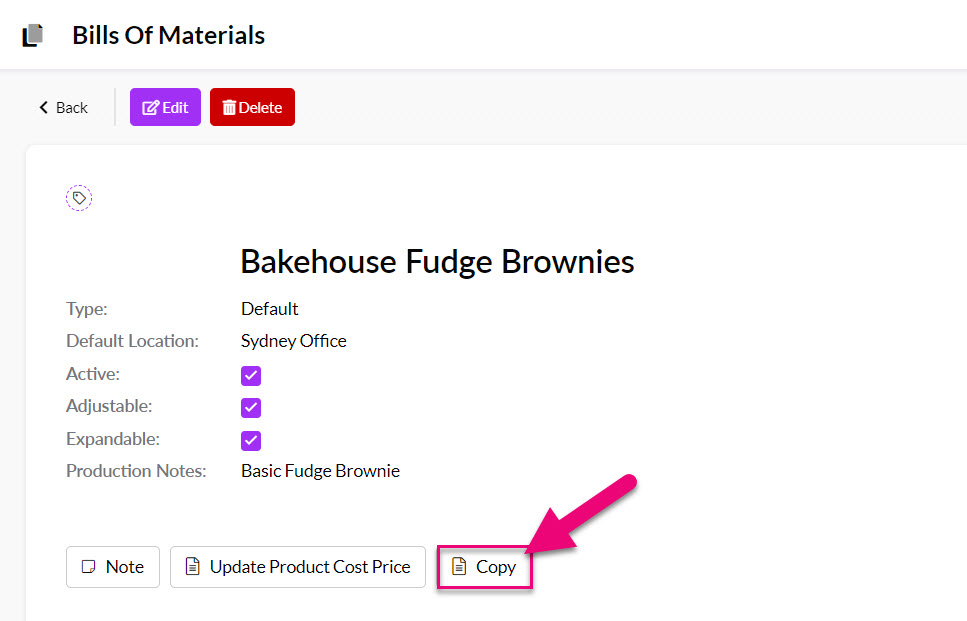
Make copies of a BoM from the record

Select the number of BoM copies to create
From a Product record
Provided that the Product is marked as being manufactured, you can use the Bill Of Material button on the toolbar.

Bulk import
See the next step on how to import BoMs in bulk.
You can download an import template to populate with your BoM data and then import this into CRM to add BoMs in bulk.
Downloading the import template
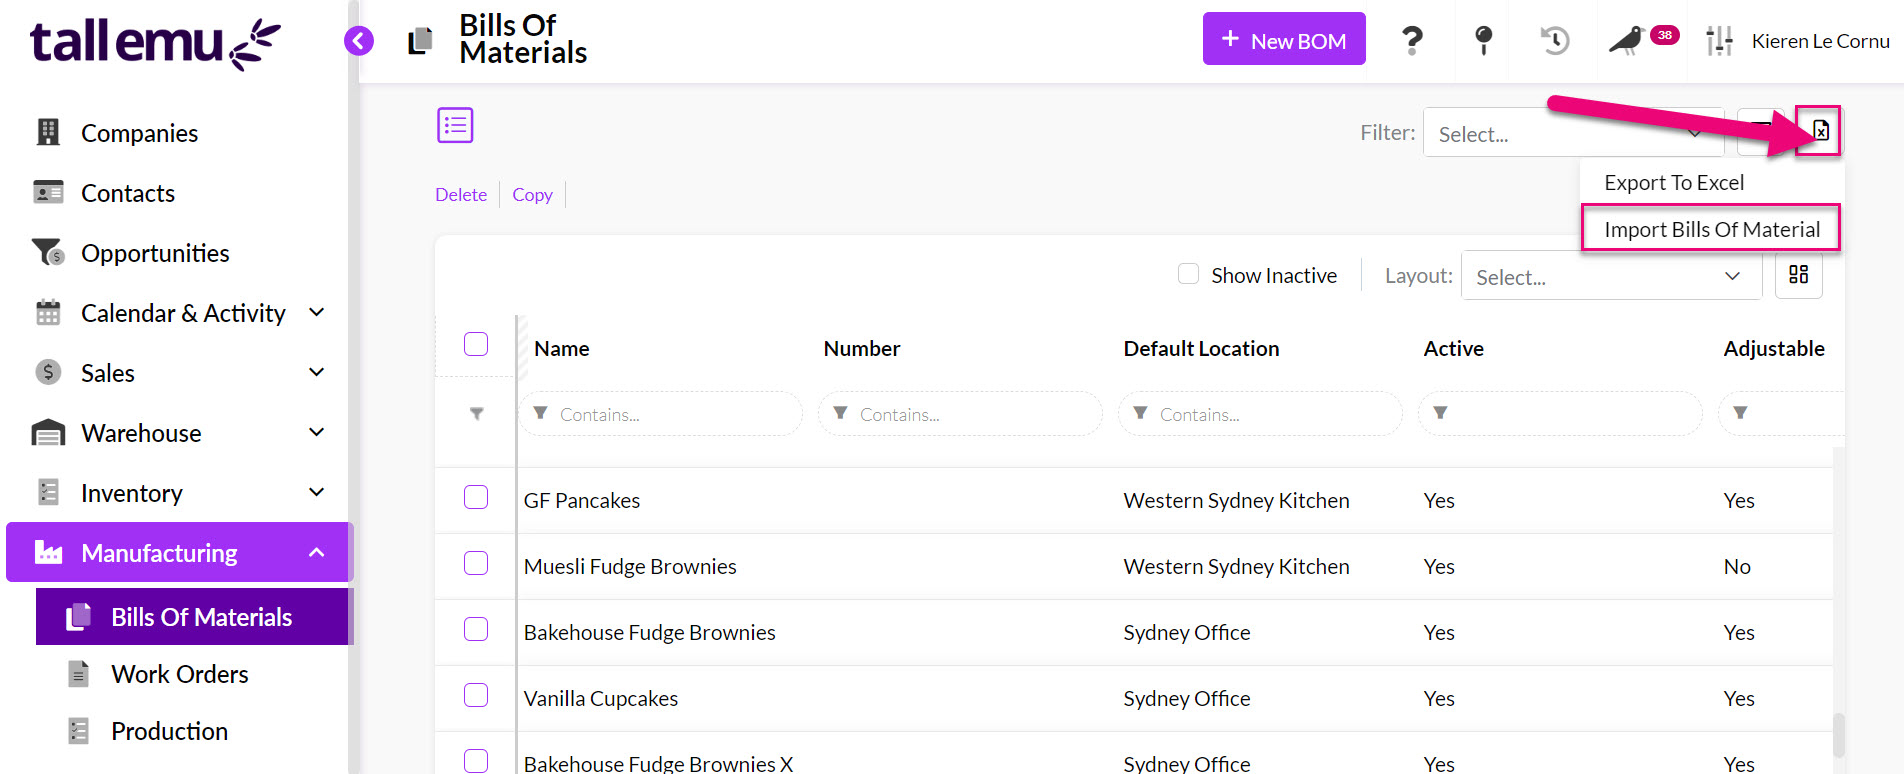
- In Manufacturing > Bills Of Material, click on the Excel icon in the top right corner of the screen and then select Import Bills Of Material.
- This will take you to the import screen, where you can download a copy of the import template.

- The import template file download will start immediately. If it doesn’t, your browser may be blocking the download.
Filling in the import template
You can then populate the template with details of your BoMs. There are a few things to note here:
- The part numbers you enter here must already exist in your system as Products.
- The Name of the BoM cannot be the same as the Name of an existing BoM in CRM.
- The format of the data in the template must exactly match the format that CRM requires, or the import will not be successful.
Following is an example of how to fill in the import template with your data. Shown in red is one complete BoM, followed by another complete BoM shown in green.

Importing your data
- When you are ready to import the data, go back into Manufacturing > Bills Of Material in CRM and click on the Excel icon in the top right corner of the screen and then select Import Bills Of Material.
- Drag and drop your CSV file or click to choose a file to upload.

- Once your file has been added, the system will map the column headings in your CSV with fields on the BoM in CRM.
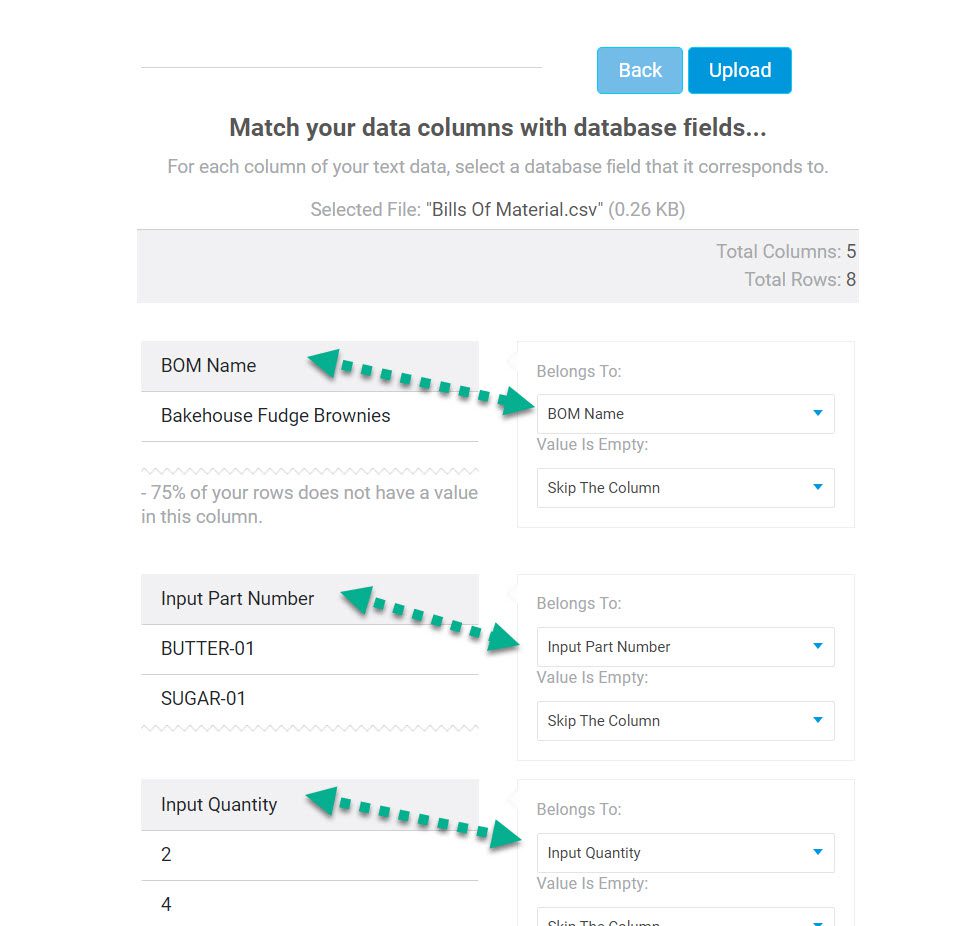
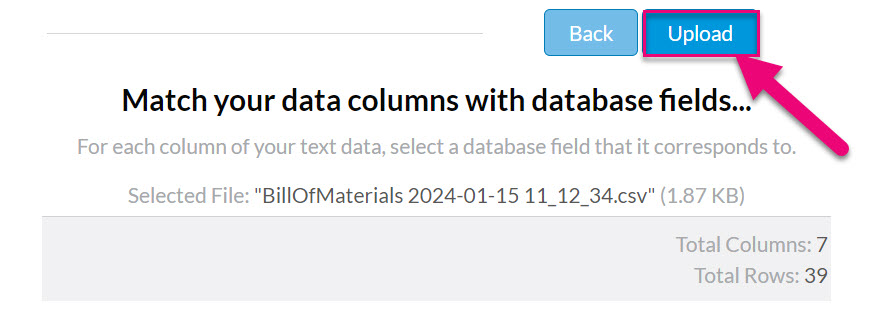
- Click on Upload to start the import.
- Once the import has been completed, a confirmation message will show to indicate that your BoMs have been imported into CRM.

- You can then return to your list of BoMs and locate the ones you have imported.
Give your BOM a Name e.g. “Bakehouse Brownies” that makes it easy to identify.

This field is optional, and you can add an alphanumeric value here as an identifier e.g. “BOM 12345”.

You can select an appropriate option in this field.

The Type field can be customised to suit your preferences via the Work Order Types & Stages field in Admin > Settings > Manufacturing.
Note that the Type field is shared between Bills Of Material and Work Orders.

Here you can specify the Default Location that will carry over into any associated Work Orders.
When you complete a Work Order, the Location is where the stock of Output Items will be made available.

If a BoM is for a specific customer, you can select them in the Customer field.
An example of this would be if you have a proprietary agreement with a customer that you only manufacture a certain product for them, and not anyone else.

You’ll also have the option to add any Production Notes that you want to carry over to the Work Order.
This can be useful if there are standing instructions that need to always appear on the Work Order (you can edit or delete them there) as it saves you needing to add them each time.
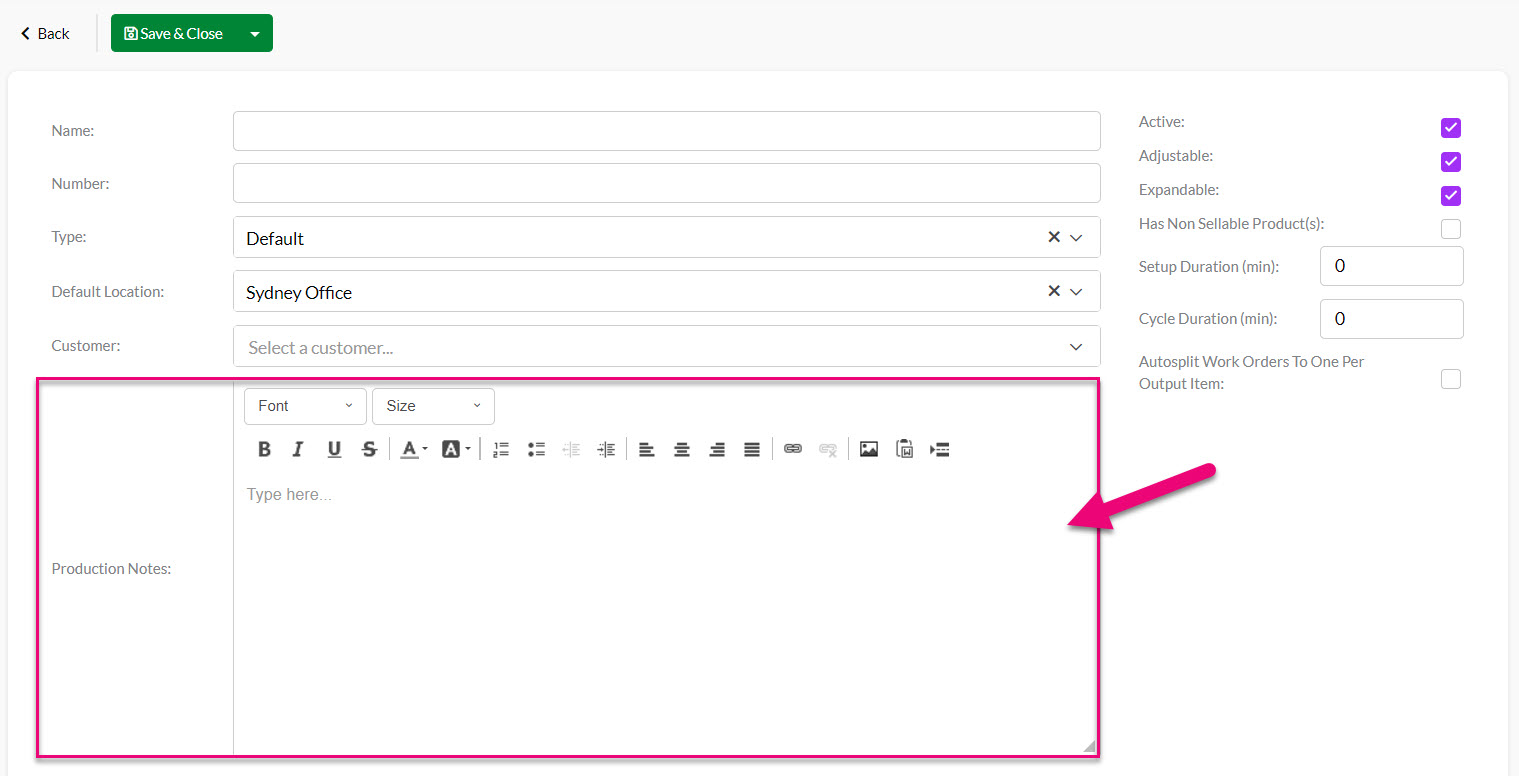
Production Notes field on a BoM
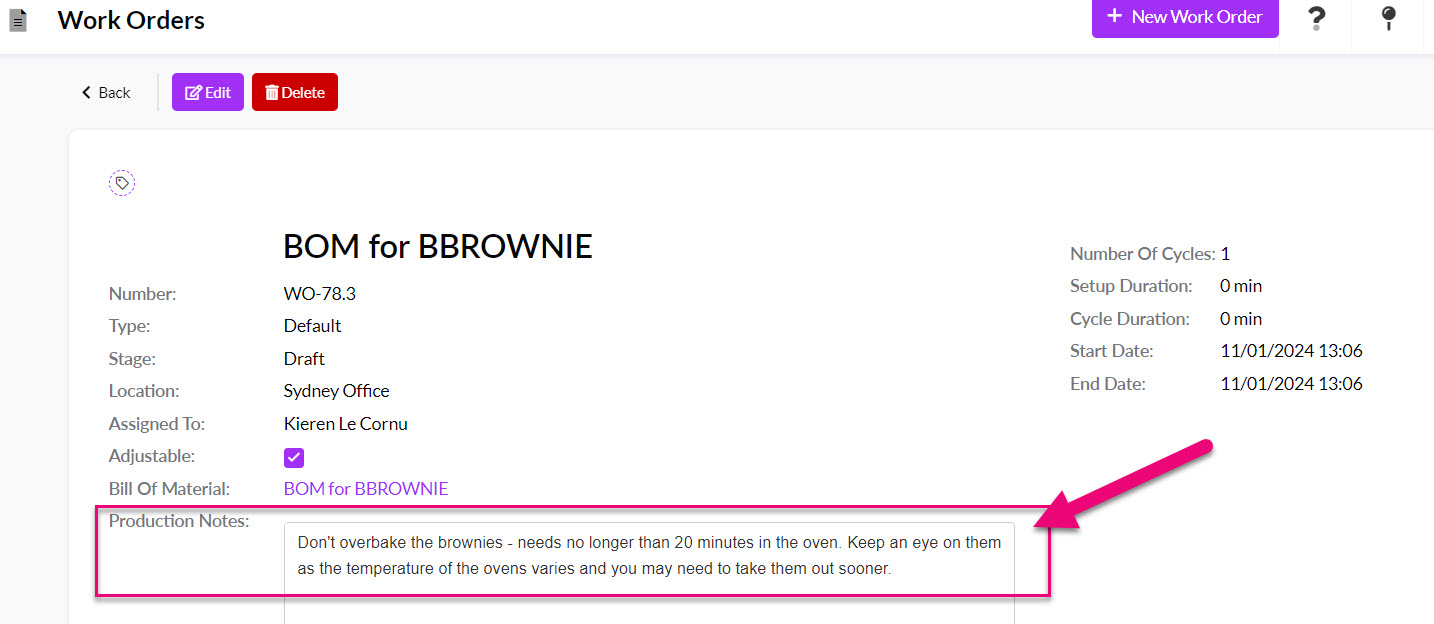
Production notes from a BoM on a Work Order
Ensure the Active box is checked if you want to be able to use the BoM for production.
if you want to deactivate a BoM in future, you can de-select this box and the BoM will remain in your system but won’t be available for production anymore.

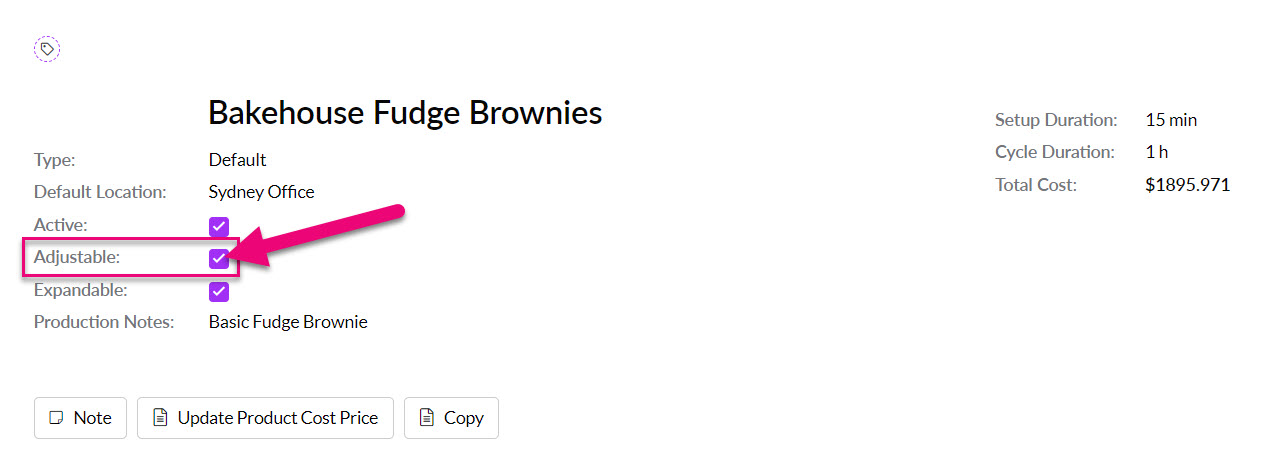
You can specify whether or not your BOM can be adjusted when it is used in a Work Order e.g. in the event that you ran out of an ingredient contained in your BOM when you are generating a Work Order, you can substitute items or adjust quantities before you start production.
Adding & removing items from a Work Order, using an Adjustable BoM
If you have not selected Adjustable on your BOM, you will not be able to modify your input or output products, production steps or resources in a Work Order.

Ticking this box means that when you sell the manufactured Products on the BoM, you will be able to expand the manufactured item so that all the underlying components are shown as well.

This can be useful when you want to:
- Generate a Purchase Order from a Sales Order for any of the underlying Products.
- Show the underlying Products on the customer-facing sale document.

There are also 2 system settings you can configure to suit your autoexpand preferences:
- Autoexpand BoM via Sales Order generation in Quote Settings.
- Expand BoM on Sale in Sales & Purchase Settings.
Note that if your BoM has the box ticked for Has Non-Sellable Product(s), you will not be able to use this feature.
If the Autosplit box has been ticked on the BoM you are using, you’ll be able to split a Work Order into separate orders for each output item. The conditions under which this is allowed are as follows:
- The order must have more than 1 cycle of production.
- There must be more than 1 output product.
- The Autosplit box must be ticked on the BoM you are using.
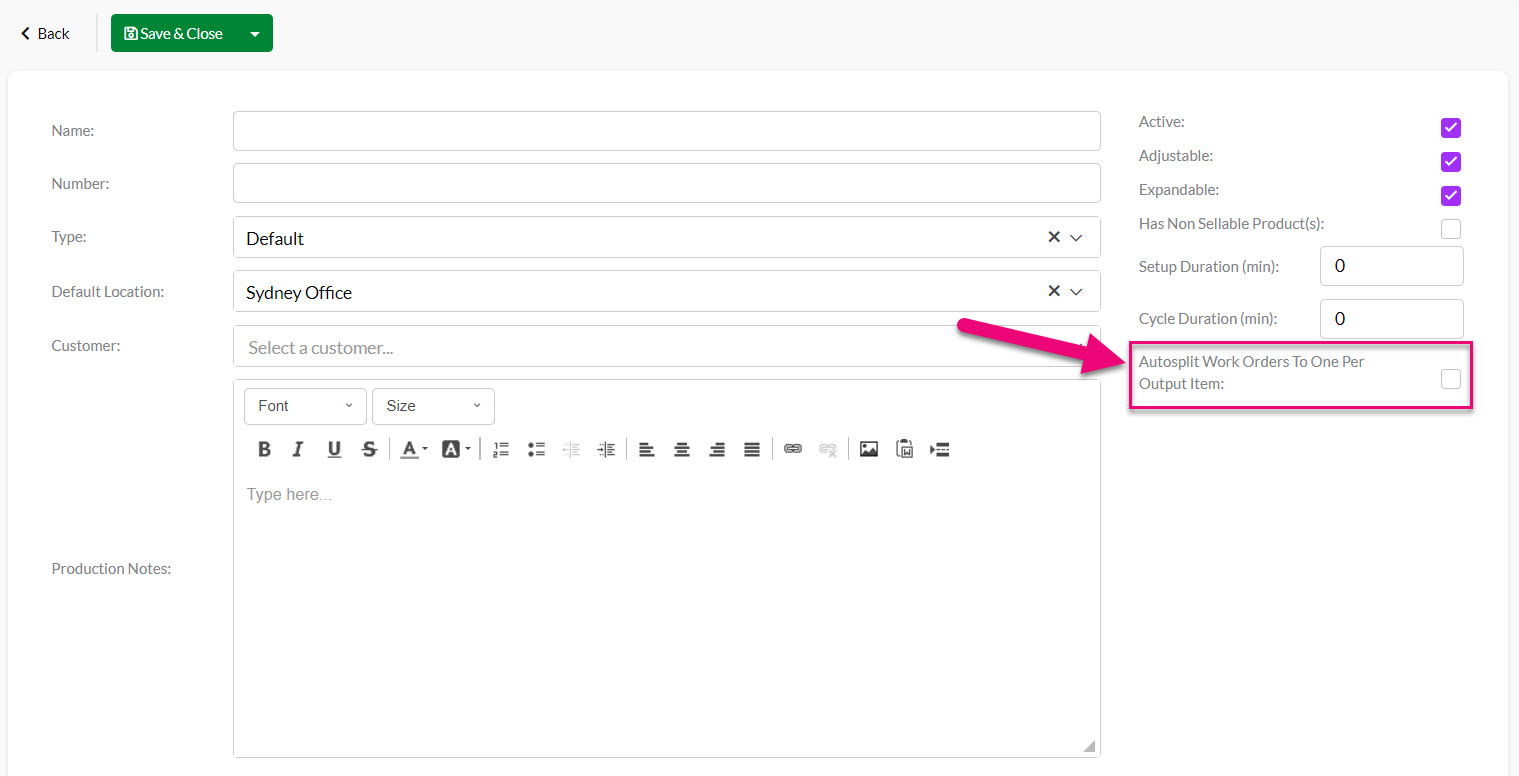
Autosplit field on a BoM
On Work Orders, the Split button will be available for use (if it’s unavailable it will be greyed out).
In the example Work Order above, it creates 3 items using 3 cycles of production. I have pressed the Split button, and the system has then created 3 Work Orders for me which are identified by having a number reference (e.g. “.1”) after the WO number.

Multiple Work Orders after a split
This box will be automatically populated by the system – you’ll notice that if you hover over it, you are unable to edit it.
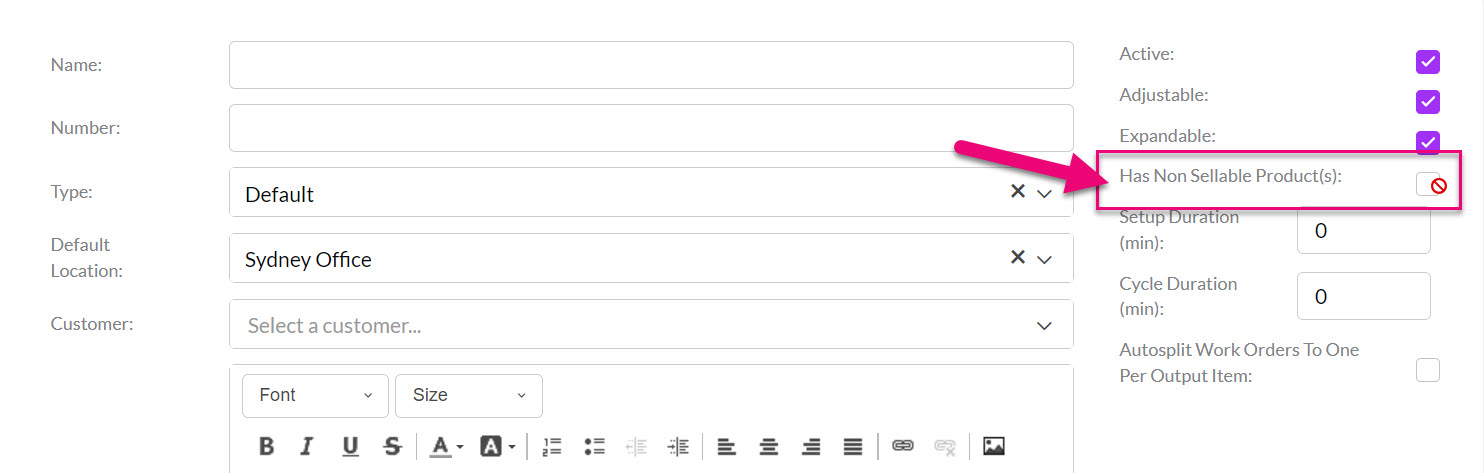
This box will be automatically checked if you have either Input or Output Items in your BoM that don’t have the Sellable box ticked on the Product record.
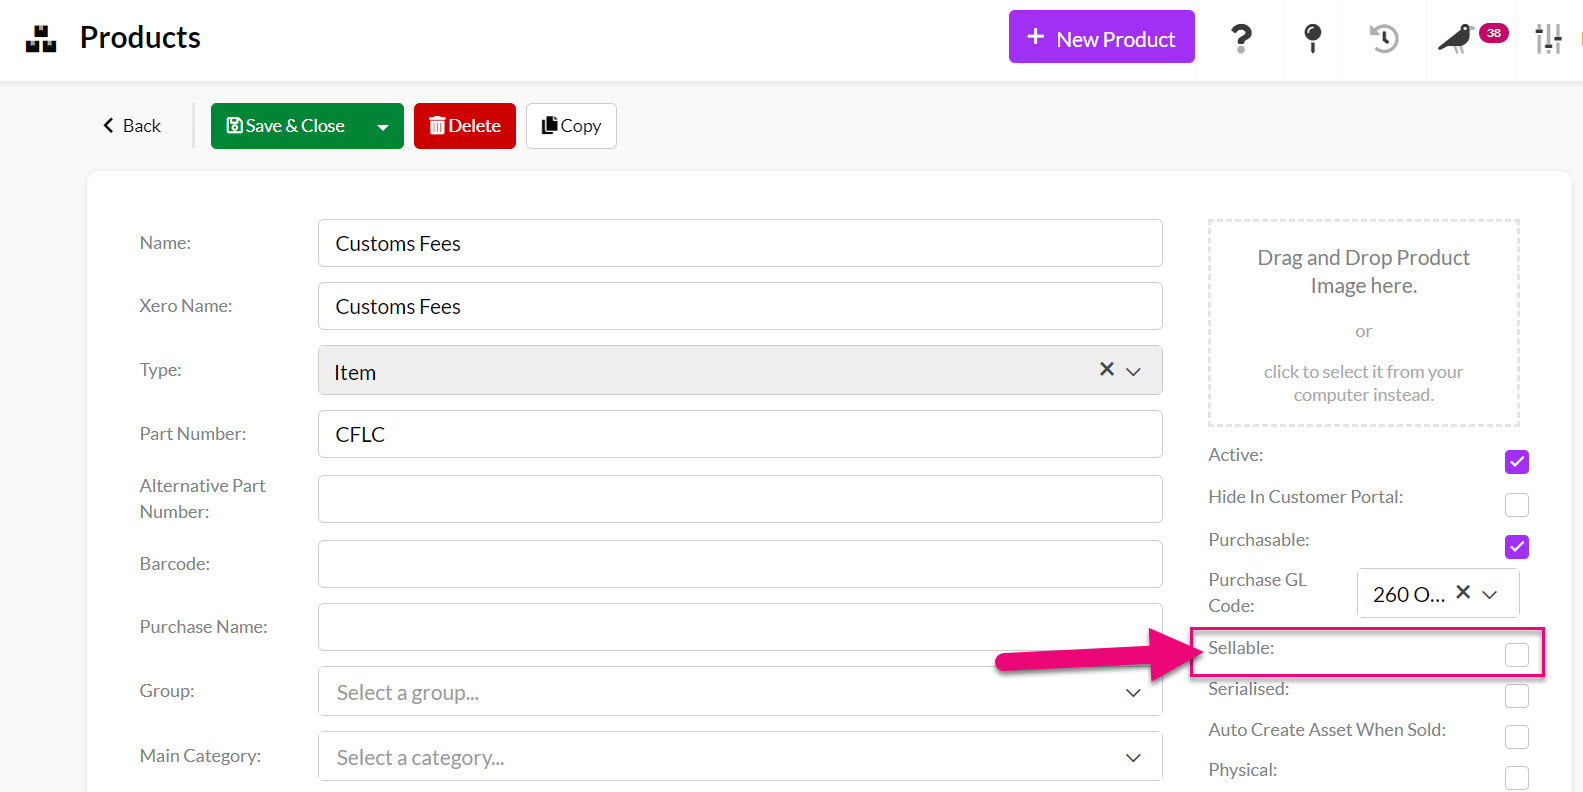
Sellable box on a Product record
If this box is checked, you will NOT be able to use the Expandable option on the BoM. This is because expanding out a BoM on sales requires that all the items in the BoM be sellable i.e. if an item is not Sellable, it cannot be shown on a sale.
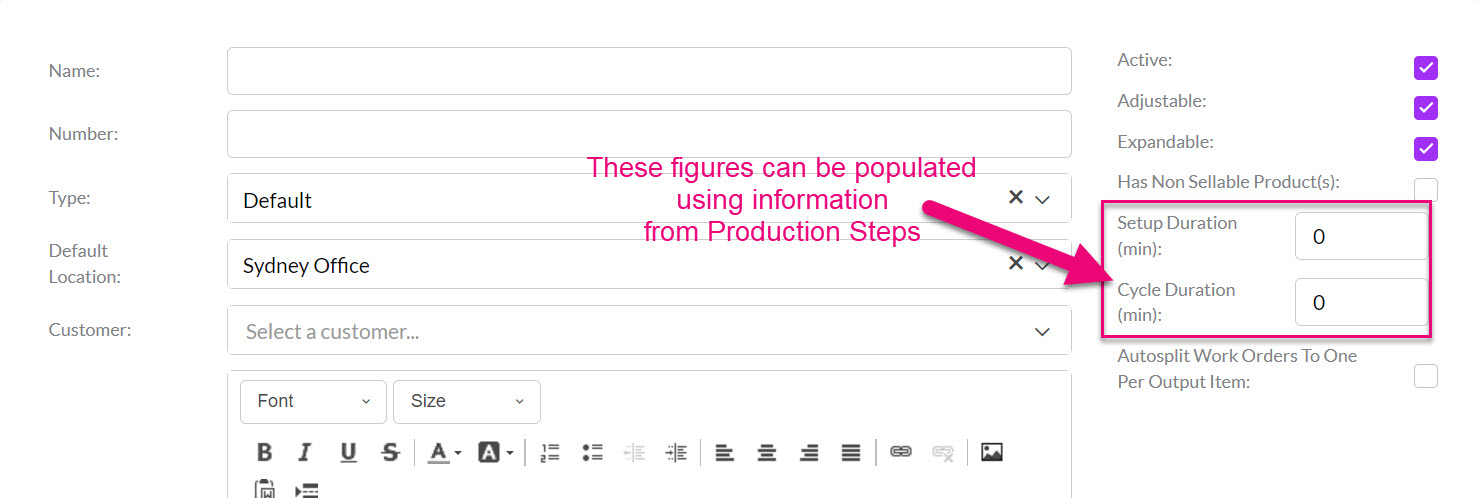
When you add in Production Steps, information about the duration of each step will automatically calculate the time required for production and populate the Setup Duration and Cycle Duration fields.
You can also manually add values to these fields.

When you execute a Bill of Material via a Work Order, you can specify the number of production cycles you want to run and the system will automatically calculate the time required, as well as filling in the Start Date and End Date for production, based on your time figures.
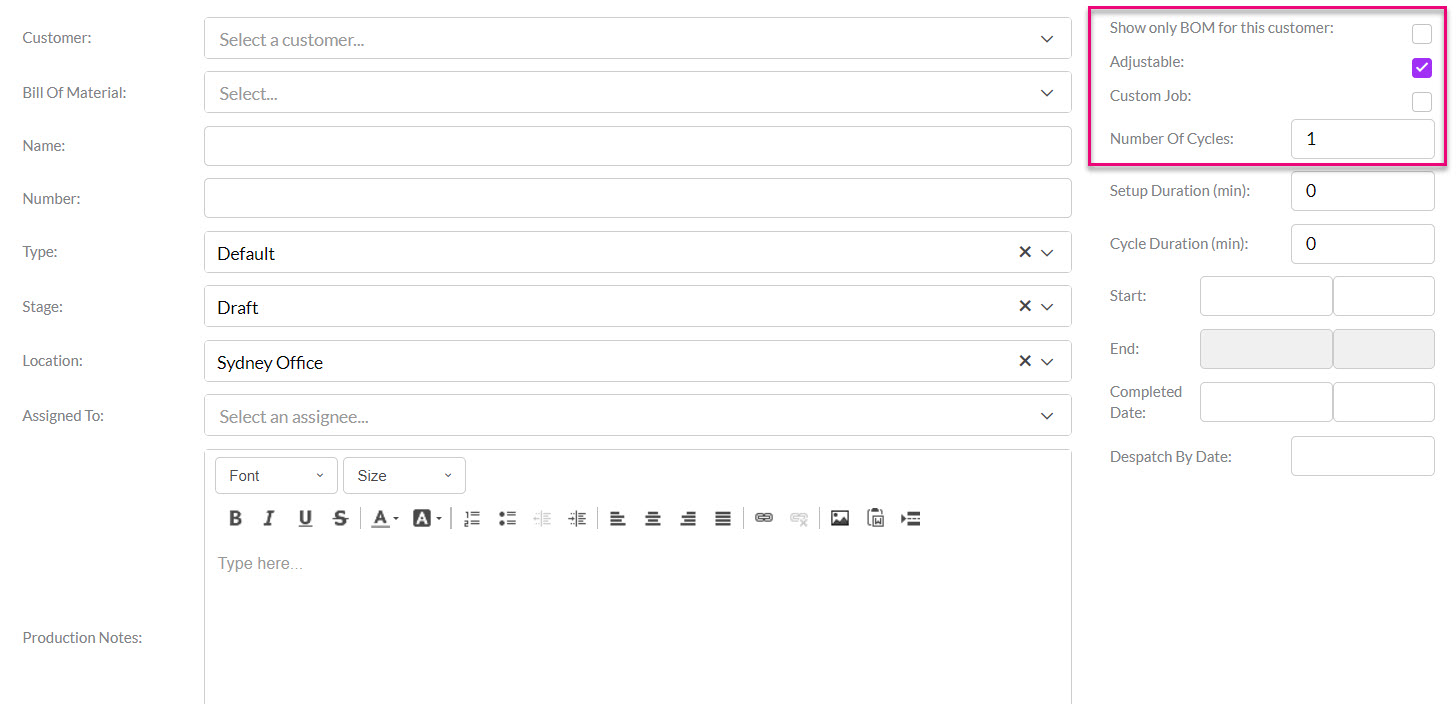
Number of cycles on a Work Order
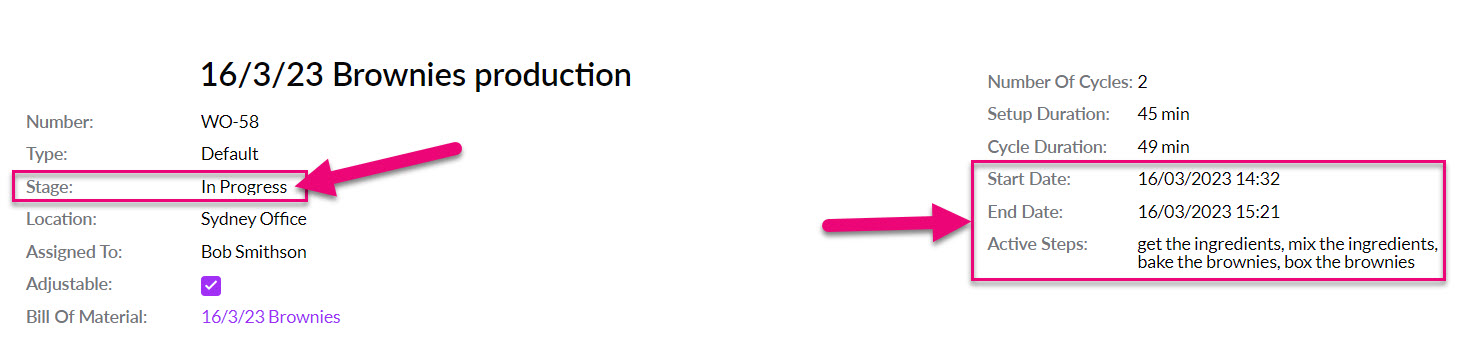
Start and End dates on a Work Order
Adding Production Steps means that you’ll be able to use the Production area in Manufacturing and also use the Time Tracker for production.
For more information, see our guide on Production Steps.
Go to the Production Steps tab and click on Add Production Step.

In the case of making brownies, production steps might include Measuring the Ingredients, Mixing the Ingredients, Baking the Brownies and Slicing the Brownies.
Hit the Add Production Step button in the top left and start by naming the steps, then providing further detail as required.
For example, Measuring the Ingredients would be listed as a setup step, the duration is not per unit, it would require labour and it might take about 15 minutes.

Baking the brownies, on the other hand, is not a setup step, the duration is not per unit, it does not require labour, but it would require Ovens as a Resource, and it might take about 45 minutes.

You can set up Resources for Manufacturing and then use Resources in your Production Steps.
In the following example, I have set up a Resource Group called “Ovens” which has a number of Resources I can choose from i.e. Oven 1, Oven 2, Oven 3, Oven 4 etc.

Resource Group field on a BoM Production Step
When you run the BoM on a Work Order, you can then select which particular Resource from the chosen Resource Group you want to use.

Selecting a Resource on a Work Order
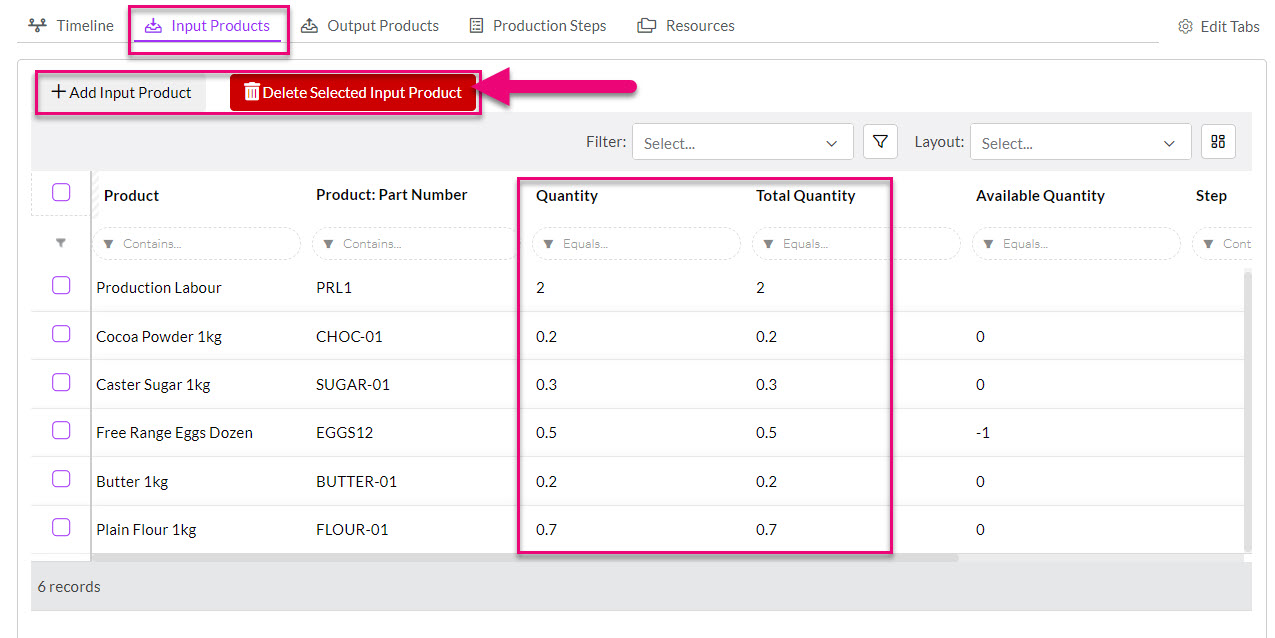
Once you’ve set up your production steps you can head to the Input Products tab. This is where you’ll define the recipe ingredients.

Click the Add Input Product button and select the ingredients required to make brownies.

For this example, I’ve chosen butter, sugar, eggs, flour and cocoa powder. It’s important to note that product inputs and outputs are calculated by quantity of the inventory item, rather than measurements – i.e. instead of simply using 700g of flour we would use 1 x 700g bag of flour OR 0.7 x 1kg bags of flour.
| Recipe Measurements | Product Quantity | Input Products |
| 200g Butter | Butter (KG) | 0.2 Butter (KG) |
| 300g Sugar | Sugar (KG) | 0.3 Sugar (KG) |
| 6 Eggs | Eggs (Dozen) | 0.5 Eggs (Dozen) |
| 700g Flour | Flour (KG) | 0.7 Flour (KG) |
| 200g Cocoa Powder | Cocoa Powder (KG) | 0.2 Cocoa Powder (KG) |

You can then click on any item to edit the details.
Note: when you generate a Work Order using your BOM and will be working with Input Products that have batch tracking enabled, you’ll be able to specify which batches to use for your Work Order.
Factoring in production costs
If you’d like to take into account other costs like labour or electricity so that they form part of the Cost Price for Output Products, you will need to add additional items to your inventory for this purpose and then add them as Input Items.
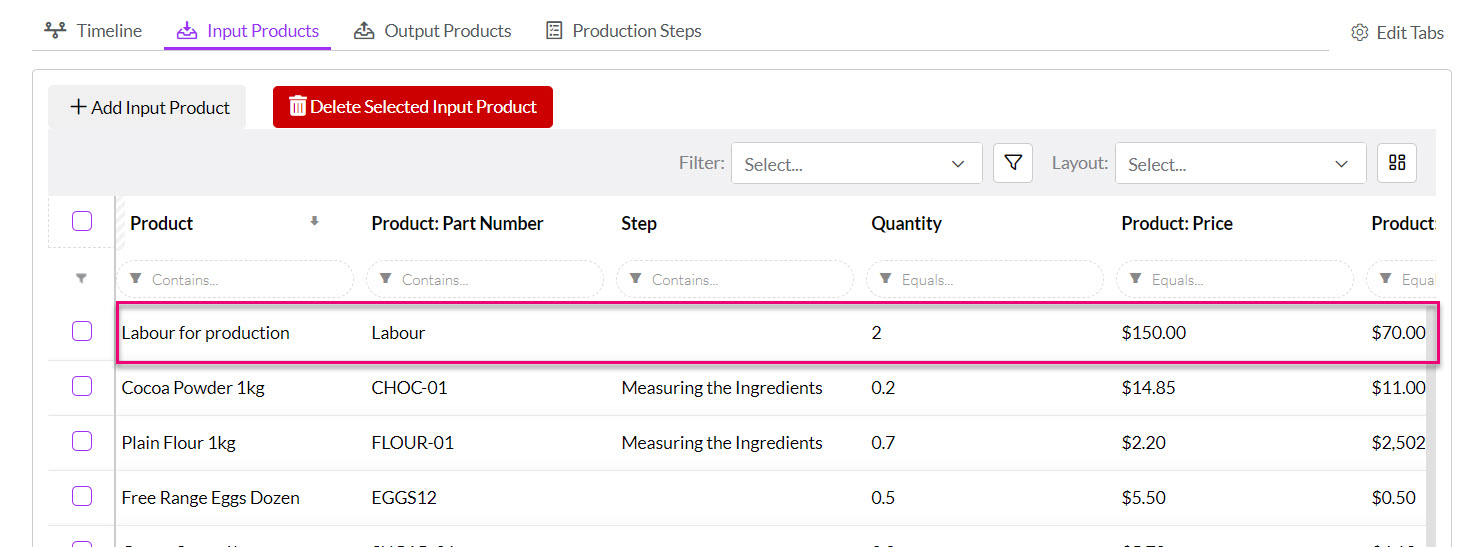
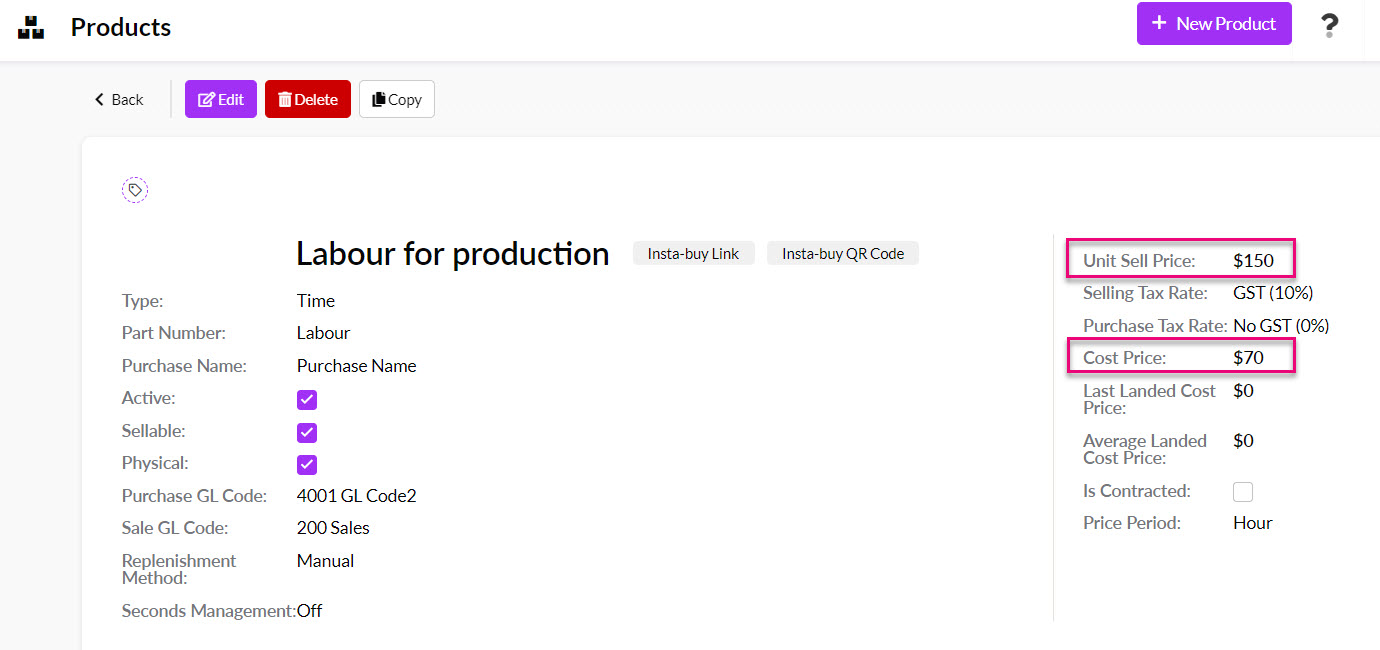
In the following example, I have a Product called “Labour for production” which is charged in 1-hour blocks at a rate of $150 an hour.
I will need 2 hours of labour to manufacture this product, so I have added it as an Input Item with a quantity of 2, meaning 2 hours.
Note that you must have set up Manufactured Products in your inventory before you can add them as Output Items here.
Once you’ve set all your input products you can head to the Output Products tab. Here you’ll be able to define the final product/recipe output.
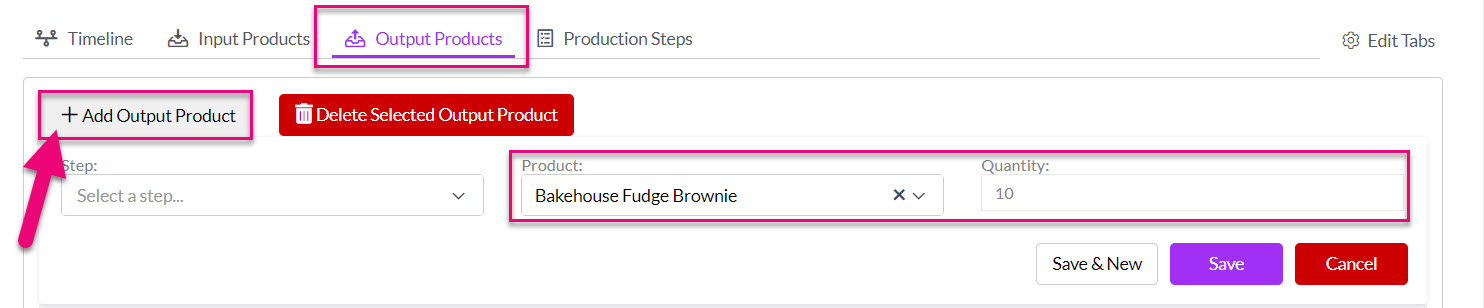
Just hit the Add Output Product button, select your Product and select the quantity.
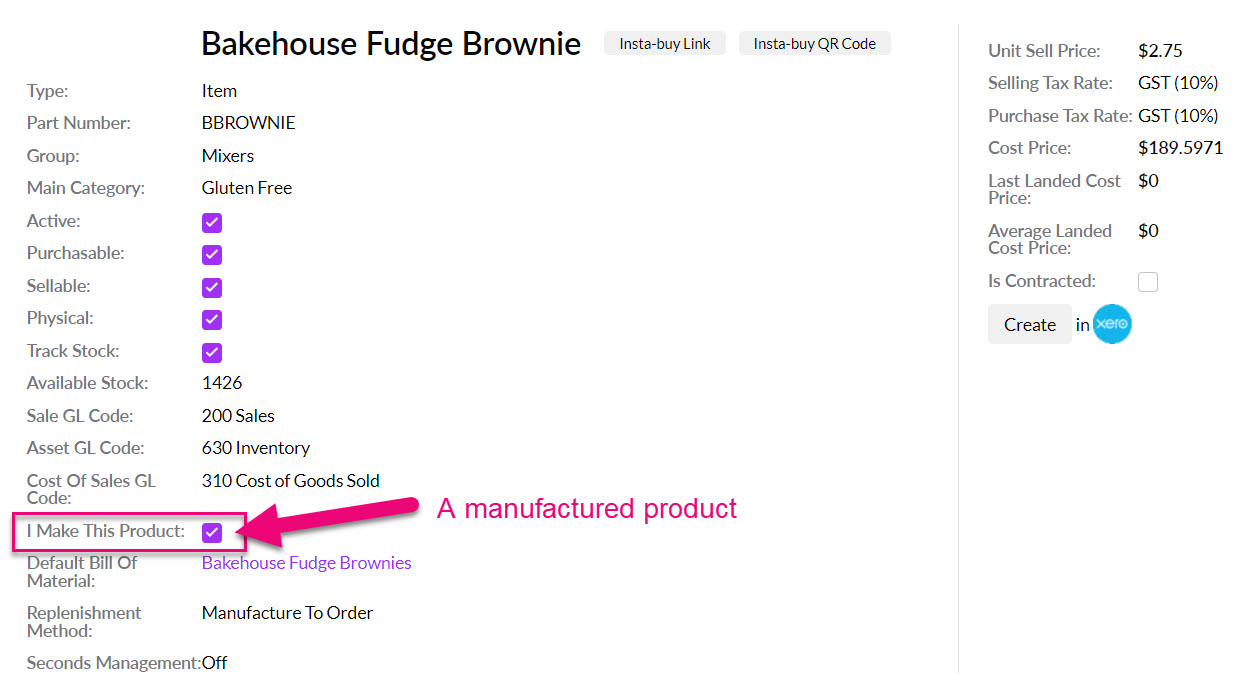
Note: you’ll only be able to select from the collection of products you’ve created and checked as ‘I Make This Product’. Click here to learn more about manufactured products.
In a similar manner to the input products, the quantity of your output product will depend on how you sell it. For example, if you sell the brownie in bulk (i.e. sell the entire 2kg brownie as a singular product) you would set the output product as Brownie (2kg) at a quantity of 1.
However, if you sell the brownies individually in 100g bites you might set the output product as Brownie (100g) and a quantity of 20.
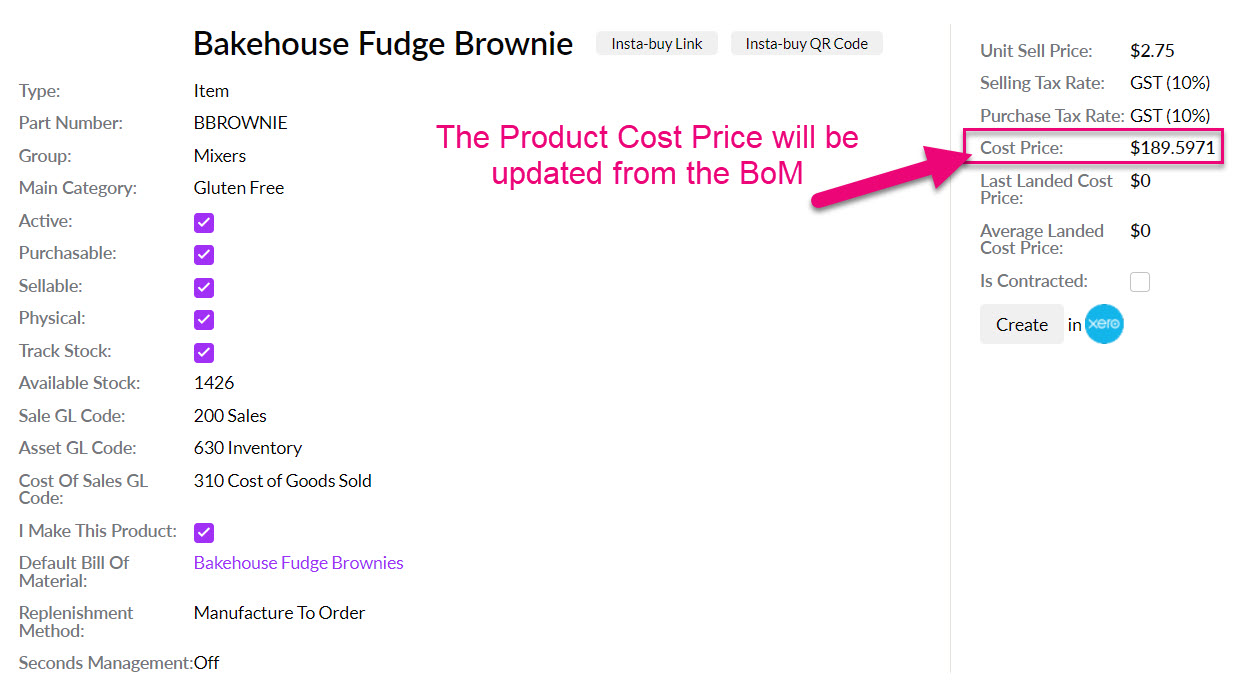
CRM will calculate the total cost of creating an Output Product by multiplying the Quantity and Cost Price for each Input Product and totalling this to display the Total Cost.
You can push the Total Cost figure to update the Product record for your Output Product by clicking on the Update Product Cost Price button – the system will then update the Cost Price field for the Product by dividing the Total Cost figure by the Quantity of Output Items the BoM will create.
In the example below, I have a BoM that will create 10 Bakehouse Fudge Brownies at a Total Cost of $189.5971. When I press the Update Product Cost Price button, the Cost Price field in the Product for Bakehouse Fudge Brownies is updated to $1,895.971 i.e. $1,895.971/20 = $189.5971.

Now you’ve successfully set up your BOM, to turn your raw materials into finished product you’ll need to run a Work Orderto execute the stock movements in line with your production process.
You can have multiple Bills Of Material for each Product. On Manufactured Products there is a field where you can specify the default BoM for the Product.
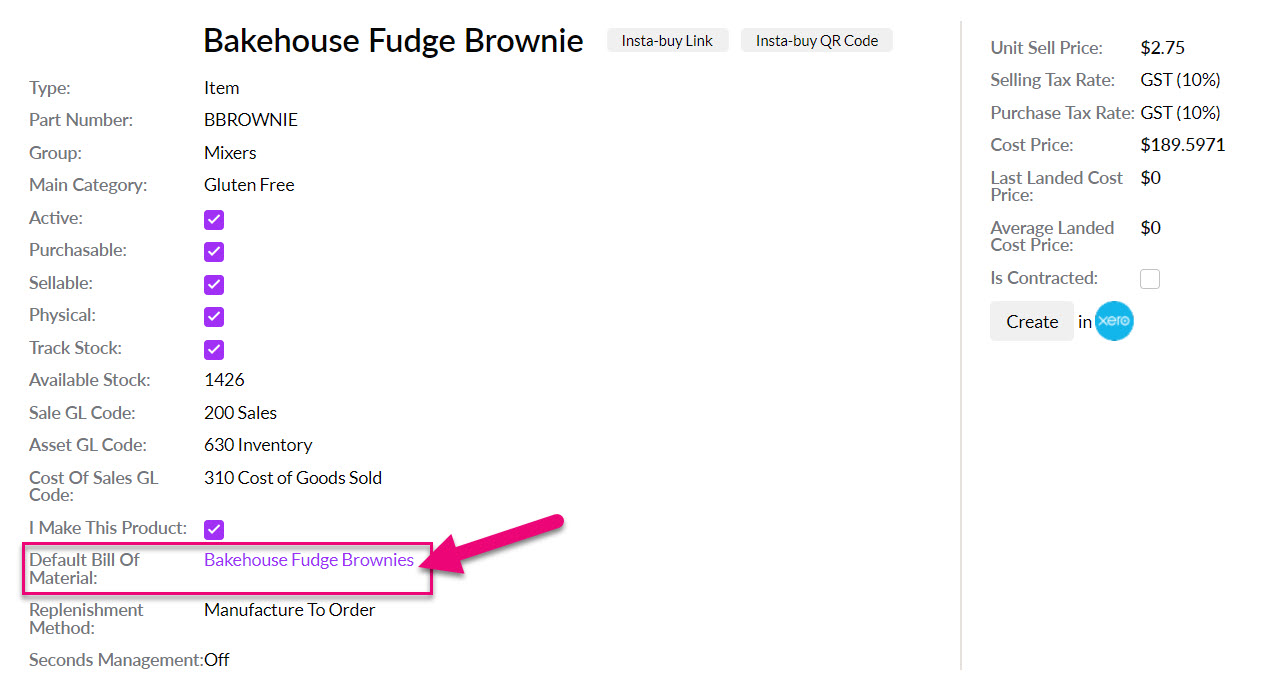
When you create Work Orders, you’ll also be able to select a BoM other than the default one set on the Product.