-
- Getting Started
- Record Tabs
- Managing Duplicate Records
- Setting Up Grid Layouts
- Show and Hide Columns
- Key setup steps
- Additional setup steps
- Tips & Tricks
- Pinning Activities
- Bulk update
- Timeline
- Bulk uploading images
- Advanced Filters
- Automated Workflows
- System Admin in CRM
- Search, sort and report
- Calendar View
- Dashboard View
- Using Views
- Import troubleshooting
- List View
- Set up your customers in CRM
- Working with Activities in CRM
- Basic Navigation
- Using the Map View
- Using the Kanban View
- Configuring Dropdown Lists
- Creating New Records
- Open or Edit Existing Records
- View Details on Map Pins
- Syncing Your Accounting System
- Change the Column order
- Setting up your CSV file for Import
- Filter Map Records
- Company Information
- Sorting Records
- Export data
- Filtering Records
- Import Data from Excel or CSV
- Colourise Map Records
- Set Up Security Groups
- Invite Other Users
- Connect Outlook
- Connect to Mailchimp or Campaign Monitor
- Set Up Other Reference Data
- Configure Online Quoting
- View Reports and Dashboards
- Connect Burst SMS
- Viewing Tags
- Adding and Editing Tags
- Sorting and Filtering with Tags
- Jobs, Assets & Service Management
- Manufacturing
- Operations
- Reporting
- Training
- Workflow Management
- Quoting & Selling
Set up your customers in CRM
This guide will take you through the process to set up your customers in CRM.
-
- Sync a record or changes from your accounting system to CRM.
- Manually edit a record.
- Bulk update fields on multiple records.
- Export and then reimport your data to update it.
See our help guides for further information about each method:
What is a customer in CRM?
A customer in CRM can be either a Contact or a Company.
The defining attribute is having the “I sell” box ticked on the record, which tells CRM to engage sales functions on the record.

“Sell to” box on a Contact
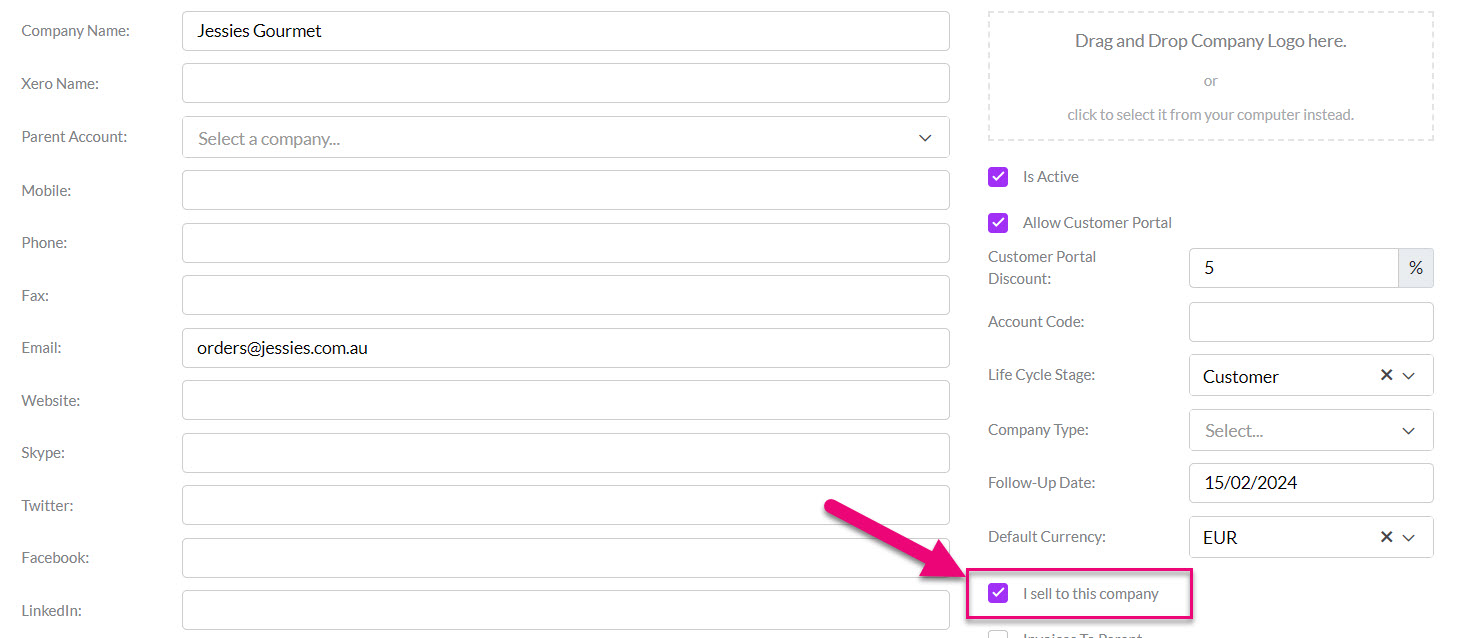
“Sell to” box on a Company
Suppliers are differentiated from customers by way of an “I buy” box.

“I buy” box on a Contact

“I buy” box on a Company
See also:
Convert Contacts to Companies (and vice versa)
If you are using Xero, your corporate customers will come into CRM as Contacts, rather than Companies.
This is because the customer form in Xero is doesn’t differentiate between individuals and entities, so when the data comes into CRM, there is no point of reference to separate the records into Companies and Contacts.
You can rectify the situation by converting Contacts into Companies in CRM.
See also:
Customer segmentation
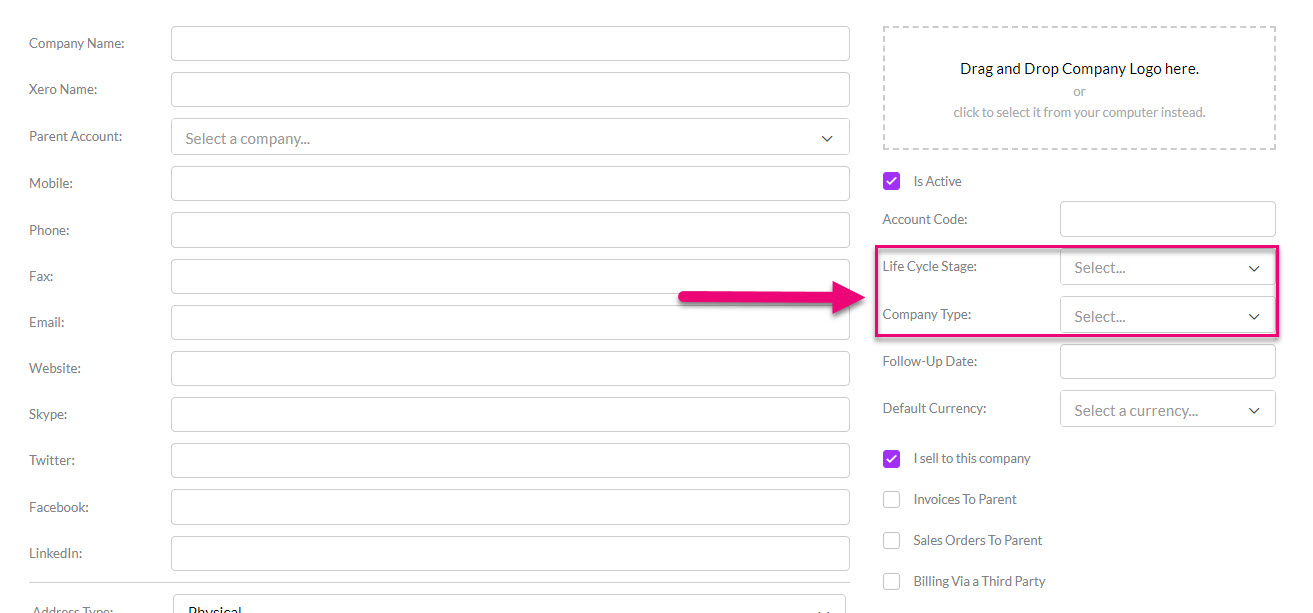
There are a range of fields you can use to segment your customer base; all these fields can be customised so that the available options are relevant to you.
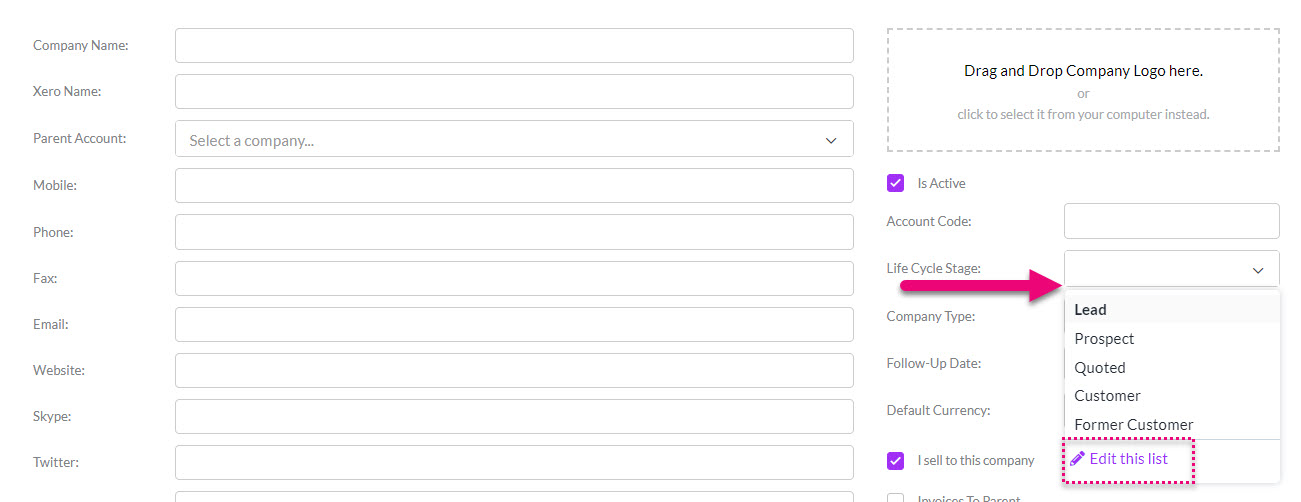
- Lifecycle Stage
- Company Type
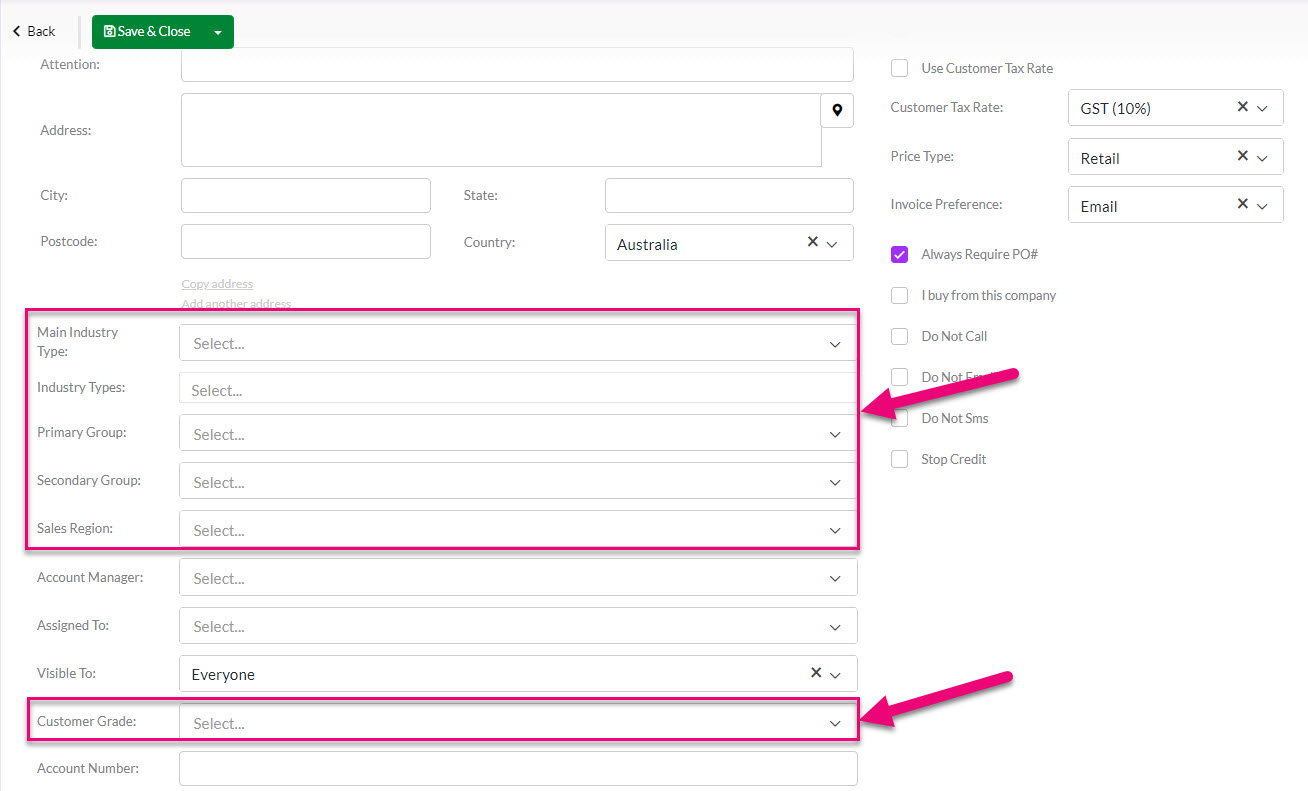
- Main Industry Type
- Primary Group
- Secondary Group
- Sales Region
- Customer Grade
- Contact Type
Customising the fields
You can do this either from:
- Admin > Settings by clicking on the name of the relevant field to edit it.

- A customer record, by clicking the relevant field and selecting the Edit option.
See also:
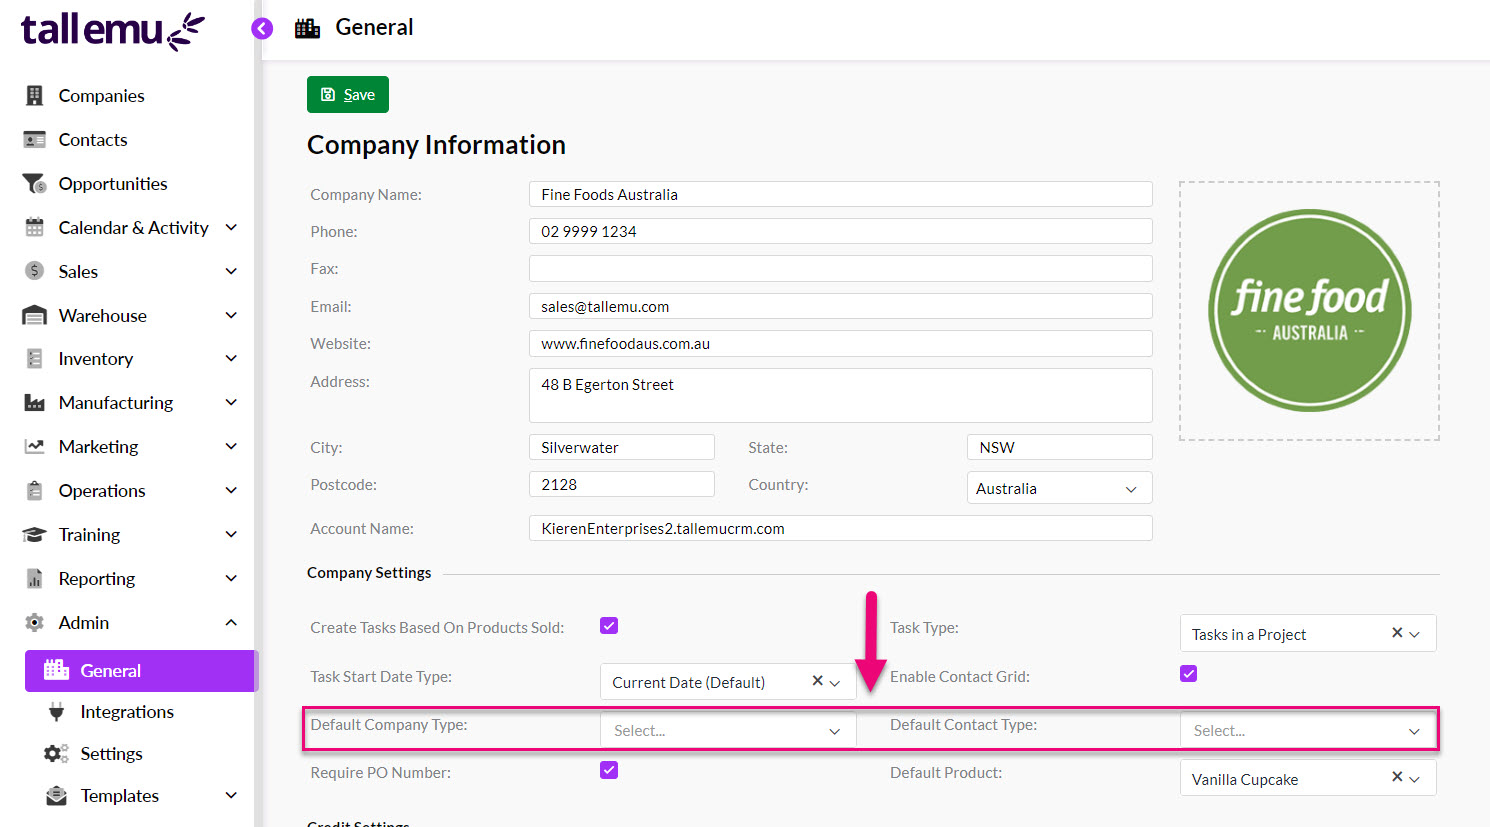
Setting default preferences
From Admin > Settings Company Settings you can set default values for Company Type and Contact Type.
Relationships between records
There are a number of ways that you can establish relationships between any combination of Company and Contact records.
- Contact for a Company – this is the basic type of relationship between entities and people; you can have multiple Contacts linked to a Company.
- Parent-child relationship – this type of relationship is based on ownership where the parent owns a child; a parent can have multiple children.
- Third-party relationship – these allow you to have a relationship is based on an association between companies, rather than a hierarchy of ownership.
- Account Relationships – allow you to create and manage other types of associations between ‘Company and Contact’, ‘Contact and Contact’ or ‘Company and Company’ records.
- Contact Positions – allows you to have Contacts with relationships to multiple Companies e.g. a person may work at more than one company or have multiple positions within a single company.
- Primary Contact – if a Company has multiple Contacts, you can specify one as the primary.
Contact for a Company
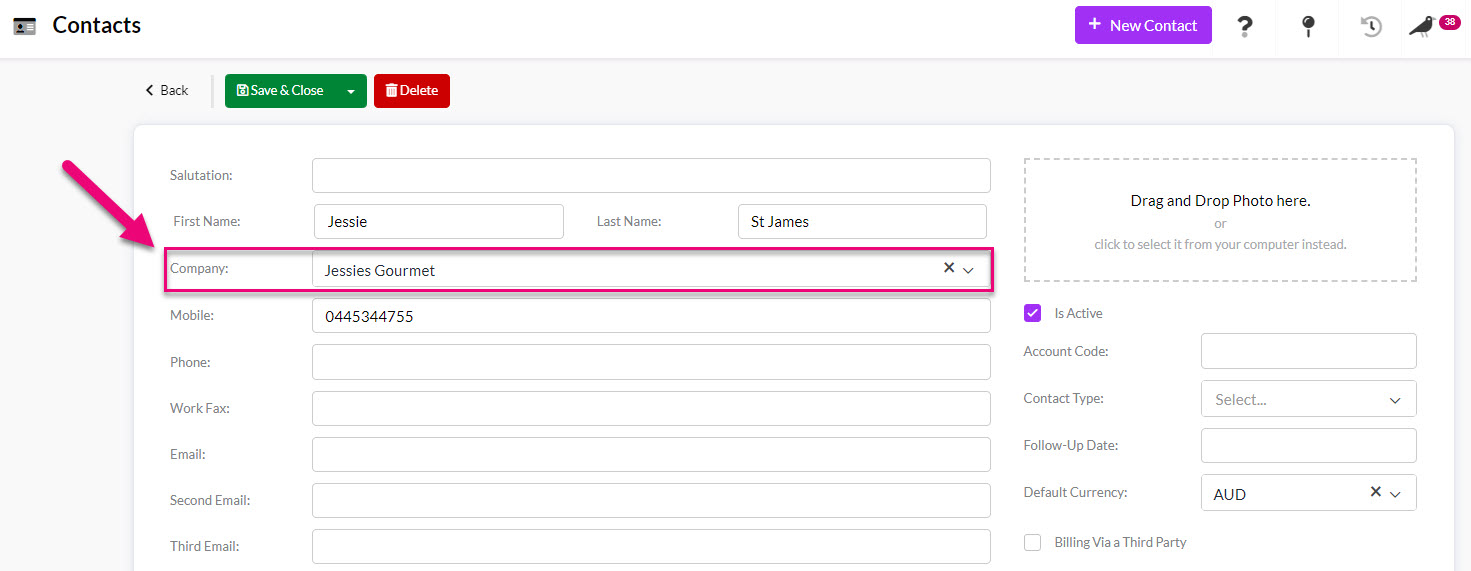
This is the simplest form of relationship where you have a Contact that is associated with a Company record. There are 2 ways that you can establish this type of relationship:
1. On a Contact record, when either creating a new record or editing an existing one, select the Company that it should be linked to, then Save & Close the record.
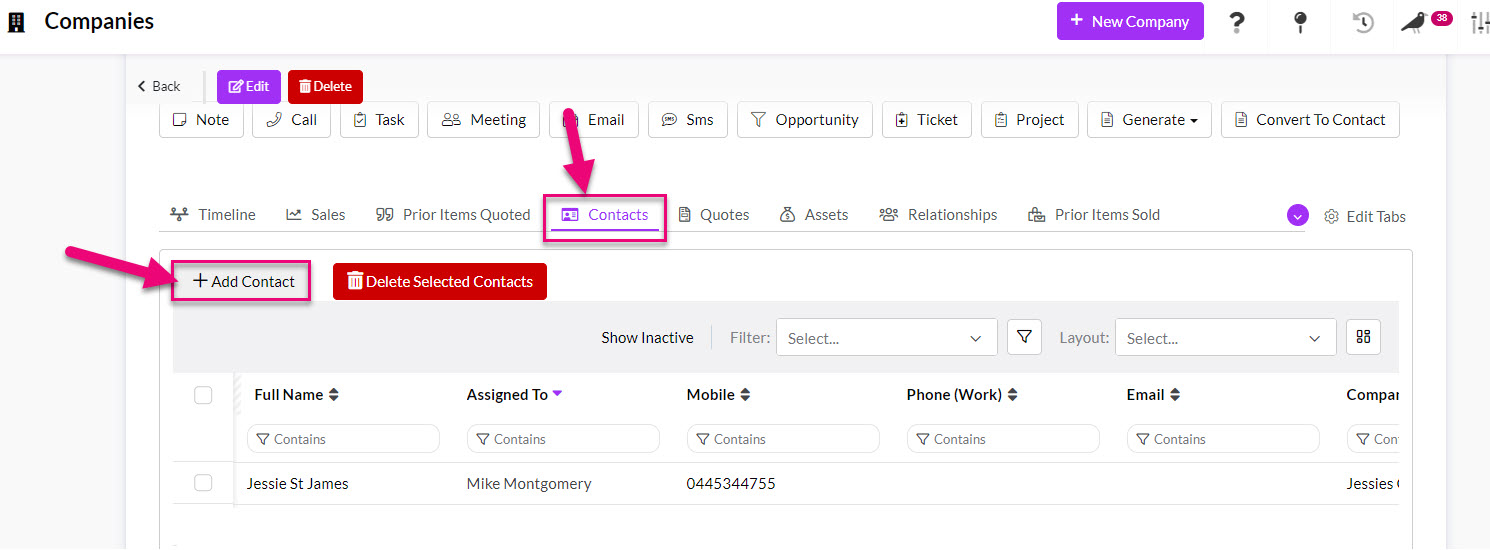
2. On a Company, navigate to the Contacts tab and use the Add Contact button to associate the records.
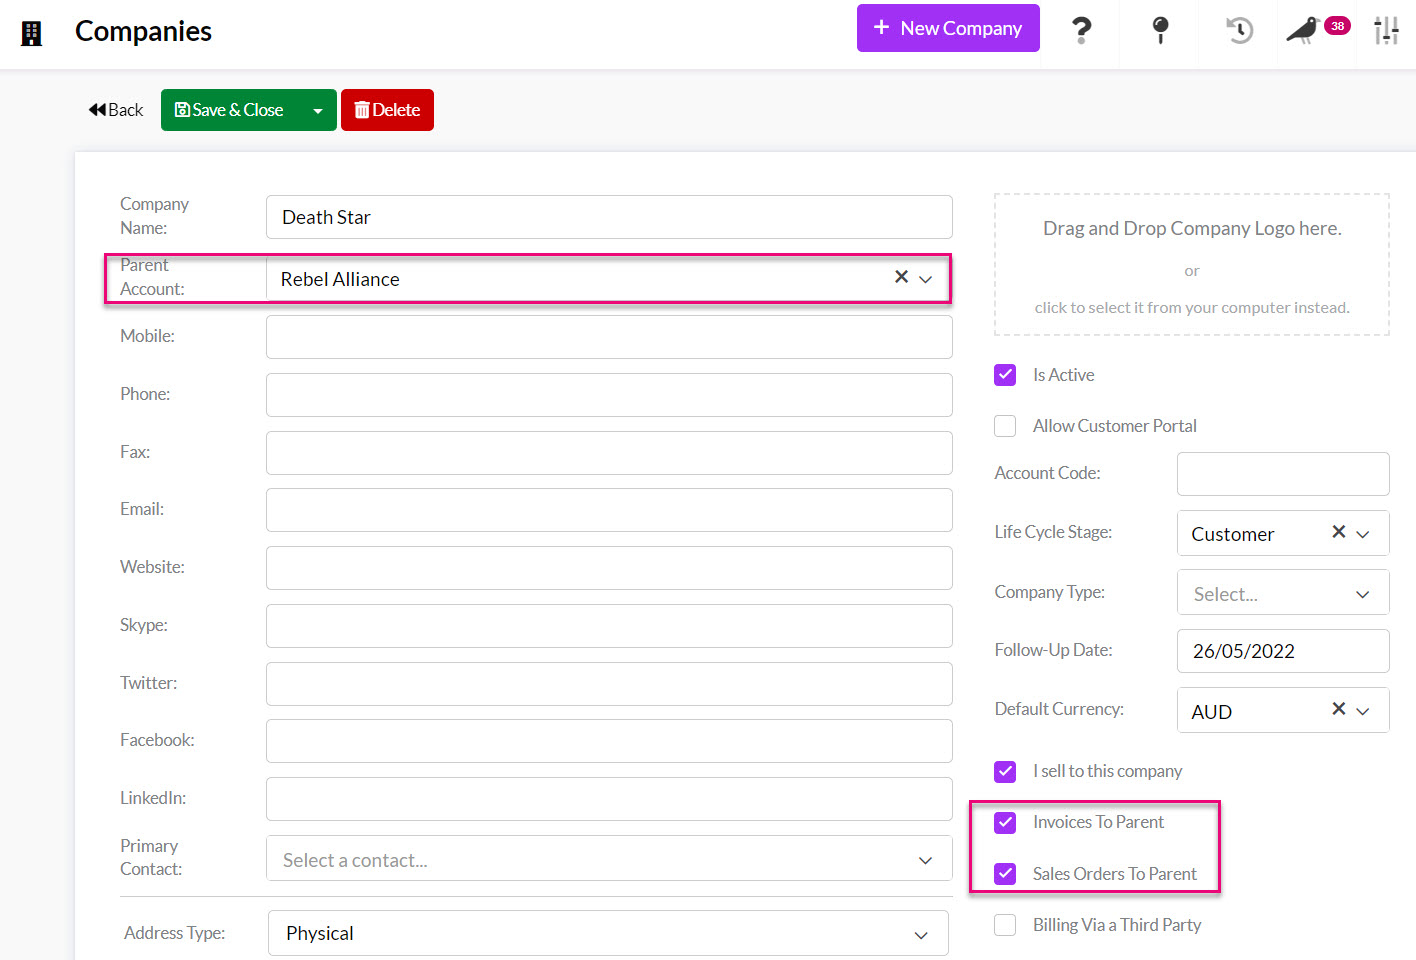
Parent-child relationships
- The first step is to enable third-party billing in your database from Admin > General > Invoice Settings > Use Parent Child Accounts – click Save at the top of the page to apply the change.

- On customer records, you will now have fields where you can establish parent-child relationships.
- These details will then flow through to sales automatically.

See also:
Third-party relationships
- The first step is to enable third-party billing in your database from Admin > General > Invoice Settings > Use Third Party Billing – click Save at the top of the page to apply the change.

- On customer records, you will now have fields where you can establish third-party relationships.
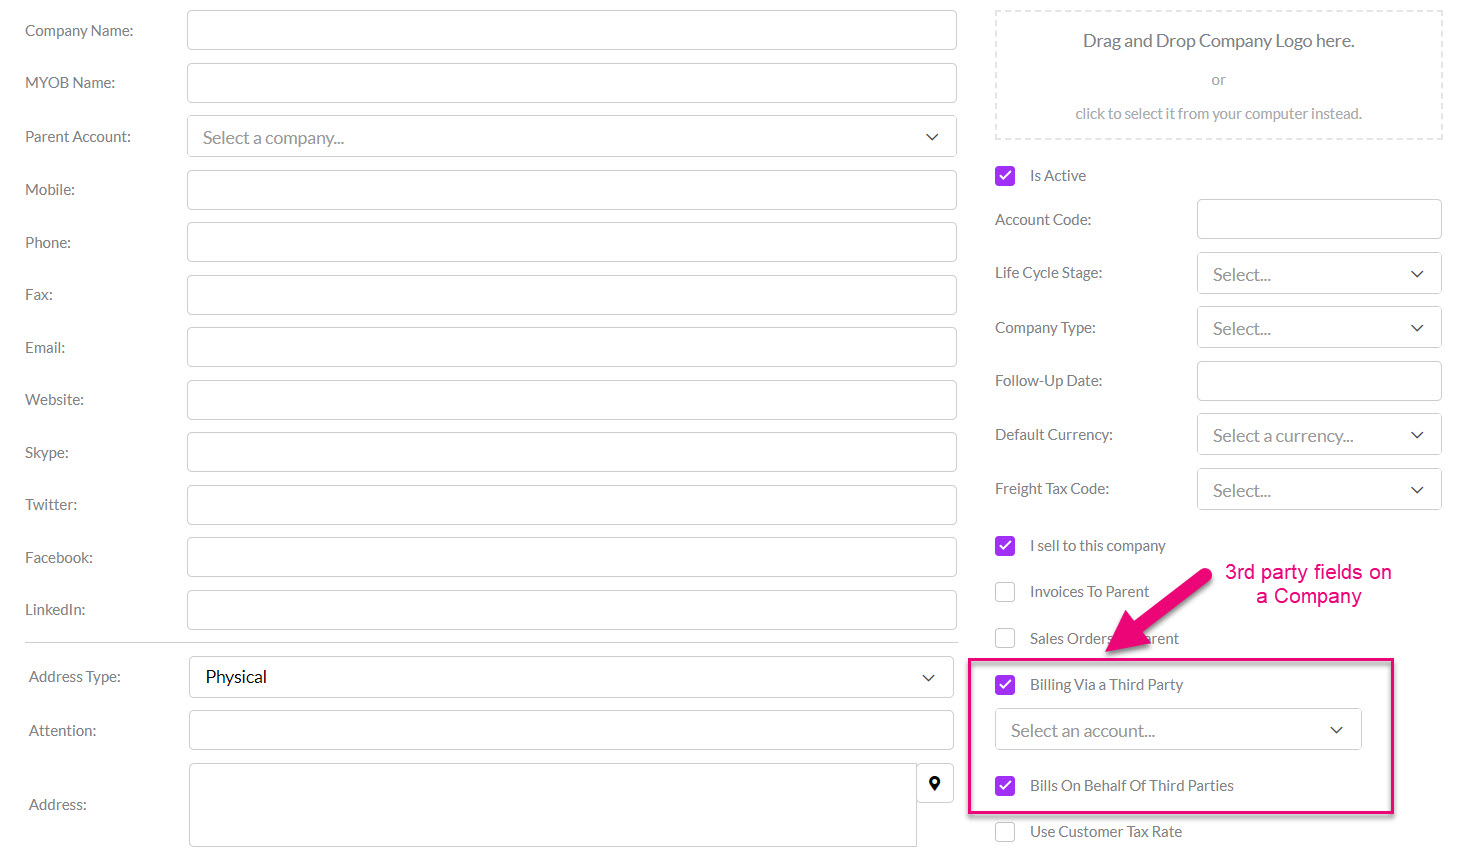
Third-Party fields on a Company form
- These details will then flow through to sales automatically.

Third-Party billing warning on an Invoice
See also:
Account Relationships
- The first step is to define the names of the “positions” from Admin > Settings > Customers > Account Relationships.
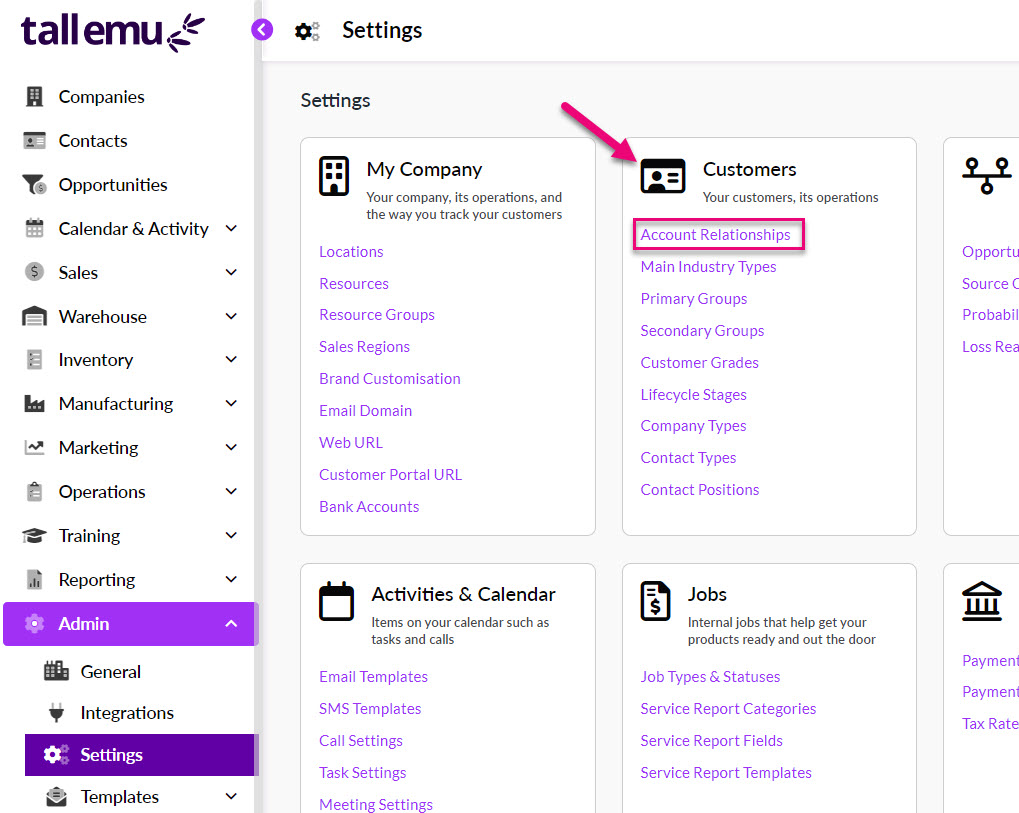
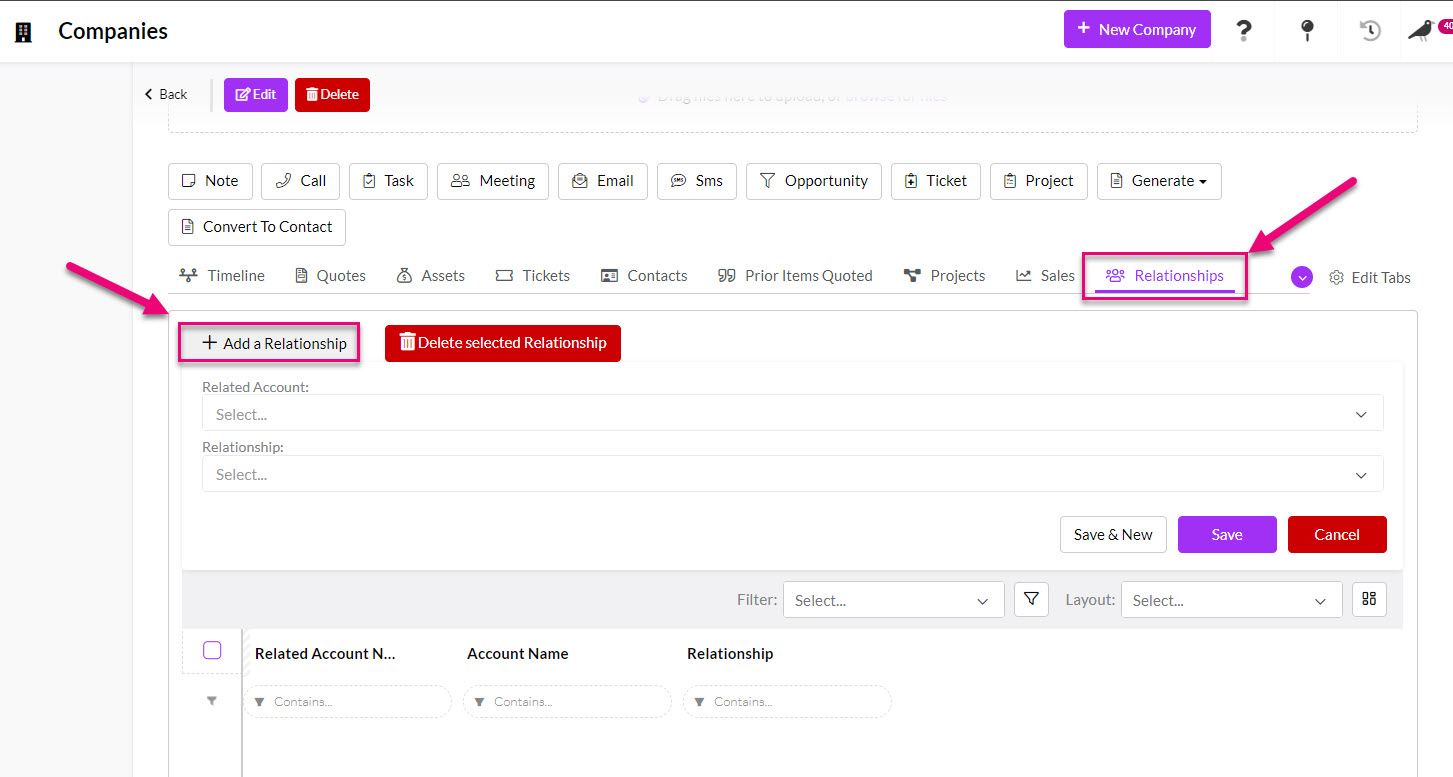
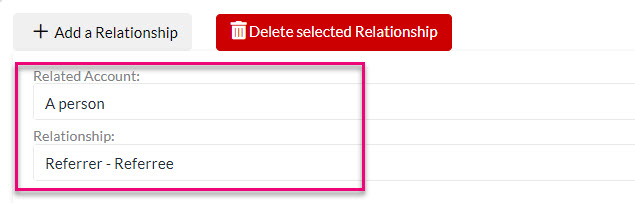
- You can then navigate to the Relationships tab on any Contact or Company record and use the Add A Relationship button to open a form where you can input details of the relationship.
See also:
Primary Contact
On a Company record, when either creating a new record or editing an existing one, select the Primary Contact that it should be linked to, then Save & Close the record.
Note that the Contact must already exist in CRM for this to work.

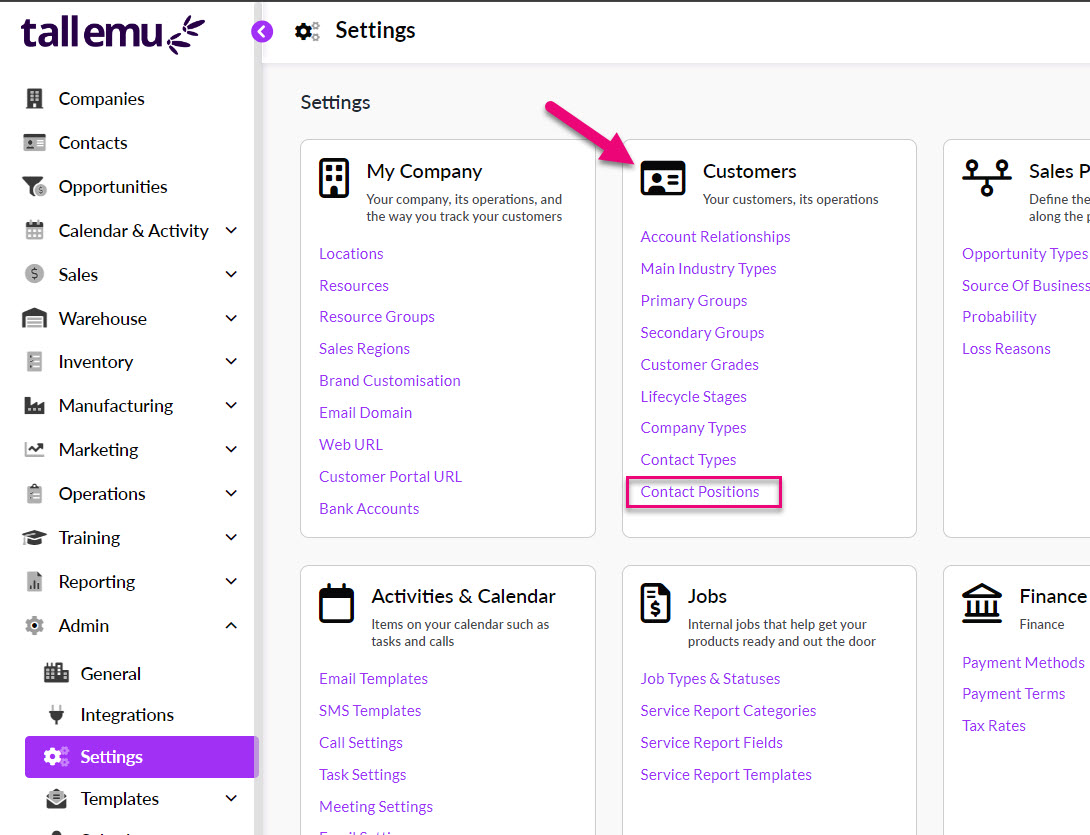
Contact Positions
- The first step is to define the names of the “positions” from Admin > Settings > Customers > Contact Positions.
- On any Contact record, navigate to the Positions tab and use the Add New Position button.

- This opens a form where you can select the Company that the position is relevant to (if applicable), then select the Position from the list you created earlier. You can also enter a Start Date and End Date for the position.
- Click on Save to create the Position record.

Set sales preferences
There are a number of preferences that you can set at a system level that will flow through to your customer records.
You can also manually set preferences on customer records.
Currency
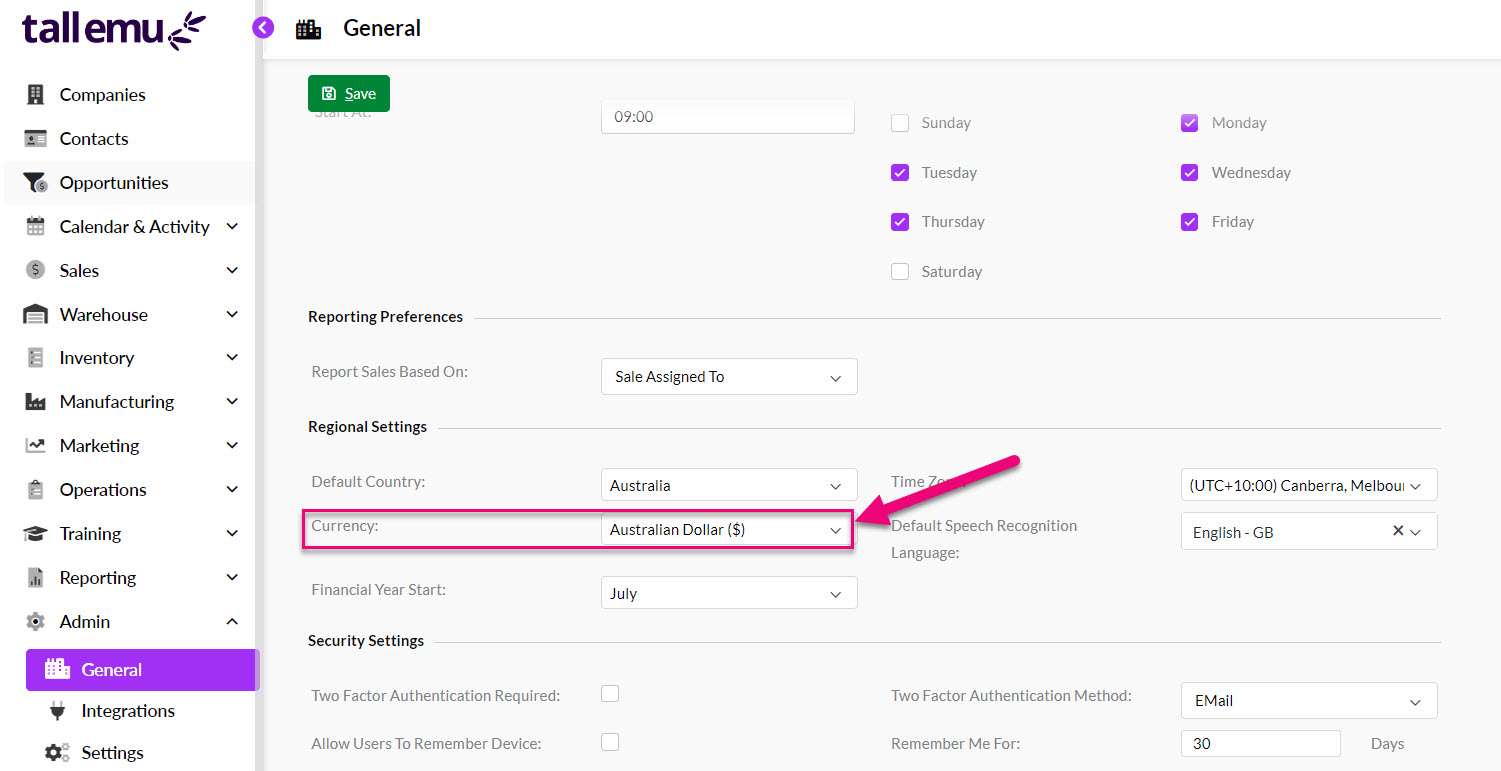
System-level
From Admin > General > Regional Settings you can set your default system currency.
See also:
Record-level
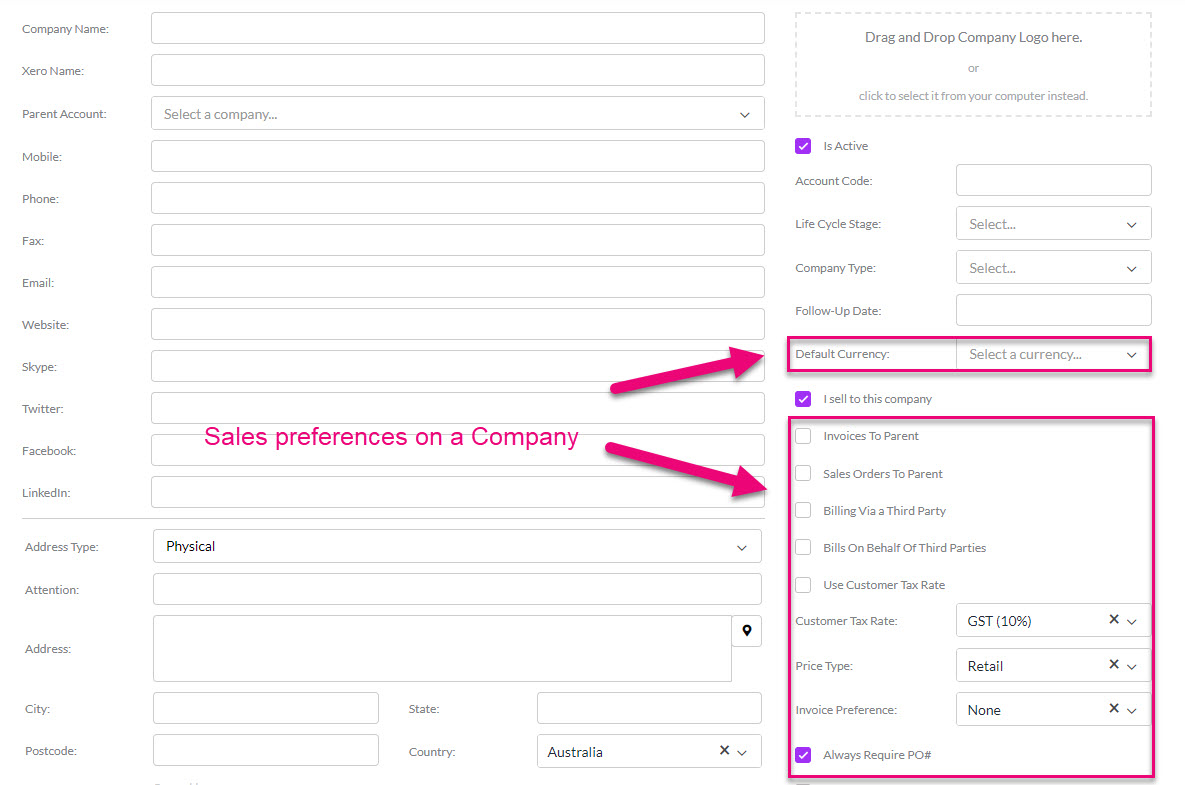
Edit any customer record and select another Default Currency from the list – this will then automatically apply to all future sale transactions.

Default Currency field on a Company
You can also manually update sales (Quotes, Sales Orders, Invoices) to use another currency.
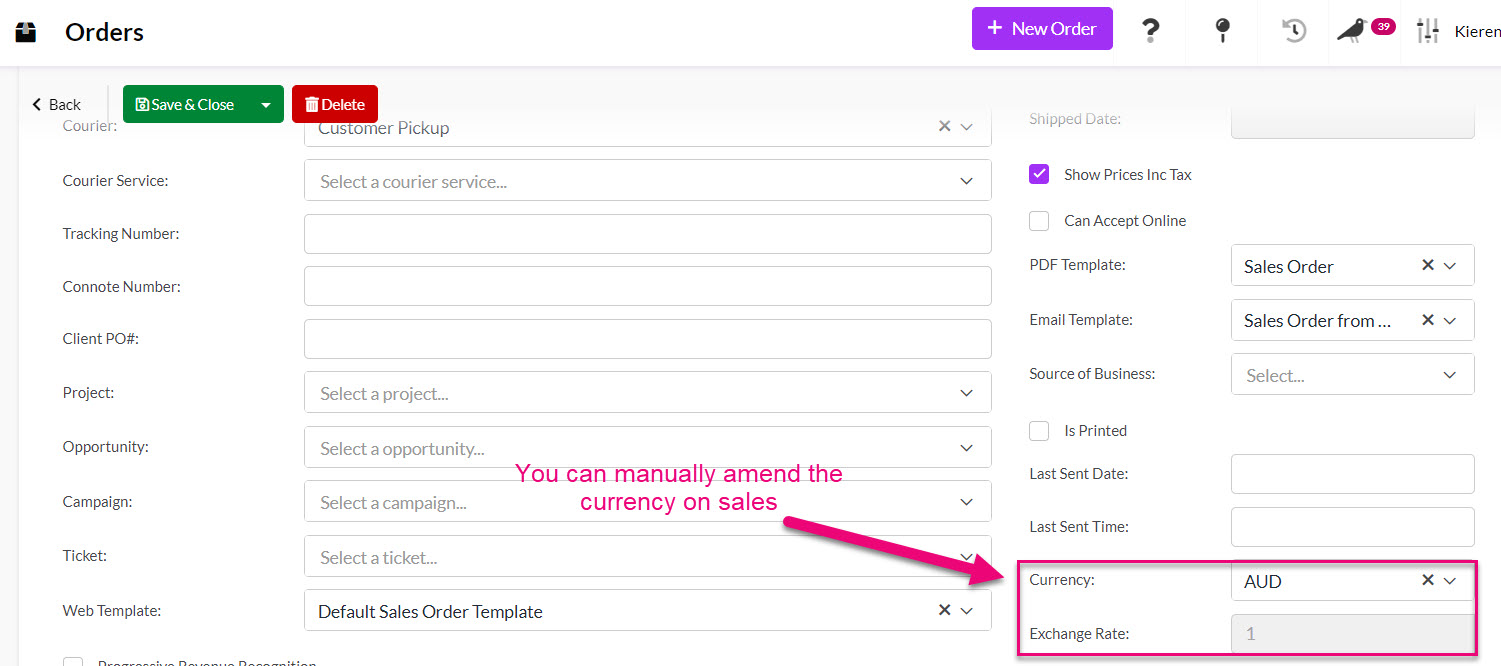
Currency fields available to edit on a Sales Order
See also:
Tax Rate
System-level
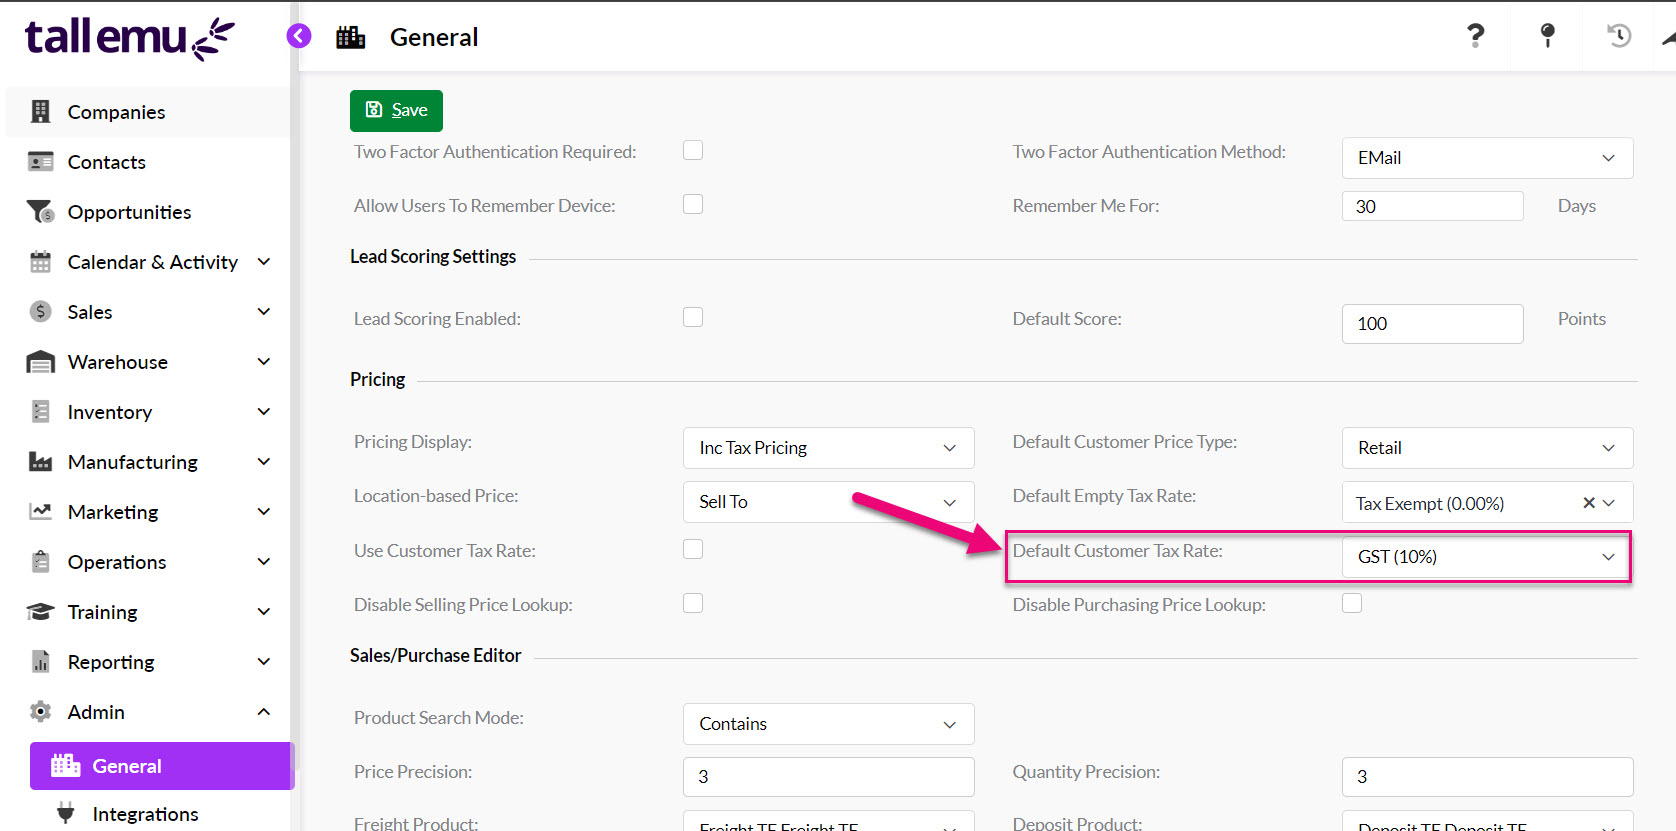
From Admin > General > Pricing you can set your system preference using the Default Customer Tax Rate field.
Record-level
You can also manually update sales (Quotes, Sales Orders, Invoices) to use another tax code.
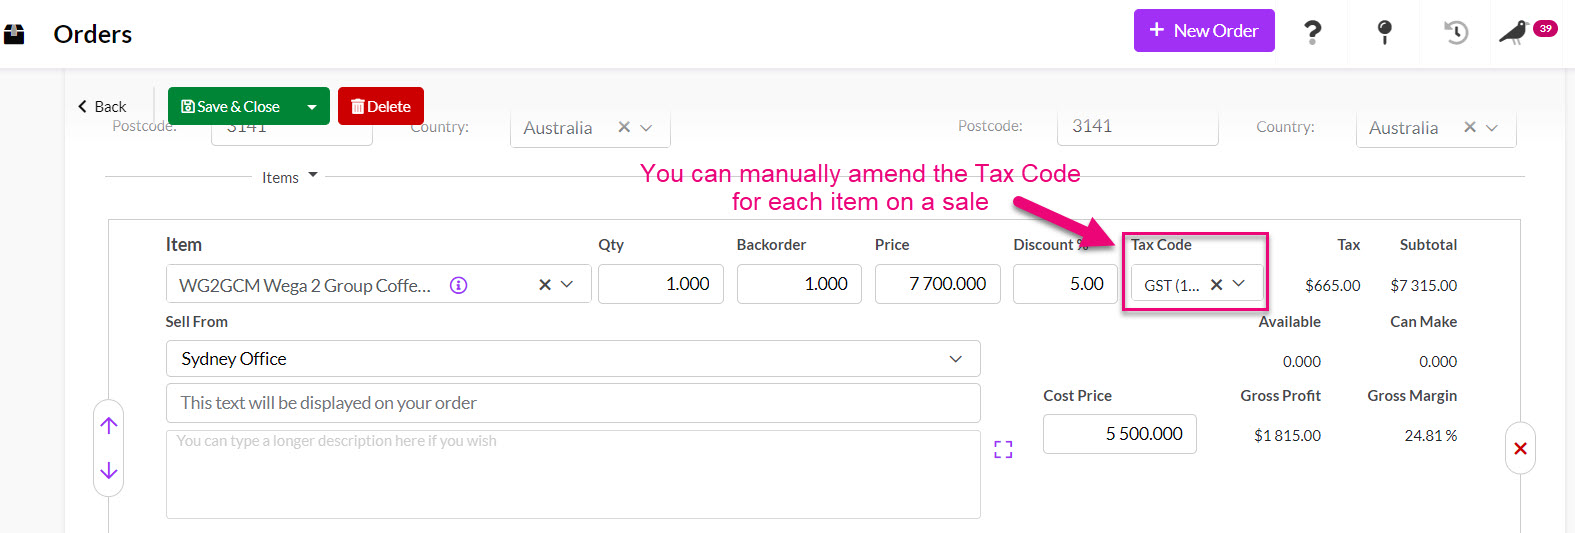
Tax Code on a Sales Order line item
See also:
Pricing
System-level
From Admin > General > Pricing you can set your system preference using the Default Customer Price Type field.

You can also price products you sell to customers based on where the customer is located (i.e. which Sales Region is applied to their record), or where you are located (i.e. your Locations). This is called Location-based pricing.

See also:
Record-level
Edit any customer record and select another Price Type from the list – this will then automatically apply to all future sale transactions.

Price Type field on a Company
You can also manually update sales (Quotes, Sales Orders, Invoices) to use another Price Type.

Price Type field on a Sales Order
You can also set up specific prices for each customer for particular Products with Customer-Special Pricing. These prices will then automatically apply to any sales you create for the customer.

Special prices on a customer record
You can also price products you sell to customers based on where the customer is located i.e. which Sales Region is applied to their record. This is called Location-based pricing.

Sales Region field on a Company record
See also:
Credit Limit
System-level
From Admin > General > Credit Settings you can enable the Credit Control Required option.
Once this feature has been enabled, warnings will display on Sales Orders and Invoices for the customer advising if the customer is:
- Over their credit limit.
- Outside their payment terms.
- On credit stop – a system warning will also appear if users try to generate shipments from an order where the customer is on credit stop.

See also:
Record-level
You can edit any customer record and enter a value in the Credit Limit field.

Purchase Order numbers
System-level
From Admin > General > Company Settings you can enable the Require PO Number option.

Record-level
You can enable or disable this setting on individual customer records using the Always Require PO# field.

Delivery preferences
System-level
From Admin > Settings > Shipping & Freight > Couriers you can specify a default Courier to apply to apply to your Outbound Shipments and Sales Orders.
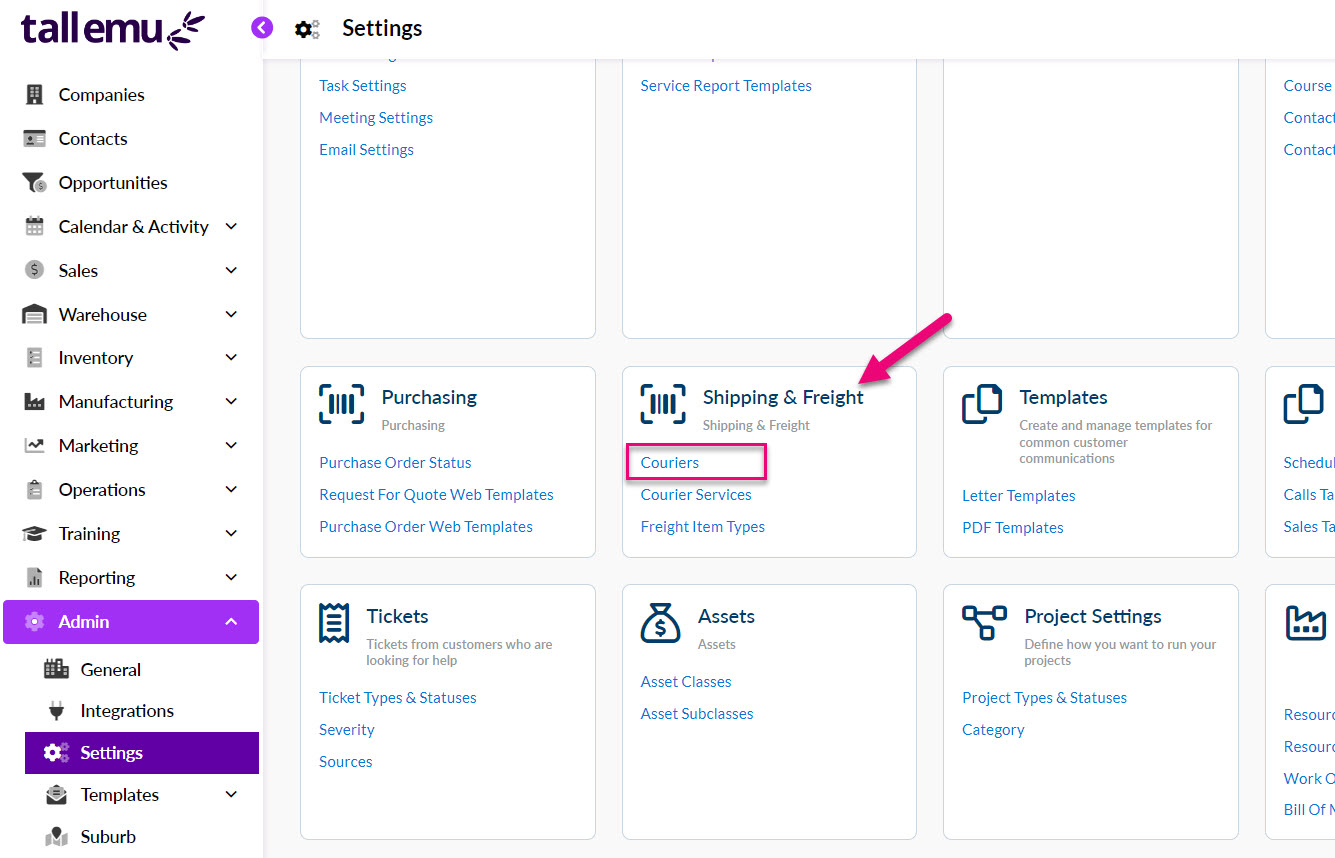

Setting a default Courier
See also:
Record-level
There is a field for Delivery Instructions on customer records; the information in this field automatically flows through to sales (Quotes, Sales Orders, Invoices).

Delivery Instruction box on a Company record

Delivery Instructions pulled through from the customer record to a Quote
On sales, you can also manually select a Courier from the list if the system default isn’t relevant.

Courier fields on a Sales Order
Limiting record access
You can limit who can see specific records and also determine what people can do with them i.e. create, edit, delete etc.
System-level
- From Admin > Settings > Users, Teams & Security you can click on Manage Teams to set specific permissions for your Users.

- Each User needs to be attached to a Team, otherwise they will not have any access in CRM. The permissions of the Team are then applied to all the Users attached to it.
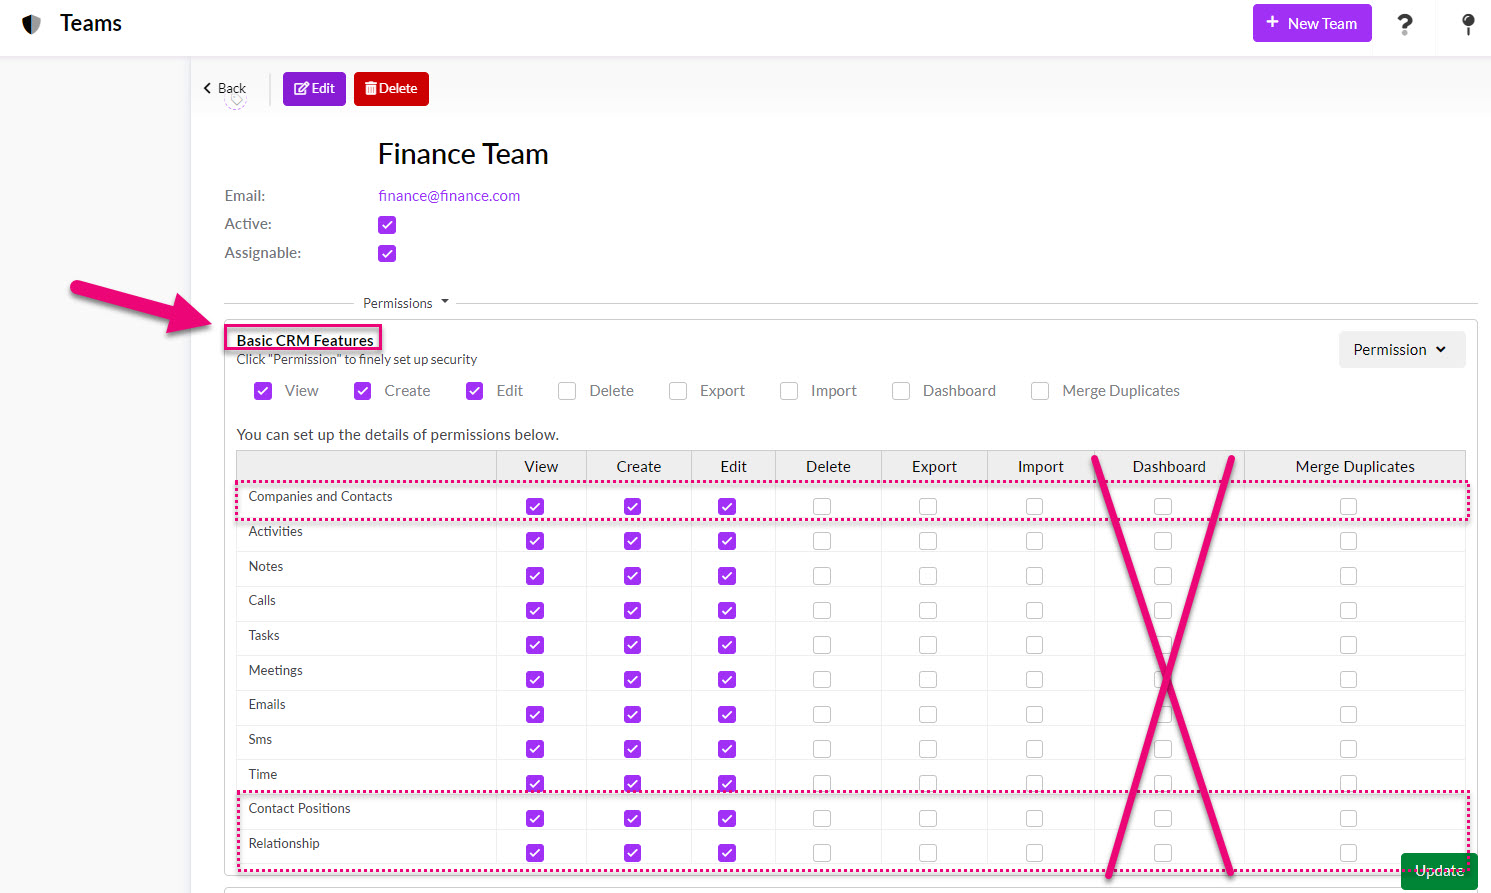
- When setting permissions for a Team, the main area that relates to customers is Basic CRM Features, as shown in the following screenshot. Here, you can determine whether people can View, Create, Delete, Import, Export and Merge Duplicates for Company and Contact records.
Note that the Dashboard column is not applicable to the Basic CRM Features section as there is no Dashboard View available in Companies or Contacts.
See also:
Record-level
Via the Visible To field on customer records, you can determine which Users can see the record:
- Everyone – all Users will be able to see the record, assuming that they have a minimum of View permission for the record type.
- Assignee – only the User that the record is Assigned To will be able to see it, with the exception of Users who belong to the Administrators Team who have full system permissions.
- My Team – all Users that belong to the same Team as you will be able to see the record. If a User belongs to multiple Teams, the visibility will overlap to the Users in each Team.

See also:
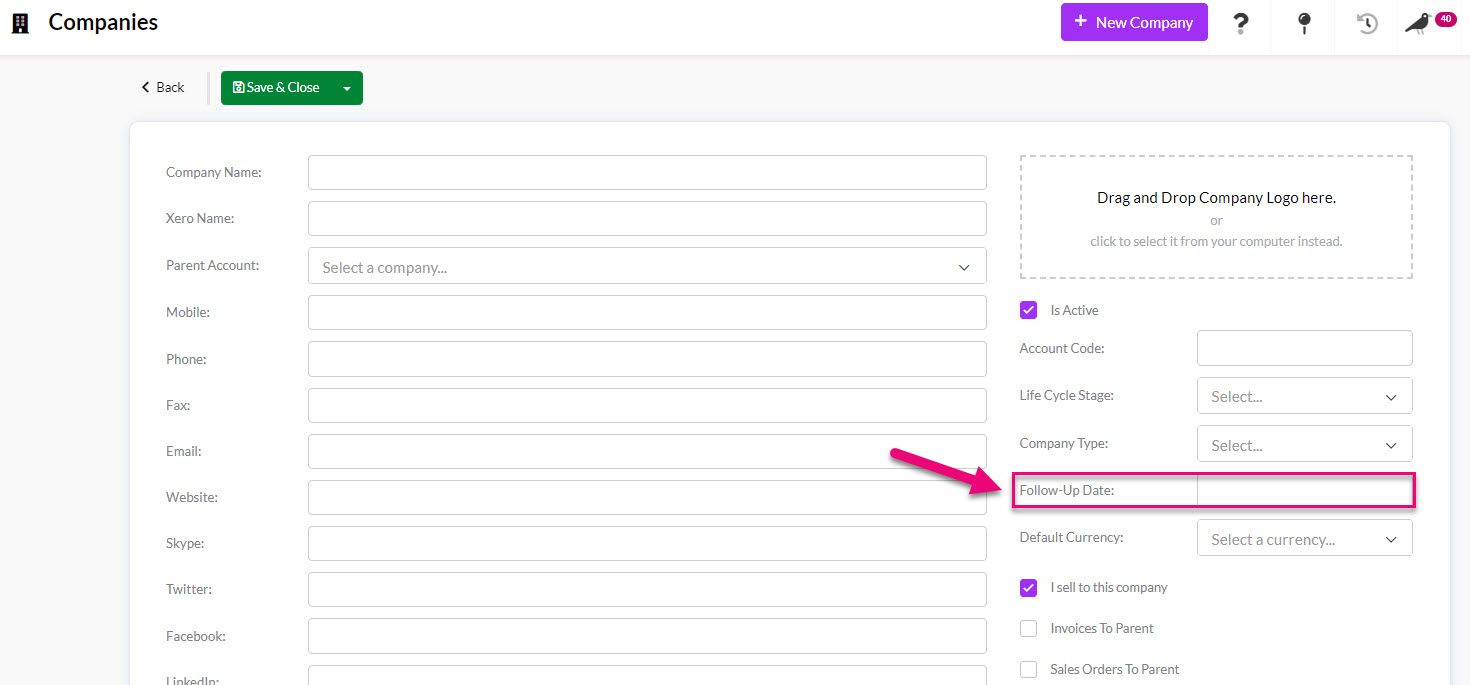
Setting follow-ups for customers
As well as setting reminders on Activities, you can use the Follow-Up Date field on customer records to generate a notification in CRM and build workflow lists of customers to contact.
Set a notification
To receive a notification :
- The Follow-Up Date field on the record must be populated.

- The Assigned To field needs to be populated with a User – this is the person that will receive the notification in CRM.
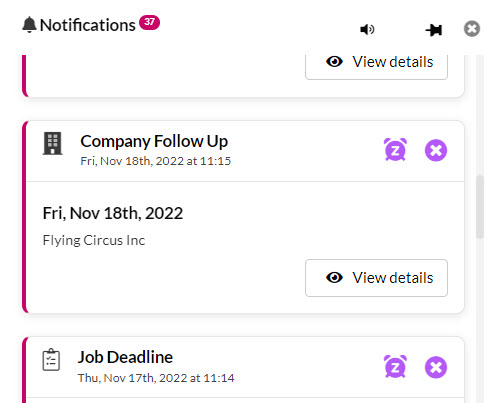
On the chosen date a notification will appear in CRM when the person the record is assigned to logs in. Following is an example of a company follow-up notification in CRM.
If you want to set a follow up for multiple records, don’t forget that you can update several records at once using bulk update.
See also:
Generate a list of customers to follow up
Once you have populated the Follow-Up Date field for multiple customer records, you can quickly generate a list of customers to follow up.
There are a few ways to do this:
- Add the Follow-Up Date column to your layout and then filter it by the desired timeframe. You can also add the column for Assigned To and filter this to show only records for a particular User.

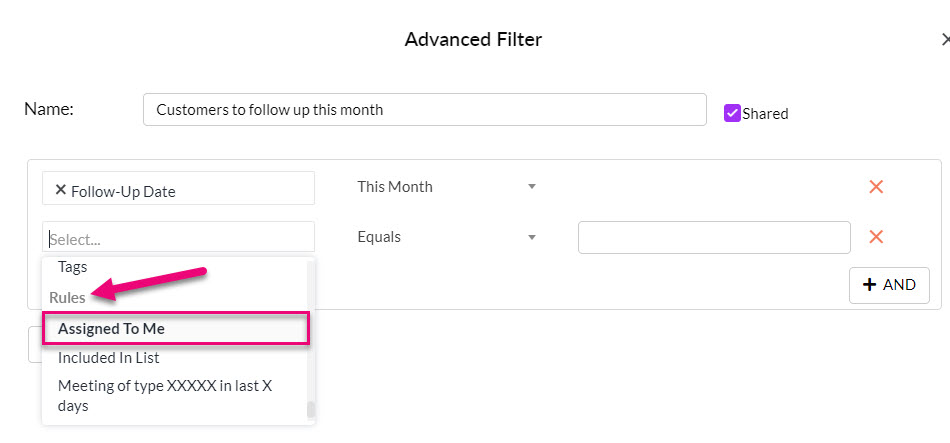
- Rather than performing these steps every time you want to generate a follow up list for a set period of time, you can create an Advanced Filter to use at any time.
- Following is an example of an Advanced Filter to show customers that have a follow-up date this month AND are also assigned to a particular User.

Pro Tip: use the Rule for “Assigned To Me” in your Advanced Filter and make it Shared – this way any User in CRM can utilise the filter and it will show them their customers to follow up i.e. “Assigned To Me” = the logged in User.

Also see: