Setting up your Sales Pipeline
This guide will take you through how to set up your sales pipeline to create and manage leads in CRM.
As there are many different terms people use to describe their leads, enquiries, prospects, deals etc., we’ll use “leads” as a catch-all term in the following guide.
1 – Customise your sales pipeline
WHY?
When it comes to managing leads, every business has their own process, terminology and lead sources. Getting your unique configuration details into CRM is an important first step, for many reasons:
- This allows you to get your existing terminology into CRM, making it easier for your users to transition over to CRM.
- You can segment your workflow and lead data according to criteria that are meaningful to your business.
- Makes reporting on your sales pipeline data quick and painless.
Opportunities are where you enter in your leads in CRM; you then manage them here until you either “win” the lead and turn them into a customer, or “lose” the lead and close it off.
HOW?
- Go to Admin > Settings > Sales Pipeline and you will find a list of fields on the Opportunity form that you can customise.

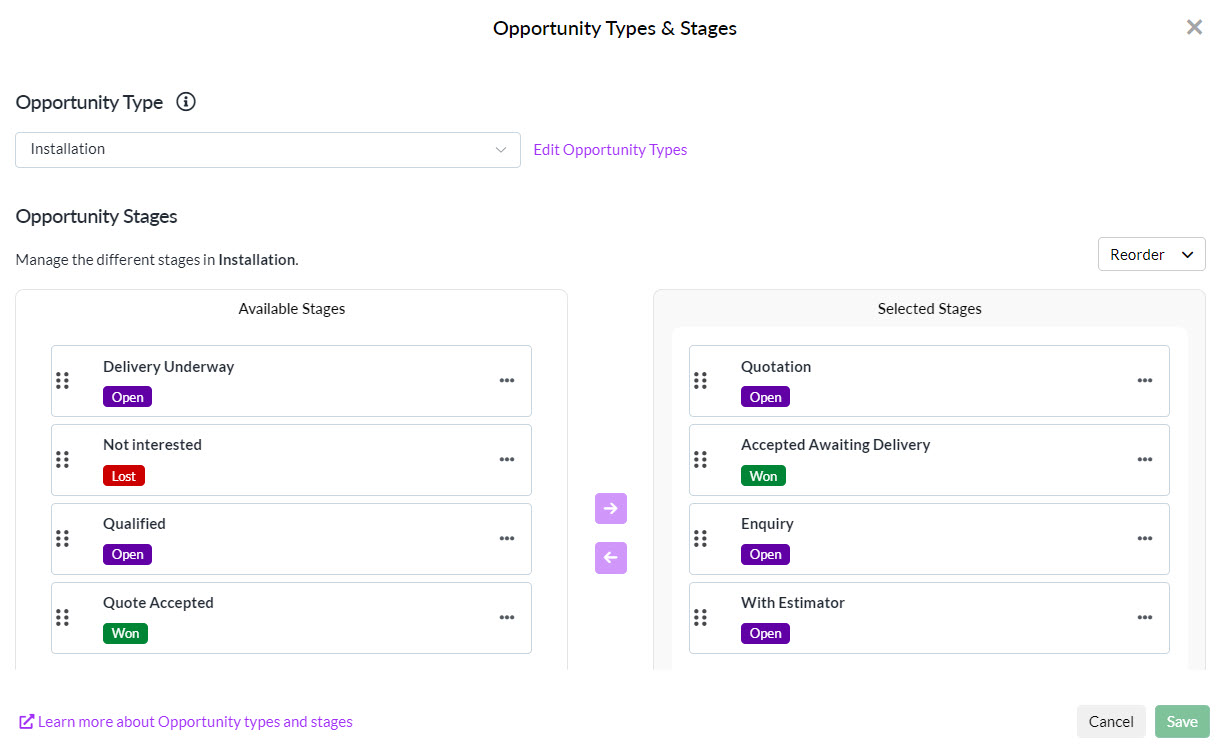
- Opportunity Types & Stages: these 2 fields work together to help you segment, sort and report on your pipeline by where your leads are up to i.e. who is open, closed, being worked on, needs to be contacted etc. They also determine whether an Opportunity record is “closed” or “open” overall.
- Source Of Business: this is a list of the places you receive leads or enquiries from i.e. phone, website, email, social media etc.

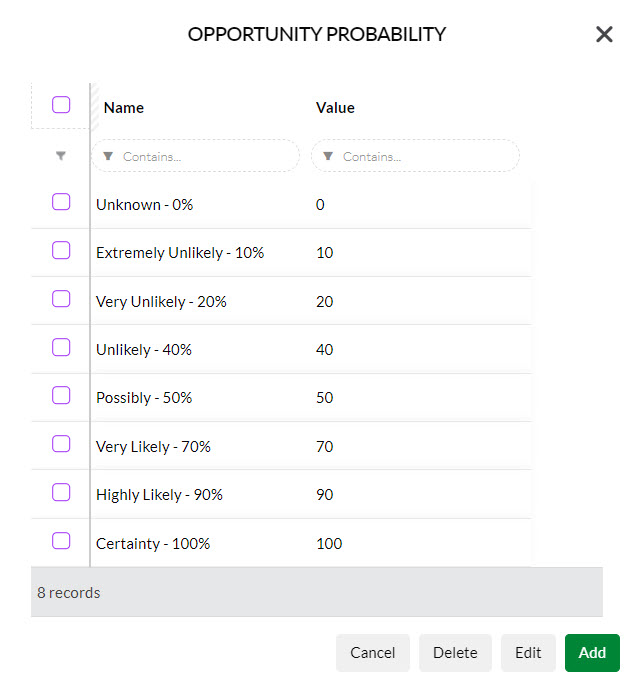
- Probability: by default, this field provides a percentage scale you can use to identify Opportunities by their likelihood to become a customer.
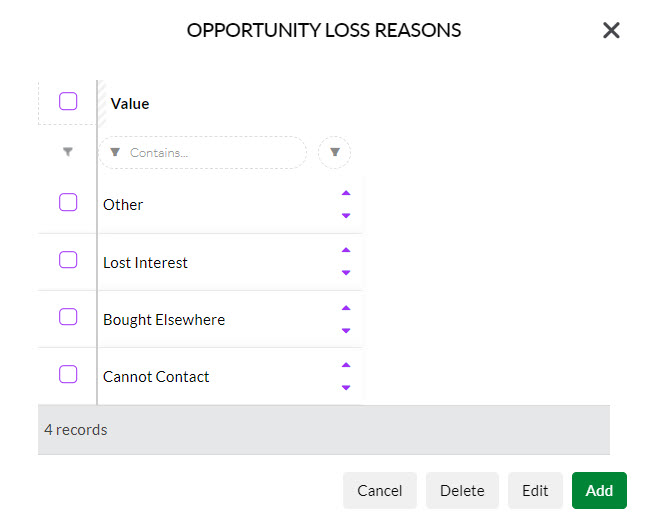
- Loss Reason: when an Opportunity record is closed off, you can select a reason why e.g. “lost interest”, “bought elsewhere”, “cannot contact” etc.
See our full guide on how to customise your Opportunity fields.
2 – Get your leads into CRM
The next step is to look at where your leads come from and how you are going to get them into CRM.
WHY?
Centralising all your leads in CRM has numerous benefits:
- Streamlined searching, sorting and reporting with all your leads in one system.
- Built in Dashboards and Reports make monitoring your pipeline in CRM quick and painless.
- Quickly segment and market to or communicate with leads from CRM using Smart Lists and an integration with either Campaign Monitor or Mailchimp.
- Automate internal notifications when a lead is created e.g. notify the sales team or specific people.
- Automate confirmation emails to leads who contact you.
HOW?
There are a number of ways that you can create new leads in CRM; you can also use several methods simultaneously.
Manually enter them
Throughout CRM there are numerous buttons that allow you to add Opportunities – following are just a few examples.

Creating an Opportunity from a Project

Creating an Opportunity on a Company
There are 2 buttons to add a new record in Opportunities

There are 2 buttons to add new records in Opportunities
See also:
Import them in bulk
From the Opportunities area you can click on the Excel icon to access the Import Opportunities feature.
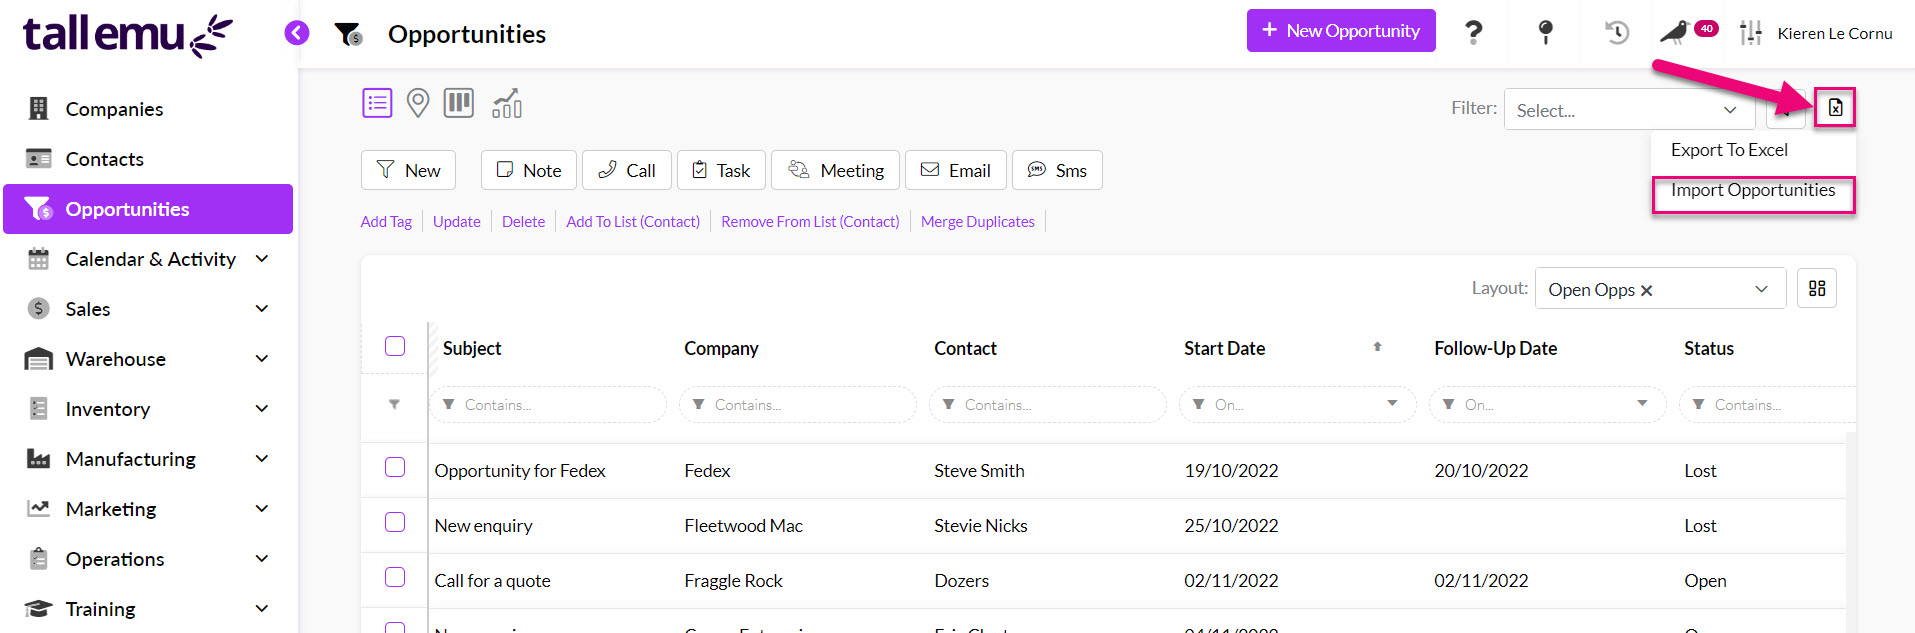
There is an import template available for download – fill this with your data and then use the import wizard to bring it into CRM.

See also:
Automate an online flow into CRM
If you use Facebook Ads, you can automatically bring these leads straight into CRM, which will create a Contact and Opportunity record for you to work with.
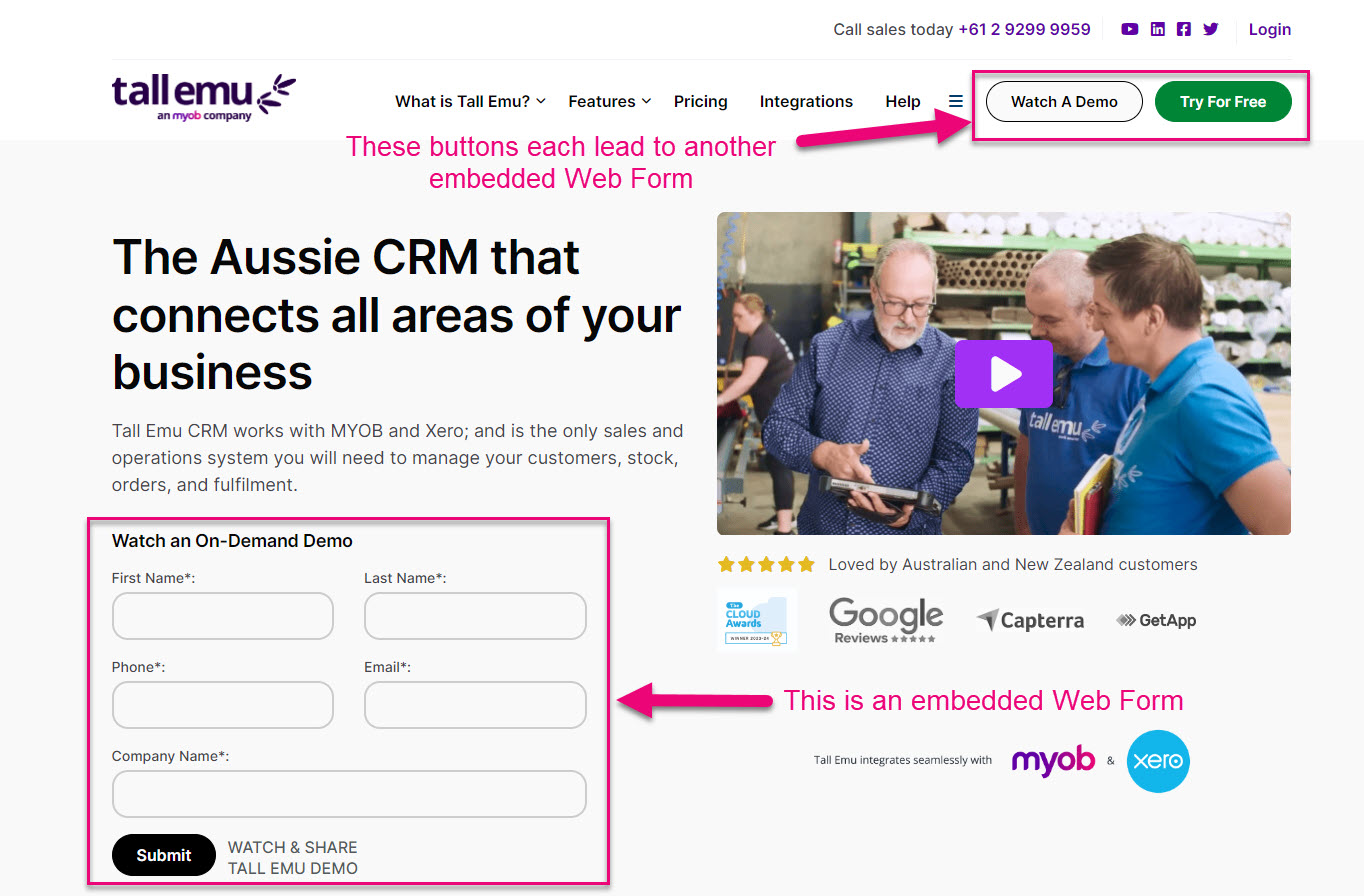
If you take enquiries or people contact you through your website, you can set up a Web Form to embed in your website which will capture this information, bring it into CRM and send automated confirmation emails.
A live example of this is something you may have already used if you contacted us on our website or signed up for a trial – we have numerous embedded forms on our site that bring enquiries directly into our CRM.
You can also add links to a Web Form into emails, social media posts or have people scan a QR code to access an online form. If you’ve registered for one of our On-Demand training packs, you will have seen that you can register by either clicking a button or scanning a QR code.

See also:
Turn an email into an Opportunity
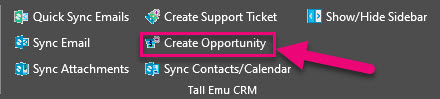
If you’re using our Inbox Insights integration for Outlook, there is a button on the toolbar that will turn a selected email into an Opportunity record in CRM.
See also:
3 – Configure pipeline permissions and access
Now that you’ve customised your pipeline and have started adding leads to it, you can decide which of your Users can see and interact with Opportunity records.
WHY?
You may not want all your leads (Opportunity, Contact and Company records) to be visible to all your Users, or you may want to limit how some Users can interact with certain records.
HOW?
There are several ways to do this.
Team permissions
Using Teams, you can specify what your Users can see and do. For example, you may want some people to be able to delete records, while others can’t.

Opportunity permissions row in a Team
See also:
Allowed Opportunity Types
When creating a Team, you can determine which Types of Opportunities the Users in that Team will be able to access.

Allowing Opportunity Types in a Team
See also:
Record access limitations
You can also limit access to specific records using the Visible To field on Opportunities, Companies and Contacts.

Changing the visibility of an Opportunity
See also:
4 – Set up workflow lists
WHY?
Working with your lead data day-to-day can be streamlined for all your users by setting up some basic workflow lists to quickly display key information.
For example, there is some information that every business will want to see:
- How many open leads do I have?
- How many closed leads are there?
- Which leads need to be followed up?
Instead of performing a lookup from scratch every time you want to view this information, you can save workflow lists that can be made visible to all Users (or only visible privately) so that everyone is literally on the same page.
HOW?
First, you need to decide what questions you frequently ask about your sales pipeline, both as a business and a User.
In this example, we’re going to find all the leads in a pipeline that need to be followed up.
Advanced Filters
Each of these questions you want to answer about your pipeline can be turned into an Advanced Filter.
You can have as many of these as you want, and you can choose which ones are publicly available to all your Users (shared) and which ones are for your use only (private).
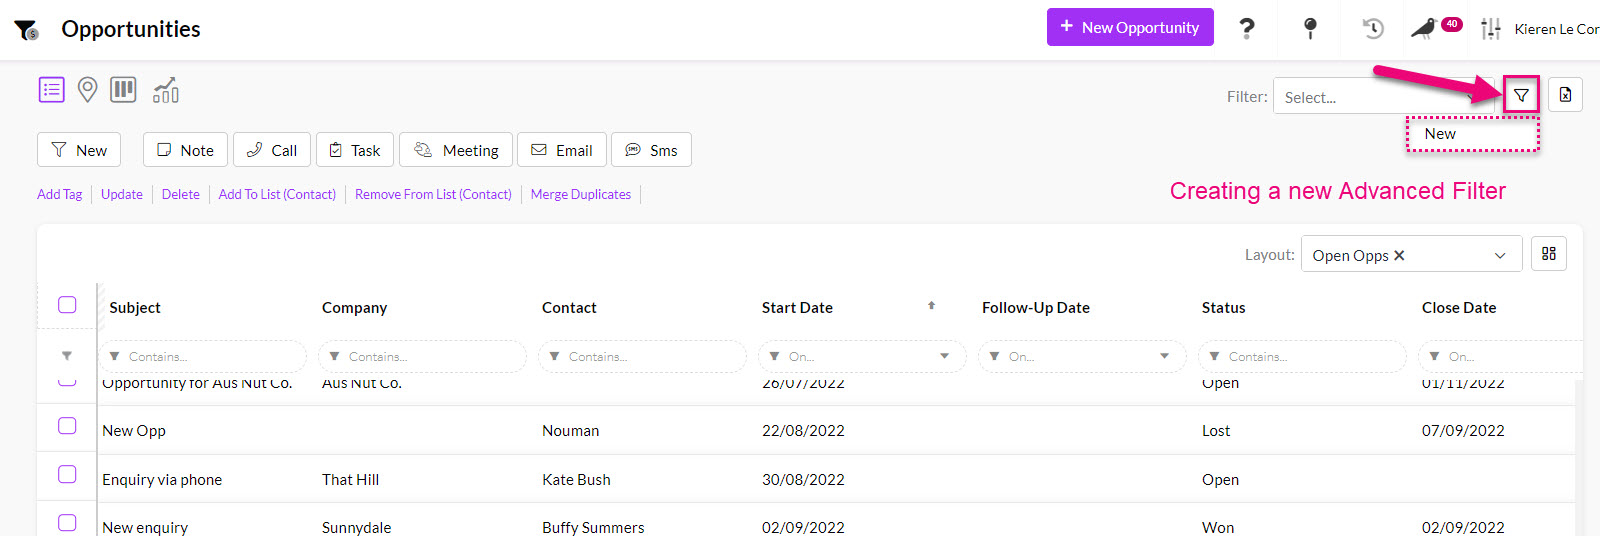
- Click on the Filter icon and select New – this opens the form to create a new filter.
- Enter in a short name for the filter that will make it easy to identify in your list of filters e.g. “Opps to follow up”.
- If you want to share this with others, click the Shared box, otherwise the filter will remain private and only the creator can see it.
- You can then start building criteria to answer your question by adding a field in CRM and then choosing the value it must meet – the following screenshot provides an overview.

Creating an Advanced Filter
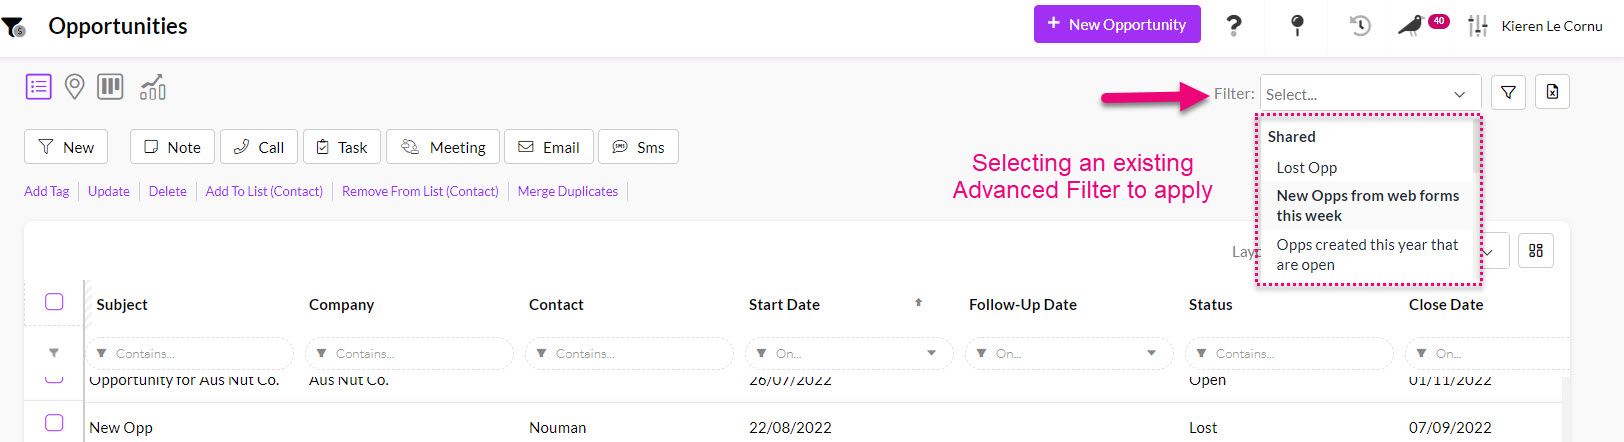
- Once saved, you can now see and select the Filter from the list to apply it.
See also:
Layouts
Once you’ve decided on the records you want to see in your Advanced Filters, you’ll likely come across the problem that once you’ve applied your Filter, the columns that you’re looking at don’t display the data you want to see.
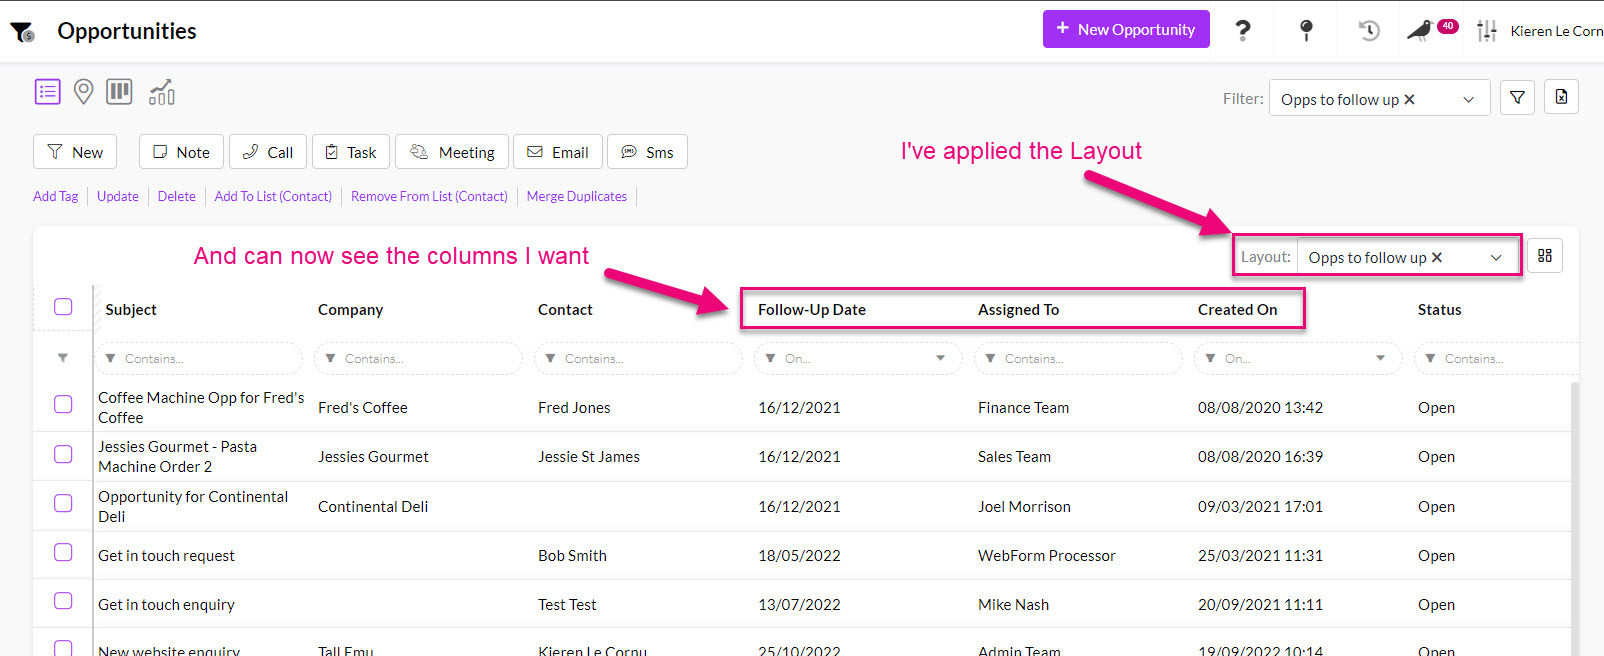
In the following example, I have applied my Advanced Filter “Opps to follow up” but I can’t see the column for Follow Up Date. I’d also like to be able to see who the record is Assigned To, along with the date it was Created On. I’ll want to see this same information whenever I deploy my “Opps to follow up” filter.
Rather than manually adjusting the columns to display the required data each time, I can do this once and save it as a Layout; I can then select this from a list, exactly the same way I can choose an Advanced Filter to apply.

- To prepare my Layout, I’ll want to add, remove and re-position columns so that what’s displayed matches my requirements.
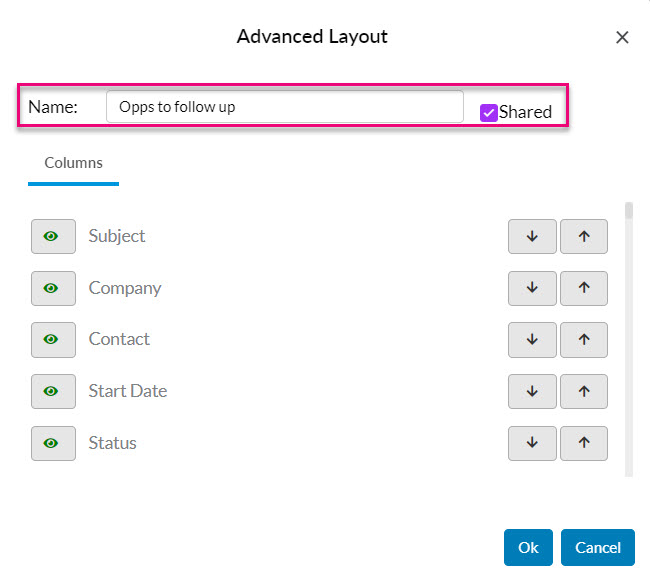
- I can then click on the button to create a new Layout.

- A box will open, and you’ll need to add an easily identifiable name for the Layout and decide whether or not it’s shared.
- In this case, I’m just going to give the Layout the same name as the Advanced Filter as I’ll be using these together.
- Press OK to save the changes.
- You’ve just created a Layout that can now be chosen from the list and applied anytime.
See also:
5 – What next?
Now that your pipeline is set up and ready to go, you’ll want to learn more about how to work with Opportunity records day-to-day:
- About the Opportunity form
- Winning and losing Opportunities
- Working with Opportunities
- View other records associated with Opportunities
- View Opportunities in Dashboards and Reports
We also have some more general guides on managing workflow in CRM: