-
- Getting Started
- Record Tabs
- Managing Duplicate Records
- Setting Up Grid Layouts
- Show and Hide Columns
- Key setup steps
- Additional setup steps
- Tips & Tricks
- Pinning Activities
- Bulk update
- Timeline
- Bulk uploading images
- Advanced Filters
- Automated Workflows
- System Admin in CRM
- Search, sort and report
- Calendar View
- Dashboard View
- Using Views
- Import troubleshooting
- List View
- Set up your customers in CRM
- Working with Activities in CRM
- Basic Navigation
- Using the Map View
- Using the Kanban View
- Configuring Dropdown Lists
- Creating New Records
- Open or Edit Existing Records
- View Details on Map Pins
- Syncing Your Accounting System
- Change the Column order
- Setting up your CSV file for Import
- Filter Map Records
- Company Information
- Sorting Records
- Export data
- Filtering Records
- Import Data from Excel or CSV
- Colourise Map Records
- Set Up Security Groups
- Invite Other Users
- Connect Outlook
- Connect to Mailchimp or Campaign Monitor
- Set Up Other Reference Data
- Configure Online Quoting
- View Reports and Dashboards
- Connect Burst SMS
- Viewing Tags
- Adding and Editing Tags
- Sorting and Filtering with Tags
- Jobs, Assets & Service Management
- Manufacturing
- Operations
- Reporting
- Training
- Workflow Management
- Quoting & Selling
Setting up your CSV file for Import
The key to successfully importing data into the CRM is to set up your input file correctly. The below guidelines will help make this process easy.
You should also refer to our dedicated guides on:
- How to import data into CRM – where and how to access and use the importer.
- Import troubleshooting – solutions for common issues.
- Bulk importing image files.
If you need any assistance with this process, please send us an email at [email protected].
1. Download an import template from CRM
If you haven’t already, go to the area of CRM you want to import data into and download a copy of our import template.


2. Set up your import file
Understanding the import template
The downloadable template file will outline the database fields that you are able to populate in the CRM – handy for easy data mapping. Each column in the template is a field in CRM.
Our import system will automatically map header row values that it recognises – e.g. First Name, Last Name, Company Name, Part Number, Mobile, Email, Phone etc.
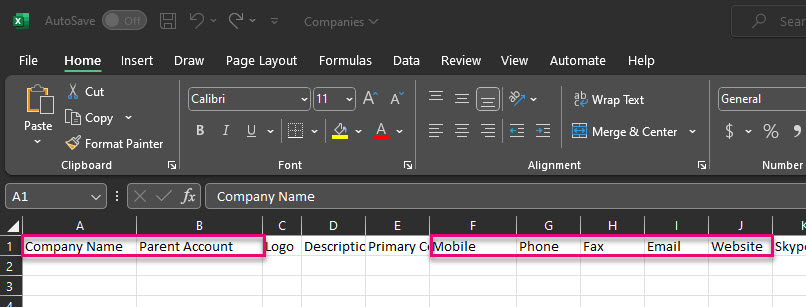
Columns in a Company import template
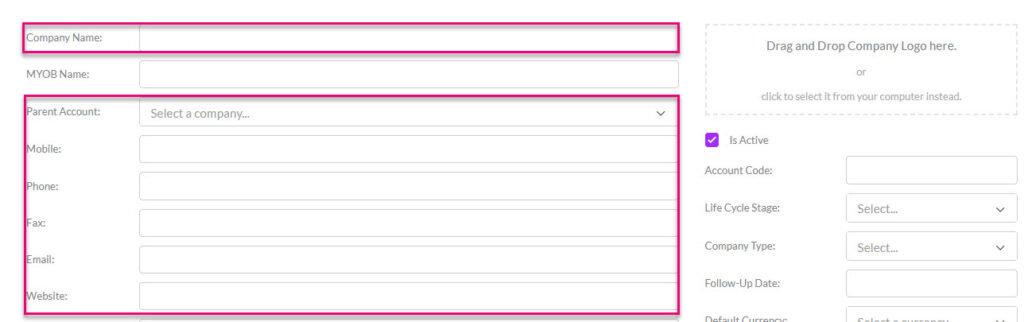
The corresponding fields on the Company form
- All columns must have a header (no blank cells in the header row).
- There are NO duplicate header names (e.g. use ‘Physical Address’ and ‘Postal Address’ rather than two columns with the header ‘Address’).
Data types
- You will need to ensure that the type of data in your file is consistent with the field you are importing into.
For example, if I have text in my file and try to import this into a number field, the import will fail because it’s the wrong type of data and can’t be accepted – a number field can only accept numbers.
- Where a field in CRM is a checkbox/Boolean, your import data should be coded with only 1 or 0 values where 1 = YES and 0 = NO or 1 = TRUE and 0 = FALSE or 1 = ACTIVE and 0 = INACTIVE.
- Ensure that any prices do not have a ‘$’ symbol in the cell – the values need to be numeric only.
- Avoid using special characters (in particular commas and apostrophes).
- Date fields should be converted into a format that is NOT country specific e.g. 31-March-2020.
Names & Addresses
- Be sure to split any address fields into their respective fields, rather than one singular column.

Correctly splitting an address up over several columns/fields
- Ensure any Contact name fields are separated into First Name and Last Name rather than a single column simply called ‘Name’.
Required fields
If you manually created a record in CRM and didn’t fill in all the required fields, you’d get and error and the record couldn’t be created.
It’s the same when you import, so you need to make sure that you have all the required fields for the module you are importing into.
For example: if you do not have a First Name you will not be able to create a new Contact, if you do not have a Company Name you will not be able to create a new Company, if you do not have a Subject you will not be able to create a new Opportunity etc.
Importing values that don’t already exist in CRM
This applies to dropdown, lookup and multi-select fields, basically anywhere you select from a list of existing values in CRM. The value must already exist in CRM.
For example: I’m importing Companies and want to set the Industry Type for them. I haven’t set up any options on the Industry Type dropdown list yet, so any values I have in that column in my import file will be rejected as they don’t exist in CRM – my import will fail.
The same situation would exist if I was trying to assign records to a person that wasn’t already either a User or Employee in CRM.
If list values are not already present, you can add them to certain fields from Admin > Settings – please see this guide for more information on how to customise dropdown field values.
To avoid this stopping your import, you can specify the action that is taken by the importer if a value is not found.
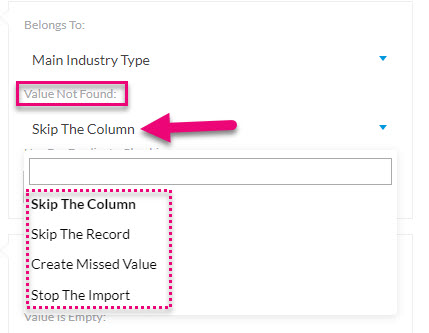
Options when a value is not found in CRM
3. Save it as the right file type – CSV
- Your file MUST be saved as a .CSV before you can import it to CRM.
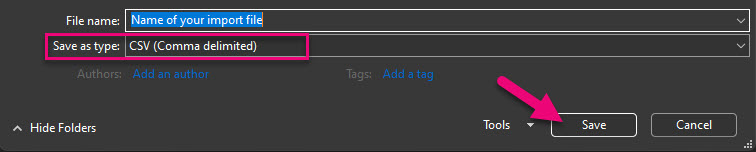
Saving a file as a .csv
If you try to upload an xls or xlsx file instead of a csv, you may see some unusual behaviour from the importer and the file will not be accepted.
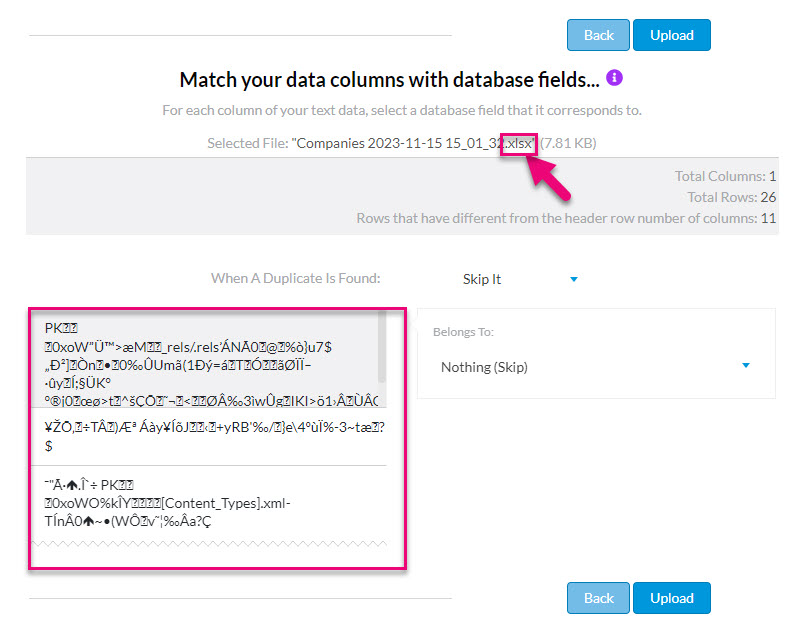
Uploading an incorrect file type
To learn how to import your file, click here.