-
- Getting Started
- Record Tabs
- Managing Duplicate Records
- Setting Up Grid Layouts
- Show and Hide Columns
- Key setup steps
- Additional setup steps
- Tips & Tricks
- Pinning Activities
- Bulk update
- Timeline
- Bulk uploading images
- Advanced Filters
- Automated Workflows
- System Admin in CRM
- Search, sort and report
- Calendar View
- Dashboard View
- Using Views
- Import troubleshooting
- List View
- Set up your customers in CRM
- Working with Activities in CRM
- Basic Navigation
- Using the Map View
- Using the Kanban View
- Configuring Dropdown Lists
- Creating New Records
- Open or Edit Existing Records
- View Details on Map Pins
- Syncing Your Accounting System
- Change the Column order
- Setting up your CSV file for Import
- Filter Map Records
- Company Information
- Sorting Records
- Export data
- Filtering Records
- Import Data from Excel or CSV
- Colourise Map Records
- Set Up Security Groups
- Invite Other Users
- Connect Outlook
- Connect to Mailchimp or Campaign Monitor
- Set Up Other Reference Data
- Configure Online Quoting
- View Reports and Dashboards
- Connect Burst SMS
- Viewing Tags
- Adding and Editing Tags
- Sorting and Filtering with Tags
- Jobs, Assets & Service Management
- Manufacturing
- Operations
- Reporting
- Training
- Workflow Management
- Quoting & Selling
Invite Other Users
Once your initial set-up is complete, you’ll want to begin inviting users to join you on the CRM. If you’re in trial, it’s important that you give every member of the team a chance to trial the software and see how it works. If you’re a new subscriber, you’ll simply need to begin adding members of the team so business can continue.
Once your accounting data is loaded, all employee records and users will exist. Just update the username, put them into the right user group (for security reasons) and invite them to the CRM.
If you choose not to import employees from your accounting system, you can always add users manually.
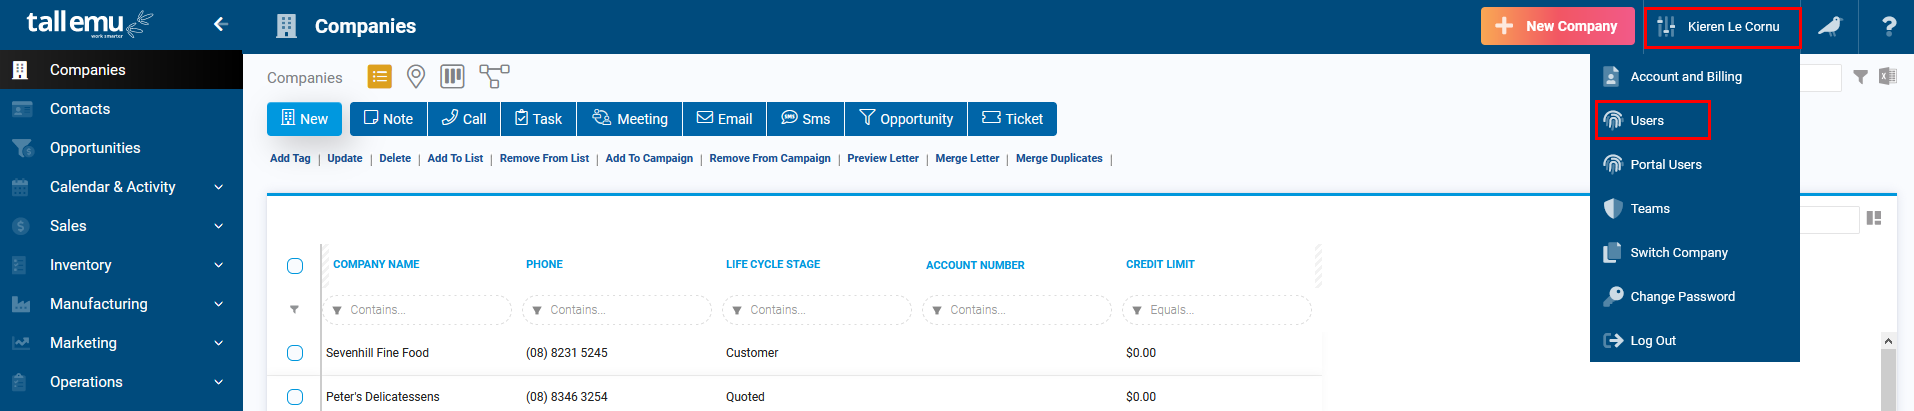
Head to your user name in the top right corner of CRM and click to reveal the menu, then select Users.
To edit an imported user just tap the desired line for the user and click Edit. Then update the details and hit Update to apply the changes.
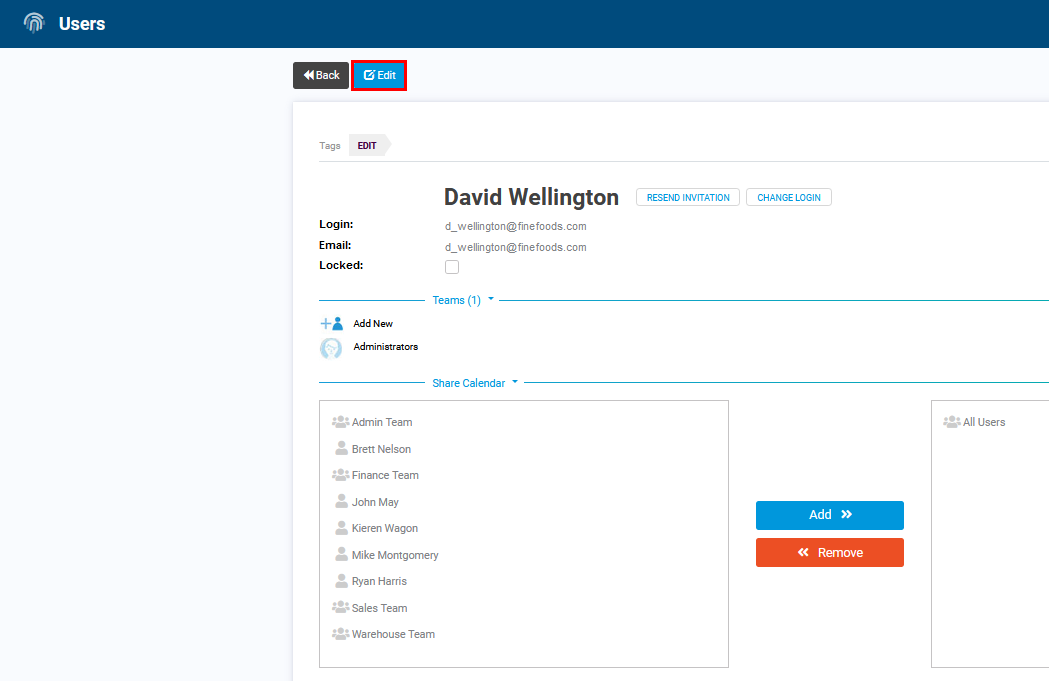
Editing a User record
By default, users we import from an accounting system are inactive. This is so you don’t end up with active, paid user accounts for every employee you’ve ever had. To update users, head to the user record, click Edit in the title bar, and then deselect the Locked checkbox.

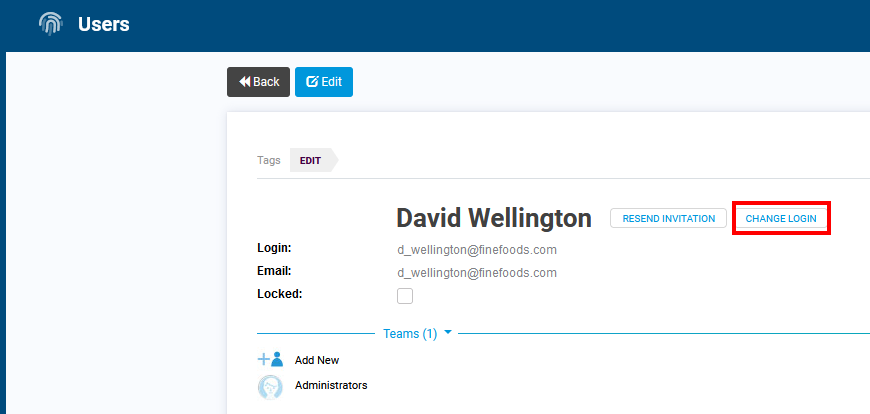
Note: when we import users from an accounting system, the login details will likely be incorrect. You need to ensure the ‘Login’ field contains a valid email address (that will be used to send an initial CRM Invite to grant access) rather than a name. To assign a valid username, open the user record as per the above instructions and make sure you use the ‘Change Login’ feature to set it to an email address.

To add an entirely new user, click New User in the top right and follow the prompts.

Note: the User should receive an email with instructions on setting up their account. If they don’t, please click the ‘Resent Invitation’ button from the User Record.
We’ve made a training video on this so if you’re stuck and need some help, be sure to watch it below.