-
- Getting Started
- Record Tabs
- Managing Duplicate Records
- Setting Up Grid Layouts
- Show and Hide Columns
- Key setup steps
- Additional setup steps
- Tips & Tricks
- Pinning Activities
- Bulk update
- Timeline
- Bulk uploading images
- Advanced Filters
- Automated Workflows
- System Admin in CRM
- Search, sort and report
- Calendar View
- Dashboard View
- Using Views
- Import troubleshooting
- List View
- Set up your customers in CRM
- Working with Activities in CRM
- Basic Navigation
- Using the Map View
- Using the Kanban View
- Configuring Dropdown Lists
- Creating New Records
- Open or Edit Existing Records
- View Details on Map Pins
- Syncing Your Accounting System
- Change the Column order
- Setting up your CSV file for Import
- Filter Map Records
- Company Information
- Sorting Records
- Export data
- Filtering Records
- Import Data from Excel or CSV
- Colourise Map Records
- Set Up Security Groups
- Invite Other Users
- Connect Outlook
- Connect to Mailchimp or Campaign Monitor
- Set Up Other Reference Data
- Configure Online Quoting
- View Reports and Dashboards
- Connect Burst SMS
- Viewing Tags
- Adding and Editing Tags
- Sorting and Filtering with Tags
- Jobs, Assets & Service Management
- Manufacturing
- Operations
- Reporting
- Training
- Workflow Management
- Quoting & Selling
Import Data from Excel or CSV
In most areas of CRM, you can download one of our import templates, add your data to it and then import the file. You can do this if you want to:
- Add new data to CRM.
- Update existing data.
You should also refer to our dedicated guides on:
Access the importer & import templates
To access the import template and wizard in any area of CRM, click on the Excel icon in the top right-hand corner of CRM and then choose the import option from the list.
Depending on which area of CRM you are in, the import options that appear may be different, as different types of data are available to import.

Import options in Companies
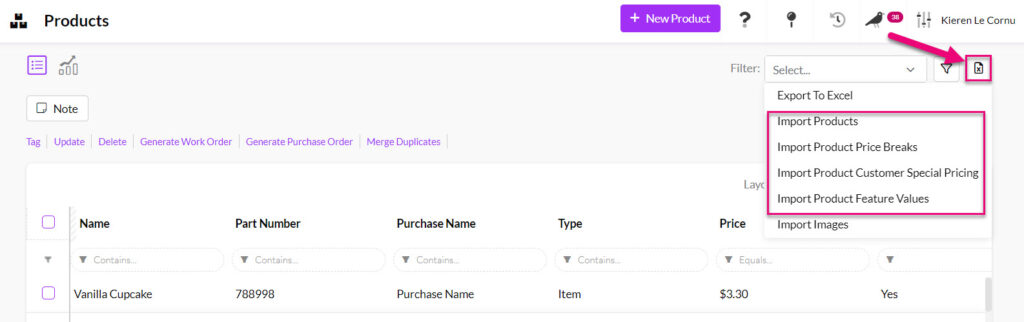
Import options in Products

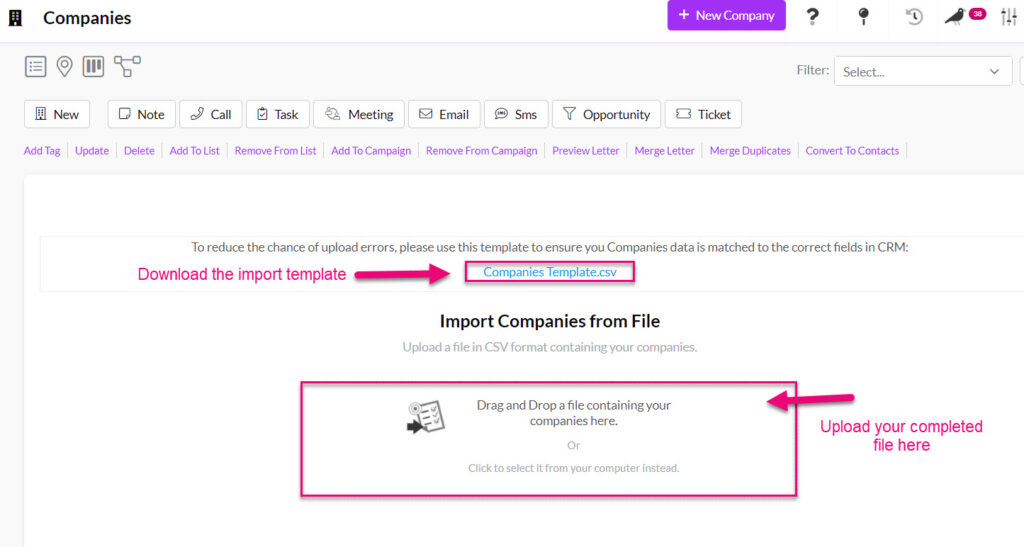
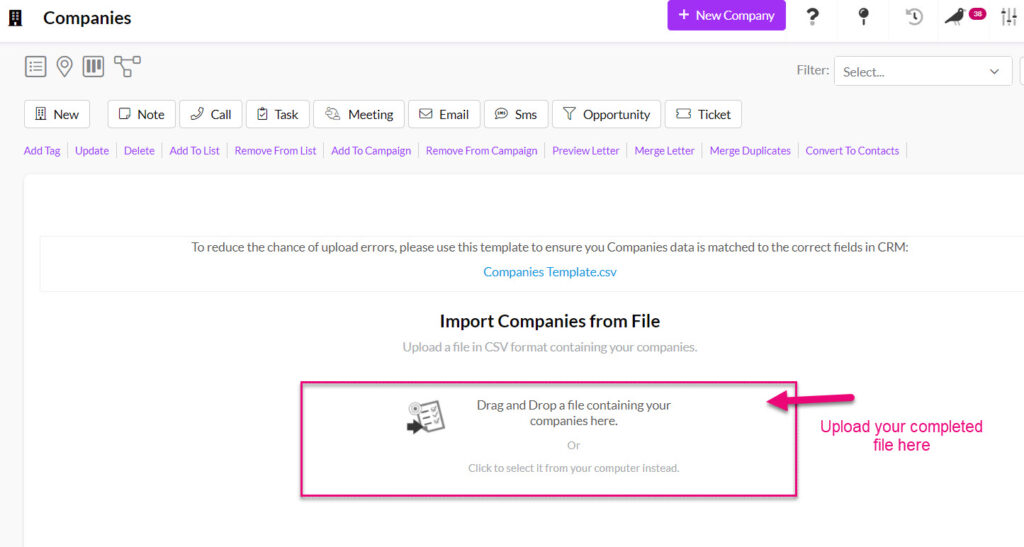
- You will then be taken to an area where you can download a copy of our import template, specific to the area you are in.
- Add your data to the template and then you can upload your file from the same page.
Where can I import?
Following is a list of areas in CRM where you are able to import ALL data into CRM yourself:
- Companies
- Contacts
- Opportunities
- Tasks
- Products
- Stocktakes
- Supplier Companies
- Supplier Contacts
- Bills Of Material (BoMs)
- Tickets
- Projects
Following is a list of areas where you can only import ‘top line data’ i.e. you could import the key details on an invoice such as the date it was created, the customer, who it is assigned to, the customer address etc., but you could not import in any detail about the items on the invoice.
- Quotes
- Sales Orders
- Invoices
If you’d like help with an import or have any questions about how to get your existing data into CRM, please contact us at [email protected].
Performing an import
Add your file
- Drag & drop or click to add your CSV import file to CRM.
- If you want to check that your file is correctly formatted before you import it, see this guide.
Ensure your data is going to the right places
- The system will automatically start matching the column names in your file to fields in CRM (mapping). You’ll be able to see where each column is mapped to in CRM and if required, change the destination field.
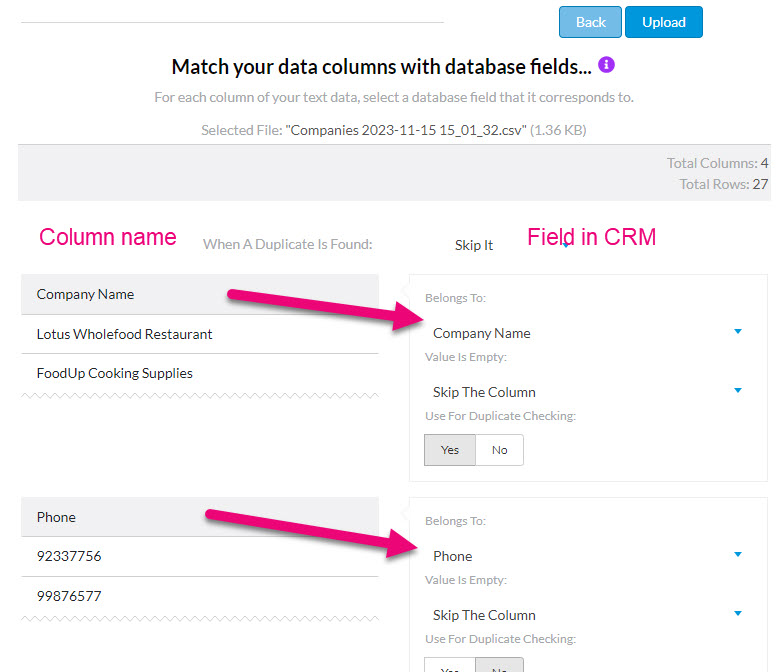
- You can also preview the data that will be added to the field to ensure it is the right type e.g. text, number etc.

- If the data you are trying to import is not compatible with the field type in CRM, a warning will often display to let you know there is an issue you need to resolve before you start the import.
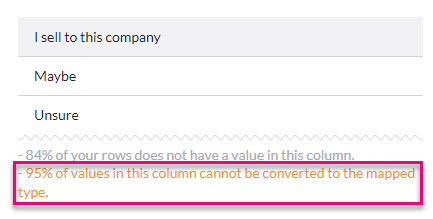
Mapping error when the data doesn’t match the field type
Decide what to do if duplicate records are found
Our handy Duplicate Checker is enabled by default, and this will autonomously check your existing data for duplicates.
You can choose to:
- Skip It – will skip the import of any duplicate records i.e. records that already exist in CRM and are also in your import file.
- Update Other Fields – the existing records found in the system will be updated with any new data that is contained in your import file.

Duplicate check options
When CRM is checking for duplicates, it needs to know what to check. You MUST specify the field that is used to check if there is a duplicate value, as per the following example screenshot.
In certain areas, CRM will choose a field by default for this purpose:
- Companies: Company Name
- Contacts: Email
- Products: Part Number
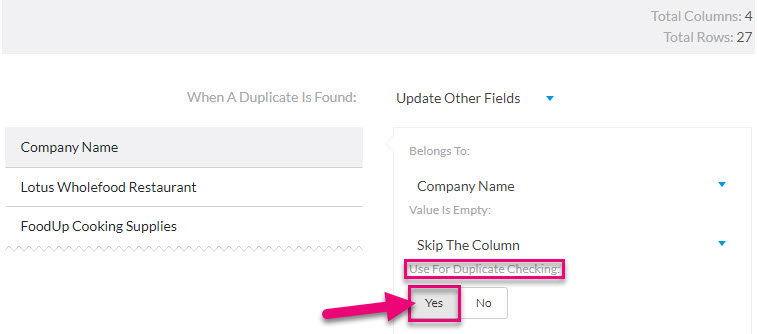
Selecting a field for duplicate checking
Decide what to do if there’s no data
If there is no data in a cell in your file, you can decide what action CRM will take:
- Skip The Column: if one cell is empty, none of the values in that column will be imported into CRM, meaning that the field won’t be populated with any data.
- Skip The Record: the row in the CSV will be skipped, thus not creating/updating a record in CRM.
- Stop The Import: the import will be cancelled.
![]()
Start the import
- When ready, click on the Upload button.

- You will then get a progress screen.

Import progress
- When the upload is finished, you will either get a success message showing details of the import or a failure message with details of the error.

A successful import message with details

An import failure example
If you have issues with your import, please see our troubleshooting guide.