-
- Getting Started
- Record Tabs
- Managing Duplicate Records
- Setting Up Grid Layouts
- Show and Hide Columns
- Key setup steps
- Additional setup steps
- Tips & Tricks
- Pinning Activities
- Bulk update
- Timeline
- Bulk uploading images
- Advanced Filters
- Automated Workflows
- System Admin in CRM
- Search, sort and report
- Calendar View
- Dashboard View
- Using Views
- Import troubleshooting
- List View
- Set up your customers in CRM
- Working with Activities in CRM
- Basic Navigation
- Using the Map View
- Using the Kanban View
- Configuring Dropdown Lists
- Creating New Records
- Open or Edit Existing Records
- View Details on Map Pins
- Syncing Your Accounting System
- Change the Column order
- Setting up your CSV file for Import
- Filter Map Records
- Company Information
- Sorting Records
- Export data
- Filtering Records
- Import Data from Excel or CSV
- Colourise Map Records
- Set Up Security Groups
- Invite Other Users
- Connect Outlook
- Connect to Mailchimp or Campaign Monitor
- Set Up Other Reference Data
- Configure Online Quoting
- View Reports and Dashboards
- Connect Burst SMS
- Viewing Tags
- Adding and Editing Tags
- Sorting and Filtering with Tags
- Jobs, Assets & Service Management
- Manufacturing
- Operations
- Reporting
- Training
- Workflow Management
- Quoting & Selling
Using the Kanban View
The Kanban view is a way to visualise and manage data in a natural drag and drop manner – just click on the Kanban icon in the view selector area.
![]()
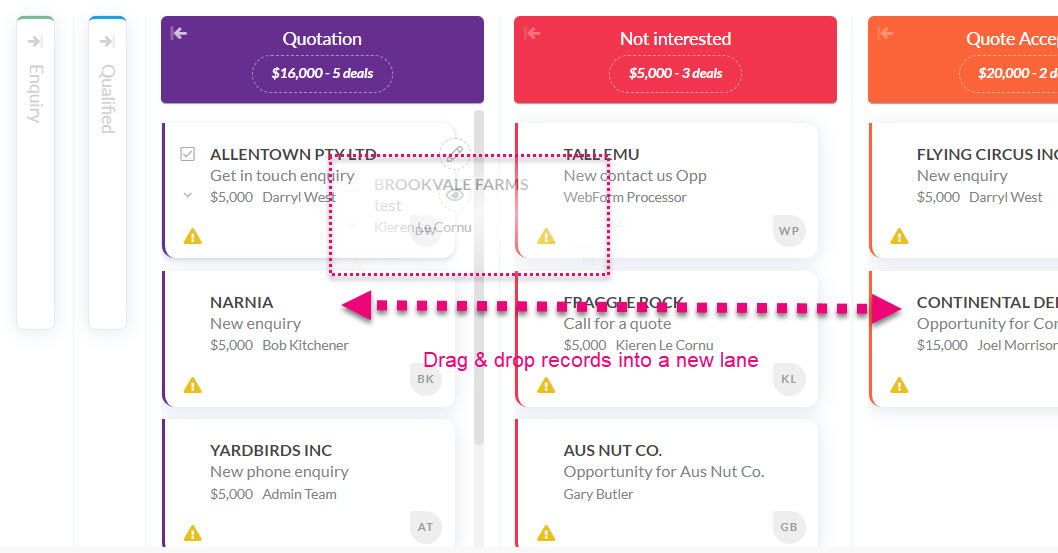
The example Kanban style screen below shows the open Opportunities:

Opportunities grouped by Stage in Kanban View
The items can be dragged from lane to lane, depending on their status, stage or who the record owner is.
Note that in some areas of CRM, you won’t be able to drag records between statuses or stages.
Note that you can customise various Stages and Statuses and field options in CRM that appear in Kanban view for a number of records. See our section on Admin > Settings for more details of what and how you can customise records.
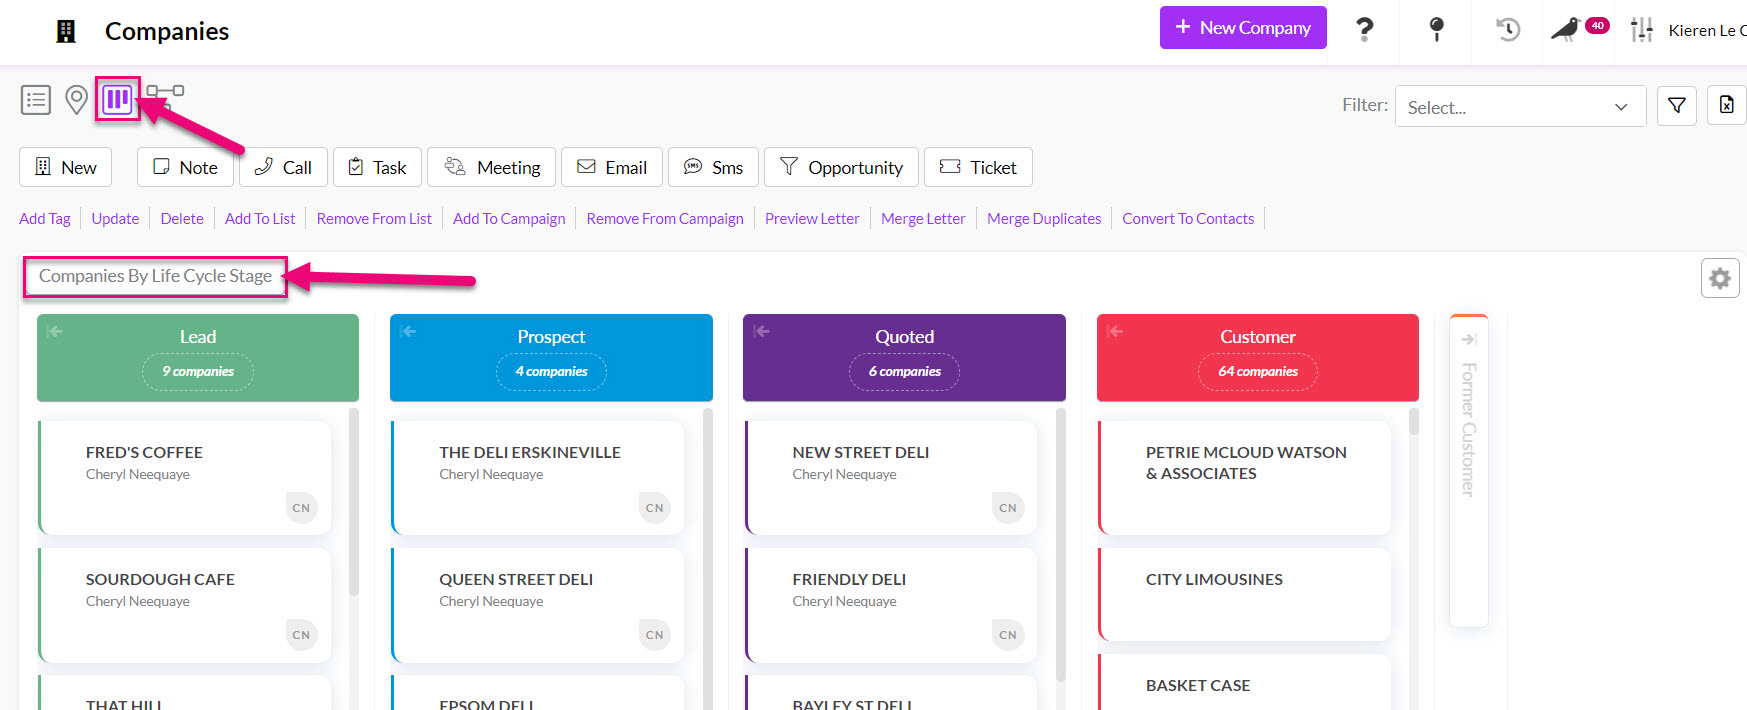
Companies in Kanban arranged by Lifecycle Stage
In some cases, like Opportunities – further options will appear when you drag items. You can drag Opportunities on to these items to either delete, mark as won, or mark as lost. When you mark an Opportunity as lost – you can specify a loss reason.
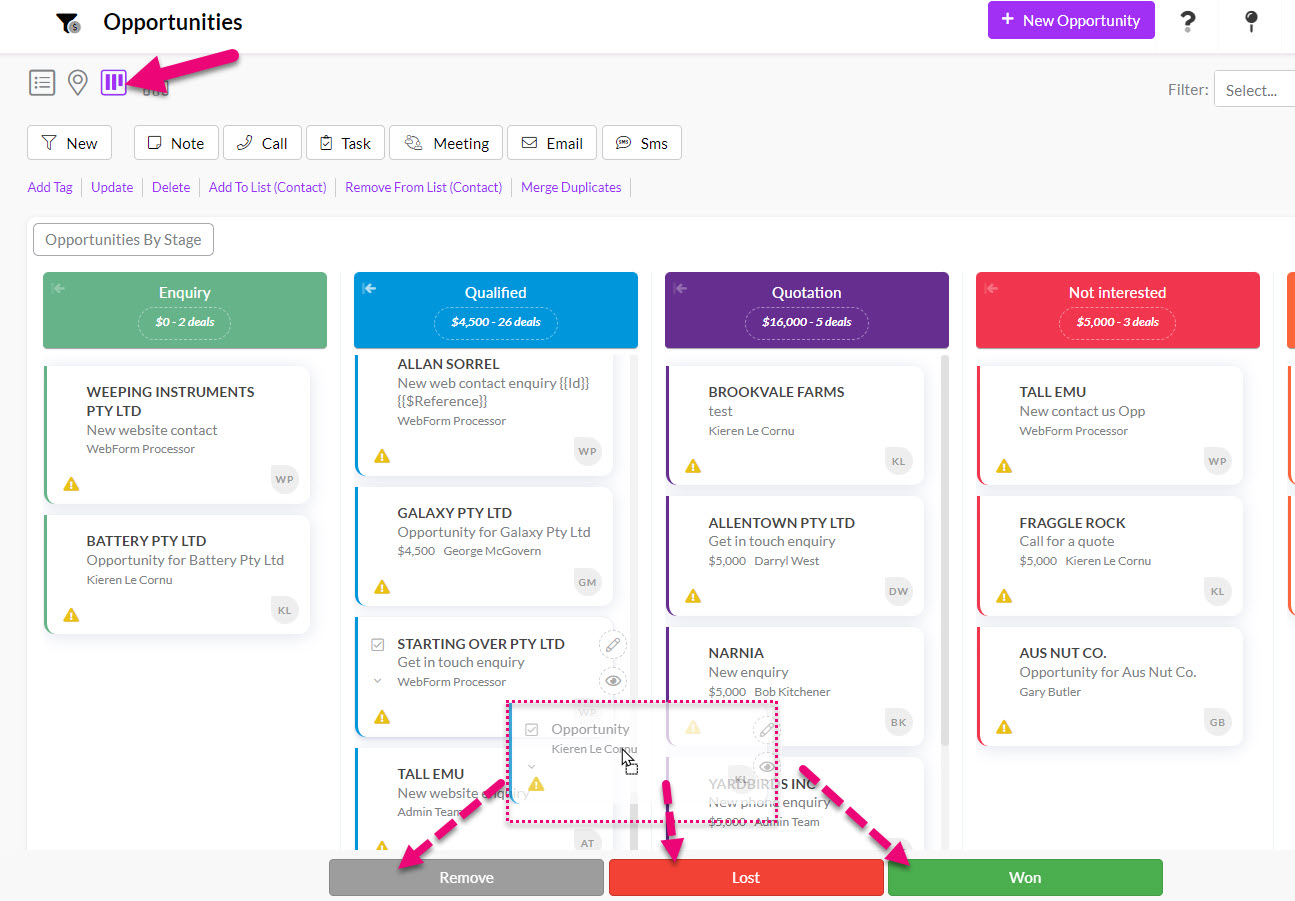
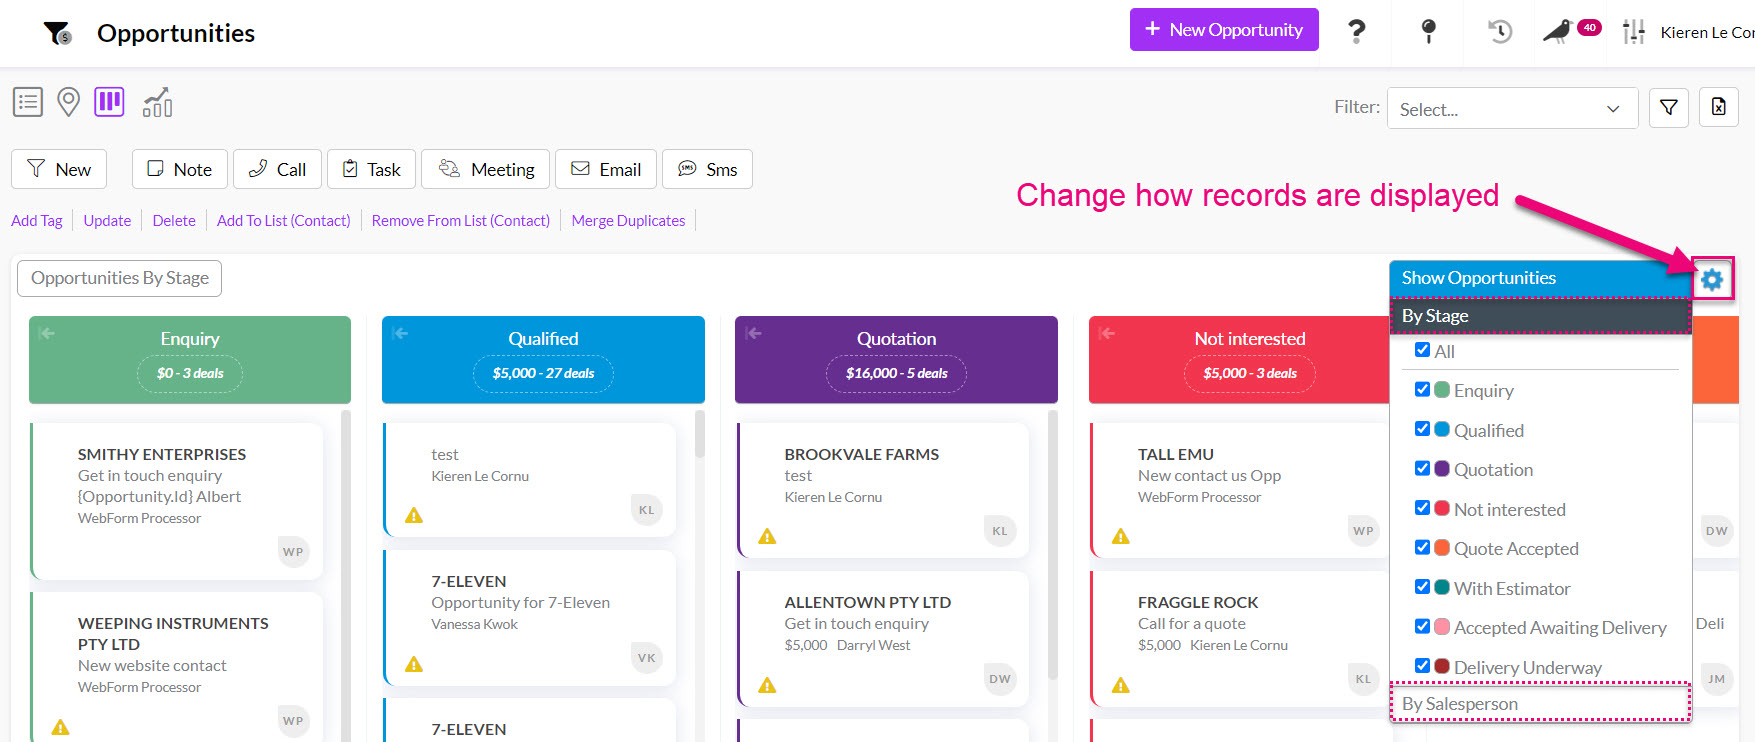
Clicking on the gear icon on the right will reveal a menu that allows you to select the criteria for your view – you can choose the field that you want to sort records by and then choose which values will be displayed.
In the following example, I can choose to display Opportunity records by either Stage or who the records are Assigned To.
Clicking on the arrow next to a section heading will collapse the section – click the arrow again in the collapsed section to expand it to its original state.

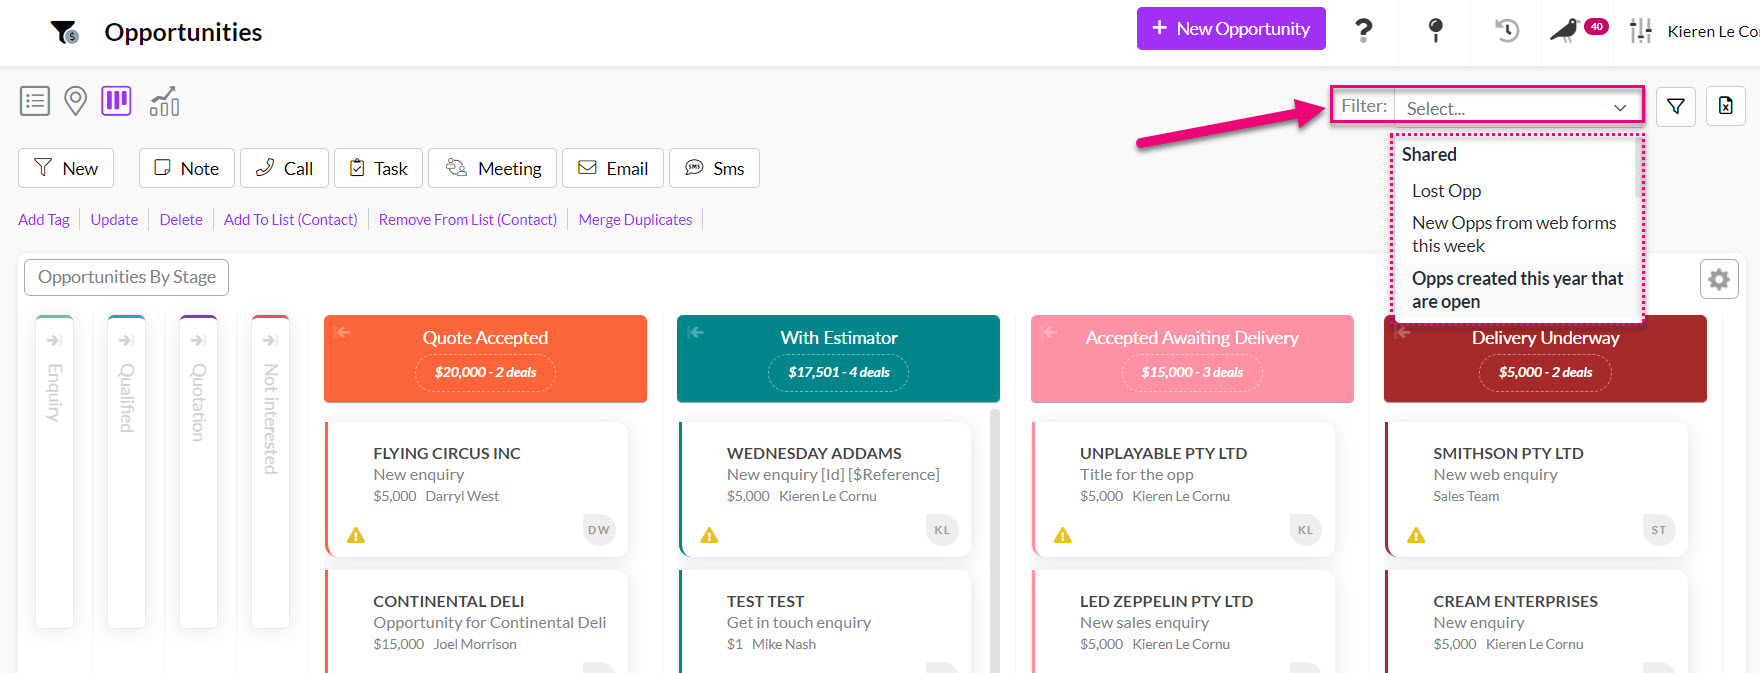
In the top right corner of the screen, you can also select from your Filters to change the view to meet specific criteria or create a new Filter.
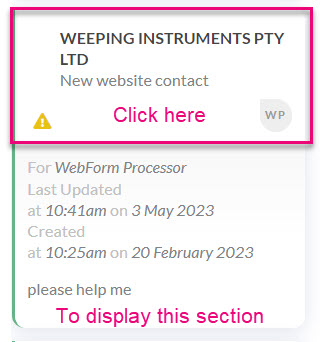
You can view more information about a record by hovering over it to reveal pencil and eye icons – click on either to edit or display the full record.
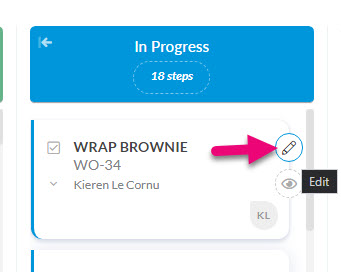
You can also click anywhere on the top half of a record to expand it with details.