Learn about lead management
The CRM Opportunity area allows you to set up a sales pipeline and configure the stages that all your sales will pass through – from an initial enquiry, through to wins and losses.
Create a new lead online
There are numerous ways that you can add new leads to CRM.
One of the most effective is by linking your website to CRM via a Web Form – this allows data entered on your site to come directly into CRM to create records, send an automated confirmation email and alert people internally.
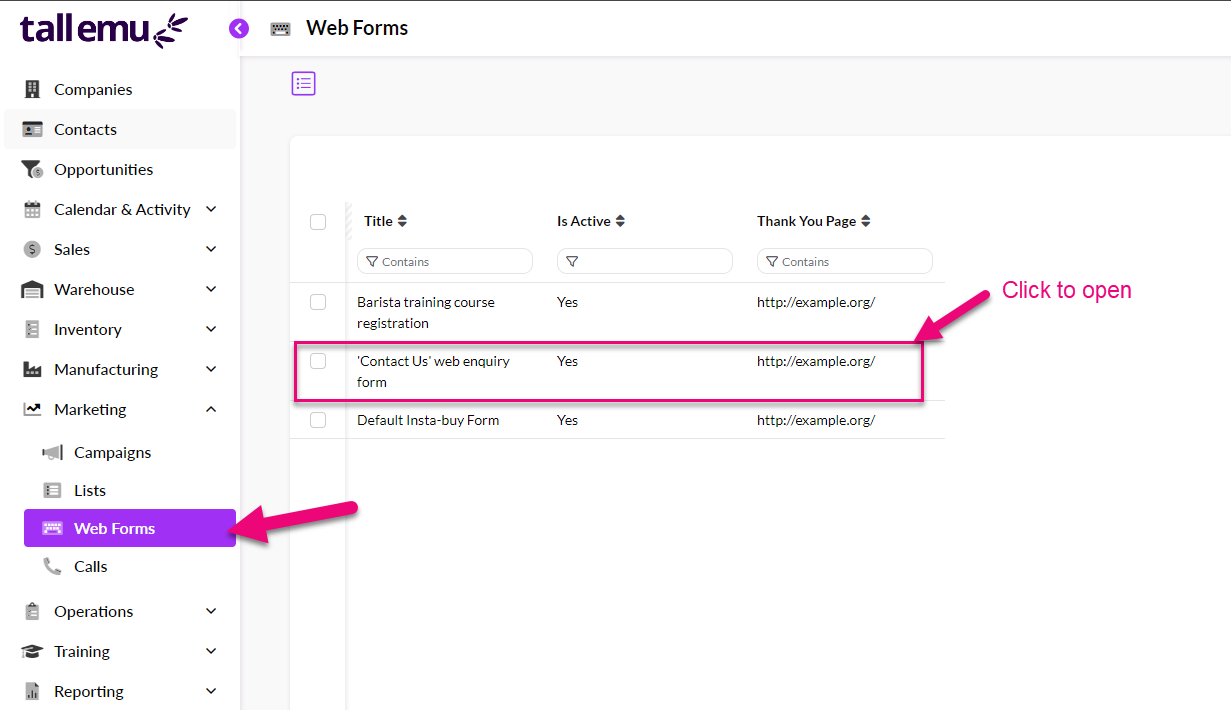
Go to Marketing > Web Forms and click to open the form called “‘Contact Us’ web enquiry form”.
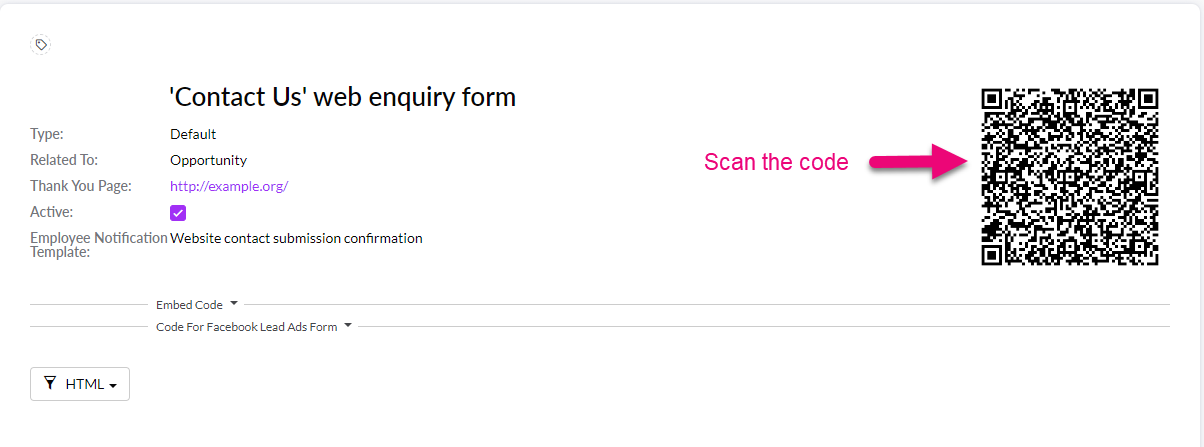
When the form opens, scan the QR code with your phone.
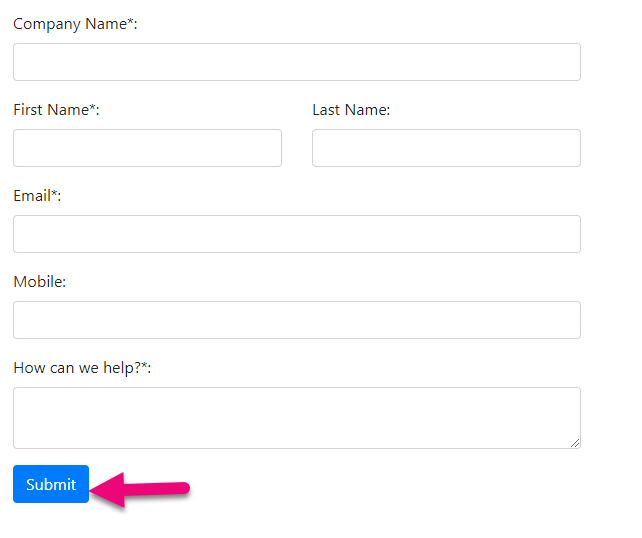
You will then be taken to a data input form – enter any details (real or fake) in here and note that fields with an asterisk (*) indicate required fields. Click on Submit.
You’ve just created a new Company, Contact and Opportunity record in CRM!
Go to Opportunities on the main menu and search for your lead record and then click to open it.
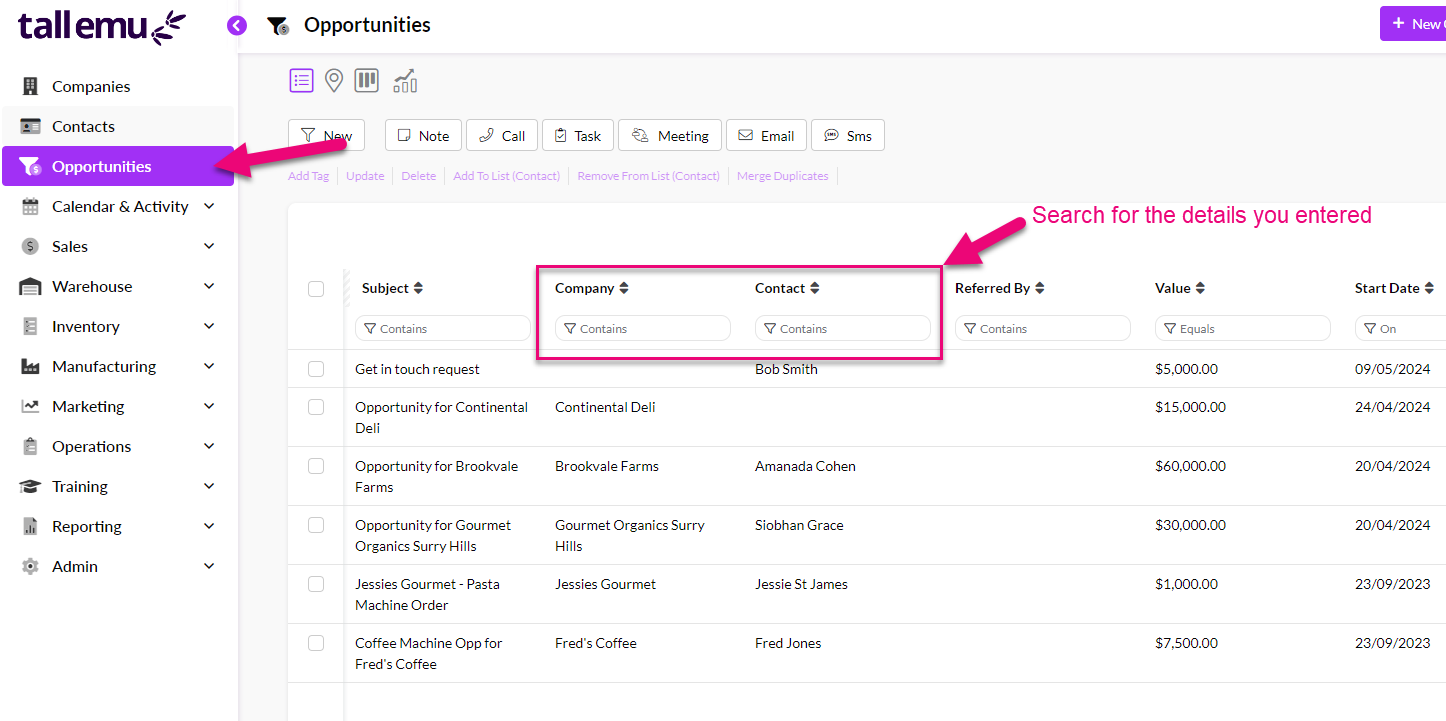
You will see that all the details you entered online have been brought into CRM – just click on the Company and/or Contact name to open the associated records.

Search for new leads via Map View
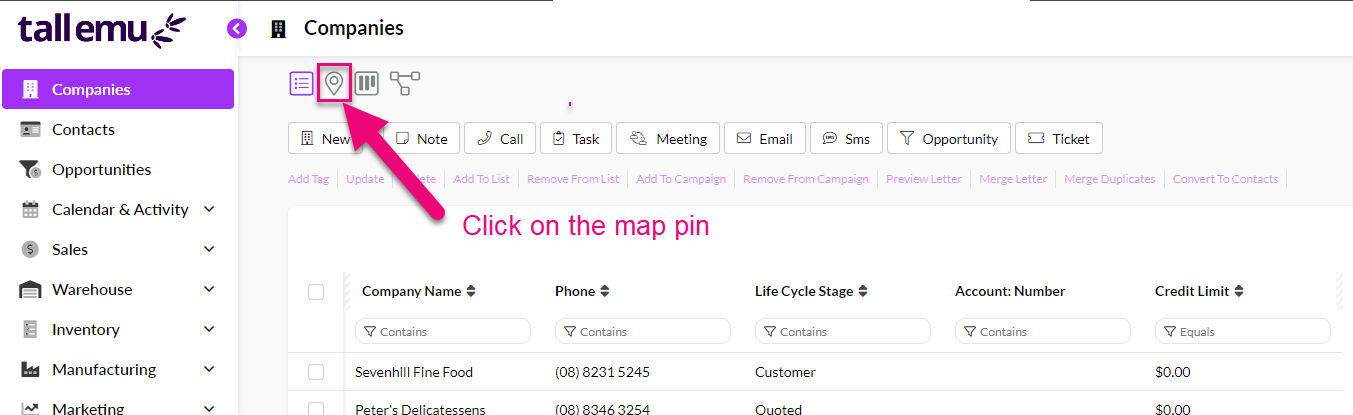
On the main menu, go to Companies and then click on the map pin icon to change the view.
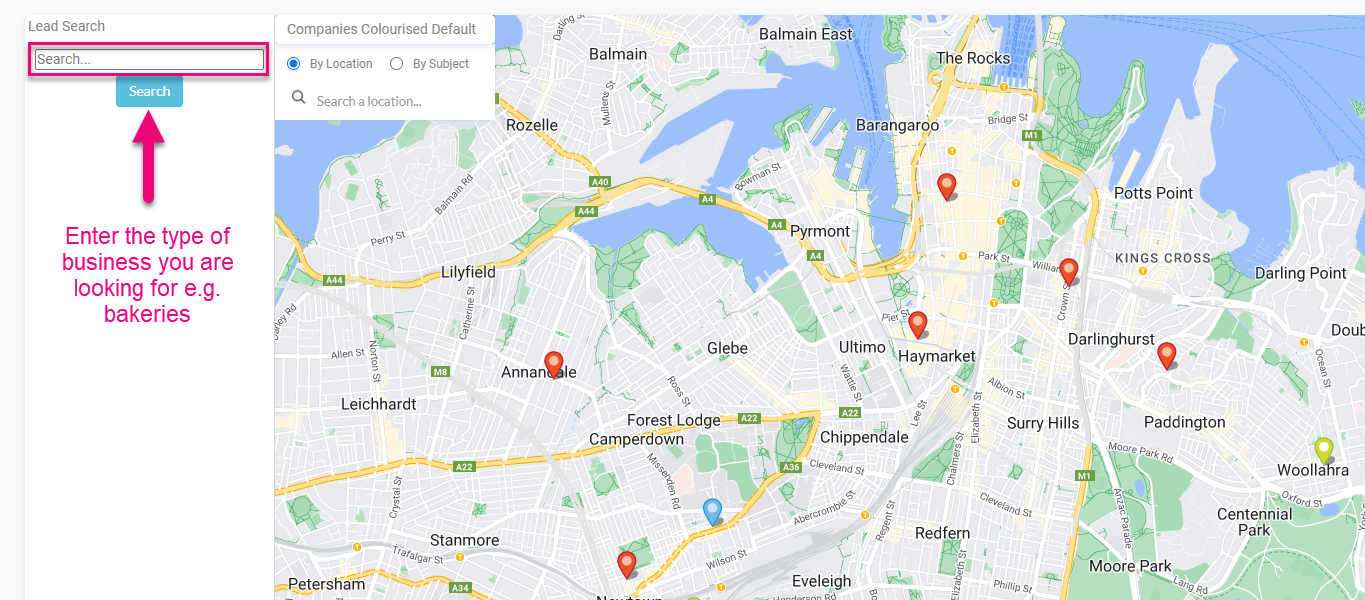
Select any area on the map and then click on the location icon on the toolbar – this opens the lead search bar.

In the search box, type in the type of business you would like to prospect for e.g. bakeries, nurseries, supermarkets etc., then click on Search.
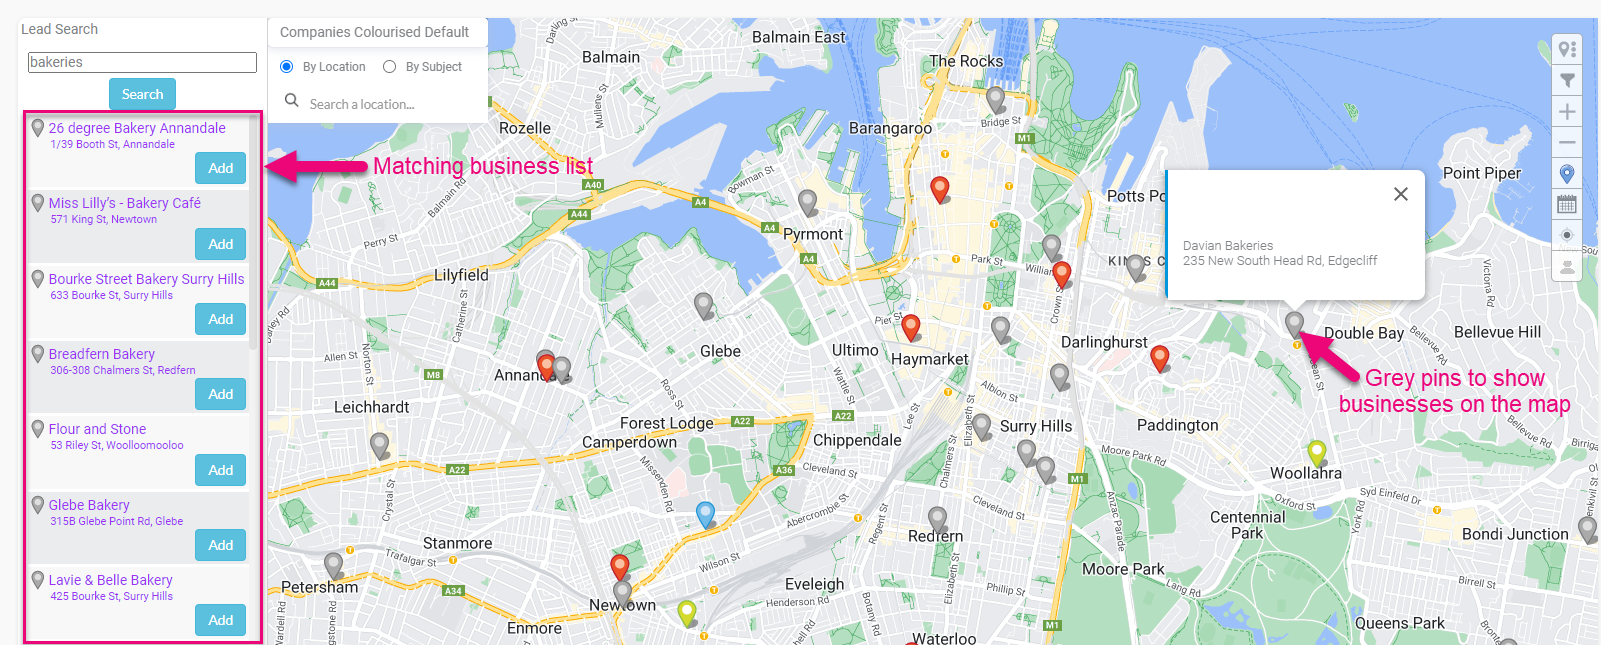
A lookup will then begin for matching businesses – these will be displayed in a list on the left and also as a grey pin on the map for each business – click on any grey pin to see more detail about the business at that location.
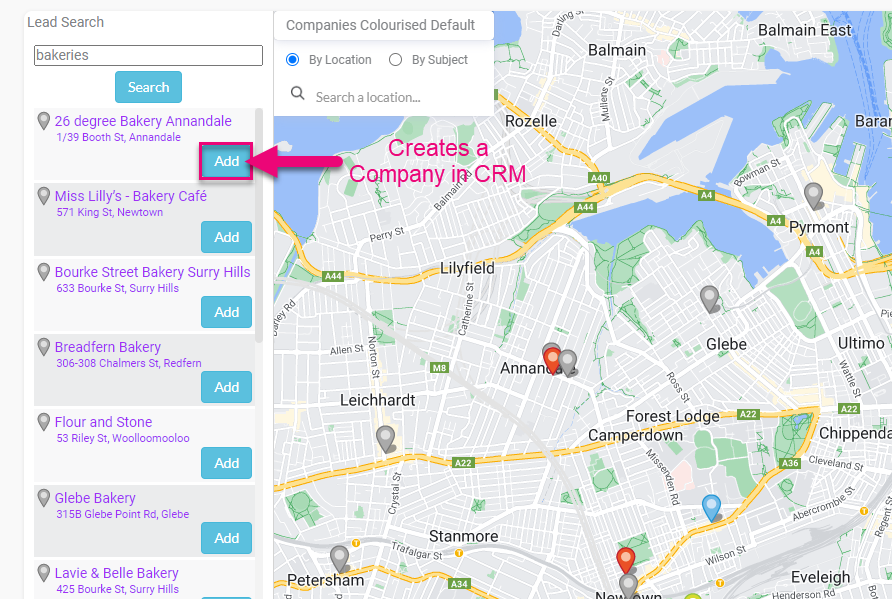
You can quickly add a new lead to CRM as a Company by clicking on the Add button on the list – add as many companies as you’d like.
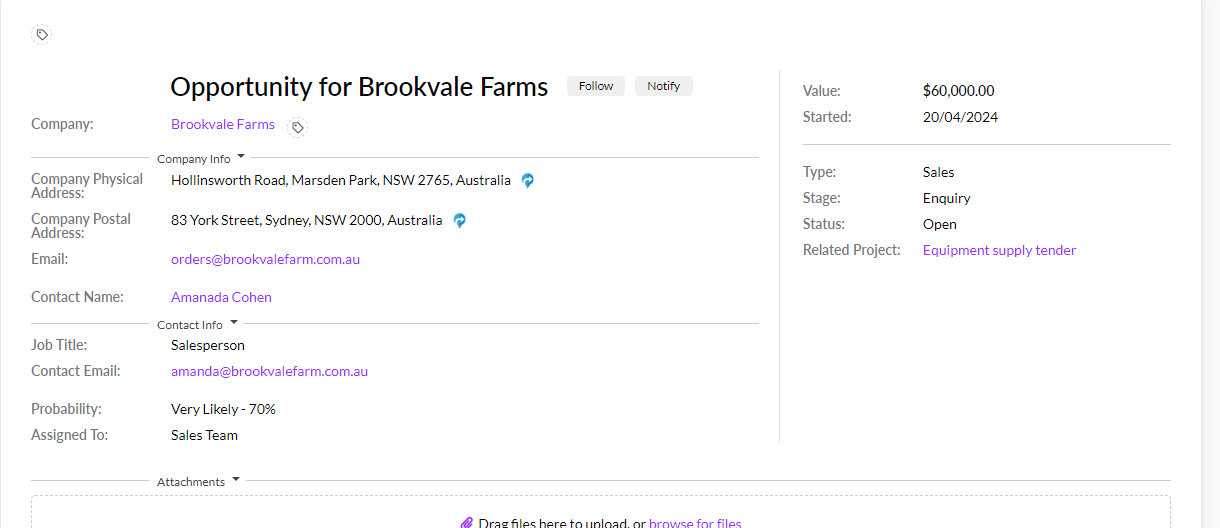
Learn about the Opportunity form
The top half of the form will display information about the lead and the potential sale.
The bottom half of the form contains an area to add attachments, an action bar and tabs to create and access linked records.
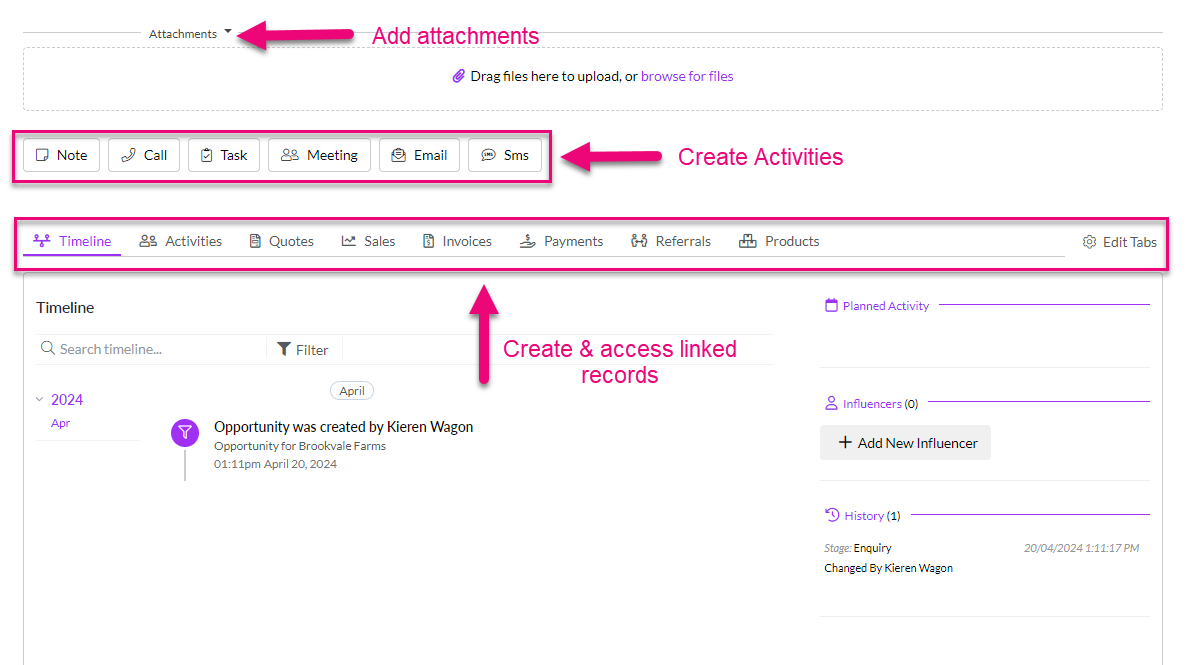
To create a new Quote, Sales Order or Invoice for the lead, just click on the relevant tab and click on the button to create a new record.

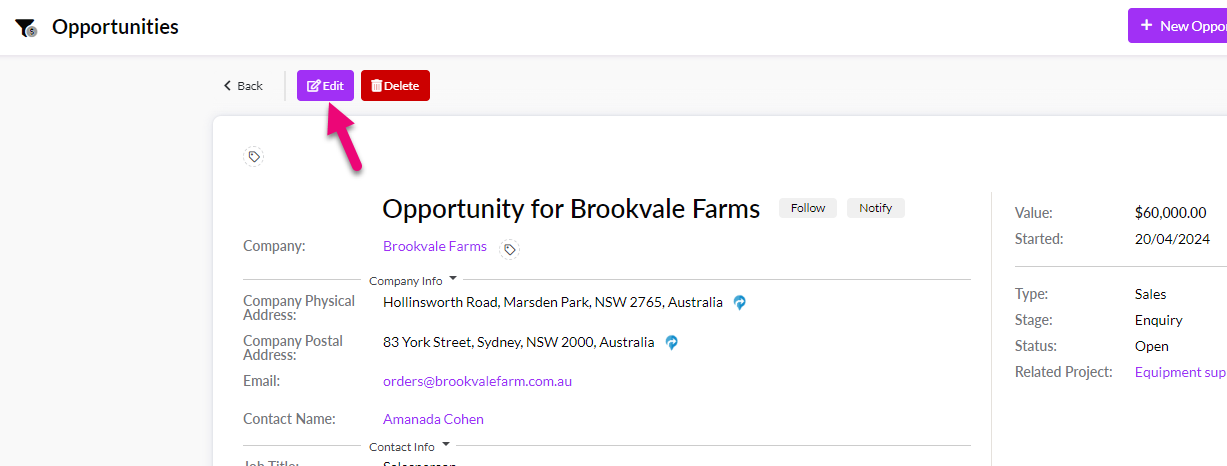
Click on the Edit button at the top of the record to change it.
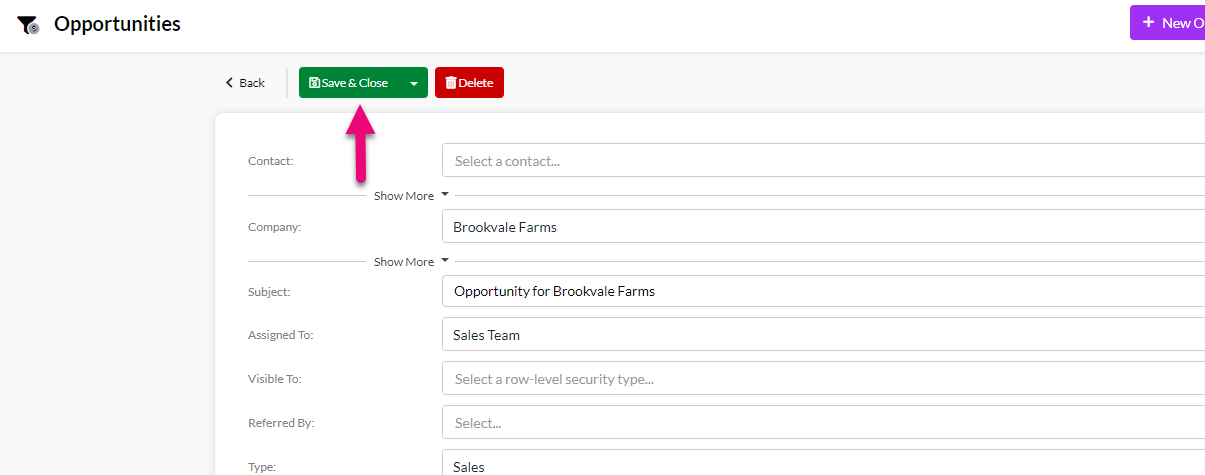
When done, click on Save & Close at the top.
Learn how to manage leads
Return to the main Opportunity screen and click on the view icon to open Kanban View.

From here, locate the record you created and click and hold it to drag & drop it into different Stages, or change the overall Status of the record.
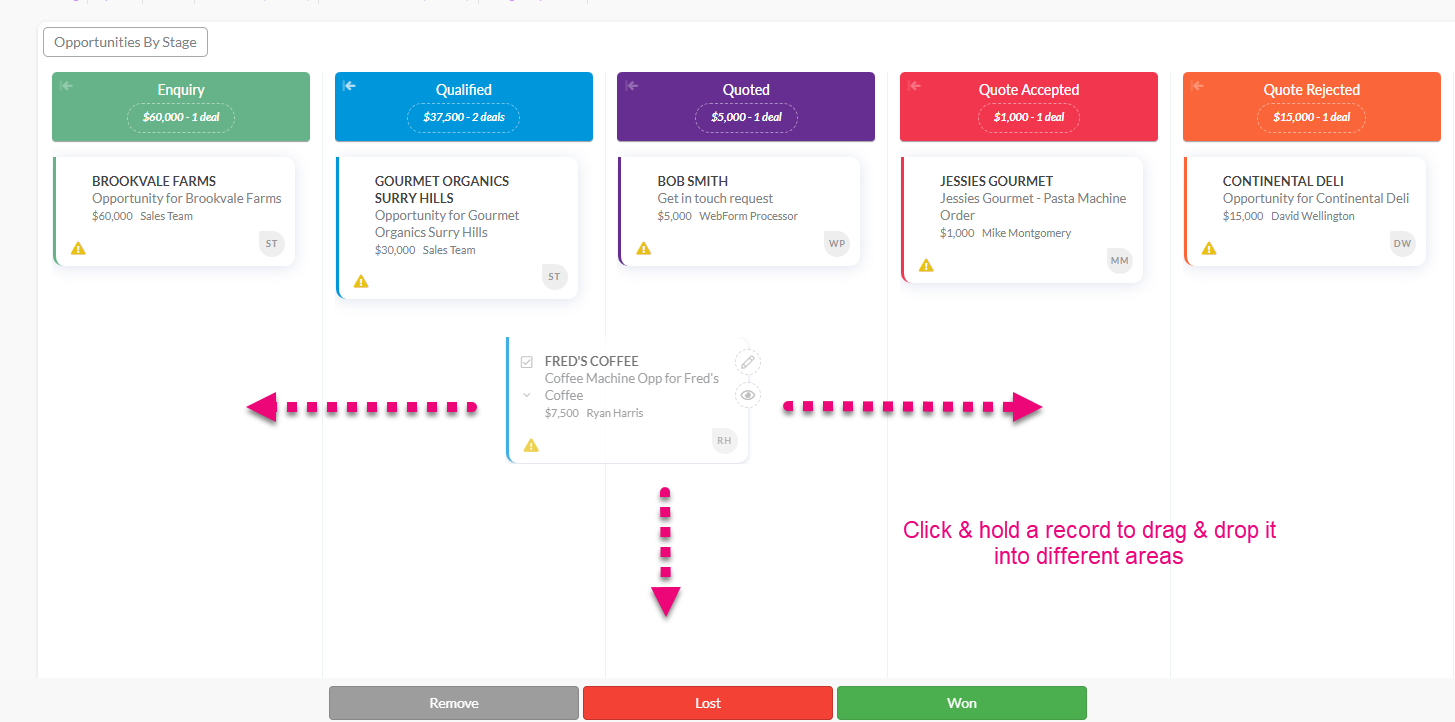
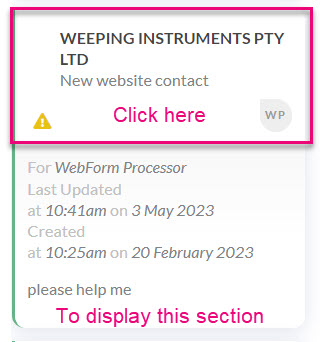
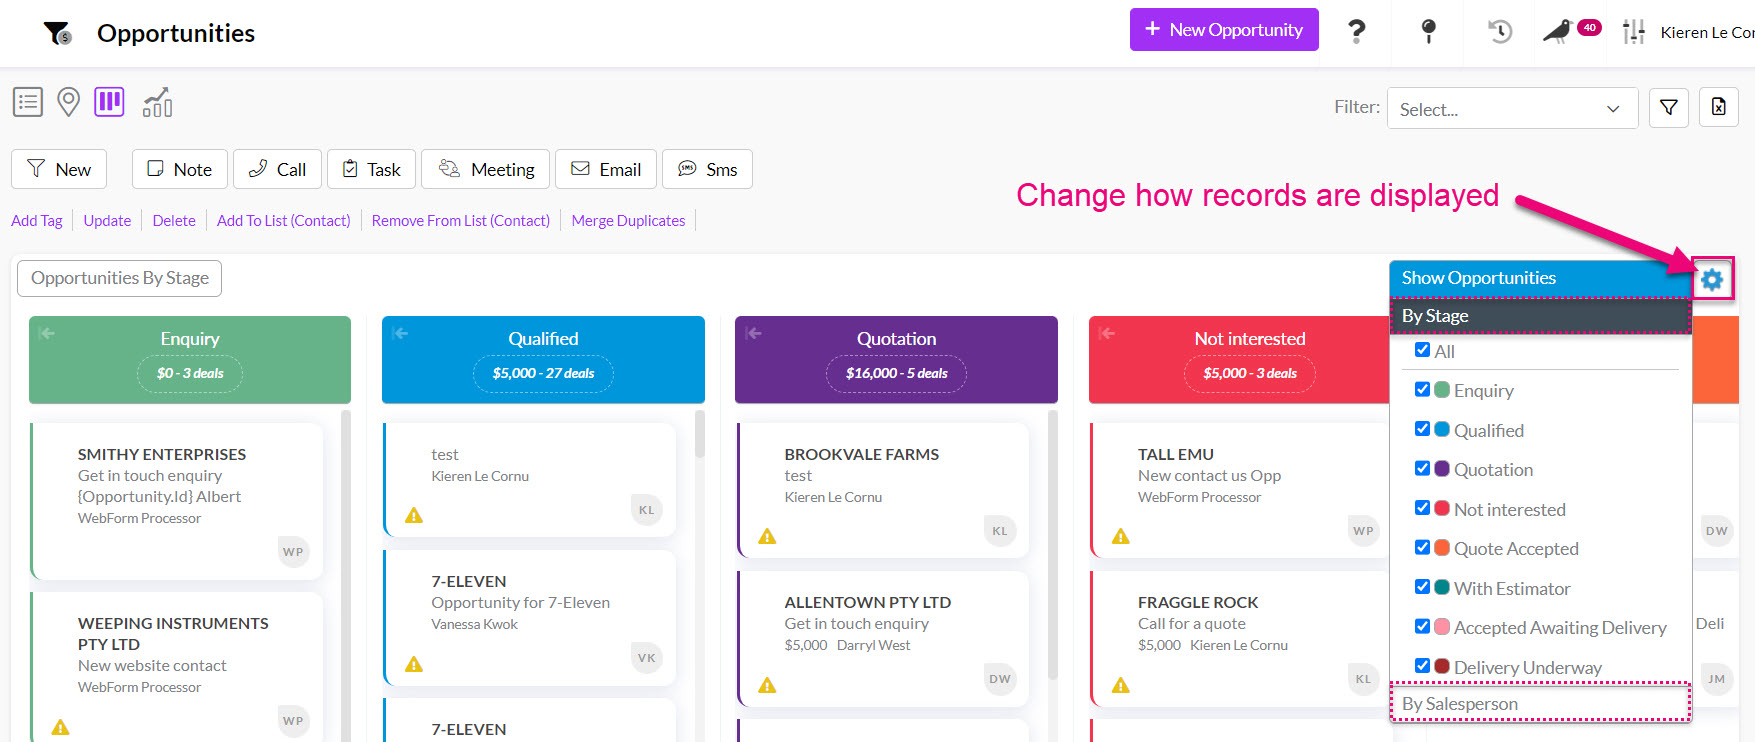
You can also play around with clicking in different areas to expand/contract records or change the type of records displayed.

To exit Kanban View, just select another choose one of the other view selectors from the top of the screen – List, Map or Dashboard view.

View a Dashboard
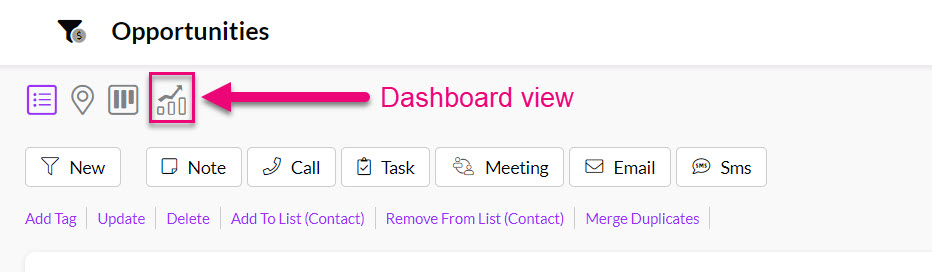
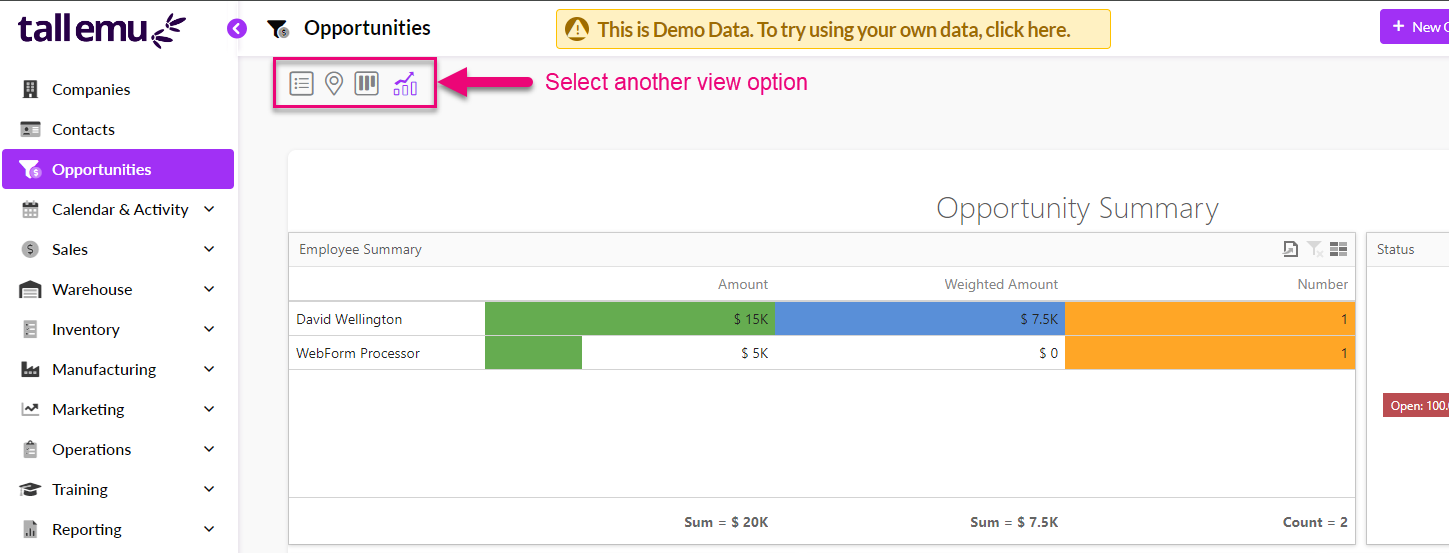
Choose Opportunities from the menu and then click on the graph icon at the top of the page.
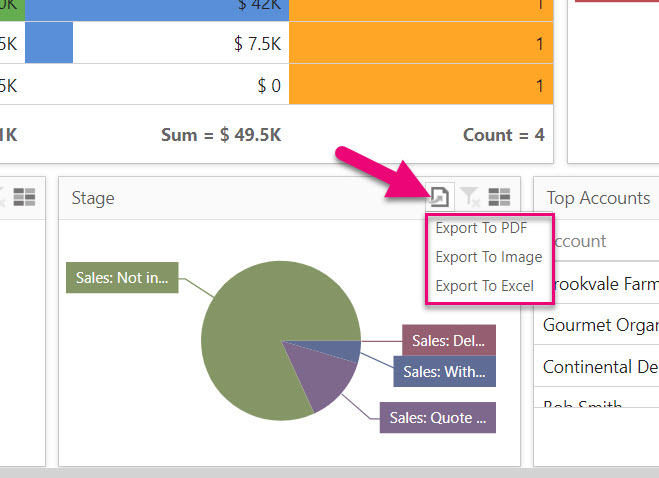
The Dashboard View will then be displayed where you can choose from a range of different Dashboards to display, change the reporting period for the data or click on any of the objects to drill down further into the data.

You can also export data from the various sections.
To exit Dashboard View, just select another choose one of the other view selectors from the top of the screen – List, Kanban or Map view.
Quickly segment records by their status
In the top right-hand corner of the page, click in the Filter box and select from the options to display different groups of records e.g. open, won, lost etc.

You can also create customised Advanced Filters to display records according to conditions you specify.
Learn how to customise your sales pipeline
On the main menu, go to Admin > Settings > Sales Pipeline – this is a list of fields that you can customise with your own options and terminology.
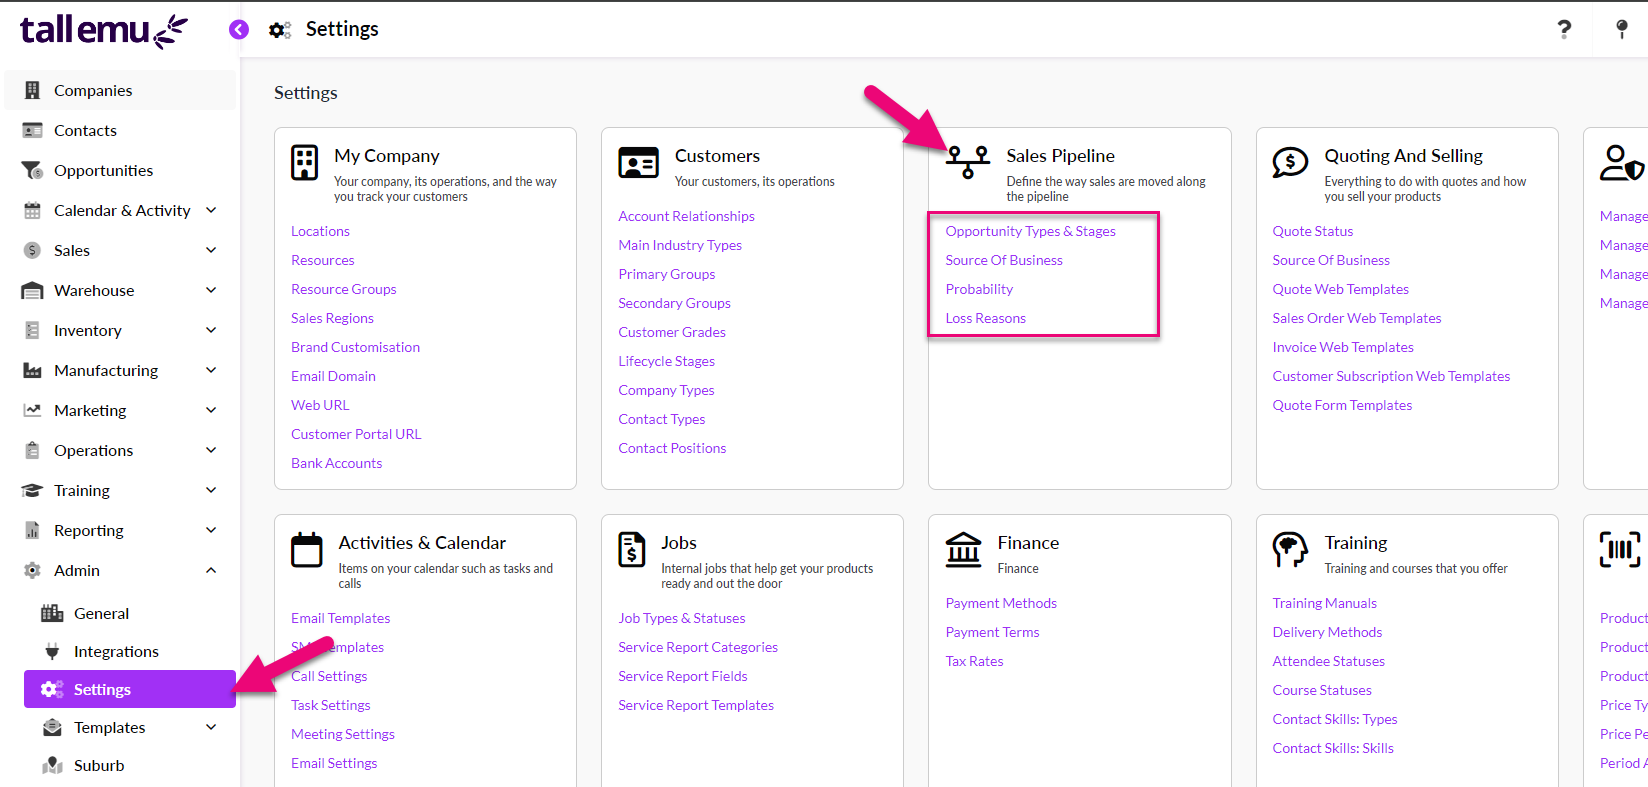
Click on any field name to open the customisation box – the options will be slightly different, depending on the type of field you choose.
The following example shows the Source Of Business field – to exit this type of customisation box, just click on the “X” in the top right corner.

The following is an example of customising the Type and Stage fields, which have a relationship with each other. To exit this type of customisation box, click Save and then click on the “X” in the top right corner.
