- Companies
-
- Admin
- Account Options
- Pricing settings
- PDF and Email Template system preferences
- Locations
- Brand Customisation
- Product Categories
- Product Groups
- Enable Time Billing
- Customising Assets
- Custom Fields
- Delivery Resources
- Delivery Options
- Reporting Preferences
- Sales & purchase settings
- Calendar Settings
- Messaging settings
- Repeated Invoice frequency
- Company Settings
- Credit Settings
- Sales Regions
- Asset Settings
- Ticket settings
- Relationships
- Proposal-based Quotes
- Customising Training
- Prefix/Sequences settings (Record Numbering)
- Creating SMS Templates
- Invoice Settings
- Creating Email Templates
- Creating Letter Templates
- Using Letter Templates
- Using SMS Templates
- Using Email Templates
- Setting up Teams
- System security
- Users
- Activate a new User account
- Log into a User account
- Managing Connections
- Calculating Landed Costs
- Resources
- Payment Methods
- Payment Terms
- Couriers
- PDF Templates
- Service Reports
- Quote Form Templates
- System Quote Preferences
- Credit Control
- Setting up Teams
- Regional Settings
Enable Time Billing
From Admin > General > Time Billing you can enable the Time Billing function in your database, which allows you to:
- Create a Time Product in CRM and set different billing rates for your customers; you can also set a standard rate across the board.
- Record your time spent in CRM via Activities (Tasks that have Time, Calls, Meetings, SMS and Emails) and segment the time into billable or not billable.
- Generate a Sales Order for a customer that will pull in billable data from their Activities. You can generate a bill from a customer record (Contact or Company), a Project or a Ticket.
Remember that if you make any changes on this page you need to click on Save at the top of the page to apply them.
Once you have enabled Time Billing, see our guide on how to use it.
Go to Inventory > Products and click on New Product.
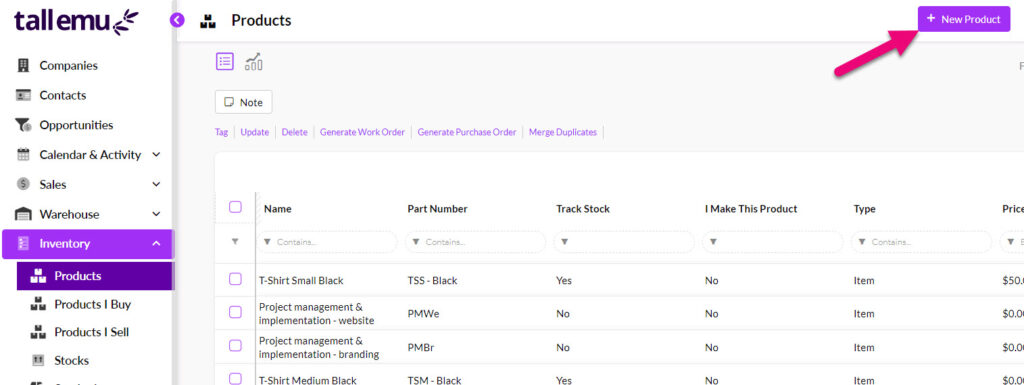
In this example I’m going to create a Time Product called Support Services so that I can bill customers for the time spent providing support, which will be billed in 1-hour blocks.
When entering in Product details you need to pay attention to the following fields:
- Ensure the Type field is set to Time.
- Enter in a Time Period – here you need to select from the dropdown list whether you will bill per hour, day, week, month, quarter or year and then enter in a corresponding number. In this example I’ve chosen to bill in a 1-hour block.
- Provide a Part Number.
- Make sure the boxes for Active and Sellable are both ticked.
- Enter in a Unit Price – this is the amount you will charge for the Time Period you selected. If you want to bill different rates for your customers, we’ll look at how to do that in a future step.
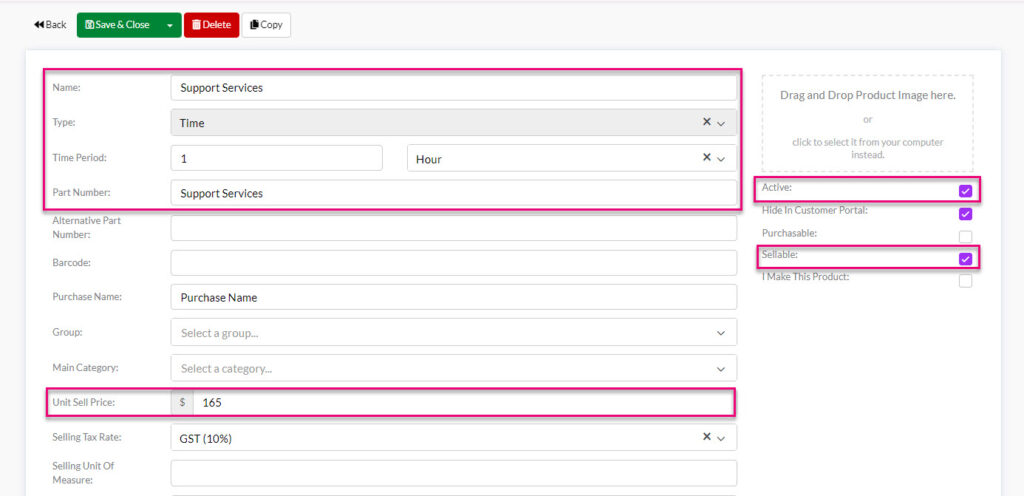
When you are finished, click on Save & Close.
You can create as many different Products as you need for billing purposes.
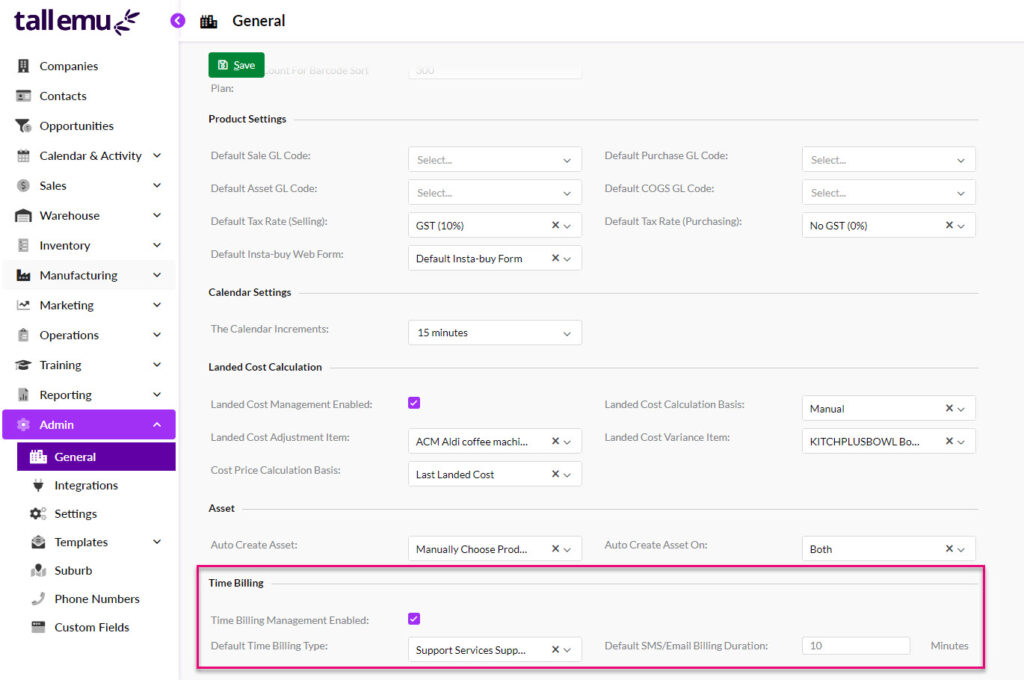
Go to Admin > General and scroll down to Time Billing at the bottom of the page.

- Tick the Time Billing Management Enabled box.
- You can select a Default Time Billing Type (the Time Product you just created). A default must always be selected in order to save.
- The Default SMS/Email Billing Duration will be the default time value applied to Emails and SMS.